Ingredients
– 1 cup creamy peanut butter for rich, smooth center
– 1/2 cup unsalted butter for creaminess
– 2 cups powdered sugar for sweetening and firming
– 1/4 teaspoon salt for balancing sweetness
– 1 teaspoon vanilla extract for flavor
– 2 cups milk chocolate for dipping for outer shell
Instructions
1-First Step: Mix the filling Start by placing 1 cup creamy peanut butter, 1/2 cup softened unsalted butter, 2 cups powdered sugar, 1/4 teaspoon salt, and 1 teaspoon vanilla extract in a large mixing bowl. Stir with a sturdy spoon or use a hand mixer on low speed until the mixture becomes thick and dough-like. At first, it may look crumbly, but keep mixing. The texture should hold together when pressed with your fingers. If the mixture feels too soft, add a spoonful of powdered sugar at a time. If it feels too dry and won’t come together, let it sit for a minute so the butter softens more. This is the stage that controls the final texture, so take a moment to get it right. A smooth filling makes shaping much easier later.
2-Second Step: Shape the eggs Scoop out small portions of the mixture, about 1 to 2 tablespoons each, depending on how large you want your eggs. Roll each piece into a ball first, then gently press and shape it into an egg form with your hands. This part does not need to look perfect. Homemade peanut butter eggs are meant to have a rustic candy look. Place each shaped piece on a parchment-lined baking sheet. If the mixture sticks to your hands, lightly dust your palms with powdered sugar or chill the filling for a few minutes before shaping more. Try to keep the eggs about the same size so they chill and coat evenly. This helps the finished batch look neat and professional.
3-Third Step: Chill until firm Once all the eggs are shaped, place the tray in the freezer for 20 to 30 minutes or in the refrigerator for about 45 minutes. Chilling is important because it firms the filling and makes dipping much easier. If the eggs are too soft, they can fall apart in the melted chocolate. A quick chill gives you cleaner coating results. While the eggs chill, prepare your chocolate. This is a good time to line a second tray with parchment paper so the dipped eggs have a place to set. If you are making these for a holiday, you can also get sprinkles or colored drizzle ready now. Planning ahead keeps the process smooth and stress-free.
4-Fourth Step: Melt the chocolate Place 2 cups milk chocolate in a microwave-safe bowl. Heat in 30-second bursts, stirring after each round until the chocolate is smooth. You can also melt it over a double boiler if you prefer more control. If the chocolate seems too thick for dipping, stir in a small amount of neutral oil or coconut oil, one teaspoon at a time. The chocolate should be silky and easy to coat with. Avoid overheating, since that can make it seize or become grainy. Stir well between each heating round. A smooth melt gives the eggs a cleaner finish and helps the coating set with a glossy look.
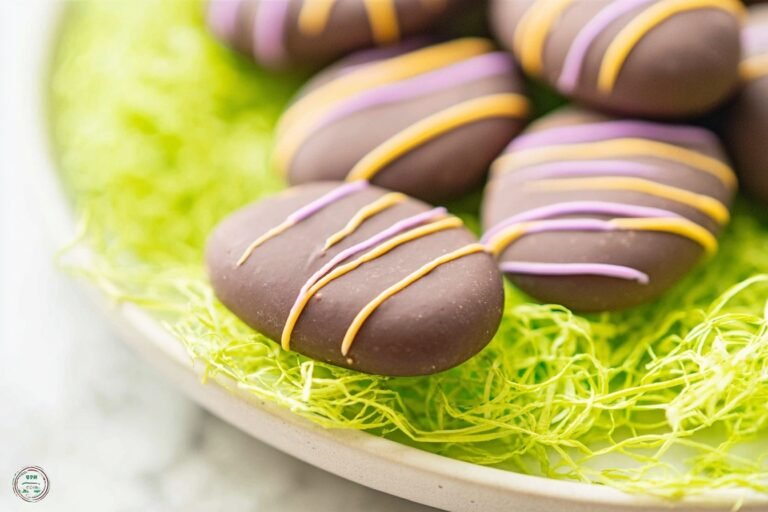
5-Fifth Step: Dip and coat Using a fork or dipping tool, lower each chilled egg into the melted chocolate. Turn it gently so it gets covered on all sides. Lift it out and tap the fork lightly against the bowl to let extra chocolate drip off. This keeps the coating from becoming too thick or messy. Place each coated egg back on the parchment-lined tray. If you want a thicker shell, let the first layer set for a few minutes and dip again. You can also drizzle extra chocolate over the top for a decorative look. This is where no bake peanut butter eggs start to look like real candy shop treats.
6-Final Step: Set and serve Refrigerate the finished eggs until the chocolate hardens, usually about 1 hour. Once set, transfer them to a serving plate or airtight container. They are now ready to enjoy. These are best served chilled, when the center is firm and the chocolate has that satisfying snap.
Last Step:
Please leave a rating and comment letting us know how you liked this recipe! This helps our business to thrive and continue providing free, high-quality recipes for you.Notes
🥄 Sift powdered sugar first for a smoother, lump-free filling texture.
❄️ Chill the peanut butter mixture well before shaping to prevent sticking to hands.
🍫 Double-dip eggs after first chocolate layer sets for thicker, professional-looking coating.
- Prep Time: 20 minutes
- Chill Time: 1 hour
- Category: Dessert
- Method: No Bake
- Cuisine: American
- Diet: Vegetarian, Gluten-Free
Nutrition
- Serving Size: 1 egg
- Calories: 250 calories
- Sugar: 20g
- Sodium: 100mg
- Fat: 15g
- Saturated Fat: 6g
- Unsaturated Fat: 8g
- Trans Fat: 0g
- Carbohydrates: 25g
- Fiber: 1g
- Protein: 5g
- Cholesterol: 10mg