Why You’ll Love These Peanut Butter Eggs
These Peanut Butter Eggs are a fast, fun treat that fits busy schedules and sweet cravings. If you want a peanut butter eggs recipe that tastes like a classic candy shop favorite, this one checks every box. It uses simple pantry ingredients, comes together without baking, and sets up beautifully in the fridge. You can make them ahead for holidays, snack trays, or edible gifts, which makes them a smart choice for home cooks who want something easy but still impressive.
Ease of preparation
- This is a true no fuss recipe with no oven needed.
- The filling mixes in one bowl and shapes quickly by hand.
- Chilling does most of the work, so active prep stays short.
Health benefits
Peanut butter gives these treats protein, healthy fats, and a satisfying texture that helps you feel full faster than many candy options. While they are still a dessert, peanuts also bring nutrients like vitamin E and magnesium. For readers who like a smarter sweet bite, this guide to peanut nutrition is a helpful place to learn more about why peanuts are such a popular snack ingredient.
Versatility
These homemade peanut butter eggs work for many tastes and occasions. You can shape them for Easter baskets, dessert platters, lunchbox treats, or party trays. They also adapt well to different chocolate coatings and filling swaps, which makes them useful for many diets and preferences.
Distinctive flavor
The mix of creamy peanut butter, rich butter, sweet powdered sugar, and smooth milk chocolate gives these eggs that familiar candy-style flavor people love. The salty note keeps the filling from tasting flat, while vanilla adds warmth. For many people, this is the kind of treat that disappears fast because it tastes so close to a store-bought favorite.
Simple ingredients, short chill time, and a creamy center make these peanut butter eggs a dependable dessert for any season.
Jump to:
- Why You’ll Love These Peanut Butter Eggs
- Ease of preparation
- Health benefits
- Versatility
- Distinctive flavor
- Essential Ingredients for Peanut Butter Eggs
- Main Ingredients
- Special Dietary Options
- How to Prepare the Perfect Peanut Butter Eggs: Step-by-Step Guide
- First Step: Mix the filling
- Second Step: Shape the eggs
- Third Step: Chill until firm
- Fourth Step: Melt the chocolate
- Fifth Step: Dip and coat
- Final Step: Set and serve
- Dietary Substitutions to Customize Your Peanut Butter Eggs
- Protein and Main Component Alternatives
- Vegetable, Sauce, and Seasoning Modifications
- Mastering Peanut Butter Eggs: Advanced Tips and Variations
- Pro cooking techniques
- Flavor variations
- Presentation tips
- Make-ahead options
- How to Store Peanut Butter Eggs: Best Practices
- Refrigeration
- Freezing
- Reheating
- Meal prep considerations
- FAQs: Frequently Asked Questions About Peanut Butter Eggs
- What ingredients are needed for homemade peanut butter eggs?
- How do you make peanut butter eggs at home step by step?
- Can I use different chocolate for coating peanut butter eggs?
- What can I substitute if I don’t like peanut butter in eggs?
- How long do homemade peanut butter eggs last and how to store them?
- Peanut Butter Eggs
- Ingredients
- Instructions
- Last Step:
- Notes
- Nutrition
- Did you make this recipe?
Essential Ingredients for Peanut Butter Eggs
To make this peanut butter eggs recipe work the right way, measure each ingredient carefully. The filling should be soft enough to mix, but firm enough to shape into eggs. The chocolate coating adds the final candy shell and helps the eggs hold their shape in the fridge.
| Ingredient | Amount | Why It Matters |
|---|---|---|
| Creamy peanut butter | 1 cup | Creates the rich, smooth center and gives the eggs their classic flavor. |
| Unsalted butter | 1/2 cup | Adds creaminess and helps the filling set into a soft dough. |
| Powdered sugar | 2 cups | Sweetens the filling and helps it become firm enough to shape. |
| Salt | 1/4 teaspoon | Balances the sweetness and brings out the peanut flavor. |
| Vanilla extract | 1 teaspoon | Adds warmth and rounds out the flavor. |
| Milk chocolate for dipping | 2 cups | Forms the outer shell and gives each egg a candy finish. |
Main Ingredients
- 1 cup creamy peanut butter – This is the heart of the filling and gives the eggs their smooth, nutty taste.
- 1/2 cup unsalted butter – Softened butter helps blend the mixture into a creamy dough.
- 2 cups powdered sugar – This sweetens the filling and gives it structure.
- 1/4 teaspoon salt – A small amount sharpens the flavor and cuts the sweetness.
- 1 teaspoon vanilla extract – Vanilla adds a warm note that makes the filling taste homemade.
- 2 cups milk chocolate for dipping – Melted chocolate coats the eggs and seals in the filling.
Special Dietary Options
- Vegan: Use plant-based butter and dairy-free chocolate. Choose a natural vegan peanut butter with no added milk ingredients.
- Gluten-free: This recipe is naturally gluten-free as written, but always check the labels on your chocolate and vanilla extract.
- Low-calorie: Use less chocolate for dipping, make smaller eggs, and try a reduced-sugar powdered sweetener blend if your brand supports it.
If you are planning more sweet treats for a holiday table, you may also like the easy ideas in my collection of simple homemade desserts.
How to Prepare the Perfect Peanut Butter Eggs: Step-by-Step Guide
First Step: Mix the filling
Start by placing 1 cup creamy peanut butter, 1/2 cup softened unsalted butter, 2 cups powdered sugar, 1/4 teaspoon salt, and 1 teaspoon vanilla extract in a large mixing bowl. Stir with a sturdy spoon or use a hand mixer on low speed until the mixture becomes thick and dough-like. At first, it may look crumbly, but keep mixing. The texture should hold together when pressed with your fingers.
If the mixture feels too soft, add a spoonful of powdered sugar at a time. If it feels too dry and won’t come together, let it sit for a minute so the butter softens more. This is the stage that controls the final texture, so take a moment to get it right. A smooth filling makes shaping much easier later.
Second Step: Shape the eggs
Scoop out small portions of the mixture, about 1 to 2 tablespoons each, depending on how large you want your eggs. Roll each piece into a ball first, then gently press and shape it into an egg form with your hands. This part does not need to look perfect. Homemade peanut butter eggs are meant to have a rustic candy look.
Place each shaped piece on a parchment-lined baking sheet. If the mixture sticks to your hands, lightly dust your palms with powdered sugar or chill the filling for a few minutes before shaping more. Try to keep the eggs about the same size so they chill and coat evenly. This helps the finished batch look neat and professional.
Third Step: Chill until firm
Once all the eggs are shaped, place the tray in the freezer for 20 to 30 minutes or in the refrigerator for about 45 minutes. Chilling is important because it firms the filling and makes dipping much easier. If the eggs are too soft, they can fall apart in the melted chocolate. A quick chill gives you cleaner coating results.
While the eggs chill, prepare your chocolate. This is a good time to line a second tray with parchment paper so the dipped eggs have a place to set. If you are making these for a holiday, you can also get sprinkles or colored drizzle ready now. Planning ahead keeps the process smooth and stress-free.
Fourth Step: Melt the chocolate
Place 2 cups milk chocolate in a microwave-safe bowl. Heat in 30-second bursts, stirring after each round until the chocolate is smooth. You can also melt it over a double boiler if you prefer more control. If the chocolate seems too thick for dipping, stir in a small amount of neutral oil or coconut oil, one teaspoon at a time.
The chocolate should be silky and easy to coat with. Avoid overheating, since that can make it seize or become grainy. Stir well between each heating round. A smooth melt gives the eggs a cleaner finish and helps the coating set with a glossy look.
Fifth Step: Dip and coat
Using a fork or dipping tool, lower each chilled egg into the melted chocolate. Turn it gently so it gets covered on all sides. Lift it out and tap the fork lightly against the bowl to let extra chocolate drip off. This keeps the coating from becoming too thick or messy.
Place each coated egg back on the parchment-lined tray. If you want a thicker shell, let the first layer set for a few minutes and dip again. You can also drizzle extra chocolate over the top for a decorative look. This is where no bake peanut butter eggs start to look like real candy shop treats.
Final Step: Set and serve
Refrigerate the finished eggs until the chocolate hardens, usually about 1 hour. Once set, transfer them to a serving plate or airtight container. They are now ready to enjoy. These are best served chilled, when the center is firm and the chocolate has that satisfying snap.
For a helpful food safety note on dairy and ingredient handling, you can also review this food and nutrition article from The Hospital of Central Connecticut. It is a useful reference when you are preparing sweet treats ahead of time for family and guests.
For the cleanest coating, keep the filling cold and work with one egg at a time.

Dietary Substitutions to Customize Your Peanut Butter Eggs
Protein and Main Component Alternatives
If you need a swap for peanut butter, you can still make a tasty version of this treat. Almond butter gives a milder, slightly sweeter flavor. Cashew butter makes the filling extra creamy. Sunflower seed butter is a strong option for nut-free homes. Each alternative works best when it is thick and not too oily.
When using a thinner nut or seed butter, start with the same amount and then add powdered sugar slowly until the filling firms up. Some natural spreads are softer than standard peanut butter, so a little extra chilling time may help. If you want simple homemade peanut butter eggs with a twist, these swaps keep the recipe flexible without changing the basic method too much.
Vegetable, Sauce, and Seasoning Modifications
While this recipe does not include vegetables or sauce, you can still change the coating and flavor profile in easy ways. Swap milk chocolate for dark chocolate if you want a deeper, less sweet finish. White chocolate gives a softer, sweeter candy shell and works well for decorating. Candy melts are also useful when you want bright colors for Easter.
For seasoning, you can add a pinch more salt if you like a stronger sweet-salty contrast. A little cinnamon can bring warmth. A few drops of almond extract can create a bakery-style flavor. If you are making peanut butter eggs no bake recipe batches for guests, try different coatings on the same tray so everyone gets a choice.
Mastering Peanut Butter Eggs: Advanced Tips and Variations
Pro cooking techniques
For the smoothest results, use softened butter that blends easily into the peanut butter. Cold butter leaves tiny lumps, which can make shaping harder. Sifting the powdered sugar before mixing can also help create a smoother filling. If your kitchen is warm, chill the dough for 10 minutes before shaping.
Another useful trick is to use a fork under the egg while dipping. This lets the extra chocolate drip away cleanly. If you want a neat bottom, place the dipped egg on parchment and let the chocolate settle before moving it. A light second dip gives a thicker shell and a more polished look. These small steps make the finished candy taste and look better.
Flavor variations
You can keep the classic flavor or make small changes for new versions. Add mini chocolate chips to the filling for extra texture. Use dark chocolate and flaky salt for a richer taste. Mix in a little crushed graham cracker for a firmer, slightly cookie-like center. If you like a festive touch, drizzle white chocolate over the top.
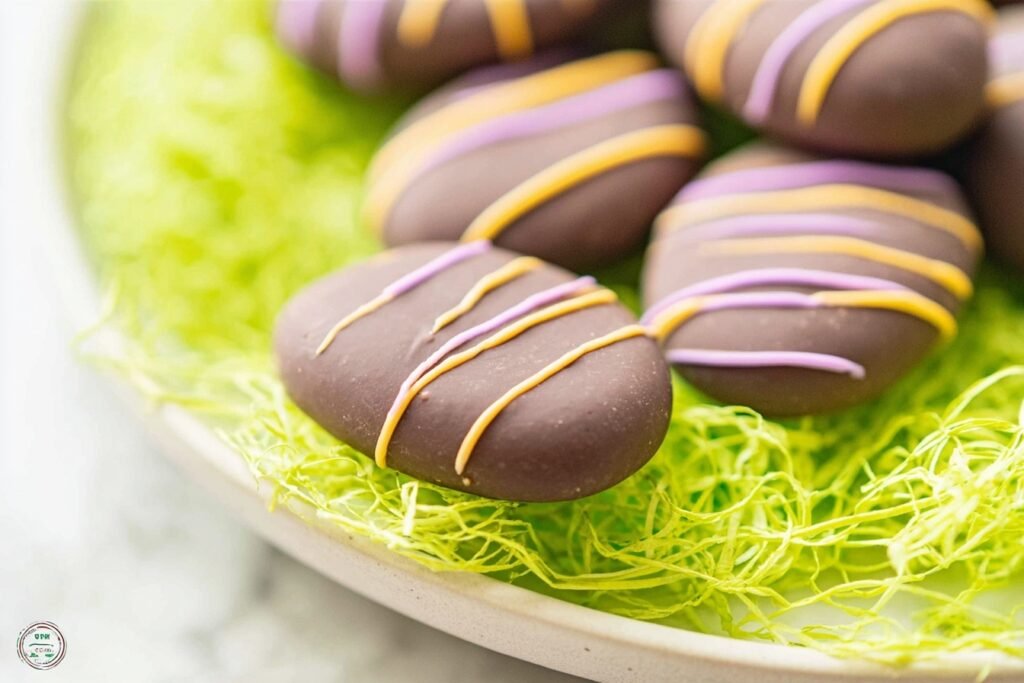
For spring gatherings, decorate with pastel sprinkles before the chocolate sets. That makes them feel more like peanut butter easter eggs. You can also make smaller bite-size shapes for snack boards or party trays. This recipe is easy to adapt without changing the core method.
Presentation tips
Serve the eggs on a white platter so the chocolate color stands out. Add paper liners if you are giving them as gifts. A few chopped peanuts around the plate can make the display look polished. If you are serving them with other desserts, place them near fruit or shortbread cookies for contrast.
For an extra special finish, let the chocolate set fully, then place the eggs in small candy cups. This helps them look neat and keeps them from sticking together. A pretty serving style can make a very simple dessert feel party-ready.
Make-ahead options
These eggs are great for planning ahead. You can make the filling a day in advance, chill it, and shape the eggs later. You can also fully finish the batch and keep it chilled until needed. That makes them a smart choice for holidays, potlucks, and busy weeks when you need a dessert ready to go.
If you love make-ahead recipes, you may also enjoy more easy treats on Recipes Valentina.
How to Store Peanut Butter Eggs: Best Practices
Refrigeration
Store the finished peanut butter eggs in an airtight container in the refrigerator. They stay fresh for 1 to 2 weeks. Place parchment paper between layers so the chocolate shells do not stick together. Keep them away from strong odors like onions or garlic, since the filling can pick up other smells in the fridge.
Freezing
For longer storage, freeze the eggs for up to 2 months. Wrap each one individually or separate layers with parchment, then place them in a freezer-safe bag or container. Let them thaw in the fridge overnight before serving. This method helps the chocolate stay in good shape and keeps the center creamy.
Reheating
These treats do not need reheating. In fact, heat can cause the chocolate to melt and the filling to soften too much. If they become too firm from the fridge, let them sit at room temperature for 5 to 10 minutes before serving. That gives you the best texture without changing the candy shell.
Meal prep considerations
If you are making a batch for later, label the container with the date. Make smaller batches if you want a fresher texture for each serving. These are excellent for portioning into lunchbox desserts or weekend snacks. Because they keep well, they are a practical option for holiday prep and last-minute entertaining.

FAQs: Frequently Asked Questions About Peanut Butter Eggs
What ingredients are needed for homemade peanut butter eggs?
How do you make peanut butter eggs at home step by step?
Can I use different chocolate for coating peanut butter eggs?
What can I substitute if I don’t like peanut butter in eggs?
How long do homemade peanut butter eggs last and how to store them?

Peanut Butter Eggs
🥜 Indulge in creamy, homemade peanut butter eggs coated in smooth milk chocolate – no-bake candy shop quality without the hassle!
🥚 Ready in minutes with just chilling time, these addictive treats are perfect for holidays, parties, or sweet tooth fixes anytime!
- Total Time: 1 hour 20 minutes
- Yield: 12-16 eggs
Ingredients
– 1 cup creamy peanut butter for rich, smooth center
– 1/2 cup unsalted butter for creaminess
– 2 cups powdered sugar for sweetening and firming
– 1/4 teaspoon salt for balancing sweetness
– 1 teaspoon vanilla extract for flavor
– 2 cups milk chocolate for dipping for outer shell
Instructions
1-First Step: Mix the filling Start by placing 1 cup creamy peanut butter, 1/2 cup softened unsalted butter, 2 cups powdered sugar, 1/4 teaspoon salt, and 1 teaspoon vanilla extract in a large mixing bowl. Stir with a sturdy spoon or use a hand mixer on low speed until the mixture becomes thick and dough-like. At first, it may look crumbly, but keep mixing. The texture should hold together when pressed with your fingers. If the mixture feels too soft, add a spoonful of powdered sugar at a time. If it feels too dry and won’t come together, let it sit for a minute so the butter softens more. This is the stage that controls the final texture, so take a moment to get it right. A smooth filling makes shaping much easier later.
2-Second Step: Shape the eggs Scoop out small portions of the mixture, about 1 to 2 tablespoons each, depending on how large you want your eggs. Roll each piece into a ball first, then gently press and shape it into an egg form with your hands. This part does not need to look perfect. Homemade peanut butter eggs are meant to have a rustic candy look. Place each shaped piece on a parchment-lined baking sheet. If the mixture sticks to your hands, lightly dust your palms with powdered sugar or chill the filling for a few minutes before shaping more. Try to keep the eggs about the same size so they chill and coat evenly. This helps the finished batch look neat and professional.
3-Third Step: Chill until firm Once all the eggs are shaped, place the tray in the freezer for 20 to 30 minutes or in the refrigerator for about 45 minutes. Chilling is important because it firms the filling and makes dipping much easier. If the eggs are too soft, they can fall apart in the melted chocolate. A quick chill gives you cleaner coating results. While the eggs chill, prepare your chocolate. This is a good time to line a second tray with parchment paper so the dipped eggs have a place to set. If you are making these for a holiday, you can also get sprinkles or colored drizzle ready now. Planning ahead keeps the process smooth and stress-free.
4-Fourth Step: Melt the chocolate Place 2 cups milk chocolate in a microwave-safe bowl. Heat in 30-second bursts, stirring after each round until the chocolate is smooth. You can also melt it over a double boiler if you prefer more control. If the chocolate seems too thick for dipping, stir in a small amount of neutral oil or coconut oil, one teaspoon at a time. The chocolate should be silky and easy to coat with. Avoid overheating, since that can make it seize or become grainy. Stir well between each heating round. A smooth melt gives the eggs a cleaner finish and helps the coating set with a glossy look.
5-Fifth Step: Dip and coat Using a fork or dipping tool, lower each chilled egg into the melted chocolate. Turn it gently so it gets covered on all sides. Lift it out and tap the fork lightly against the bowl to let extra chocolate drip off. This keeps the coating from becoming too thick or messy. Place each coated egg back on the parchment-lined tray. If you want a thicker shell, let the first layer set for a few minutes and dip again. You can also drizzle extra chocolate over the top for a decorative look. This is where no bake peanut butter eggs start to look like real candy shop treats.
6-Final Step: Set and serve Refrigerate the finished eggs until the chocolate hardens, usually about 1 hour. Once set, transfer them to a serving plate or airtight container. They are now ready to enjoy. These are best served chilled, when the center is firm and the chocolate has that satisfying snap.
Last Step:
Please leave a rating and comment letting us know how you liked this recipe! This helps our business to thrive and continue providing free, high-quality recipes for you.Notes
🥄 Sift powdered sugar first for a smoother, lump-free filling texture.
❄️ Chill the peanut butter mixture well before shaping to prevent sticking to hands.
🍫 Double-dip eggs after first chocolate layer sets for thicker, professional-looking coating.
- Prep Time: 20 minutes
- Chill Time: 1 hour
- Category: Dessert
- Method: No Bake
- Cuisine: American
- Diet: Vegetarian, Gluten-Free
Nutrition
- Serving Size: 1 egg
- Calories: 250 calories
- Sugar: 20g
- Sodium: 100mg
- Fat: 15g
- Saturated Fat: 6g
- Unsaturated Fat: 8g
- Trans Fat: 0g
- Carbohydrates: 25g
- Fiber: 1g
- Protein: 5g
- Cholesterol: 10mg


