Why You’ll Love This Oven Baked Ribs
If you have been craving Oven Baked Ribs that come out tender, juicy, and packed with flavor, this recipe is a keeper. It uses simple pantry ingredients, a low oven temperature, and a quick sauce that brings everything together without a lot of fuss. I love recipes like this because they fit busy nights, relaxed weekends, and special family dinners with the same ease.
- Easy preparation: You only need 15 minutes to get the ribs ready before the oven takes over. That makes this recipe friendly for home cooks, busy parents, students, and working professionals who want a solid dinner without standing over the stove.
- Comforting and satisfying: Each serving gives you 26 grams of protein, so these ribs feel hearty and filling. The low-and-slow bake helps the meat turn tender while the sauce adds a sweet, tangy finish.
- Flexible for different kitchens: This method works well for baby back ribs, and it can also be adapted for spare ribs or St. Louis-style ribs. You can also make it fit your pantry by adjusting the sauce or using a thicker ketchup.
- Big flavor with simple ingredients: The mix of cumin, brown sugar, ketchup, chili sauce, and vinegar gives these ribs a rich balance of sweet, smoky, and tangy notes that taste like you worked much harder than you did.
Low heat, foil, and a quick broil at the end are the three simple moves that turn a good rack of ribs into a meal people talk about later.
For readers who enjoy easy comfort food, you might also like these sweet and savory pineapple casserole ideas for a cozy side dish on the same table.
Jump to:
- Why You’ll Love This Oven Baked Ribs
- Essential Ingredients for Oven Baked Ribs
- Main Ingredients
- Ingredient Notes and Helpful Swaps
- Special Dietary Options
- How to Prepare the Perfect Oven Baked Ribs: Step-by-Step Guide
- First Step: Get the ribs ready
- Second Step: Wrap and bake low and slow
- Third Step: Make the sauce while the ribs bake
- Fourth Step: Check for tenderness
- Fifth Step: Sauce and broil
- Final Step: Rest, slice, and serve
- Dietary Substitutions to Customize Your Oven Baked Ribs
- Protein and Main Component Alternatives
- Vegetable, Sauce, and Seasoning Modifications
- Mastering Oven Baked Ribs: Advanced Tips and Variations
- Pro cooking techniques
- Flavor variations
- Presentation tips
- Make-ahead options
- How to Store Oven Baked Ribs: Best Practices
- Refrigeration
- Freezing
- Reheating
- Meal prep considerations
- FAQs: Frequently Asked Questions About Oven Baked Ribs
- How long do you bake ribs in the oven?
- What temperature should ribs be baked at in the oven?
- How do you make oven baked ribs tender?
- Do you have to wrap ribs in foil when baking in the oven?
- What’s the best BBQ sauce for oven baked ribs?
- Oven Baked Ribs
- Ingredients
- Instructions
- Last Step:
- Notes
- Nutrition
- Did you make this recipe?
Essential Ingredients for Oven Baked Ribs
Before you start cooking, gather everything you need so the process stays smooth. This recipe uses a short ingredient list, but each item has a job to do. The ribs bring the main flavor, the oil helps the sauce cook properly, and the sauce ingredients create that sticky finish people expect from great Oven Baked Ribs.
Main Ingredients
- 2 to 2.5 pounds baby back pork ribs – The star of the recipe. Baby back ribs cook evenly and become tender in the oven with low heat.
- 1 tablespoon olive oil – Used to cook the onion and help build the sauce.
- 1/4 cup finely diced onion – Adds depth and a little sweetness to the barbecue-style sauce.
- 1/2 teaspoon ground cumin – Gives the sauce a warm, earthy note that pairs well with pork.
- 1/2 cup ketchup – Forms the base of the sauce and helps it cling to the ribs.
- 1 tablespoon hot chili sauce – Adds heat and a little bite.
- 2 tablespoons light brown sugar – Brings sweetness and helps the sauce caramelize under the broiler.
- 1 tablespoon apple cider vinegar – Adds tang and balances the sweetness.
- Salt and ground pepper to taste – Simple seasoning that brings out the natural flavor of the meat.
Ingredient Notes and Helpful Swaps
| Ingredient | Why It Matters | Easy Swap |
|---|---|---|
| Baby back pork ribs | Lean, tender, and ideal for slow oven baking | Spare ribs or St. Louis-style ribs |
| Ketchup | Creates the sauce base | Use a thicker ketchup without high-fructose corn syrup |
| Hot chili sauce | Adds heat and balance | Use your favorite hot sauce or mild chili sauce |
| Apple cider vinegar | Brightens the sauce | White vinegar or a splash of lemon juice |
Special Dietary Options
- Vegan: Replace pork ribs with king oyster mushrooms, tofu slabs, or seitan strips. The sauce can stay the same if your chili sauce and ketchup are plant-based.
- Gluten-free: Use certified gluten-free ketchup and chili sauce. The rest of the ingredients are naturally gluten-free.
- Low-calorie: Use a lighter ketchup, reduce the brown sugar slightly, and trim any visible fat from the ribs before cooking.
How to Prepare the Perfect Oven Baked Ribs: Step-by-Step Guide
These Oven Baked Ribs are all about patience and simple technique. The oven does most of the work, and you get tender ribs with a sticky finish that tastes like classic barbecue comfort food. The total time is 3 hours 15 minutes, with 15 minutes of prep and about 3 hours of cooking.
First Step: Get the ribs ready
Start by preheating your oven to 275°F. This lower temperature is the key to soft, tender ribs that cook evenly without drying out. While the oven heats, check the ribs for the thin membrane on the bone side. If it is present, loosen it with a knife, grab it with a paper towel, and pull it off in one piece if you can.
Removing that membrane matters because it helps the seasoning reach the meat and gives you a better texture after baking. Pat the ribs dry, then season both sides with salt and ground pepper to taste. If you want the best result, season generously but keep it simple since the sauce adds plenty of flavor later.
Second Step: Wrap and bake low and slow
Place the ribs on foil, with the meatiest side facing down. This helps the fat melt through the meat as it cooks. Wrap the rack tightly in foil so the steam stays inside, which is what helps the ribs become so tender. If you are cooking more than one rack, wrap each one separately so they cook evenly.
Set the wrapped ribs on a baking sheet and slide them into the oven. Bake for 2.5 to 3.5 hours, depending on the size of the rack. Baby back ribs closer to 2 pounds may finish sooner, while thicker racks may need the full time. You want the meat tender enough that it bends easily and starts to pull back from the bone.
The oven temperature stays low on purpose. That gentle heat gives the connective tissue time to soften, which is how you get ribs that feel rich and tender instead of dry and tough.
Third Step: Make the sauce while the ribs bake
About halfway through the bake, or whenever you have a quiet moment, make the sauce. Heat 1 tablespoon olive oil in a small saucepan over medium heat. Add 1/4 cup finely diced onion and cook until soft and fragrant. This step gives the sauce a savory base and takes away the raw onion bite.
Next, stir in 1/2 teaspoon ground cumin and cook for about 30 seconds. Then add 1/2 cup ketchup, 1 tablespoon hot chili sauce, 2 tablespoons light brown sugar, and 1 tablespoon apple cider vinegar. Stir everything together and let it simmer gently until slightly thickened. Taste the sauce and add a little more salt and pepper if needed. The goal is a sauce that is sweet, tangy, and just a little spicy.
If you enjoy homemade sauce ideas, you may also like the flavor balance in this bright and tangy lemon curd recipe, especially if you like sweet and sharp flavors in your cooking.
Fourth Step: Check for tenderness
When the ribs have baked long enough, open the foil carefully because steam will rush out. Use tongs to test the rack by lifting one end. If it bends easily and the meat starts to crack slightly on the surface, the ribs are ready for the final sauce step. You can also pierce the meat with a fork or knife. It should feel tender and give little resistance.
Another good test is to look at the bone ends. If they are starting to show and the meat has pulled back a bit, that is a strong sign the ribs are ready. If they still feel firm, rewrap and bake for another 20 to 30 minutes, then check again.
Fifth Step: Sauce and broil
Carefully remove the ribs from the foil and place them on a foil-lined baking sheet. Brush a generous layer of sauce over the top. Make sure you cover the ribs evenly, but do not drown them. A nice coat is enough because the broiler will help the sauce caramelize.
Turn the broiler on and place the ribs under it for 3 to 4 minutes. Watch closely, because the sugar in the sauce can brown quickly. You want a sticky, lightly charred finish, not burnt edges. If you like a deeper glaze, you can brush on a second thin layer and broil again for a short minute or two.
Final Step: Rest, slice, and serve
Let the ribs rest for about 10 minutes before slicing. Resting helps the juices settle so each bite stays moist. Slice between the bones and serve with extra sauce on the side. These ribs pair well with coleslaw, roasted potatoes, cornbread, or even a simple green salad if you want a lighter plate.
Recipe timing: Prep 15 minutes, Cook 3 hours, Total 3 hours 15 minutes.

Dietary Substitutions to Customize Your Oven Baked Ribs
Protein and Main Component Alternatives
If you cannot find baby back ribs, spare ribs and St. Louis-style ribs both work well with this method. Just plan for a slightly longer bake time because these cuts can be larger and meatier. You can also use the same sauce approach for pork shoulder strips or bone-in pork chops, though the cooking time will change.
For a different protein style, some cooks like to use country-style ribs. They are meaty and forgiving, which makes them a good choice for cooks who want a richer bite. If you are cooking for someone who avoids pork, the sauce can be used on chicken thighs or even roasted cauliflower for a similar sweet and spicy flavor profile.
Vegetable, Sauce, and Seasoning Modifications
You can swap the onion for shallots if you want a sweeter, softer base. If you like more heat, add a pinch of cayenne or extra chili sauce. For a milder version, cut the chili sauce in half and add a little more brown sugar to keep the sauce balanced.
Need a different tang? Try a splash of lemon juice or white vinegar in place of the apple cider vinegar. If you want a smokier flavor, add a bit of smoked paprika to the sauce. For a pantry-friendly version, use whatever ketchup you already have, but a thicker ketchup without high-fructose corn syrup gives a richer final glaze.
Mastering Oven Baked Ribs: Advanced Tips and Variations
Once you have made these ribs once, small changes can help you match the recipe to your taste. The core method stays the same, but a few smart touches can make the results even better.
Pro cooking techniques
- Bake meatiest side down: This helps the fat and juices move through the ribs as they cook.
- Check doneness by feel: Piercing or bending the rack works better than guessing by time alone.
- Wrap each rack separately: This is especially helpful when cooking for a crowd.
- Use a foil-lined tray: It makes cleanup much easier after the broil step.
Flavor variations
Try adding smoked paprika for a deeper barbecue taste, or mix in a little honey if you want a sweeter glaze. A spoonful of mustard in the sauce gives it extra tang. You can also change the heat level by using a mild or spicy chili sauce, depending on who is eating.
For a more Southern-style plate, serve the ribs with creamy sides and something sweet to finish the meal. If you like browsing recipe ideas for special treats after dinner, you may enjoy this strawberry shortcake dessert as a nice follow-up.
Presentation tips
Slice the ribs cleanly between the bones and fan them out on a platter. Spoon extra sauce into a small bowl for dipping. A sprinkle of chopped parsley or thinly sliced green onion can add color if you want a prettier finish.
Make-ahead options
You can bake the ribs earlier in the day, then cool and refrigerate them until you are ready to sauce and broil. This is helpful for parties, weeknight dinners, and meal planning. The sauce can also be made ahead and stored in the fridge for a few days, which makes the final cook even faster.
How to Store Oven Baked Ribs: Best Practices
Leftover ribs store well, which is great news if you like meal prep or want an easy lunch the next day. Keep them in an airtight container once they have cooled.
Refrigeration
Store baked ribs in the fridge for up to 4 days. If you have a lot left, slice them first so they are easier to reheat later.
Freezing
For longer storage, freeze the ribs for up to 3 months. Wrap them tightly in foil or freezer-safe wrap, then place them in a freezer bag or container. If possible, freeze portions separately so you can pull out only what you need.
Reheating
Reheat ribs wrapped in foil at 275°F until warmed through. This method helps keep moisture in the meat. You can also add a small spoonful of sauce before wrapping if the ribs seem dry.
Meal prep considerations
These ribs are a smart choice for batch cooking because they hold up well after baking. Make a double batch on the weekend and use the leftovers for lunches, quick dinners, or next-day sandwiches. For a classic side dish idea, try pairing them with a comforting bake like this pineapple casserole recipe.

FAQs: Frequently Asked Questions About Oven Baked Ribs
How long do you bake ribs in the oven?
What temperature should ribs be baked at in the oven?
How do you make oven baked ribs tender?
Do you have to wrap ribs in foil when baking in the oven?
What’s the best BBQ sauce for oven baked ribs?

Oven Baked Ribs
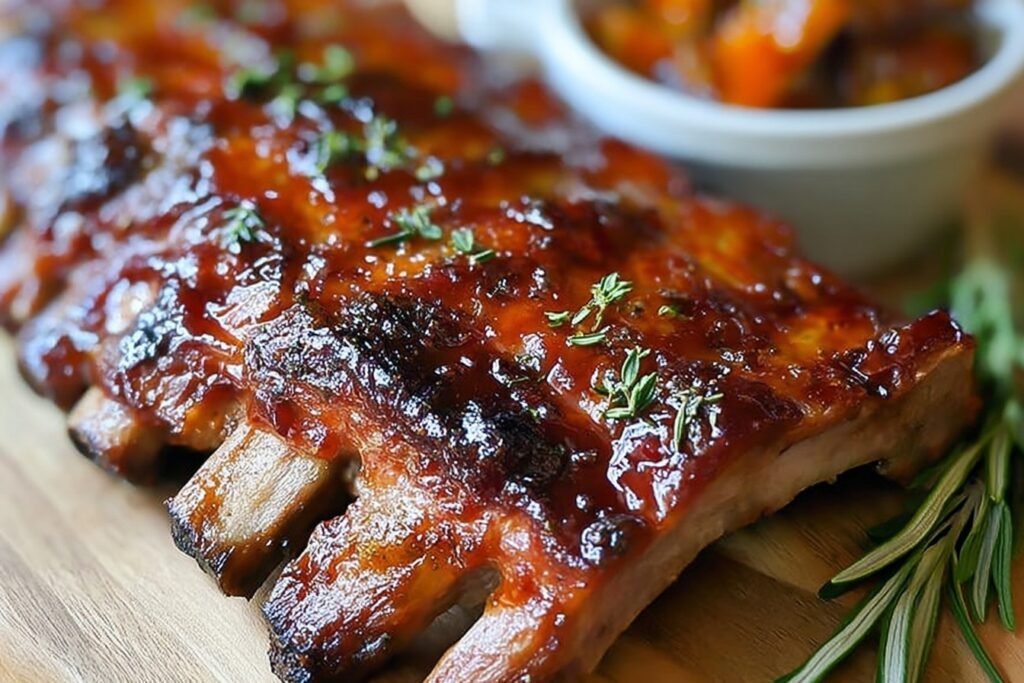
🥩🍖 Enjoy tender, fall-off-the-bone baby back ribs baked effortlessly in the oven – juicy, flavorful without needing a grill!
🔥 Homemade spicy-sweet sauce adds smoky barbecue perfection, ideal for easy weeknight dinners or impressive gatherings!
- Total Time: 3 hours 15 minutes
- Yield: 4 servings
Ingredients
– 2 to 2.5 pounds baby back pork ribs
– 1 tablespoon olive oil
– 1/4 cup finely diced onion
– 1/2 teaspoon ground cumin
– 1/2 cup ketchup
– 1 tablespoon hot chili sauce
– 2 tablespoons light brown sugar
– 1 tablespoon apple cider vinegar
– Salt and ground pepper to taste
Instructions
1-First Step: Get the ribs ready Start by preheating your oven to 275°F. This lower temperature is the key to soft, tender ribs that cook evenly without drying out. While the oven heats, check the ribs for the thin membrane on the bone side. If it is present, loosen it with a knife, grab it with a paper towel, and pull it off in one piece if you can. Removing that membrane matters because it helps the seasoning reach the meat and gives you a better texture after baking. Pat the ribs dry, then season both sides with salt and ground pepper to taste. If you want the best result, season generously but keep it simple since the sauce adds plenty of flavor later.
2-Second Step: Wrap and bake low and slow Place the ribs on foil, with the meatiest side facing down. This helps the fat melt through the meat as it cooks. Wrap the rack tightly in foil so the steam stays inside, which is what helps the ribs become so tender. If you are cooking more than one rack, wrap each one separately so they cook evenly. Set the wrapped ribs on a baking sheet and slide them into the oven. Bake for 2.5 to 3.5 hours, depending on the size of the rack. Baby back ribs closer to 2 pounds may finish sooner, while thicker racks may need the full time. You want the meat tender enough that it bends easily and starts to pull back from the bone.
3-Third Step: Make the sauce while the ribs bake About halfway through the bake, or whenever you have a quiet moment, make the sauce. Heat 1 tablespoon olive oil in a small saucepan over medium heat. Add 1/4 cup finely diced onion and cook until soft and fragrant. This step gives the sauce a savory base and takes away the raw onion bite. Next, stir in 1/2 teaspoon ground cumin and cook for about 30 seconds. Then add 1/2 cup ketchup, 1 tablespoon hot chili sauce, 2 tablespoons light brown sugar, and 1 tablespoon apple cider vinegar. Stir everything together and let it simmer gently until slightly thickened. Taste the sauce and add a little more salt and pepper if needed. The goal is a sauce that is sweet, tangy, and just a little spicy.
4-Fourth Step: Check for tenderness When the ribs have baked long enough, open the foil carefully because steam will rush out. Use tongs to test the rack by lifting one end. If it bends easily and the meat starts to crack slightly on the surface, the ribs are ready for the final sauce step. You can also pierce the meat with a fork or knife. It should feel tender and give little resistance. Another good test is to look at the bone ends. If they are starting to show and the meat has pulled back a bit, that is a strong sign the ribs are ready. If they still feel firm, rewrap and bake for another 20 to 30 minutes, then check again.
5-Fifth Step: Sauce and broil Carefully remove the ribs from the foil and place them on a foil-lined baking sheet. Brush a generous layer of sauce over the top. Make sure you cover the ribs evenly, but do not drown them. A nice coat is enough because the broiler will help the sauce caramelize. Turn the broiler on and place the ribs under it for 3 to 4 minutes. Watch closely, because the sugar in the sauce can brown quickly. You want a sticky, lightly charred finish, not burnt edges. If you like a deeper glaze, you can brush on a second thin layer and broil again for a short minute or two.
6-Final Step: Rest, slice, and serve Let the ribs rest for about 10 minutes before slicing. Resting helps the juices settle so each bite stays moist. Slice between the bones and serve with extra sauce on the side. These ribs pair well with coleslaw, roasted potatoes, cornbread, or even a simple green salad if you want a lighter plate.
Last Step:
Please leave a rating and comment letting us know how you liked this recipe! This helps our business to thrive and continue providing free, high-quality recipes for you.Notes
✂️ Always remove the silver skin membrane from the back of the ribs for superior tenderness and flavor absorption.
🔍 Test doneness by bending the rack or piercing with a fork – meat should pull easily from the bone.
❄️ Store cooked ribs in fridge up to 4 days or freeze up to 3 months; reheat wrapped in foil at 275°F.
- Prep Time: 15 minutes
- Cook Time: 3 hours
- Category: Main Course
- Method: Oven
- Cuisine: American
- Diet: Gluten Free
Nutrition
- Serving Size: 1/2 rack
- Calories: 433 calories
- Sugar: 11g
- Sodium: 694mg
- Fat: 30g
- Saturated Fat: 10g
- Unsaturated Fat: 20g
- Trans Fat: 0g
- Carbohydrates: 13g
- Fiber: 0g
- Protein: 26g
- Cholesterol: 107mg


