Ingredients
– 1 strawberry cake mix, 15.25 oz for a soft and colorful cake base
– 1 1/3 cups guava nectar or guava juice to bring tropical flavor into the cake batter
– 3 eggs to help the cake rise and hold together
– 1/3 cup coconut oil, room temperature and liquid for moisture and a gentle coconut note
– 8 ounces cream cheese, softened for a rich and tangy filling
– 1/3 cup sugar to sweeten the cream layer
– 1 teaspoon vanilla for warm flavor
– 8 ounces thawed whipped topping to keep the layer light and fluffy
– 2 cups guava nectar or guava juice for the glossy fruit topping
– 1/2 cup sugar to balance the tart fruit flavor
– 1/4 cup cornstarch to thicken the gel
– 3 tablespoons water for the slurry
Instructions
1-First step: Mix the cake batter Start by preheating your oven according to the instructions on the strawberry cake mix box. Lightly grease a 9×13-inch glass baking dish so the cake releases easily after baking. In a mixing bowl, combine the 1 strawberry cake mix, 1 1/3 cups guava nectar or guava juice, 3 eggs, and 1/3 cup coconut oil that is room temperature and liquid. Mix until everything is well combined, but do not overmix. A hand whisk works well here because it helps keep the cake tender instead of tough. Once the batter looks smooth, pour it into the prepared dish and bake according to the package directions. Since oven times can vary a little, start checking a few minutes before the end of the suggested bake time. Insert a toothpick into the center of the cake. If it comes out clean or with just a few moist crumbs, the cake is ready.
2-Second step: Make the cream cheese layer While the cake bakes, prepare the creamy filling. In a medium mixing bowl, beat 8 ounces softened cream cheese with a hand mixer until fluffy. Add 1/3 cup sugar and 1 teaspoon vanilla, then mix until smooth and well blended. Slowly fold in 8 ounces thawed whipped topping until the mixture is light and even. Refrigerate this layer until the cake is fully cool. Room temperature cream cheese mixes more smoothly, so take it out early if you can. This step matters because cold cream cheese can leave lumps in the frosting layer. If you are making dessert for a crowd, you can also prepare this layer ahead of time and keep it chilled for a few hours.
3-Third step: Cook the guava gel topping Next, make the glossy topping that gives this Hawaiian Guava Cake its signature look. In a medium saucepan, add 2 cups guava nectar or guava juice and 1/2 cup sugar. Bring the mixture to a boil over medium heat. In a small bowl, stir 1/4 cup cornstarch with 3 tablespoons water to make a slurry. Remove the guava mixture from the heat, stir in the slurry, then return the pan to the stove and bring it back to a boil for 1 minute while stirring. If you want a thicker set, you can boil the gel slurry for 2 minutes instead of 1, which helps it firm up a little more. After cooking, cool the topping in the refrigerator until it thickens and is easy to spread. If your guava juice tastes very sweet, you can taste and adjust the sugar slightly before boiling.
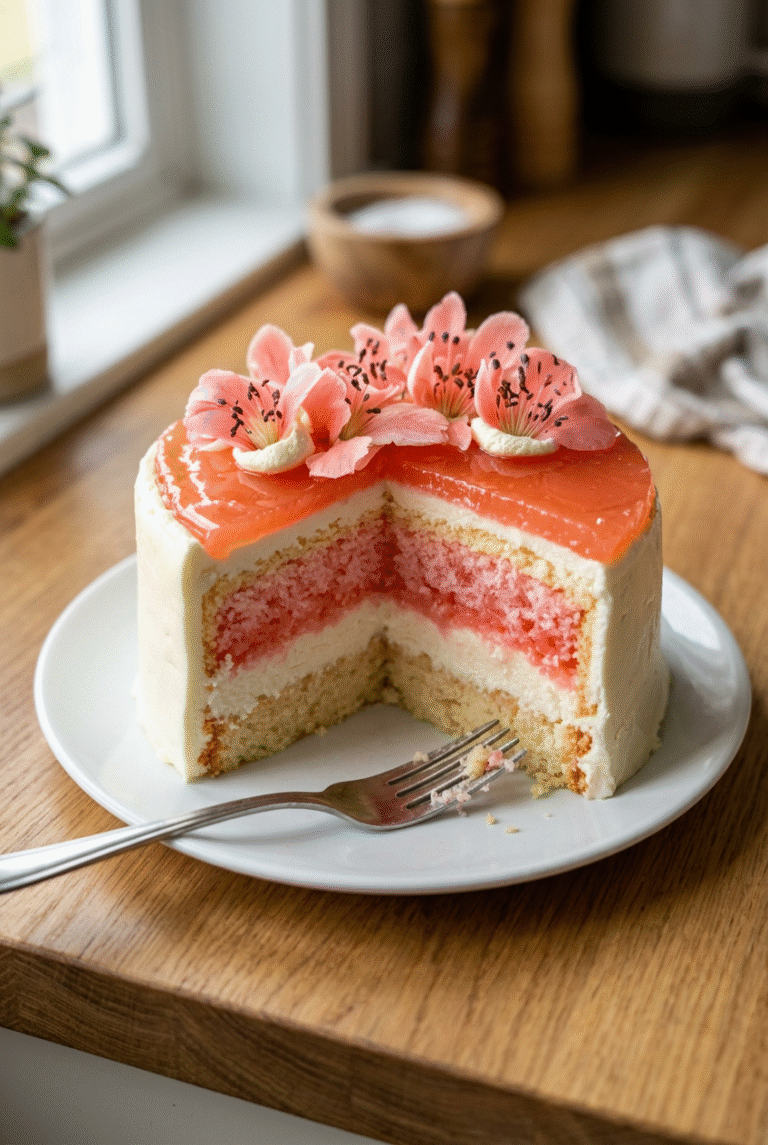
4-Fourth step: Assemble the cake When the cake has cooled completely, spread the cream cheese mixture evenly over the top. Take your time with this part so the layer looks smooth from edge to edge. A cooled cake is important here, because warm cake can melt the cream filling and make the layers slide. After the cream layer is in place, spoon or pour the guava gel over the top and spread it gently. Cover the entire surface for that bright, shiny finish. Then place the cake in the refrigerator so the layers can set well.
5-Final step: Chill and serve For the best slices, chill the cake for at least 12 hours before serving. This helps the guava topping firm up and makes the cream layer neat and sliceable. If you are short on time, a few hours will work, but overnight chilling gives the cleanest results. Before serving, garnish with fresh guava slices or shredded coconut if you want a tropical look.
Last Step:
Please leave a rating and comment letting us know how you liked this recipe! This helps our business to thrive and continue providing free, high-quality recipes for you.Notes
🍈 Taste guava nectar first and adjust sugar in gel for perfect sweet-tart balance.
🧁 Ensure cake is fully cooled before layering to avoid melting the frosting.
🌺 Garnish with fresh guava slices or shredded coconut for extra tropical flair.
- Prep Time: 10 minutes
- Chilling Time: 12 hours
- Cook Time: 25 minutes
- Category: Desserts
- Method: Bake
- Cuisine: Hawaiian
- Diet: Vegetarian
Nutrition
- Serving Size: 1 slice
- Calories: 416 kcal
- Sugar: 44g
- Sodium: 338mg
- Fat: 17g
- Saturated Fat: 11g
- Unsaturated Fat: 6g
- Trans Fat: 0g
- Carbohydrates: 62g
- Fiber: 1g
- Protein: 4g
- Cholesterol: 65mg