


Easy Cheese and Chives Scones
These cheddar cheese and chive scones are the kind of fast savory bake that earns a permanent place in a weekly rotation. Sharp cheddar gives them their pronounced, savory flavor, fresh chives add a mild oniony note, and just a hint of black pepper rounds out every bite with gentle warmth.
The crumb is light and fluffy with the tender, flaky layers that make a great scone. They are at their very best hot from the oven with a little butter melting into the top, but they are easy to enjoy in several ways: on their own, with extra butter and grated cheese, with jam, or simply at room temperature once they have cooled.
Savory scones like these are a beloved staple in South Africa, New Zealand, Australia, and the UK, where they sit very close to what North Americans call biscuits.
This version builds on the author’s cheese scones and classic English scones approach, adapted here from the original cheddar cheese and chives scone recipe.
With 15 minutes of prep and a short bake, they are a simple and reliable choice for breakfast, brunch, or snack time.

Jump to:
- Easy Cheese and Chives Scones
- Ingredient Notes & Substitutions
- Step By Step Instructions
- Expert Tips for this Recipe
- Storage and Freezing
- Other Scones Recipes You May Like
- FAQs
- What is the best cheese to use in cheese and chive scones?
- Why are my cheese scones tough instead of tender?
- Can you freeze cheese and chive scones?
- How do you reheat day-old cheese scones?
- Cheddar Cheese and Chives Scones
- Ingredients
- Instructions
- Last Step:
- Nutrition
- Did you make this recipe?
Ingredient Notes & Substitutions
The recipe card gives every exact quantity. These notes explain what each ingredient does and where you can swap, so you can bake with confidence even if your pantry is not perfectly stocked. I like weighing everything on a kitchen scale, because grams are the most accurate way to bake.
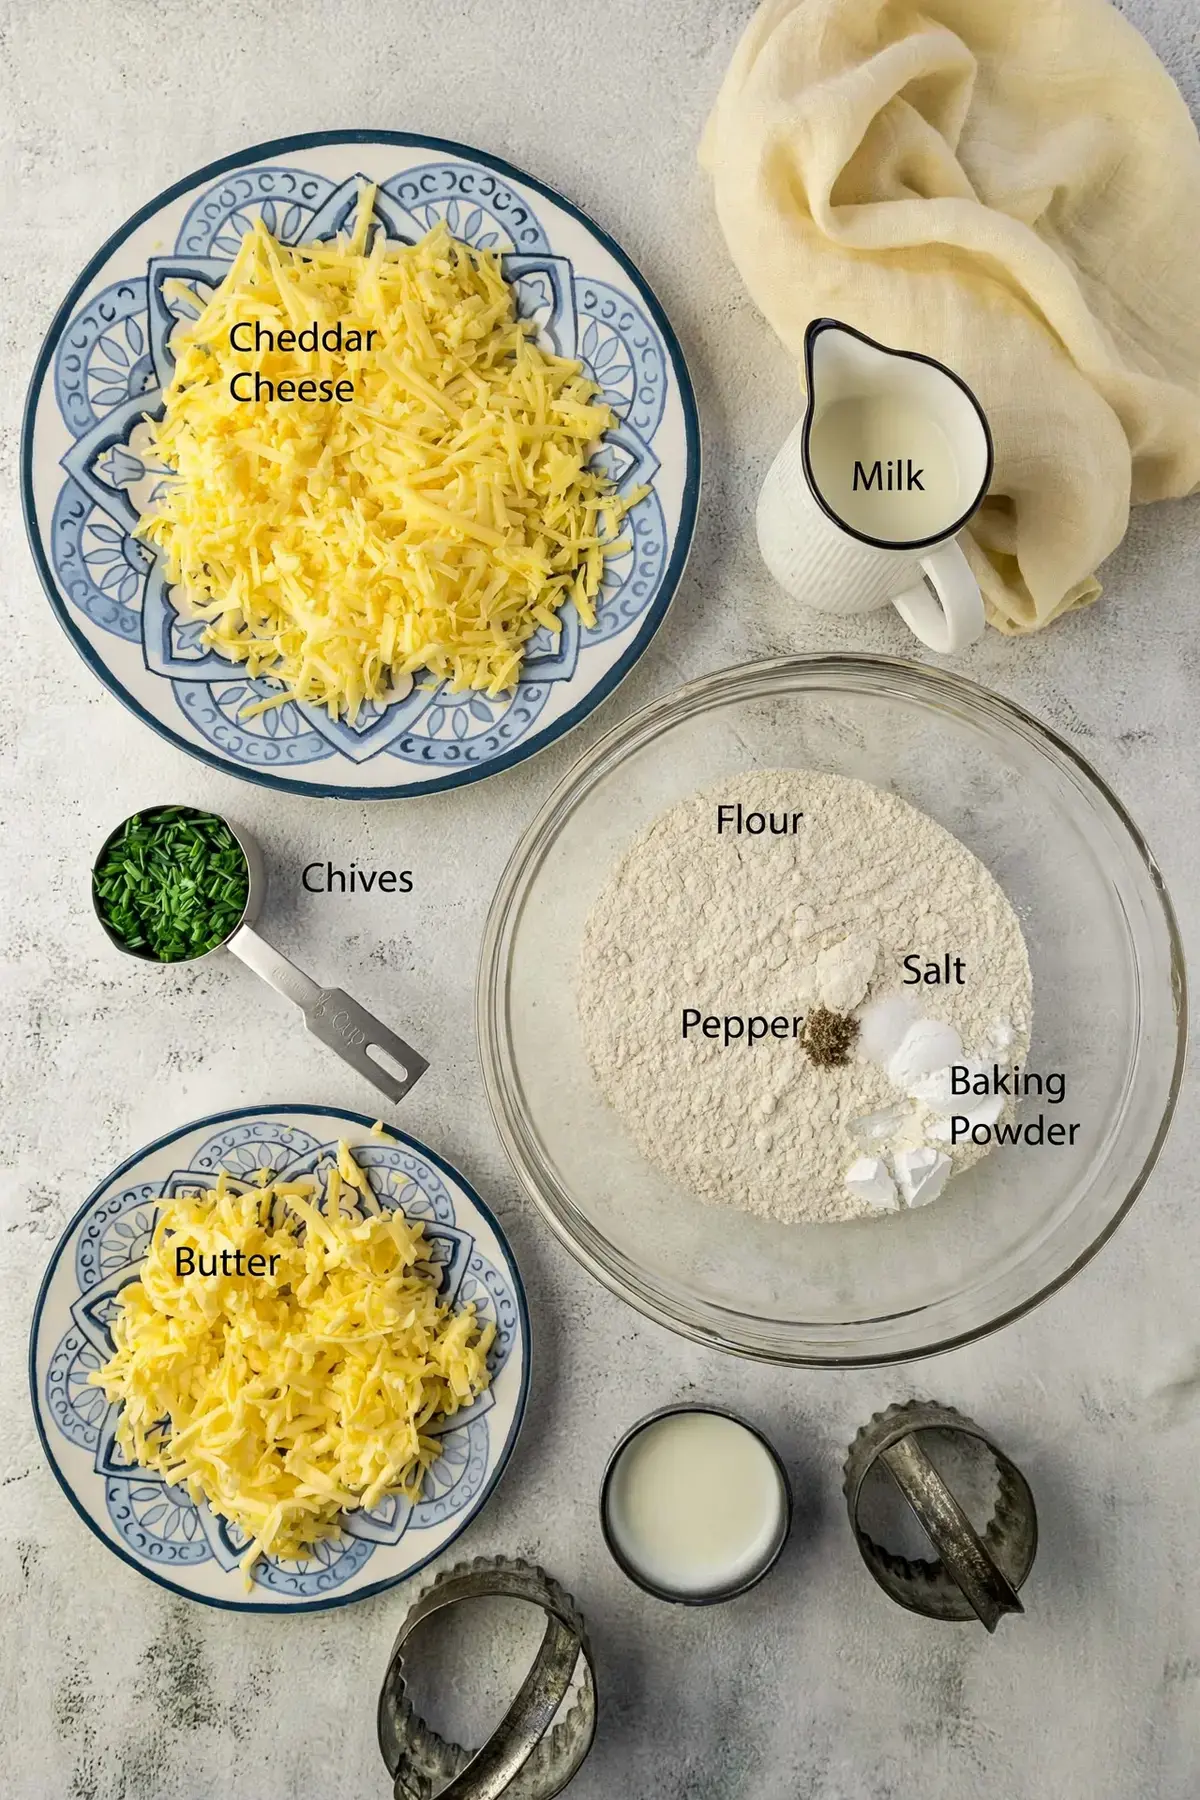
- Plain flour, 300 grams. Standard all purpose or standard grade flour is the base here. For something a bit different, self raising or self rising flour can replace it, but you should still add an extra half teaspoon of baking powder so the lift stays reliable.
- Baking powder, 3 teaspoons. This is what gives the scones their rise. It loses strength over time, so I find it worth checking freshness before you start: put a quarter to a half teaspoon in a heat proof container, add boiling water, and look for fizzing. If it fizzes, it is still fresh and ready to use.
- Cold salted butter, 60 grams. Butter does two jobs at once. It adds rich flavor, and because it is cold, the steam it releases in the hot oven works together with the baking powder to create lift. That steam is the secret behind a soft, fluffy, flaky scone. The source recipe uses New Zealand butter, which is similar to European or Irish butter.
- Cheddar cheese, 160 grams, grated. Mature or vintage cheddar gives the most pronounced cheese flavor, which is exactly what you want in a savory scone. Regular cheddar or New Zealand tasty cheese works well too. About 40 grams of the grated cheese is set aside to sprinkle over the tops before baking. For something a bit different, you can replace 60 grams of the cheddar with parmesan, Parmigiano Reggiano, or Grana Padano for even more depth.
- Fresh chives, one third cup, finely sliced. Chives bring a mild oniony note without overpowering the cheese. If you do not have them, swap in spring onions, green onions, or scallions.
- Milk, 200 mL, plus 3 tablespoons for brushing. Milk adds the moisture that brings the dough together. Full fat or whole milk is preferred for the richest result, but trim or 2 percent milk can be used. The extra 3 tablespoons are brushed over the tops before baking to help them turn golden.
- Black pepper, half a teaspoon, cracked. A small amount adds depth of flavor and just a little spiciness. It is subtle, but you would miss it if it were gone.
- Table salt, a quarter to a half teaspoon. This is only needed if you are using unsalted butter. If you used salted butter, or if the cheese tastes salty enough on its own, you can skip the added salt.
For a quick reference, here are the simplest swaps in one place:
| Ingredient | Swap |
|---|---|
| Plain flour | Self raising flour, still with an extra half teaspoon of baking powder |
| Cheddar cheese | Regular cheddar, tasty cheese, or 60 grams swapped for parmesan |
| Fresh chives | Spring onions, green onions, or scallions |
| Whole milk | Trim or 2 percent milk |
| Added salt | Skip it when using salted butter or salty cheese |
Chill everything, handle the dough as little as you can, and these scones will come out golden, tall, and perfectly flaky.
Step By Step Instructions
Start with cold ingredients, because cold butter is what creates those flaky layers. Grate the butter and the cheese first if you like, then return them to the fridge while you measure everything else.
Preheat the oven to 220C (425F, Gas Mark 7) and line a baking tray or sheet with parchment or baking paper.
The recipe card gives 15 minutes of prep and a 15 minute cook time for a 30 minute total, while the method below allows a 15 to 20 minute bake window so you can bake until the scones are risen and golden brown.
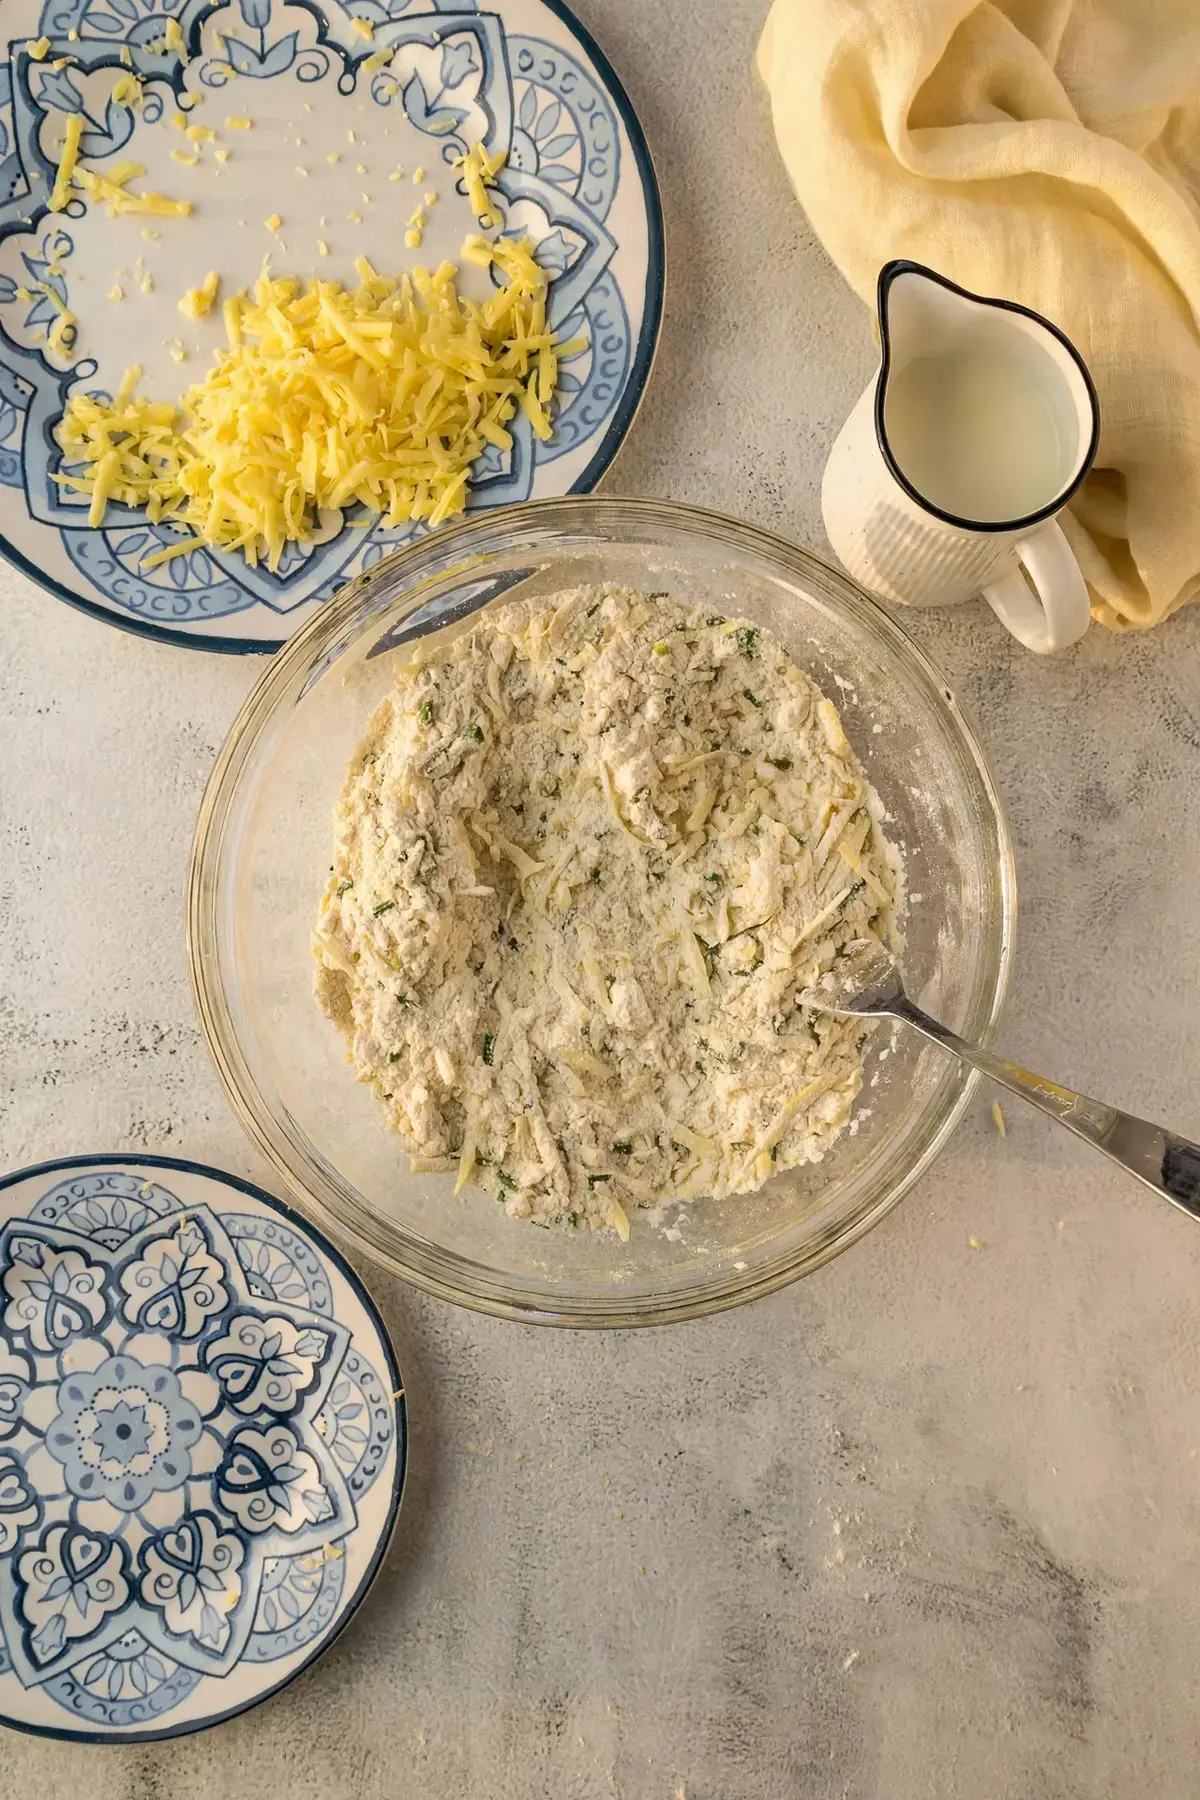
- Grate the cheese. Grate the 160 grams of cheddar, then set aside about 40 grams to sprinkle over the tops before baking.
- Whisk the dry ingredients. In a large mixing bowl, whisk together the flour, baking powder, salt, and black pepper until evenly combined.
- Cut in the butter. Grate the cold butter or cut it into small blocks, then rub it into the flour with your fingertips until the mixture looks like coarse breadcrumbs with small pea sized pieces of butter still visible. A pastry cutter works just as well and keeps warm hands off the dough.
- Add cheese and chives. Stir the grated cheese and the finely sliced chives through the flour mixture until they are well distributed.
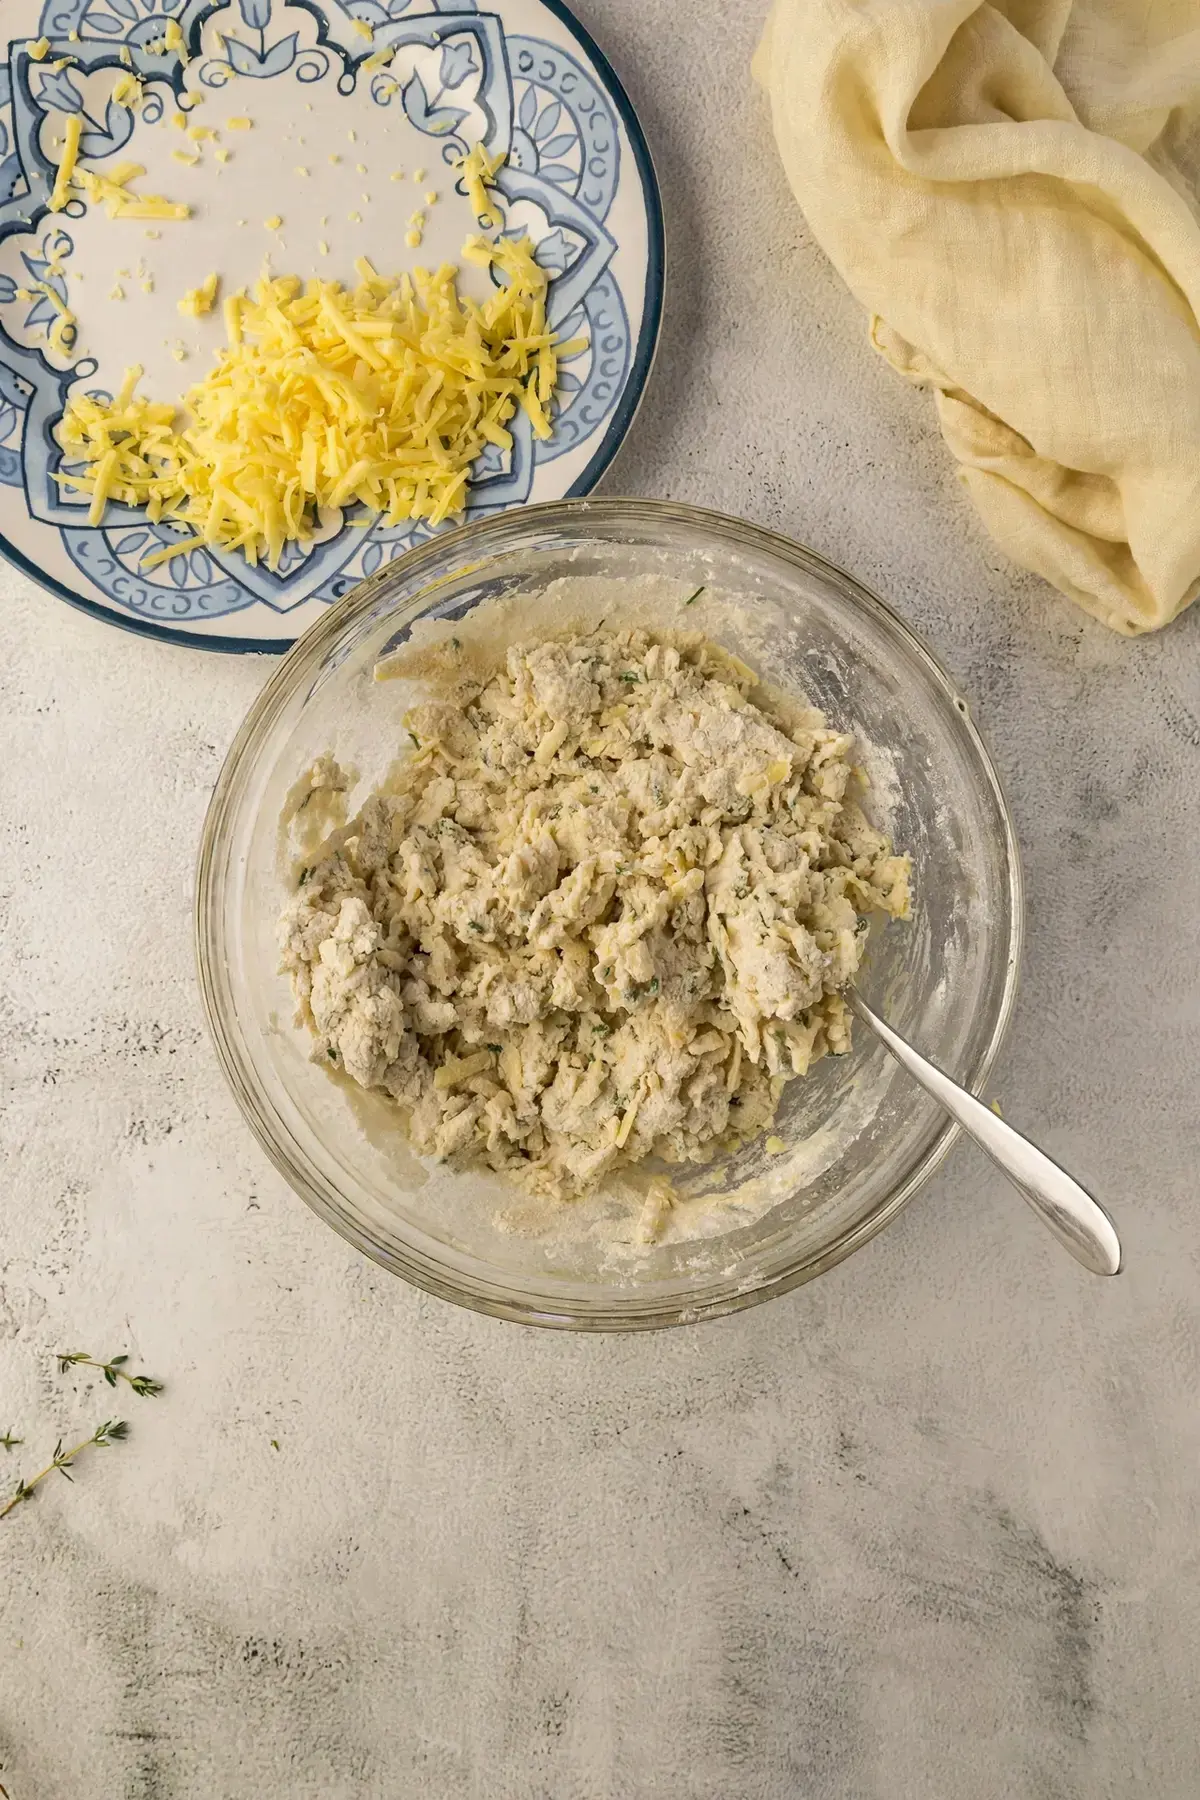
- Make a rough dough. Pour in the 200 mL of milk and stir with a fork until a rough, shaggy dough forms. It should just come together, so stop stirring once it does.
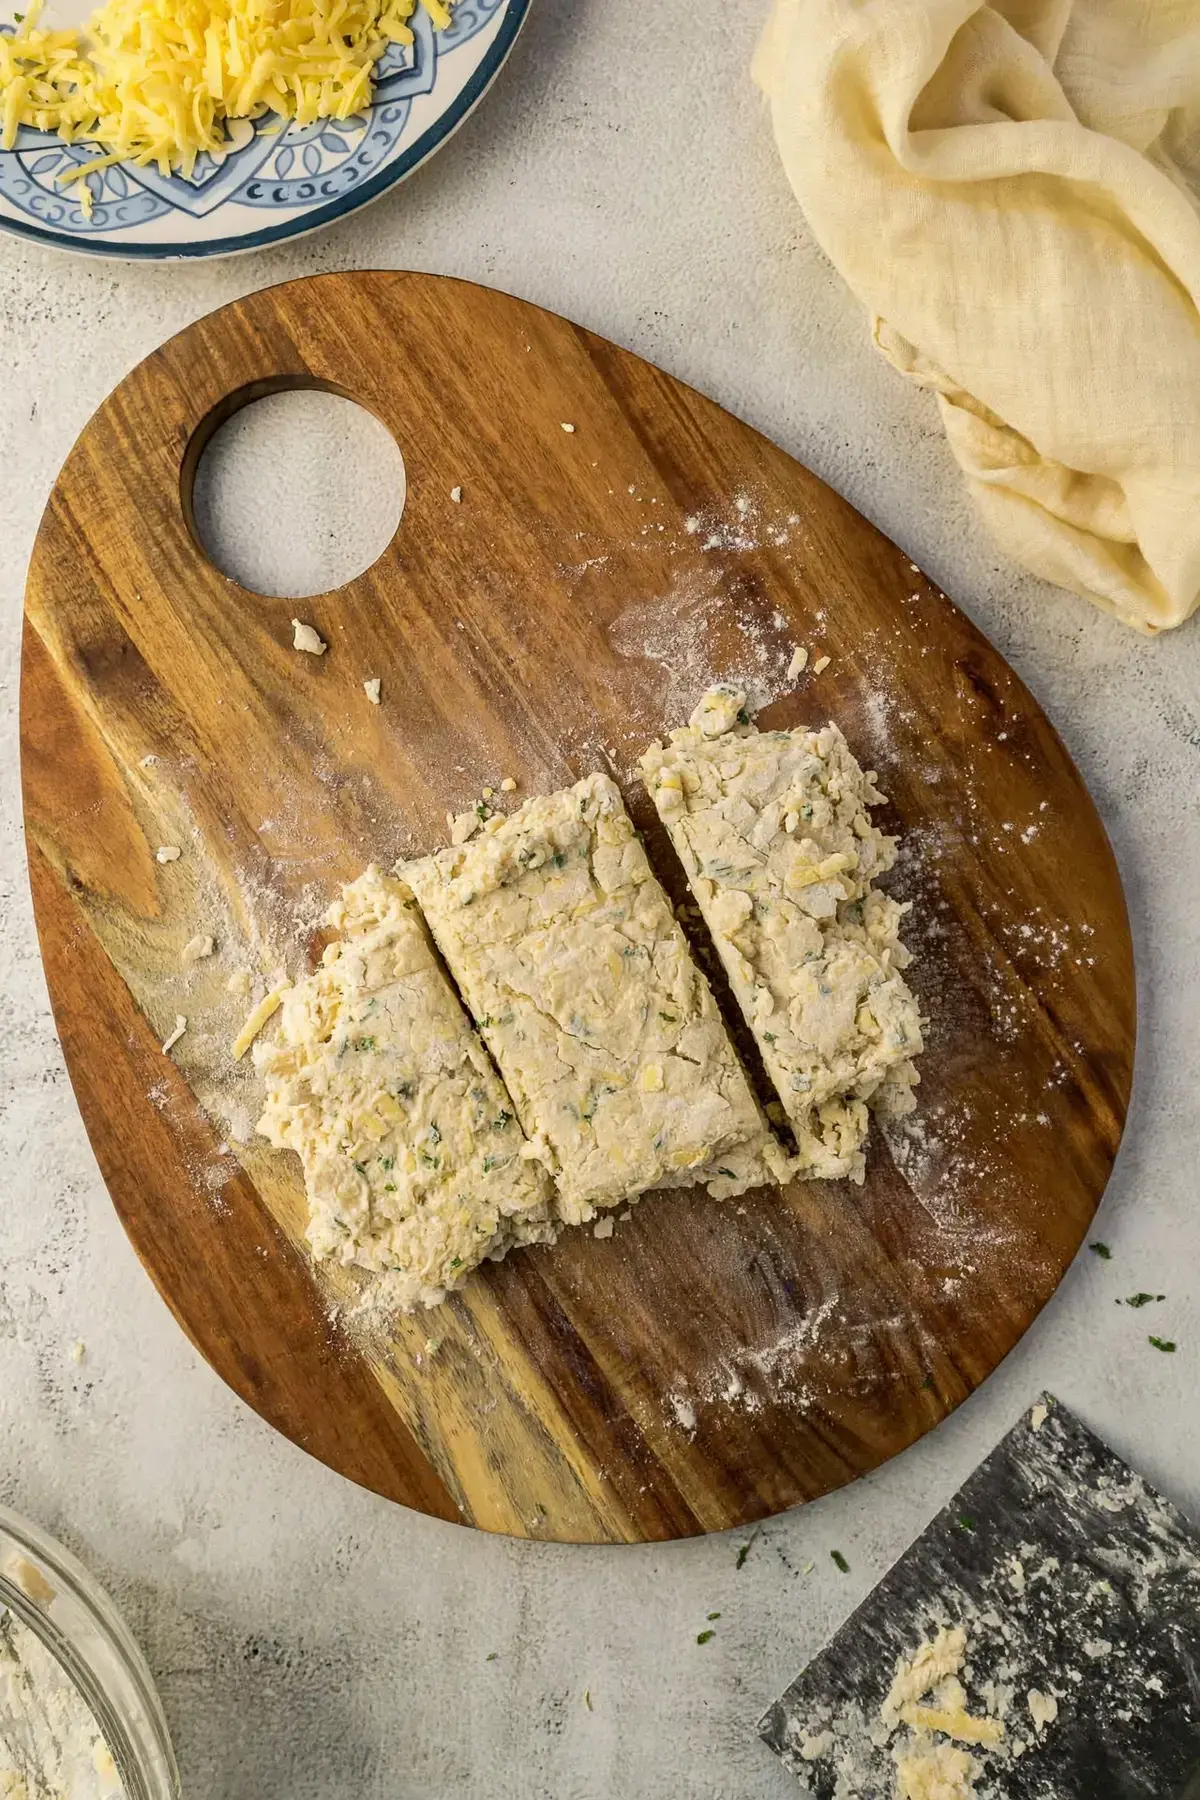
- Laminate the dough. Turn the dough onto a lightly floured surface and bring it together into a rectangle. With a knife or bench scraper, cut the dough into thirds, fold the outer edges over the middle section, and press down with your hands or a rolling pin until it is about 3cm thick. Repeat this folding and pressing twice more. This simple lamination builds thin layers of butter and cheese into the dough, which is what bakes up so flaky.
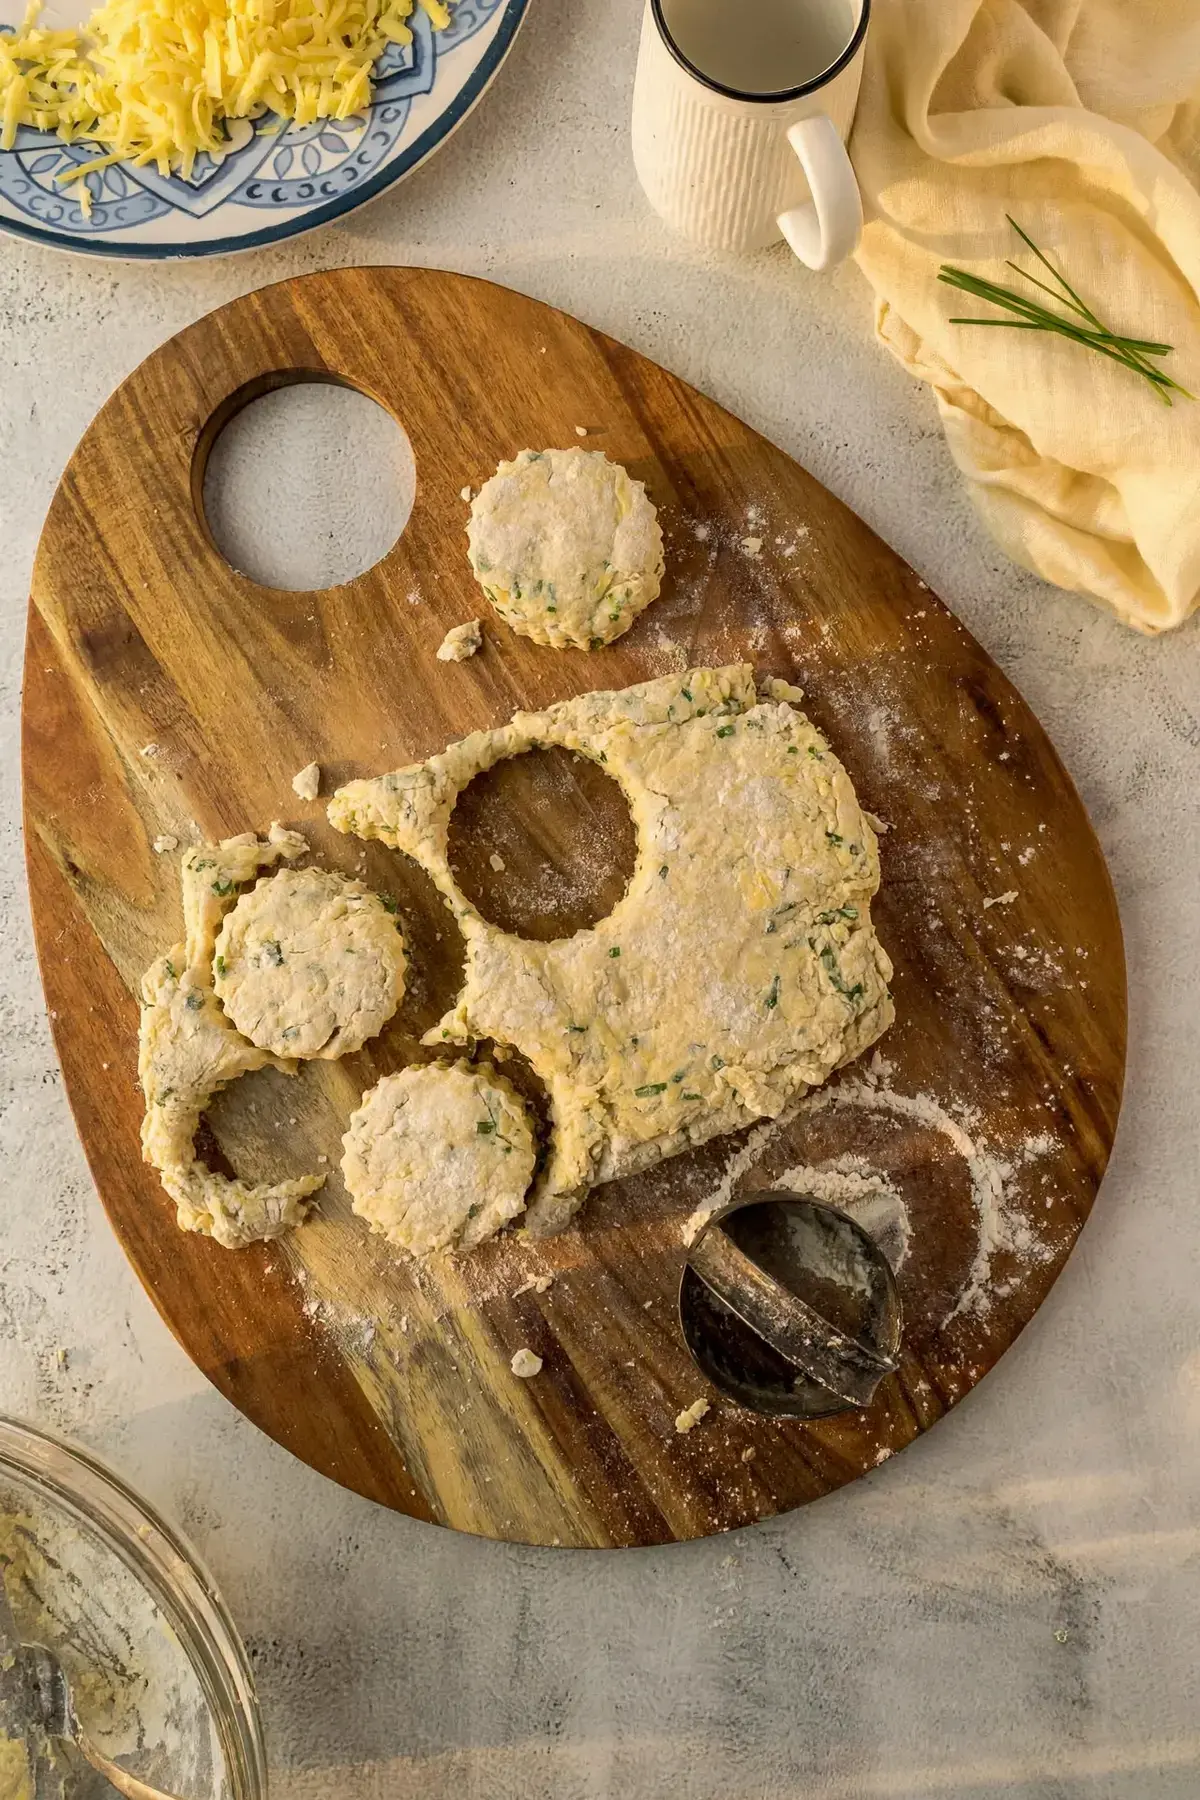
- Cut the scones. Cut 6 to 8 large scones with a cookie cutter or a knife. If you use a round cutter, gather the leftover pieces by gently kneading them together into a disk or square and cut out more scones, working the dough as little as possible so they stay tender.
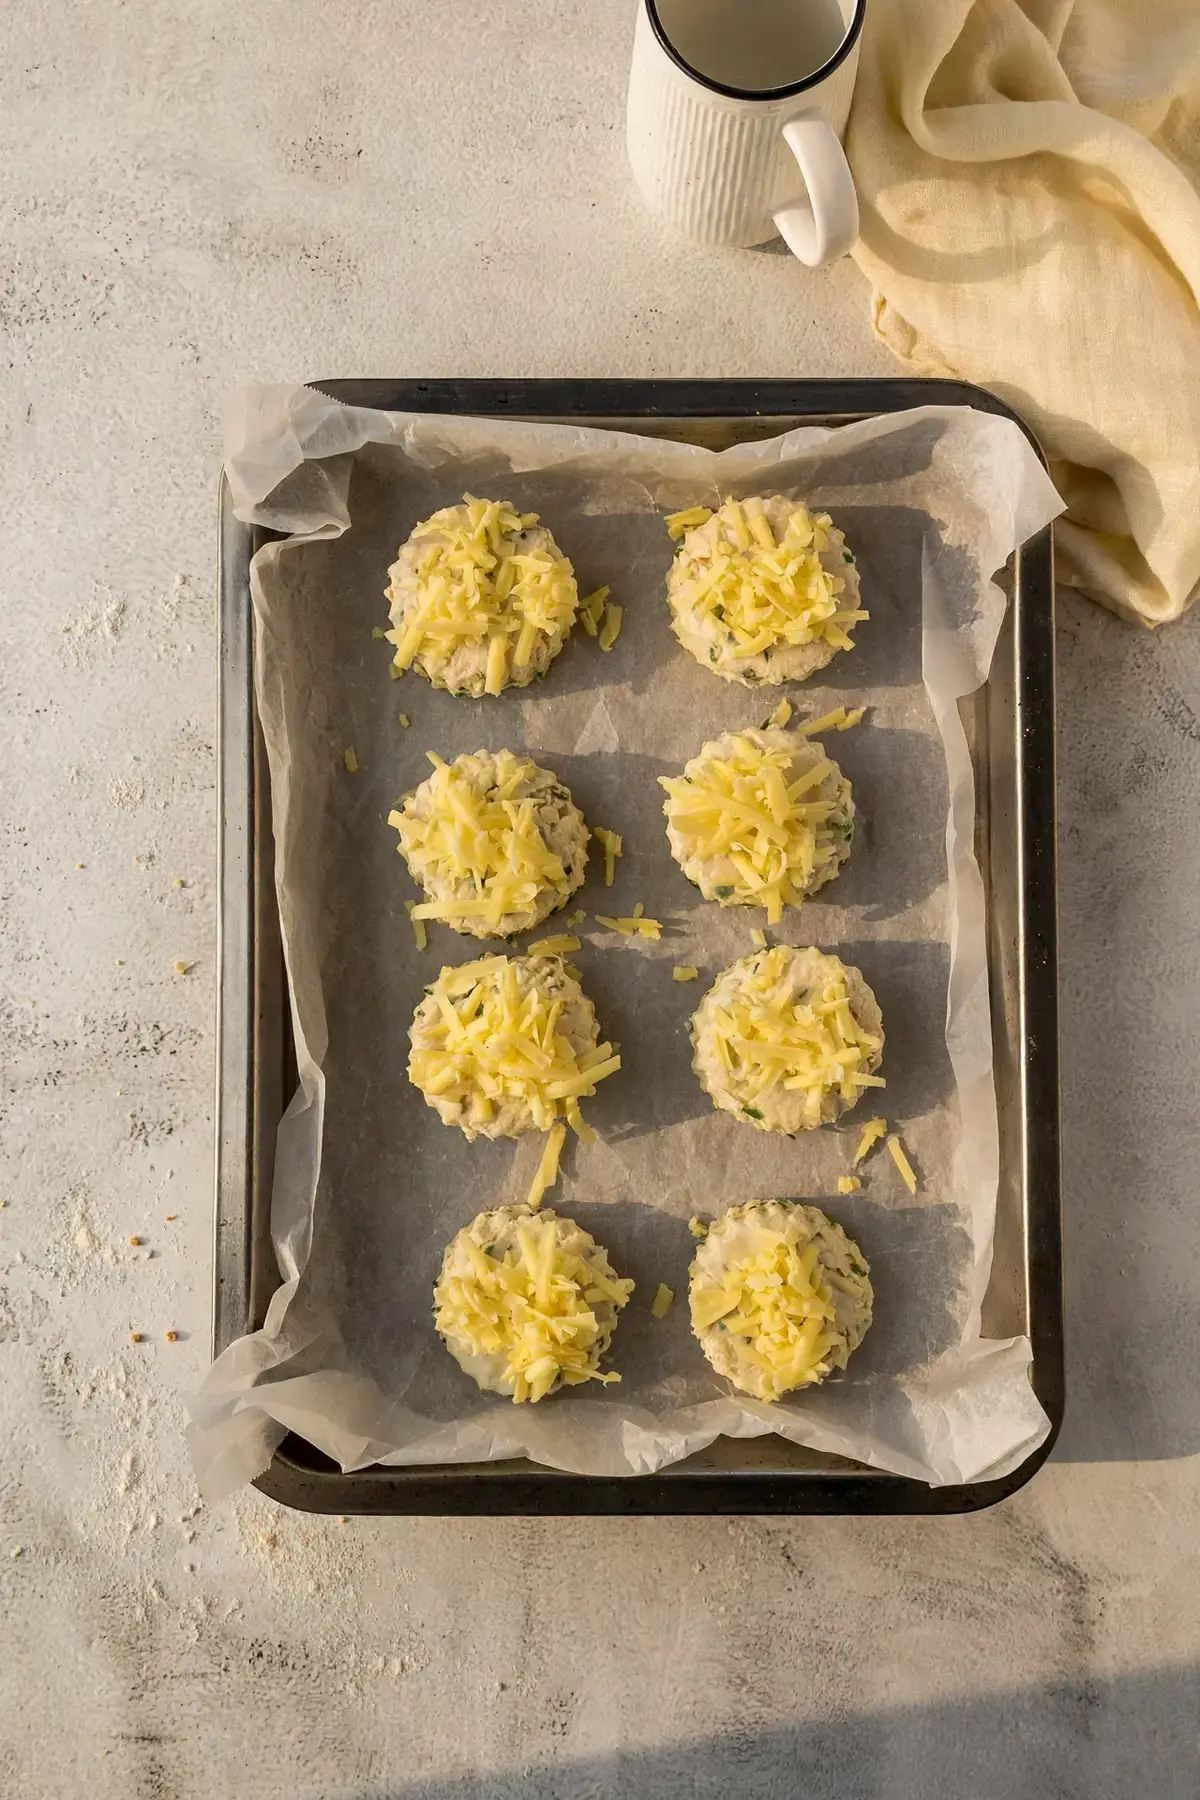
- Top and bake. Place the scones about 2 to 3cm apart on the prepared baking sheet. Brush the tops with the reserved 3 tablespoons of milk using a pastry brush, then sprinkle over the 40 grams of reserved cheddar. Bake in the fully preheated oven for 15 to 20 minutes, until the scones have risen and turned a nice golden brown.
- Cool slightly. Move the scones to a wire rack and let them cool just slightly before serving warm.
For a party friendly alternative, divide the dough into 12 to 16 smaller pieces to make mini scones. These bake more quickly, for 8 to 10 minutes, and make an easy snack or lunchbox addition.
Expert Tips for this Recipe
These are the habits that make the difference between good scones and great ones. I keep coming back to the same few rules every time I bake them.
- Weigh your ingredients. A kitchen scale gives the most accurate baking, and accuracy matters most with flour and leavening.
- Keep everything cold. Leave the ingredients in the fridge right up until you need them. Grate the cheese and butter, or cut the butter into small blocks, before you start the dough, and pop them back in the fridge while you prepare everything else.
- Chill your tools in warm weather. If your kitchen is particularly warm, chill the bowl and utensils in the fridge for 30 minutes before starting. Warm hands and warm tools melt the butter too early, and melted butter cannot make flaky layers.
- Handle the dough as little as possible. Every extra touch works against tenderness. A bench scraper is ideal for folding and moving the dough because it keeps warm hands off it.
- Laminate the scraps too. When you gather leftover dough, fold it together in layers rather than kneading it into a ball. Laminating the scraps creates layers of butter and cheese, adds flakiness, and makes the dough cohesive with less handling.
- Rest shaped scones in the fridge if needed. If the weather is warm, or if you are still waiting roughly 20 minutes for the oven to fully preheat, refrigerate the scones on the baking tray until the oven is ready. Cold dough hitting a hot oven gives the best rise.
- Make them the night before. To get ahead, place the cutout scones on a baking paper lined tray, cover with cling film or plastic wrap, and bake them straight from the fridge once the oven is fully preheated.
- Adjust for fan forced ovens and air fryers. Lower the temperature by 20 to 25 degrees when using a fan forced oven or an air fryer.
- Never skip the full preheat. A fully preheated oven is essential for a good rise, so give the oven the full time it needs before the scones go in.
Storage and Freezing
These scones store well, which makes them a practical bake to keep on hand.
- Unbaked dough. Scone dough keeps in an airtight container in the fridge for a day or two before baking, and it can be frozen for up to 3 months.
- Baked scones. Once baked, the scones keep at room temperature in an airtight container for 3 days. They can also be frozen for up to 3 months. To freeze them, let the scones cool completely, wrap each one in plastic wrap, and place them in an airtight container. Defrost overnight in the fridge, or bake directly from frozen with about 5 minutes added to the baking time.
Day old scones come back to life quickly. Warm them in the microwave for 10 to 20 seconds beside a small bowl of water, or in a 150C (300F, Gas Mark 2) oven for 5 minutes with a bowl of water alongside.
If a batch ever turns out tough or hard, overworked dough is the usual cause, so handle the next batch even less.

Other Scones Recipes You May Like
If these savory scones disappear as fast as expected, there are more to try. Bake a batch of Ultimate Cheese Scones next, or browse the full collection of Sweet And Savory Scones Recipes for both sweet and savory ideas. For another take on this exact flavor pairing, this easy cheddar chive scones recipe is worth a look.

See the additional source.
FAQs
What is the best cheese to use in cheese and chive scones?
Why are my cheese scones tough instead of tender?
Can you freeze cheese and chive scones?
How do you reheat day-old cheese scones?

Cheddar Cheese and Chives Scones
Easy Cheese and Chives Scones These cheddar cheese and chive scones are the kind of fast savory bake that earns a permanent place in a weekly rotation. Sharp cheddar gives them their pronounced, savory flavor, fresh chives add a mild oniony note, and just a hint of black pepper rounds out every bite with gentle warmth.
- Total Time: 30 min
- Yield: 8 scones 1x
Ingredients
160 grams cheddar cheese, grated
300 grams plain flour, all-purpose/standard grade
3 teaspoons baking powder
¼ – ½ teaspoon table salt, if using unsalted butter
½ teaspoon black pepper, cracked
60 grams butter, salted
200 mL milk
3 tablespoons milk, for brushing tops
⅓ cup chives, finely sliced
Instructions
1-Preheat the oven to 220°C/425F/Gas Mark 7: Preheat the oven to 220°C/425F/Gas Mark 7. Line a baking tray or baking sheet with parchment paper or baking paper.
2-Grate the cheddar cheese, keeping aside approximately: Grate the cheddar cheese, keeping aside approximately 40 grams to place on top of the scones before baking.
3-In a large mixing bowl, whisk together: In a large mixing bowl, whisk together the dry ingredients (flour, baking powder, salt, and black pepper).
4-Either grate the butter or cut it: Either grate the butter or cut it into small blocks. Rub the butter into the flour until it resembles coarse breadcrumbs with small pea-sized pieces of butter in the flour. This can also be done using a pastry cutter.
5-Add the grated cheese and chives to: Add the grated cheese and chives to the flour mixture, and stir through until well-distributed.
6-Pour the milk into the flour mixture,: Pour the milk into the flour mixture, using a fork, and stir to make a rough dough.
7-Lightly flour a clean surface: Lightly flour a clean surface. Place the scone dough in the middle of the lightly floured surface and bring the dough together into a rectangle. Using a knife or bench scraper, cut the dough into thirds and fold the outer edges on the middle section. Press down using your hands or a rolling pin until the dough is about 3cm thick. Repeat the process twice more. This laminates the dough.
8-Either using a cookie cutter or knife,: Either using a cookie cutter or knife, cut 6 to 8 large scones. If using a round cookie cutter, bring together the left-over dough, by gently kneading the dough together and forming a disk or square to cut out additional scones. Try to work with the dough as little as possible.
9-Place the scones onto the prepared baking: Place the scones onto the prepared baking sheet. Then brush the tops of the scones with milk using a pastry brush, and sprinkle the leftover cheddar cheese on the tops of the scones.
10-Bake the scones in a preheated oven: Bake the scones in a preheated oven for 15 to 20 minutes. The scones would have risen and be a nice golden brown when they were done. Remove from the oven, and place the scone on a wire rack to cool down slightly before serving.
Last Step:
Please leave a rating and comment letting us know how you liked this recipe! This helps our business to thrive and continue providing free, high-quality recipes for you.- Prep Time: 15 min
- Cook Time: 15 min
- Method: bake
Nutrition
- Serving Size: 1 scone
- Calories: 290kcal
- Fat: 13g
- Carbohydrates: 31g
- Protein: 11g