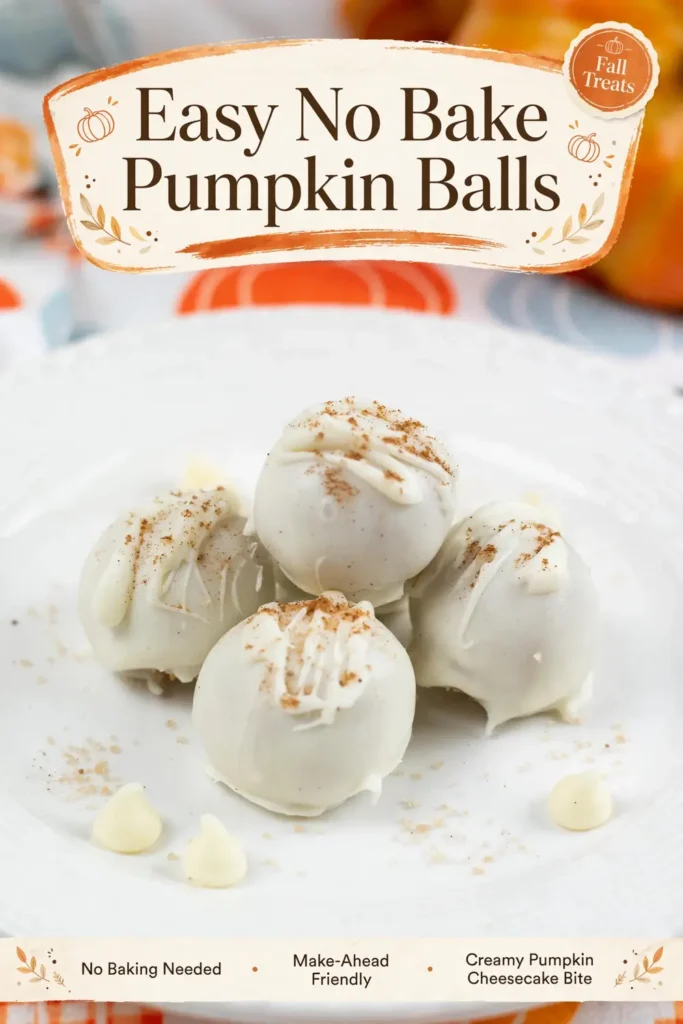
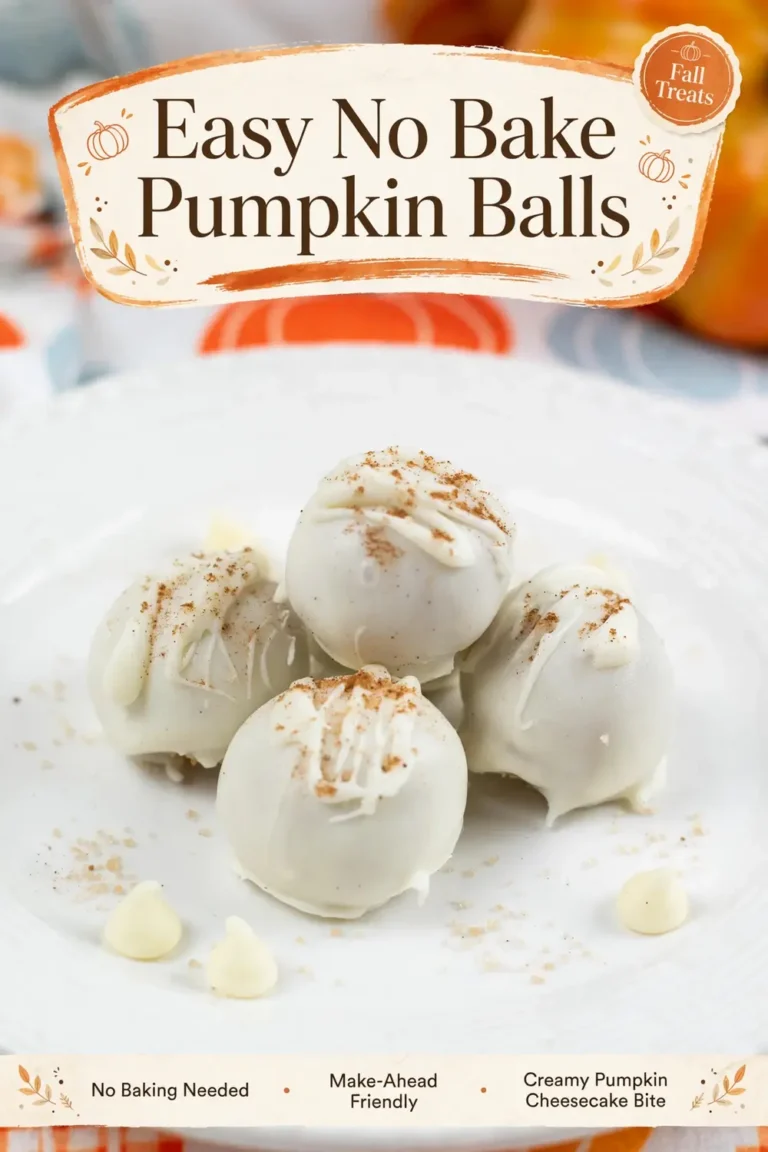
These easy no bake pumpkin balls come together in just a few minutes, which makes them perfect for busy fall days and last minute party prep! Each little bite tastes like a mix of pumpkin pie and cheesecake, creamy, cozy, and full of classic fall flavor.
One of the best parts is that the recipe uses only 1/3 cup of pumpkin puree, so it is a smart way to use up leftover canned pumpkin. Instead of letting that open can sit in the fridge, you can turn it into a sweet little treat that everyone will love.
The creamy pumpkin balls get coated in a smooth white chocolate coating that sets up beautifully and gives every bite a sweet, festive finish. Serve them alongside other pumpkin desserts on a dessert tray for a spread that looks as good as it tastes.

They are perfect for pumpkin fans and cheesecake fans alike, since one little bite delivers the flavor of both. Make them for any fall party, add them to a Thanksgiving dessert table, or stir up a batch whenever a sweet craving strikes. These are perfect for sharing, gifting, and nibbling straight from the fridge! They also make a lovely edible gift, since they travel well in a little treat bag.
This version is adapted from the original pumpkin balls recipe from Play Party Plan, written by Britni Vigil and published November 3, 2023. Readers have given it a five star rating from five votes, which says a lot about how simple, creamy, and party ready these little bites really are.
Why You’ll Love This Recipe
No oven needed! This is a true no bake recipe, so there is no need to turn on the oven. That makes it a wonderful choice for holiday desserts, when oven space is precious and the last thing anyone wants is another pan to watch.
Perfect for making ahead. You can mix, roll, and dip the balls in advance, then keep them chilled in the fridge until serving time. Party day stays calm and fun when dessert is already done! If you love make ahead party desserts, this Best Pumpkin Pie Cheesecake Recipe is another crowd pleaser worth trying.
Creamy pumpkin flavor. These little bites bring all the cozy spice of the season in one creamy package. Think of them as a festive fall alternative to typical Oreo truffles or brownie balls, with a pumpkin cheesecake twist that sets them apart. The mix of pumpkin, warm spice, and sweet white chocolate hits every cozy note, and the creamy center keeps everyone coming back for one more.
Jump to:
- Why You’ll Love This Recipe
- Ingredients
- Ingredient Notes
- Tip!
- How to make pumpkin balls
- 1, Make The Pumpkin Ball Dough
- Tip!
- 2, Roll the Pumpkin Balls
- 3, Dip and Decorate the Pumpkin Truffles
- Tip!
- Expert Tips
- FAQs
- How long do pumpkin balls last in the fridge?
- Can you freeze pumpkin balls?
- Can I use pumpkin pie filling instead of pumpkin puree?
- Why is my pumpkin ball mixture crumbly?
- No Bake Pumpkin Balls
- Ingredients
- Instructions
- Last Step:
- Nutrition
- Did you make this recipe?
Ingredients
Here is everything you will need to make these creamy little bites. The list is short, simple, and uses easy to find pantry staples.
| Detail | Info |
|---|---|
| Prep time | 5 minutes |
| Total time | 1 hour 5 minutes |
| Course | Dessert |
| Cuisine | American |
| Method | No cook |
- 4 oz cream cheese, softened
- 2 Tbsp powdered sugar
- ⅓ cup pumpkin puree
- 2 cups graham cracker crumbs

- ½ tsp pumpkin pie spice
- ½ tsp cinnamon
- 2 cups white chocolate chips
- 1 to 2 tsp coconut oil, optional

Per ball nutrition from the recipe card comes to 132 calories, with 15 grams of carbohydrates, 2 grams of protein, and 7 grams of fat. Each ball also has 4 grams of saturated fat, 0.4 grams of fiber, 11 grams of sugar, 8 milligrams of cholesterol, and 75 milligrams of sodium.
Ingredient Notes
A few quick notes on the key ingredients will help these turn out creamy, smooth, and perfectly spiced.
- Pumpkin puree: Use real pure pumpkin puree, not pumpkin pie filling. Libby’s is the most common brand, but any brand works as long as it is true pumpkin puree. Double check the label before you buy.
- White chocolate chips: High quality white chocolate chips melt better than generic ones, so they give you a smoother, easier to work with coating. White almond bark or white chocolate melting wafers also work well for the coating.
- Graham cracker crumbs: Store bought crumbs are totally fine. You can also pulse whole graham crackers in a food processor until they turn into fine, even crumbs.
- Pumpkin pie spice: A store bought blend works perfectly here. If you have a favorite homemade pumpkin pie spice blend, that works fine too.
- Cream cheese: It must be softened to room temperature before mixing. Soft cream cheese blends in smoothly and keeps the balls creamy instead of full of little cream cheese chunks.
With the right ingredients lined up, the rest of the recipe is pure fun: mix, roll, dip, and decorate.
Tip!
If you make your own graham cracker crumbs from whole graham crackers instead of buying them, keep processing until they are fine crumbs with no large pieces. Even crumbs blend into the dough smoothly and help the balls hold together, while big pieces can make the texture uneven and the rolling trickier. A food processor makes quick work of it, and you can pulse in short bursts to check the texture as you go.
How to make pumpkin balls
Making pumpkin balls is very easy, especially if you have made similar treats such as Oreo balls or brownie balls before. The whole process breaks down into three simple phases: make the dough, roll the balls, then dip and decorate. Each phase is quick, and the chilling time does most of the work for you.
1, Make The Pumpkin Ball Dough
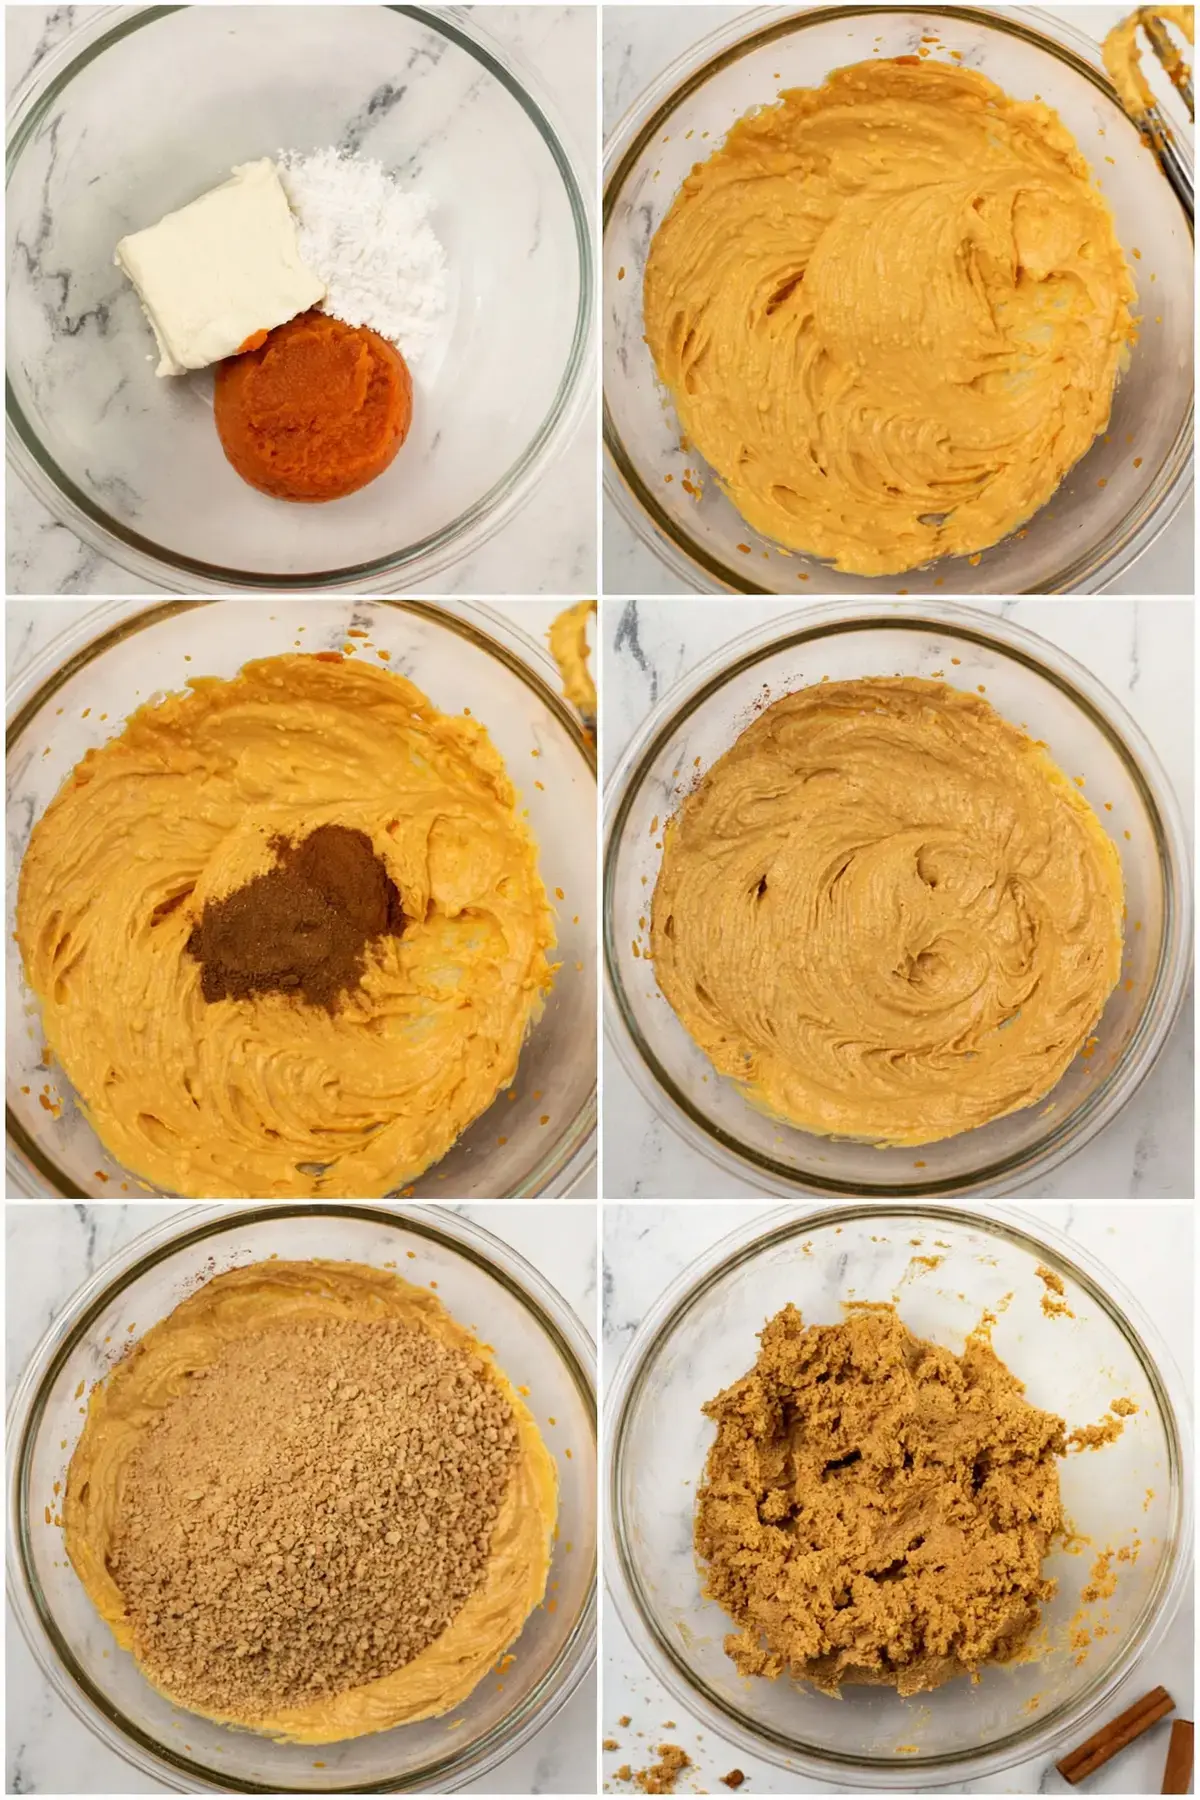
- In the bowl of an electric stand mixer, or in a large bowl if you are using a hand mixer, beat together the softened cream cheese and the powdered sugar until light and creamy, about 2 to 3 minutes. Using the recipe card measurements here gives a foolproof result.
- Mix in the pumpkin puree, 1 cup of the graham cracker crumbs, the pumpkin pie spice, and the cinnamon until everything is fully combined. Then add the second cup of graham cracker crumbs and mix again. Adding the crumbs in two portions helps the dough come together smoothly.
Tip!
Add the graham cracker crumbs gradually, mixing between additions. Start with 1 cup, mix it in thoroughly, then add the remaining 1 cup. Adding them all at once can make the mixture more crumbly than it needs to be.
Cover the bowl with plastic wrap or tin foil and refrigerate the dough for at least 30 minutes. Longer is better, but 30 minutes is the minimum. A well chilled dough is much easier to roll and holds its shape beautifully. If the dough still feels soft after 30 minutes, give it a little longer; a firm dough rolls into smooth, even balls.
2, Roll the Pumpkin Balls
- Line a baking sheet with parchment paper.
- Using a small spoon or a tablespoon, scoop 1 tablespoon balls of dough and place them on the prepared sheet.
- Refrigerate the rolled balls again for at least 30 minutes. Longer chilling is fine, but that second chill is important: it keeps the balls from falling apart when they get dipped in the warm white chocolate. Uniform 1 tablespoon scoops help them look neat and dip evenly.

3, Dip and Decorate the Pumpkin Truffles
- Place the white chocolate chips in a medium microwave safe bowl and microwave on high for 30 seconds, then stir. Repeat the 30 second microwave and stir cycle until the chips are completely melted and smooth.
Tip!
If the melted white chocolate feels too thick for dipping, stir in about 1 teaspoon of coconut oil. It thins the coating nicely and gives it a shinier finish.
Dip each refrigerated pumpkin ball into the melted chocolate using a fork or a candy dipper.
Tap the fork gently on the side of the bowl to remove any excess chocolate, then place the dipped ball back on the parchment lined baking sheet to set.
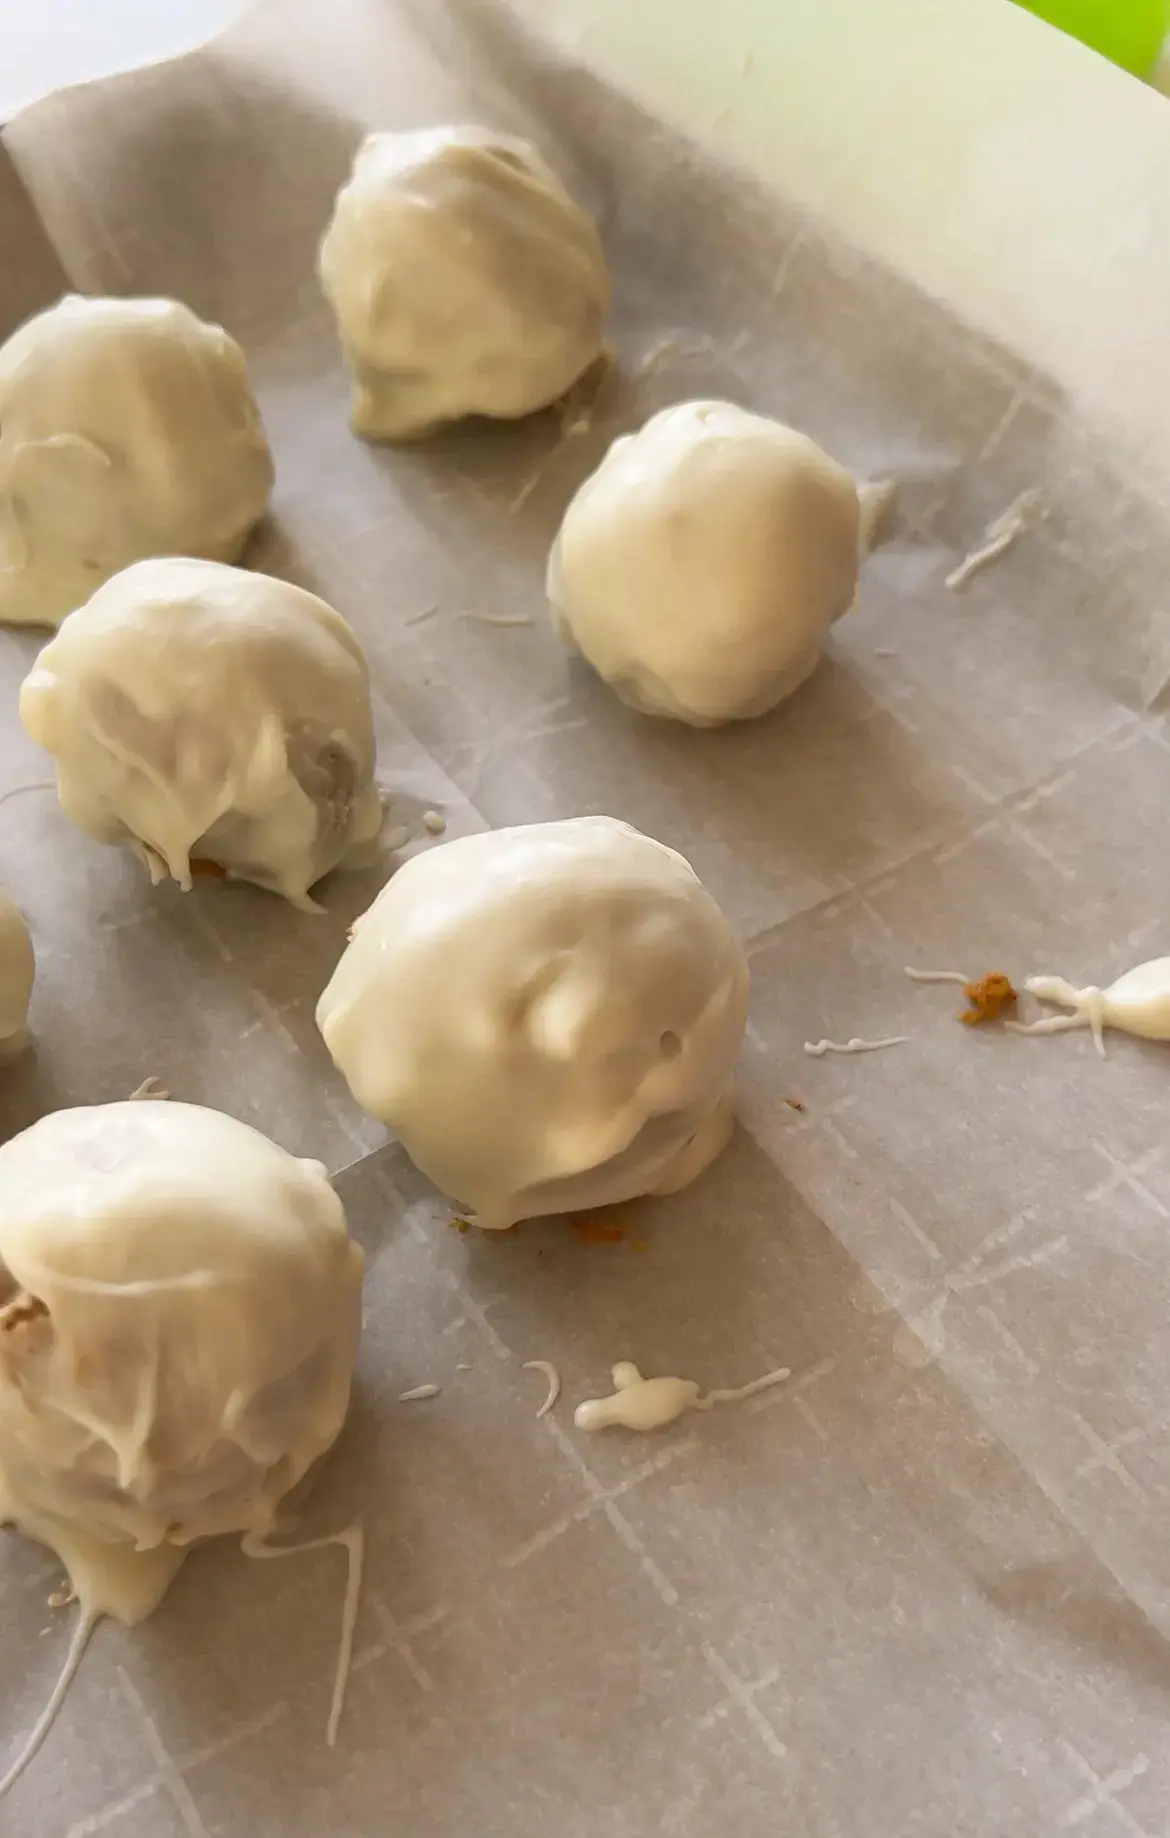
For a pretty finish, drizzle the remaining melted chocolate over the truffles and immediately sprinkle on sprinkles or leftover graham cracker crumbs while the drizzle is still wet. A light dusting of pumpkin pie spice over the melted chocolate adds even more pumpkin flavor.
Place the finished balls in the fridge for about 20 to 30 minutes so they harden completely.

Then transfer them to a serving dish or platter and serve right away. The recipe author prefers them chilled, though they are also good at room temperature.
Expert Tips
Refrigerate in an airtight container for up to 5 days. No thawing is needed. These bites are best enjoyed chilled, so eat them straight from the fridge for the creamiest texture.
Freeze for up to 3 months. For longer storage, freeze the balls in a zipper top freezer safe bag. When you are ready for a treat, take out as many as you want and thaw them in the fridge for a few hours, then enjoy them chilled.
These little truffles also make sweet gifts. Divide them into small treat bags and hand them out to friends and family. Pair them with cute Thanksgiving gift tags for an extra thoughtful touch. If you love bite sized cheesecake style treats, try these Creamy Blueberry Cheesecake Protein Balls next.

These bites taste best straight from the fridge, so keep them chilled until the moment you serve them.
See the additional source.
FAQs
How long do pumpkin balls last in the fridge?
Can you freeze pumpkin balls?
Can I use pumpkin pie filling instead of pumpkin puree?
Why is my pumpkin ball mixture crumbly?
No Bake Pumpkin Balls
These easy no bake pumpkin balls come together in just a few minutes, which makes them perfect for busy fall days and last minute party prep! Each little bite tastes like a mix of pumpkin pie and cheesecake, creamy, cozy, and full of classic fall flavor.
- Total Time: 65 min
Ingredients
4 oz cream cheese, softened
2 Tbsp powdered sugar
⅓ cup pumpkin puree
2 cups graham cracker crumbs
½ tsp pumpkin pie spice
½ tsp cinnamon
2 cups white chocolate chips
1–2 tsp coconut oil
Instructions
1-In the bowl of an electric stand: In the bowl of an electric stand mixer, or just a large bowl if you’re using a hand mixer, beat together the cream cheese and powdered sugar until they are light and creamy, for about 2-3 minutes.
2-Next mix in the pumpkin puree, 1: Next mix in the pumpkin puree, 1 cup of graham cracker crumbs, pumpkin spice, and cinnamon. Mix together until everything is fully combined. Then add in the second cup of graham cracker crumbs and mix again. This should help you avoid having crumbs!
3-Then put plastic wrap or tin foil: Then put plastic wrap or tin foil over the bowl and refrigerate the dough for at least 30 minutes. Longer is better but 30 minutes at least a must.
4-After the dough is done chilling, prepare: After the dough is done chilling, prepare a baking sheet by lining it with parchment paper.
5-Using a small spoon or a tablespoon: Using a small spoon or a tablespoon make 1 tablespoon balls of dough and place them onto the prepared baking sheet. Refrigerate the dough again for at least 30 minutes.
6-Microwave the white chocolate chips in a: Microwave the white chocolate chips in a medium microwave safe bowl on high for 30 seconds, then stir. Repeat this process again until the white chocolate chips are completely melted.
7-Dip the refrigerated pumpkin balls into the: Dip the refrigerated pumpkin balls into the melted chocolate chips by using a fork or a candy dipper. Tap the fork on the bowl to get rid of any excess chocolate. Once the pumpkin balls are dipped, place them back on the parchment lined baking sheet to allow them to set.
8-Drizzle the rest of the melted chocolate: Drizzle the rest of the melted chocolate over the truffles and sprinkle the sprinkles or leftover graham cracker crumbs directly onto the drizzles.
9-Place the finished balls in the fridge,: Place the finished balls in the fridge, about 20 to 30 minutes, for a little to make sure they are completely hardened.
10-Transfer to a serving dish or platter: Transfer to a serving dish or platter and serve immediately!
Last Step:
Please leave a rating and comment letting us know how you liked this recipe! This helps our business to thrive and continue providing free, high-quality recipes for you.- Prep Time: 5 min
- Method: no_cook
Nutrition
- Calories: 132kcal
- Sugar: 11g
- Sodium: 75mg
- Fat: 7g
- Saturated Fat: 4g
- Carbohydrates: 15g
- Fiber: 0.4g
- Protein: 2g
- Cholesterol: 8mg