Peanut Butter Chocolate Caramel Bar
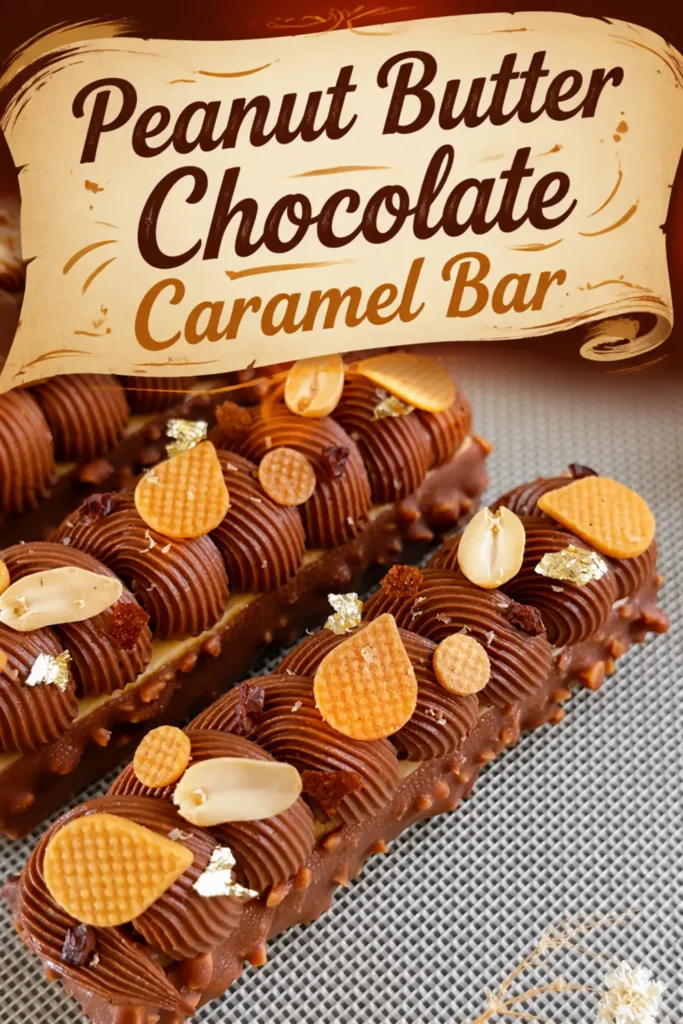
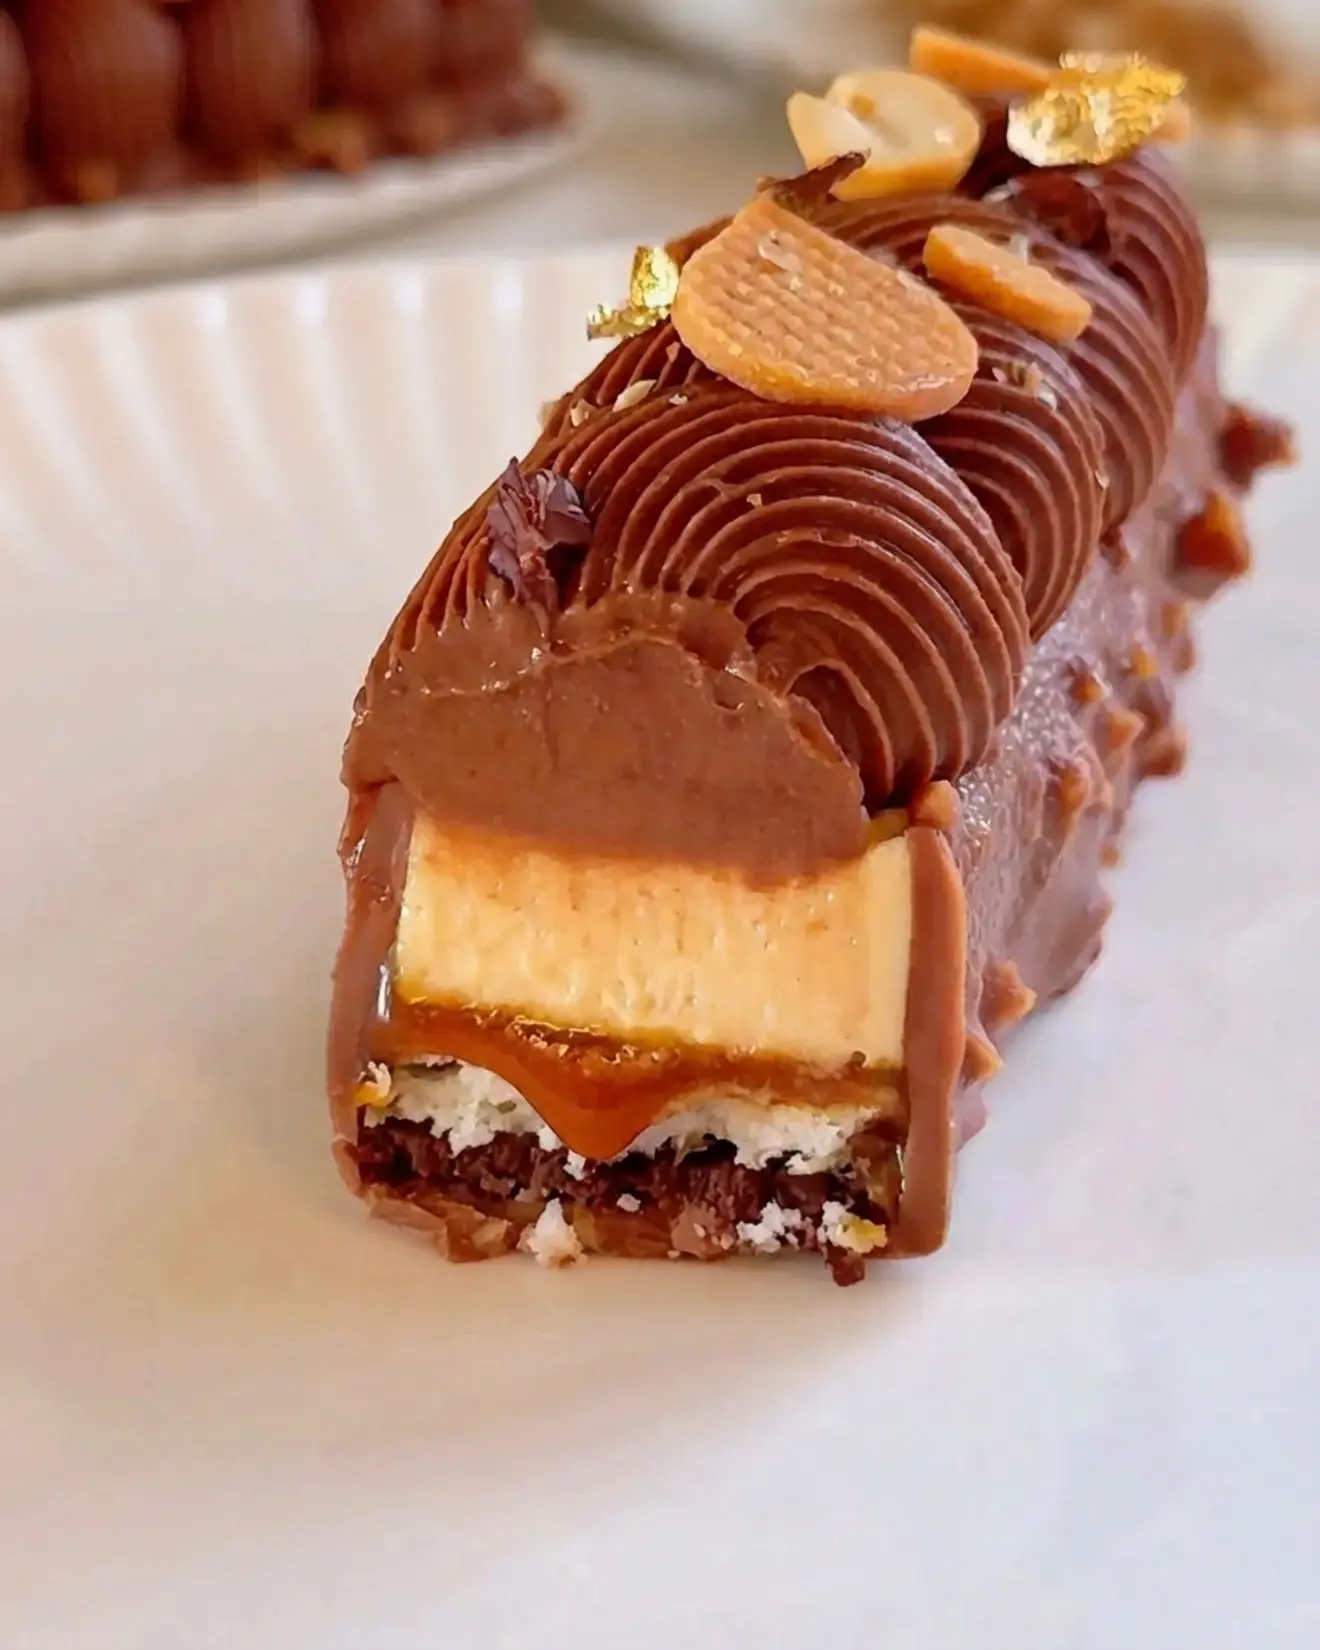
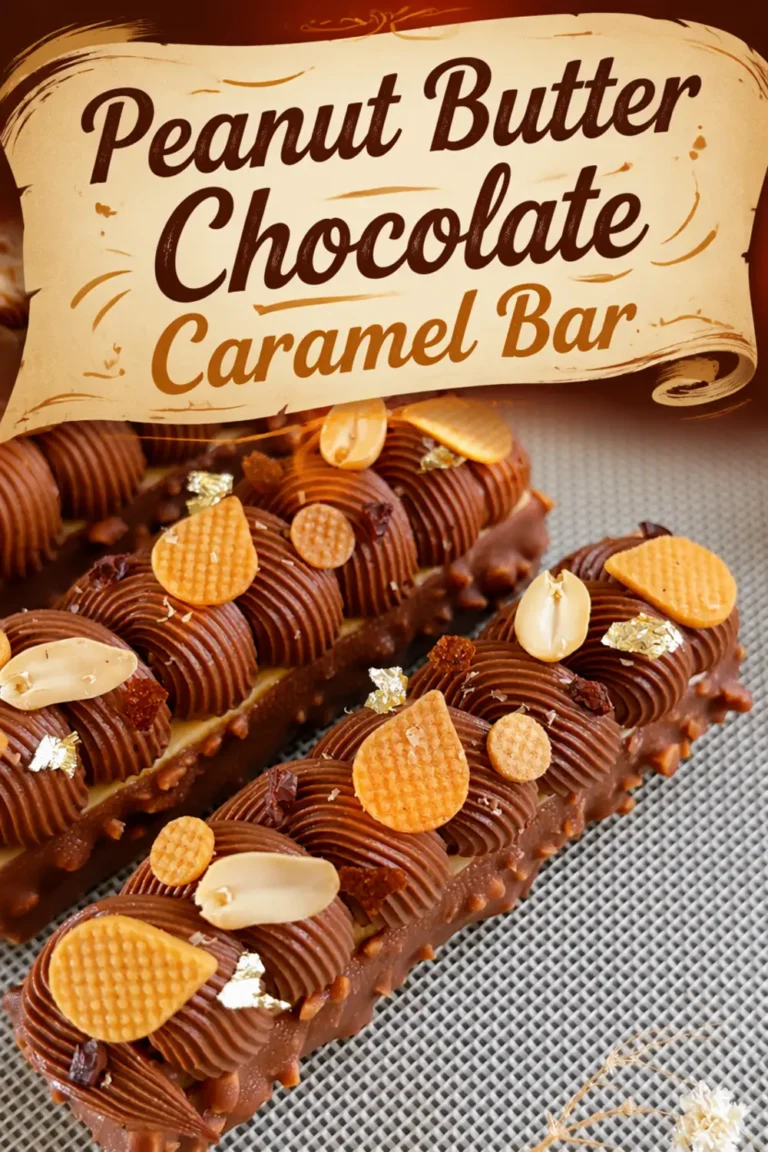
There is a moment I look forward to every time I build this dessert. The knife presses through the glossy top, slides down, then catches for a heartbeat on something crisp before it meets caramel that gives just enough.
That is the whole reason this bar exists. It is the kind of bar where the caramel gives just enough when you cut in, and that first bite brings together creamy, nutty, and crunchy in a way that feels like a treat without being too heavy.
This is not a quick bake you throw together between errands. It is a project for a slow afternoon, the kind where the kitchen fills with the smell of toasted nuts and dark chocolate and you end up with something that looks like it belongs behind glass in a pastry case.
The reward is a square of dessert with real architecture: a soft base, a crackling middle, a caramel that oozes on the cut, and a mousse that stays airy all the way to the last bite.
If you grew up loving a certain peanut, caramel, and chocolate candy bar, you will recognize the flavor logic here right away. This version takes that familiar trio and rebuilds it with pastry technique.
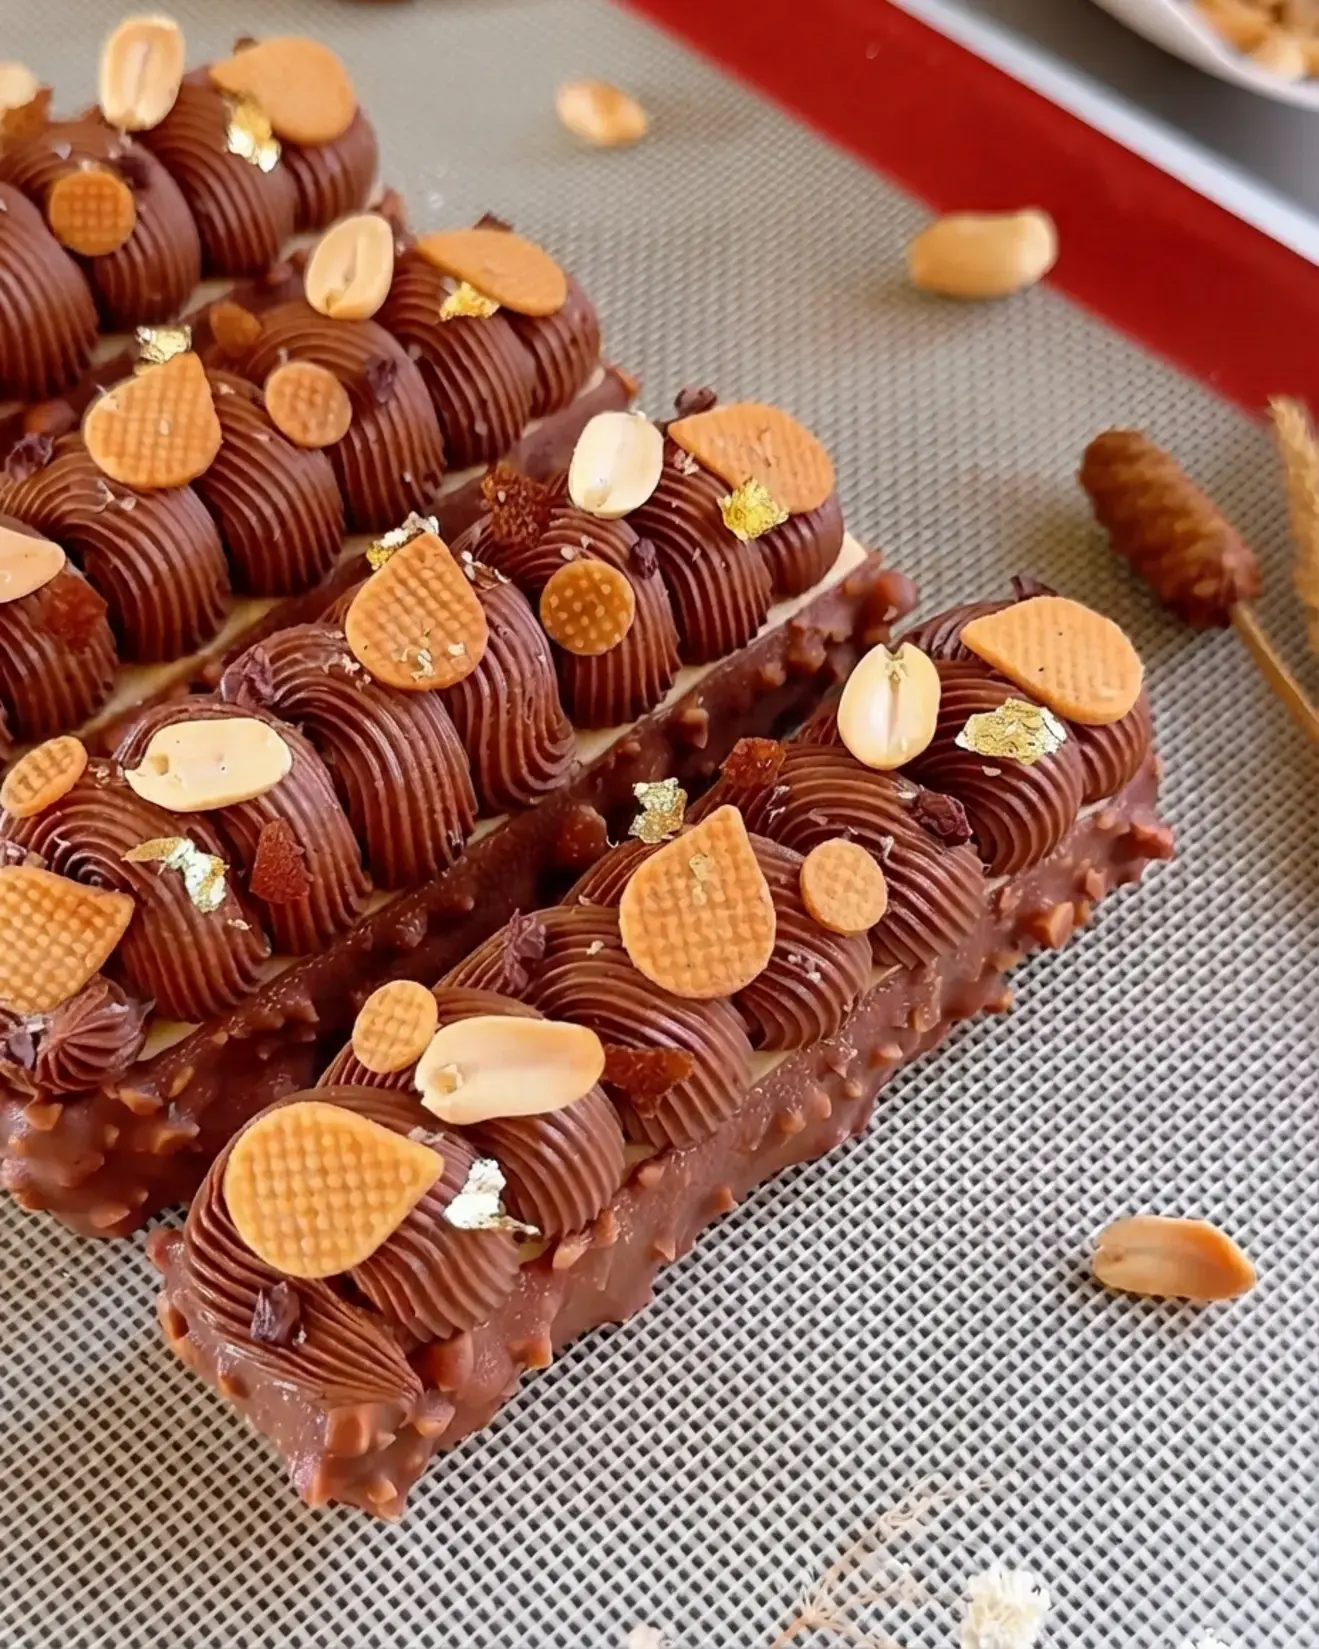
The peanut butter mousse is lighter than any candy filling, the caramel is salted so it never tastes flat, and the top is finished with a chocolate whipped ganache and a rocher glaze that add shine and a little drama.
Here is what you are building, from the bottom up.
- A dacquoise base, soft and lightly chewy, built on nut flour and meringue
- A layer of chocolate feuilletine for delicate, crackling crunch
- Salted caramel that stays soft enough to ooze when you cut
- A peanut butter mousse that is creamy but never heavy
- A chocolate whipped ganache piped across the top
- A rocher glaze for a glossy, finished surface
The whole dessert is assembled in a 20.5cm square ring mold. That size gives you tall, clean layers and tidy squares once everything is chilled and set. A ring mold with a removable base is the easiest way to lift the finished bar free without disturbing the top, so if you have one, this is the moment to use it.
What I love most about this bar is the balance. It is nutty and rich and smooth without being overly sweet. The mousse carries the creaminess, the feuilletine keeps the texture lively, and the salted caramel ties the peanut and the chocolate together. Nothing shouts. Every layer has a job, and each one earns its place.
The result is a dessert that feels refined but still nostalgic. It is a more grown up take on a classic combination of peanut, caramel, and chocolate, with an airy mousse, a caramel soft enough to ooze when you cut, and a crisp base underneath it all.
Serve it in slim bars after dinner, or cut it a little larger for a celebration table where dessert is the main event.
Chill the assembled bar completely before you cut. A warm kitchen and a warm knife will crush the layers, and the caramel will run instead of holding its shape.
A few pieces of equipment make the build calmer. A 20.5cm square ring mold, a digital scale for the ganache, a small saucepan, a whisk, an offset spatula for smoothing layers, and a sharp knife you can wipe clean between cuts. None of it is exotic. It is just the small set of tools that keeps a layered dessert neat.
If you are new to layered pastry, take it one component at a time. Read the whole build first, gather everything, then work from the base upward. Layered desserts reward patience far more than speed, and every minute of chilling is doing quiet work for you.
Jump to:
- Peanut Butter Chocolate Caramel Bar
- With chocolate feuilletine, dacquoise, salted caramel, peanut butter mousse, chocolate whipped ganache, and rocher glaze
- FAQs
- What is in a peanut butter chocolate caramel bar?
- How to make a peanut butter chocolate caramel bar at home?
- What is dacquoise in a dessert bar?
- Can I make peanut butter chocolate caramel bars ahead of time?
- Chocolate whipped ganache
- Ingredients
- Instructions
- Last Step:
- Did you make this recipe?
With chocolate feuilletine, dacquoise, salted caramel, peanut butter mousse, chocolate whipped ganache, and rocher glaze
Every layer in this dessert exists for a reason, and the order matters more than it looks. You begin with the dacquoise because it is the foundation that holds everything above it.
It sits somewhere between a cake and a macaron shell, soft and lightly chewy, and it gives the bar a base a knife can move through without fighting back.

The chocolate feuilletine goes on next. Feuilletine is a thin, crisp crepe flake, and when it is folded through chocolate and set, it becomes a delicate, crackling sheet.
That thin snap is the contrast that keeps the dessert from turning into a single note of cream. In a bite, you feel it right after the top layers and just before the caramel takes over.
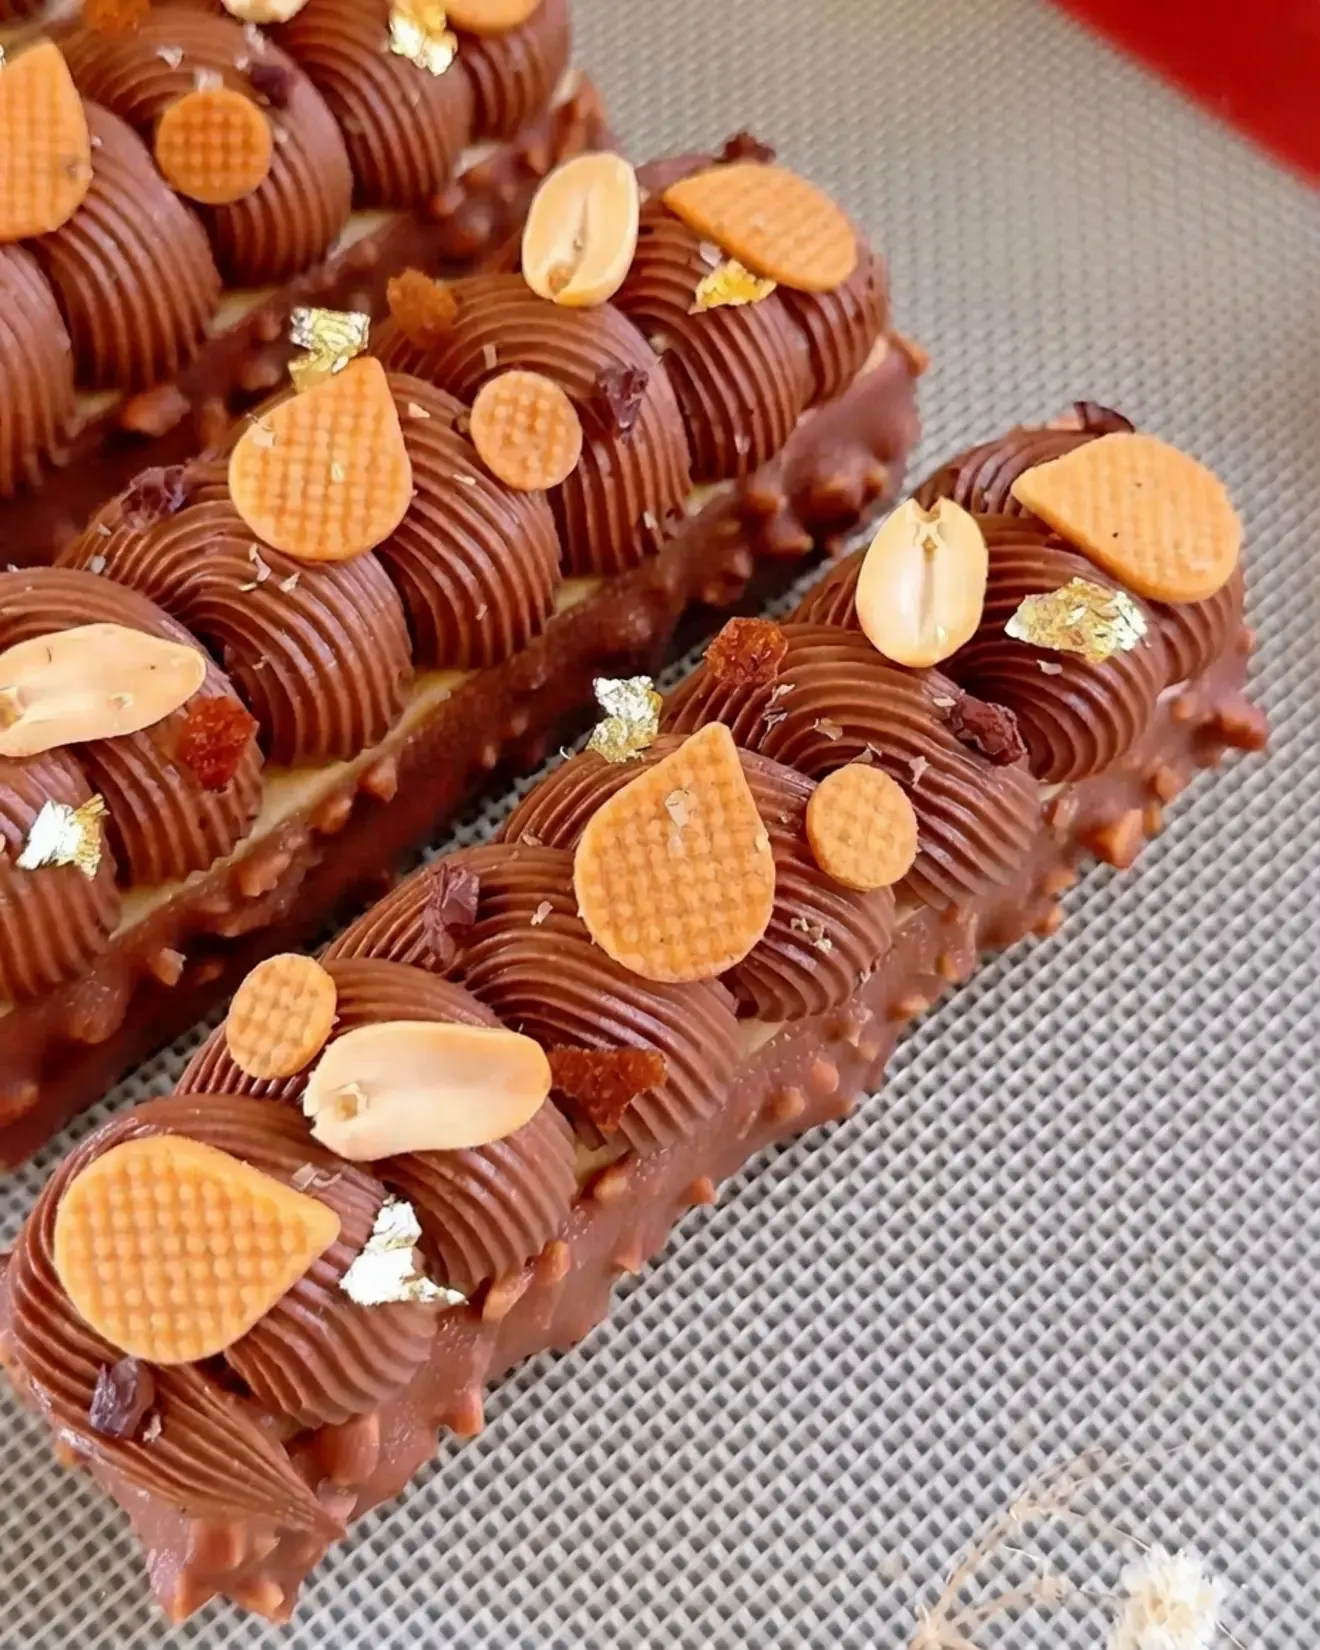
Then comes the salted caramel, and this is the layer that makes the bar feel generous. It is cooked until it is thick enough to hold its shape in the mold but soft enough to ooze when you cut. The salt keeps it from tasting cloying and sharpens the peanut that comes next.
Above the caramel sits the peanut butter mousse. It is airy and creamy, and it carries the peanut flavor without the density of a candy bar filling. Because it is light, the whole slice stays approachable. You get richness from the chocolate and the caramel, and lift from the mousse, so the last bite feels as good as the first.
The top two layers are the finish. A chocolate whipped ganache is piped over the mousse, then a rocher glaze goes on for shine. The ganache is the component I want to walk through in full, because it is where small details decide whether the texture lands soft and glossy or stiff and dull.

Here is the chocolate whipped ganache, exactly as it is meant to be made.
| Ingredient | Amount | Notes |
|---|---|---|
| Whipping cream (1) | 200 g | heated until hot |
| Platinum gelatin leaf | 1 g | or 1.3 g gold gelatin leaf, or 7.5 g gelatin mass |
| 55% dark chocolate | 160 g | melted |
| Whipping cream (2) | 120 g | kept cold |
| Fine salt | a pinch | balances the chocolate |
The two creams are listed separately on purpose. The first is heated so it can melt the gelatin and the chocolate together. The second stays cold and goes in at the end, which cools the mixture quickly and helps it whip into a stable, silky ganache later.
Method, step by step:
- Heat the cream (1) in a saucepan until hot. Stir in the hydrated gelatin.
- Pour the hot cream over the melted chocolate and mix until well combined. Add the cold cream (2) and mix until smooth.
- Cover with cling film, touching the surface, and chill overnight. Whip to medium peaks before piping.
Three steps, but each one carries weight. When you hydrate the gelatin, use ice cold water and let the leaf soften fully before you lift it out, then squeeze gently so it does not water down the cream.
When the hot cream meets the chocolate, stir from the center outward until the mixture turns glossy and uniform. If the chocolate is not fully melted at the start, you will see small specks that never quite disappear.
Adding the cold cream is the step people rush, and it is the one that matters most for texture. Pour it in slowly and keep mixing until the ganache is completely smooth. This is what sets you up for a clean whip the next day.

Cover the surface directly with cling film, pressing it down so no skin forms, and let it chill overnight.
The next day, whip the ganache to medium peaks. Not stiff, not loose. Medium peaks hold a soft shape and still pipe beautifully, which is exactly what you want over a delicate mousse. If you take it too far, it turns grainy and heavy. If you stop too early, it slumps.
Once the ganache is whipped, pipe it over the set mousse and smooth or shape it however you like. The rocher glaze goes on last for a mirror finish and a little shine. From there, the bar goes back into the cold until you are ready to serve.
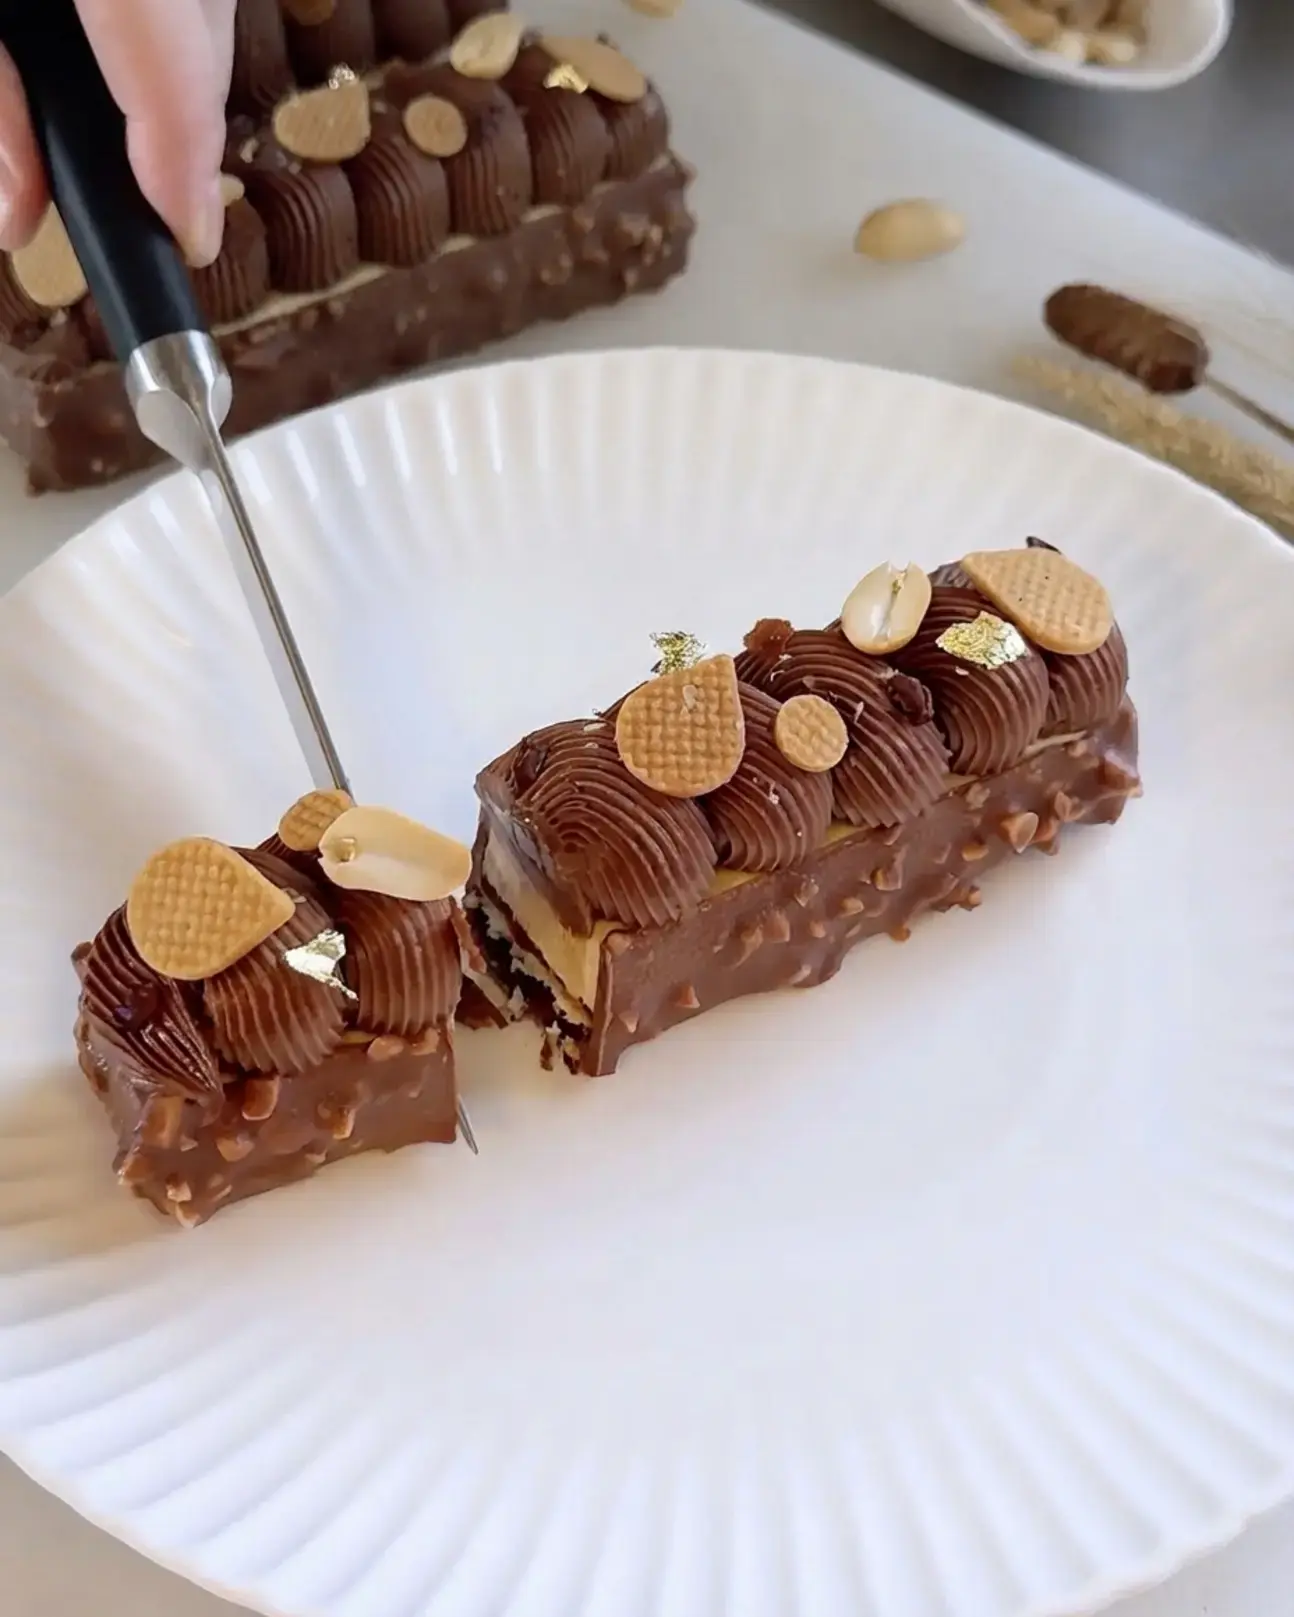
Serving is simple. Run a thin knife under hot water, dry it, and cut with a single confident motion. Wipe the blade between cuts so each square stays clean. The caramel should give just enough, the mousse should hold its shape, and the base should stay crisp.
For storage, keep the finished bar cold and covered so the ganache and mousse stay firm and the feuilletine keeps its snap. Bring the slices out a few minutes before serving so the caramel softens at the edges, then serve them before they warm too much.

Whip the ganache only to medium peaks. That texture pipes cleanly over the mousse and stays soft and glossy instead of turning heavy.
If you love the peanut, caramel, and chocolate combination, this is the version to make when you want dessert to feel like a small occasion. It takes patience, a little planning, and an overnight chill, and it gives back a layered bar that looks composed and tastes like something you would happily order in a pastry shop.
FAQs
What is in a peanut butter chocolate caramel bar?
How to make a peanut butter chocolate caramel bar at home?
What is dacquoise in a dessert bar?
Can I make peanut butter chocolate caramel bars ahead of time?
Chocolate whipped ganache
Peanut Butter Chocolate Caramel Bar There is a moment I look forward to every time I build this dessert. The knife presses through the glossy top, slides down, then catches for a heartbeat on something crisp before it meets caramel that gives just enough.
- Total Time: 0 min
Ingredients
Chocolate whipped ganache
200 g whipping cream (1), hot
1 g platinum gelatin leaf (=1.3g gold gelatin leaf or 7.5g gelatin mass)
160 g 55% dark chocolate, melted
120 g whipping cream (2), cold
fine salt
Instructions
Chocolate whipped ganache
1-Heat the cream (1) in a saucepan: Heat the cream (1) in a saucepan until hot. Stir in the hydrated gelatin.
2-Pour over the melted chocolate and mix: Pour over the melted chocolate and mix until well combined. Add the cold cream (2) and mix until smooth.
3-Cover with cling film, touching the surface,: Cover with cling film, touching the surface, and chill overnight. Whip to medium peaks before piping.
Last Step:
Please leave a rating and comment letting us know how you liked this recipe! This helps our business to thrive and continue providing free, high-quality recipes for you.- Prep Time: 0 min
- Cook Time: 0 min
- Method: mixed