Ingredients
– 6-ounce package strawberry gelatin for setting the mold and giving bright fruit flavor
– 2 cups boiling water for dissolving the gelatin completely
– 1 cup ice cold water for cooling the mixture quickly
– 15-ounce can jellied cranberry sauce for adding tart berry flavor and body
– 1 cup sour cream for creating a creamy layer and smooth taste
– Optional whipped cream for adding a soft topping for serving
Instructions
1-First Step: Dissolve the gelatin Start by pouring the 6-ounce package of strawberry gelatin into a mixing bowl. Add 2 cups of boiling water and stir until the gelatin is fully dissolved. This part matters because any undissolved granules can leave the final dessert grainy instead of smooth. Once the gelatin is dissolved, whisk in 1 cup of ice cold water. The cold water helps bring the temperature down faster, which is important for the next steps. If the mixture is too hot when you add the cranberry sauce and sour cream, the dairy can separate and the texture may turn uneven.
2-Second Step: Cool the gelatin mixture Place the bowl in the refrigerator for about 15 minutes to cool slightly. You do not want it to set firm at this stage. Instead, it should just cool enough so the next ingredients blend in smoothly. This short chill also helps create a better final texture. When gelatin cools a bit before mixing with creamy ingredients, the finished mold tends to hold its shape more neatly. If you are a busy cook, this is a nice pause in the process because it gives you time to prepare the rest of the ingredients.
3-Third Step: Mix the cranberry sauce and sour cream In a separate bowl, whisk together the 15-ounce can of jellied cranberry sauce and 1 cup sour cream until the mixture looks fairly smooth. The sour cream adds body and creaminess, while the cranberry sauce brings a sweet-tart flavor that keeps the dessert from tasting one-note. For the best result, use canned jellied cranberry sauce instead of whole berry sauce. The smoother texture blends more evenly into the gelatin. Full-fat sour cream gives a richer taste, but light sour cream also works if you want a lighter dessert.
4-Fourth Step: Combine everything gently After the gelatin has cooled slightly, add the cranberry and sour cream mixture to the bowl. Stir gently until everything is combined and the color looks even. Take your time here and avoid rushing, since fast mixing can add too much air or create streaks. At this point, taste is not really the goal. Texture is what matters most. You want the mixture to be smooth, creamy, and evenly blended so every slice has the same pretty look when you serve it.
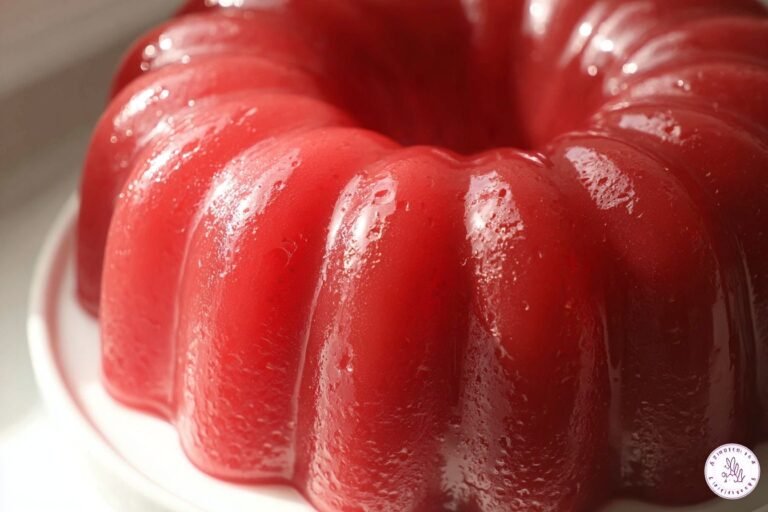
5-Fifth Step: Pour into the mold Pour the finished mixture into a gelatin mold. A traditional mold works best, but a bundt pan is a good backup if you do not have one. You can also use a 9×13-inch pan if that is easier for your kitchen setup. If you want easier release later, lightly coat the mold with a thin layer of neutral cooking spray. Just use a very light touch so the dessert still looks polished when unmolded. Too much spray can leave a greasy film on the outside.
6-Sixth Step: Chill until set Refrigerate the mold for at least 6 hours, though 8 hours is better for the firmest set. If you are planning ahead, letting it chill overnight is a great idea. The longer chill time gives the gelatin plenty of time to set fully, which makes unmolding much easier. A set Strawberry Jello Mold should feel firm to the touch and should not wobble heavily in the center. If it still seems soft after 6 hours, give it more time. Gelatin desserts can vary a little depending on refrigerator temperature and the shape of the pan.
7-Final Step: Unmold and serve When you are ready to serve, loosen the edges by running a thin knife or spatula around the sides of the mold. Dip the outside of the mold briefly in warm water for just 10 to 15 seconds if needed. Do not leave it in hot water too long, or the edges may melt. Place a serving plate over the mold, then carefully invert it. Give it a gentle shake if needed, and the mold should release. If desired, top with whipped cream before serving. It adds a soft, pretty finish that looks wonderful at the table. For the cleanest unmolding, keep the dip in warm water short. A quick release is enough to loosen the edges without softening the dessert.
Last Step:
Please leave a rating and comment letting us know how you liked this recipe! This helps our business to thrive and continue providing free, high-quality recipes for you.Notes
💧 Always use boiling water to fully dissolve the gelatin for proper setting.
❄️ Cool the gelatin slightly before adding other ingredients to prevent separation.
🥛 Full-fat or light sour cream both work for creamy texture.
- Prep Time: 10 minutes
- Chill: 8 hours
- Category: Desserts
- Method: Chilling
- Cuisine: American
- Diet: Vegetarian
Nutrition
- Serving Size: 1 slice
- Calories: 173 calories
- Sugar: 31g
- Sodium: 109mg
- Fat: 4g
- Saturated Fat: 2g
- Unsaturated Fat: 2g
- Trans Fat: 0g
- Carbohydrates: 32g
- Fiber: 0g
- Protein: 1g
- Cholesterol: 11mg