Why You’ll Love This Sticky Orange Chicken
If you are craving Sticky Orange Chicken that tastes like your favorite takeout, this recipe brings that sweet, bright, crispy flavor right to your kitchen. It uses simple ingredients, cooks fast, and gives you that saucy orange chicken finish that keeps every bite coated and satisfying. For busy nights, this is the kind of meal that feels special without asking for much time or effort.
- Easy to make: The chicken gets coated in a light mix of flour and cornstarch, dipped in egg, then fried until crisp. The sauce comes together in one pan, so dinner stays simple from start to finish.
- Family friendly: The sweet orange sauce, gentle ginger, and mild garlic make this Sticky Orange Chicken a hit with kids and adults alike. You can also control the chili flakes to keep it mild or add more heat.
- Great for different eating styles: You can serve it with rice, noodles, steamed vegetables, or a lighter side if you want a more balanced plate. It also adapts well to gluten free or lower sugar swaps.
- Big flavor, home style comfort: Fresh orange juice, orange zest, soy sauce, and a little vinegar create that classic sweet tangy taste people love in orange chicken recipes.
Tip: If you enjoy takeout style meals, this recipe pairs nicely with simple sides like steamed broccoli, jasmine rice, or a crisp cucumber salad.
For another helpful kitchen guide, you can check out more easy family recipes on Recipes Valentina. If you like comparing versions, this orange chicken inspiration from Kitchen Sanctuary is also a useful reference.
Jump to:
- Why You’ll Love This Sticky Orange Chicken
- Essential Ingredients for Sticky Orange Chicken
- Chicken and Coating
- Orange Chicken Sauce
- Garnish
- Special Dietary Options
- How to Prepare the Perfect Sticky Orange Chicken: Step-by-Step Guide
- First Step: Prep the chicken and coating
- Second Step: Coat the chicken
- Third Step: Fry until golden and crisp
- Fourth Step: Make the orange sauce
- Fifth Step: Combine chicken and sauce
- Final Step: Garnish and serve
- Dietary Substitutions to Customize Your Sticky Orange Chicken
- Protein and Main Component Alternatives
- Vegetable, Sauce, and Seasoning Modifications
- Mastering Sticky Orange Chicken: Advanced Tips and Variations
- Pro cooking techniques
- Flavor variations
- Presentation tips
- Make-ahead options
- How to Store Sticky Orange Chicken: Best Practices
- FAQs: Frequently Asked Questions About Sticky Orange Chicken
- Sticky Orange Chicken
- Ingredients
- Instructions
- Last Step:
- Notes
- Nutrition
- Did you make this recipe?
Essential Ingredients for Sticky Orange Chicken
Here is a clear ingredient list so you can gather everything before you start. This keeps the cooking process smooth and helps the Sticky Orange Chicken come together without stress.
Chicken and Coating
- 4 boneless skinless chicken breasts, cut into bite-size pieces
- 3 eggs, whisked
- 1/3 cup cornstarch
- 1/3 cup flour
- Salt, to taste
- Oil for frying
Orange Chicken Sauce
- 1 cup orange juice
- 1/2 cup sugar
- 2 tablespoons rice vinegar or white vinegar
- 2 tablespoons soy sauce
- 1/4 teaspoon ginger
- 1/4 teaspoon garlic powder or 2 garlic cloves, finely diced
- 1/2 teaspoon red chili flakes
- Orange zest from 1 orange
- 1 tablespoon cornstarch
Garnish
- Green onions
- Orange zest
Special Dietary Options
- Vegan: Use firm tofu or cauliflower instead of chicken, swap eggs for a plant based dredging mixture, and use a vegan soy sauce if needed.
- Gluten free: Replace the flour with a gluten free flour blend and use certified gluten free soy sauce or tamari.
- Low calorie: Air fry the chicken, use less sugar in the sauce, and serve with steamed vegetables instead of rice.
How to Prepare the Perfect Sticky Orange Chicken: Step-by-Step Guide
Making Sticky Orange Chicken at home is easier than many people think. The key is to set up your ingredients first, fry the chicken in batches, and cook the sauce until it turns glossy and thick. Once you learn the rhythm, this becomes one of those meals you can make on a busy weeknight without feeling rushed.
First Step: Prep the chicken and coating
Start by cutting the 4 boneless skinless chicken breasts into bite-size pieces. Pat them dry so the coating sticks better. In one bowl, whisk the 3 eggs. In another bowl, mix the 1/3 cup cornstarch, 1/3 cup flour, and salt.
This step matters because a dry chicken surface helps the coating cling well. If you want a lighter version, you can use less coating, but the classic crisp texture comes from the full dredge. Set up your frying pan or deep skillet and add enough oil for frying so the chicken can cook evenly.
Second Step: Coat the chicken
Dip each chicken piece first into the whisked eggs, then into the cornstarch and flour mixture. Make sure each piece is coated well on all sides. Place the coated chicken on a plate while you finish the rest.
If you like extra crunch, let the coated chicken rest for a few minutes before frying. This helps the coating stick better during cooking. It is a small trick, but it can make the finished Sticky Orange Chicken even crispier.
Third Step: Fry until golden and crisp
Heat the oil over medium high heat until hot. Add the chicken in batches so the pan does not get crowded. Fry each batch until the chicken turns golden brown and crisp on the outside and fully cooked inside, about 4 to 6 minutes depending on size.
Place cooked chicken on a paper towel lined plate to catch extra oil. If you are cooking for a family, this is a good moment to keep finished batches warm in a low oven while the rest fry. Avoid overloading the pan because that can lower the oil temperature and make the chicken less crisp.
Fourth Step: Make the orange sauce
In a medium saucepan, add 1 cup orange juice, 1/2 cup sugar, 2 tablespoons rice vinegar or white vinegar, 2 tablespoons soy sauce, 1/4 teaspoon ginger, 1/4 teaspoon garlic powder or 2 garlic cloves finely diced, 1/2 teaspoon red chili flakes, orange zest from 1 orange, and 1 tablespoon cornstarch.
Stir everything together before turning on the heat so the cornstarch starts to dissolve. Cook over medium heat, stirring often, until the sauce begins to bubble and thicken. This usually takes just a few minutes. The sauce should become glossy and coat the back of a spoon.
Helpful note: If your sauce seems too thin, let it cook a little longer. If it gets too thick, add a splash of orange juice or water to loosen it.
Fifth Step: Combine chicken and sauce
Add the fried chicken to the sauce and gently toss until every piece is coated. Work quickly so the coating stays crisp on the outside while still soaking up the sweet orange flavor. This is the moment when the dish turns into that classic takeout style Sticky Orange Chicken people love.
If you want a stronger orange taste, add a little more zest at this stage. For more heat, sprinkle in a few extra chili flakes. If you are cooking for children or anyone who prefers mild food, leave the spice at the listed amount or reduce it slightly.
Final Step: Garnish and serve
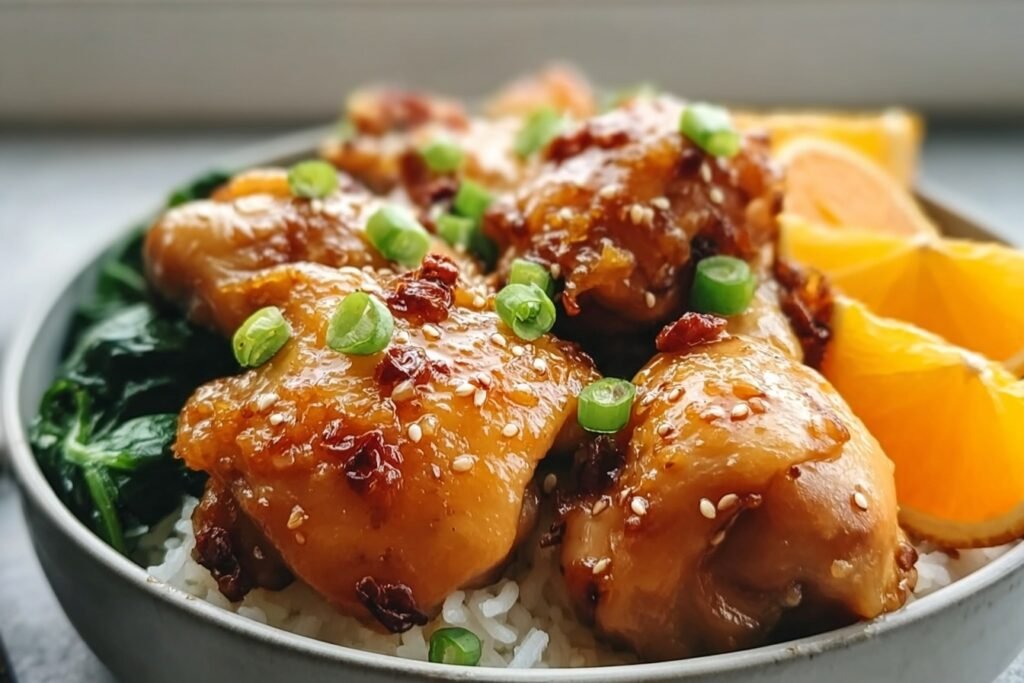
Spoon the Sticky Orange Chicken onto a serving plate or into a bowl. Top with chopped green onions and extra orange zest. Serve it hot with steamed rice, fried rice, noodles, or vegetables.
For a fuller meal, add broccoli, snap peas, or carrots on the side. If you are planning a weeknight dinner, the chicken and sauce can be served right away while everything is still fresh and crisp. For dessert or a citrus themed meal, you might also like reading more about the health benefits of oranges from Health.

Dietary Substitutions to Customize Your Sticky Orange Chicken
Protein and Main Component Alternatives
If you want to change the main protein, there are several easy swaps. Chicken thighs work well if you prefer juicier meat. Tofu is a great plant based option because it soaks up the orange sauce nicely. Cauliflower also works if you want a lighter meat free dish with a crisp edge.
For a baked version, you can skip the frying step and bake the coated chicken on a lined sheet pan until golden. Air frying is another smart choice for home cooks who want less oil but still want a crunchy bite. If you use a different protein, keep the pieces small so they cook at the same rate.
Vegetable, Sauce, and Seasoning Modifications
You can also change the sauce to fit your taste. Use less sugar for a less sweet version or add a little more vinegar for extra tang. If you like more spice, increase the red chili flakes. If you want a milder flavor for kids, reduce the chili and keep the ginger soft and gentle.
Vegetables like bell peppers, broccoli, snow peas, or carrots can be tossed in with the chicken or served on the side. For gluten free cooking, use tamari instead of soy sauce and a gluten free flour blend in place of regular flour. A small change in seasoning can make the recipe fit many diets without losing that signature Sticky Orange Chicken taste.
Mastering Sticky Orange Chicken: Advanced Tips and Variations
Once you make Sticky Orange Chicken once or twice, a few simple tricks can take it from good to really memorable. The goal is crisp chicken, balanced sauce, and a bright finish that tastes fresh and homemade.
Pro cooking techniques
Keep the oil hot enough before frying. If the oil is too cool, the coating absorbs extra oil and turns soft. Fry in small batches and let the chicken rest briefly on a rack or paper towels before saucing. For a thicker coating, you can double dip the chicken in egg and flour mixture, though the original version already gives a nice crisp shell.
When making the sauce, whisk well before heating so the cornstarch does not clump. Stir often while it cooks. If you want a smoother finish, strain out the zest before adding the chicken, but many cooks like the extra citrus aroma it brings.
Flavor variations
You can add a touch of fresh grated ginger for a stronger spice note. A bit of sesame oil at the end can give a nutty aroma. For a sweeter glaze, add a spoonful more sugar. For a sharper tang, use a little extra vinegar. This recipe is flexible, so you can make the flavor match your family’s taste.
Presentation tips
Serve the chicken over rice in a wide bowl and scatter on green onions and orange zest for color. Add steamed broccoli on the side for a fuller plate. A sprinkle of sesame seeds also looks nice if you have them on hand. Bright colors make the dish look fresh and inviting.
Make-ahead options
You can mix the sauce ingredients ahead of time and keep them in the fridge. The chicken can also be cut the day before and stored covered. For best crunch, fry the chicken just before serving and toss it in the sauce at the last minute.
How to Store Sticky Orange Chicken: Best Practices
Sticky Orange Chicken keeps well when stored the right way, which makes it handy for leftovers and meal prep.
Refrigeration: Place leftovers in an airtight container and store them in the fridge for up to 3 days. If possible, keep the chicken and sauce separate so the coating stays crisp longer.
Freezing: Freeze the fried chicken and sauce separately in freezer safe containers for up to 2 months. Thaw in the fridge overnight before reheating.
Reheating: Warm the chicken in the oven or air fryer so it gets some crispness back. Heat the sauce in a small pan, then toss everything together once hot. The microwave works too, but the texture will be softer.
Meal prep considerations: For batch cooking, fry the chicken and cool it completely before storing. Make the sauce ahead and refrigerate it in a jar. When you are ready to eat, reheat and combine just before serving for the best taste and texture.

FAQs: Frequently Asked Questions About Sticky Orange Chicken
Print
Sticky Orange Chicken
🍊 Crave-worthy crispy orange chicken with sweet-tangy glaze, better than takeout and ready in 40 minutes!
🐔 Golden fried bites packed with flavor, perfect for weeknight dinners or Chinese night at home.
- Total Time: 40 minutes
- Yield: 4 servings
Ingredients
– 4 boneless skinless chicken breasts, cut into bite-size pieces
– 3 eggs, whisked
– 1/3 cup cornstarch
– 1/3 cup flour
– Salt, to taste
– Oil for frying
– 1 cup orange juice
– 1/2 cup sugar
– 2 tablespoons rice vinegar or white vinegar
– 2 tablespoons soy sauce
– 1/4 teaspoon ginger
– 1/4 teaspoon garlic powder or 2 garlic cloves, finely diced
– 1/2 teaspoon red chili flakes
– Orange zest from 1 orange
– 1 tablespoon cornstarch
– Green onions
– Orange zest
Instructions
1-First Step: Prep the chicken and coating Start by cutting the 4 boneless skinless chicken breasts into bite-size pieces. Pat them dry so the coating sticks better. In one bowl, whisk the 3 eggs. In another bowl, mix the 1/3 cup cornstarch, 1/3 cup flour, and salt. This step matters because a dry chicken surface helps the coating cling well. If you want a lighter version, you can use less coating, but the classic crisp texture comes from the full dredge. Set up your frying pan or deep skillet and add enough oil for frying so the chicken can cook evenly.
2-Second Step: Coat the chicken Dip each chicken piece first into the whisked eggs, then into the cornstarch and flour mixture. Make sure each piece is coated well on all sides. Place the coated chicken on a plate while you finish the rest. If you like extra crunch, let the coated chicken rest for a few minutes before frying. This helps the coating stick better during cooking. It is a small trick, but it can make the finished Sticky Orange Chicken even crispier.
3-Third Step: Fry until golden and crisp Heat the oil over medium high heat until hot. Add the chicken in batches so the pan does not get crowded. Fry each batch until the chicken turns golden brown and crisp on the outside and fully cooked inside, about 4 to 6 minutes depending on size. Place cooked chicken on a paper towel lined plate to catch extra oil. If you are cooking for a family, this is a good moment to keep finished batches warm in a low oven while the rest fry. Avoid overloading the pan because that can lower the oil temperature and make the chicken less crisp.
4-Fourth Step: Make the orange sauce In a medium saucepan, add 1 cup orange juice, 1/2 cup sugar, 2 tablespoons rice vinegar or white vinegar, 2 tablespoons soy sauce, 1/4 teaspoon ginger, 1/4 teaspoon garlic powder or 2 garlic cloves finely diced, 1/2 teaspoon red chili flakes, orange zest from 1 orange, and 1 tablespoon cornstarch. Stir everything together before turning on the heat so the cornstarch starts to dissolve. Cook over medium heat, stirring often, until the sauce begins to bubble and thicken. This usually takes just a few minutes. The sauce should become glossy and coat the back of a spoon.
5-Fifth Step: Combine chicken and sauce Add the fried chicken to the sauce and gently toss until every piece is coated. Work quickly so the coating stays crisp on the outside while still soaking up the sweet orange flavor. This is the moment when the dish turns into that classic takeout style Sticky Orange Chicken people love. If you want a stronger orange taste, add a little more zest at this stage. For more heat, sprinkle in a few extra chili flakes. If you are cooking for children or anyone who prefers mild food, leave the spice at the listed amount or reduce it slightly.
6-Final Step: Garnish and serve Spoon the Sticky Orange Chicken onto a serving plate or into a bowl. Top with chopped green onions and extra orange zest. Serve it hot with steamed rice, fried rice, noodles, or vegetables. For a fuller meal, add broccoli, snap peas, or carrots on the side. If you are planning a weeknight dinner, the chicken and sauce can be served right away while everything is still fresh and crisp. For dessert or a citrus themed meal, you might also like reading more about the health benefits of oranges from Health.
Last Step:
Please leave a rating and comment letting us know how you liked this recipe! This helps our business to thrive and continue providing free, high-quality recipes for you.Notes
🔥 Fry chicken in batches at 350°F to keep oil hot for maximum crispiness – don’t overcrowd!
🍊 Fresh orange juice and zest elevate the sauce; adjust sugar for desired sweetness.
🥢 Double-fry the chicken (first at 325°F, rest, then 375°F) for extra restaurant-style crunch.
- Prep Time: 20 minutes
- Cook Time: 20 minutes
- Category: Main Course
- Method: Stovetop
- Cuisine: Chinese-American
Nutrition
- Serving Size: 1/4 recipe
- Calories: 450 kcal
- Sugar: 30g
- Sodium: 800mg
- Fat: 20g
- Saturated Fat: 4g
- Unsaturated Fat: 16g
- Trans Fat: 0g
- Carbohydrates: 45g
- Fiber: 1g
- Protein: 25g
- Cholesterol: 150mg


