Ingredients
– 2 cups Graham cracker crumbs – Forms the sturdy, crunchy base for your chocolate m&ms bars
– 1/2 cup Unsalted butter, melted – Binds the crust together and adds richness
– 14 oz Sweetened condensed milk – Creates the sweet, creamy layer that holds everything together
– 1 1/2 cups Semi-sweet chocolate chips – Provides the rich chocolate foundation
– 1/2 cup White chocolate chips – Adds a lovely contrast in both color and flavor
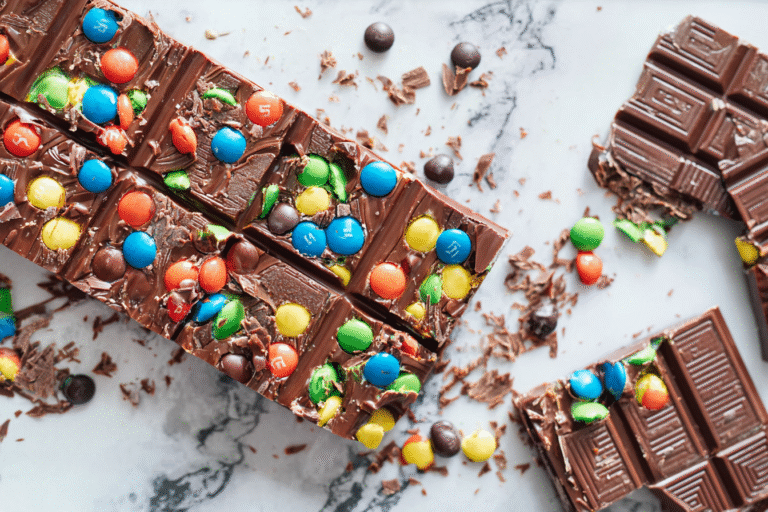
– 1 1/2 cups Mini M&Ms – The star ingredient that gives these bars their signature crunch and colorful appearance
– 1 teaspoon Vanilla extract – Enhances and balances the overall sweetness
– 1/4 teaspoon Salt – Intensifies the chocolate flavor and balances sweetness
Instructions
1-First Step: Preparation and Organization Before diving into the recipe, prepare your workspace and gather all necessary equipment. You’ll need a 9×13 inch baking pan, parchment paper, mixing bowls, a rubber spatula, and measuring cups and spoons. Line your baking pan with parchment paper, leaving an overhang on two sides. This will make removing the bars much easier later. Prepare your ingredients by measuring everything in advance, which streamlines the process and ensures accuracy. For the best results, have your butter melted and your chocolate chips ready to pour. This preparation step might seem simple, but it sets the foundation for a smooth cooking experience.
2-Second Step: Creating the Crust Start by combining the graham cracker crumbs with melted butter in a medium mixing bowl. Mix thoroughly until all the crumbs are evenly coated and the mixture resembles wet sand. Press this mixture firmly and evenly into the bottom of your prepared pan using the back of a spoon or the bottom of a measuring cup. Creating an even layer is crucial for the structural integrity of your m&m chocolate bars no bake. Place the pan in the refrigerator while you prepare the filling, which helps the crust set slightly.
3-Third Step: Preparing the Chocolate Filling In a microwave-safe bowl or using a double boiler, combine the sweetened condensed milk with both types of chocolate chips. Microwave in 30-second intervals, stirring between each, until the mixture is smooth and completely melted. Alternatively, you can heat the mixture over simmering water, stirring constantly until combined. Once melted and smooth, stir in the vanilla extract and salt. This creates a rich, glossy chocolate mixture that will bind everything together. Be careful not to overheat, as this can cause the chocolate to seize or become grainy.
4-Fourth Step: Assembling the Bars Pour the warm chocolate mixture over the prepared graham cracker crust, spreading it evenly with a spatula. While the chocolate is still warm, sprinkle approximately 1 cup of the mini M&Ms over the top, pressing them gently into the chocolate to ensure they adhere properly. Reserve the remaining 1/2 cup of M&Ms for later. This initial layer of candies will melt slightly into the chocolate, creating a beautiful marbled effect while maintaining their signature crunch. For those with dietary restrictions, this is when you would add any special ingredients or substitutions as discussed in the ingredients section.
5-Fifth Step: Adding the Final Touch Once the chocolate has cooled slightly but is still tacky, sprinkle the remaining M&Ms over the top of the bars. This final layer will stay crunchy and colorful, creating a beautiful presentation. For an extra professional touch, you could press a few whole M&Ms into specific patterns or arrange them in rows. Place the pan in the refrigerator and chill for at least 2-3 hours, or until completely set. The bars should be firm to the touch and hold their shape when cut.
6-Final Step: Cutting and Serving Once fully chilled, remove the pan from the refrigerator. Using the parchment paper overhang, lift the bars out of the pan and place on a cutting board. For clean cuts, use a sharp knife dipped in hot water and wiped clean between each slice. Cut the bars into 24 squares or rectangles, depending on your preferred size. For the best presentation, wipe the knife clean after each cut. These no bake m&ms dessert bars are now ready to serve! They can be enjoyed immediately or stored for later. Serve them on a decorative platter for a beautiful presentation that showcases their colorful appearance.
Last Step:
Please leave a rating and comment letting us know how you liked this recipe! This helps our business to thrive and continue providing free, high-quality recipes for you.Notes
🍬 Press mixture tightly into pan for bars that hold together perfectly.
❄️ Chill longer in hot weather for easier cutting without crumbling.
🎨 Use themed M&M’s for holidays to make festive, eye-catching treats.
- Prep Time: 15 minutes
- Chill: 1 hour
- Category: Dessert
- Method: No-Bake
- Cuisine: American
- Diet: Vegetarian
Nutrition
- Serving Size: 1 bar
- Calories: 220 calories
- Sugar: 22g
- Sodium: 140mg
- Fat: 10g
- Saturated Fat: 4g
- Unsaturated Fat: 5g
- Trans Fat: 0g
- Carbohydrates: 32g
- Fiber: 1g
- Protein: 4g
- Cholesterol: 0mg