
Why You’ll Love This Mm Chocolate Bars
There are countless reasons to fall in love with these Mm Chocolate Bars, making them a perfect addition to your dessert repertoire. These no bake bars offer a delightful combination of sweetness and crunch that appeals to both kids and adults alike.
- Ease of preparation: These chocolate m&m bars require minimal effort and no baking time. Simply mix the ingredients, press into a pan, and chill. The entire process takes less than 30 minutes, making them ideal for busy weeknights or last-minute gatherings.
- Versatility: This m&m dessert recipe adapts beautifully to various dietary needs and preferences. Whether you need a gluten-free option or want to reduce sugar, these no bake bars can be customized without sacrificing taste or texture.
- Distinctive flavor: The combination of rich chocolate, crunchy cookie base, and colorful candy coating creates an irresistible treat that stands out from typical bar desserts. The contrast between the soft, chewy interior and the satisfying crunch of M&Ms makes every bite exciting.
- Crowd-pleaser: These easy dessert recipe bars are always a hit at parties, potlucks, and family gatherings. Their colorful appearance makes them visually appealing, while the familiar flavors ensure they disappear quickly from any dessert table.
Jump to:
- Why You’ll Love This Mm Chocolate Bars
- Essential Ingredients for Mm Chocolate Bars
- Main Ingredients:
- Special Dietary Options:
- Vegan:
- Gluten-free:
- Low-calorie:
- How to Prepare the Perfect Mm Chocolate Bars: Step-by-Step Guide
- First Step: Preparation and Organization
- Second Step: Creating the Crust
- Third Step: Preparing the Chocolate Filling
- Fourth Step: Assembling the Bars
- Fifth Step: Adding the Final Touch
- Final Step: Cutting and Serving
- Protein and Main Component Alternatives
- Chocolate Alternatives
- Candy Variations
- Base Substitutions
- Vegetable, Sauce, and Seasoning Modifications
- Nut and Seed Additions
- Flavor Enhancers
- Sauce and Drizzle Options
- Mastering Mm Chocolate Bars: Advanced Tips and Variations
- Pro Cooking Techniques
- Flavor Variations
- Presentation Tips
- Make-Ahead Options
- How to Store Mm Chocolate Bars: Best Practices
- Refrigeration
- Freezing
- Meal Prep Considerations
- FAQs: Frequently Asked Questions About Mm Chocolate Bars
- Mm Chocolate Bars
- Ingredients
- Instructions
- Last Step:
- Notes
- Nutrition
- Did you make this recipe?
Essential Ingredients for Mm Chocolate Bars
Creating the perfect batch of these no bake m&ms dessert bars requires gathering the right ingredients. Each component plays a crucial role in achieving the ideal texture and flavor profile that makes this simple m&m bar dessert recipe so special.
Main Ingredients:
2 cups Graham cracker crumbs – Forms the sturdy, crunchy base for your chocolate m&m bars
1/2 cup Unsalted butter, melted – Binds the crust together and adds richness
14 oz Sweetened condensed milk – Creates the sweet, creamy layer that holds everything together
1 1/2 cups Semi-sweet chocolate chips – Provides the rich chocolate foundation
1/2 cup White chocolate chips – Adds a lovely contrast in both color and flavor
1 1/2 cups Mini M&Ms – The star ingredient that gives these bars their signature crunch and colorful appearance
1 teaspoon Vanilla extract – Enhances and balances the overall sweetness
1/4 teaspoon Salt – Intensifies the chocolate flavor and balances sweetness
Special Dietary Options:
Vegan:
Replace butter with vegan butter or coconut oil
Use dairy-free chocolate chips
Choose vegan-friendly M&Ms or similar colorful candies
Substitute sweetened condensed milk with coconut condensed milk
Gluten-free:
Use certified gluten-free graham cracker crumbs or crushed gluten-free cookies
Verify all other ingredients are certified gluten-free
Low-calorie:
Reduce sweetened condensed milk to 10 oz and substitute with fat-free version
Use reduced-calorie chocolate chips
Increase the proportion of M&Ms for flavor while reducing the sweetened condensed milk
How to Prepare the Perfect Mm Chocolate Bars: Step-by-Step Guide
Making these delightful easy no bake m&m bars recipe is straightforward when you follow these detailed instructions. With proper preparation and attention to detail, you’ll create a dessert that looks impressive and tastes absolutely divine.
First Step: Preparation and Organization
Before diving into the recipe, prepare your workspace and gather all necessary equipment. You’ll need a 9×13 inch baking pan, parchment paper, mixing bowls, a rubber spatula, and measuring cups and spoons. Line your baking pan with parchment paper, leaving an overhang on two sides. This will make removing the bars much easier later. Prepare your ingredients by measuring everything in advance, which streamlines the process and ensures accuracy. For the best results, have your butter melted and your chocolate chips ready to pour. This preparation step might seem simple, but it sets the foundation for a smooth cooking experience.
Second Step: Creating the Crust
Start by combining the graham cracker crumbs with melted butter in a medium mixing bowl. Mix thoroughly until all the crumbs are evenly coated and the mixture resembles wet sand. Press this mixture firmly and evenly into the bottom of your prepared pan using the back of a spoon or the bottom of a measuring cup. Creating an even layer is crucial for the structural integrity of your m&m chocolate bars no bake. Place the pan in the refrigerator while you prepare the filling, which helps the crust set slightly.
Third Step: Preparing the Chocolate Filling
In a microwave-safe bowl or using a double boiler, combine the sweetened condensed milk with both types of chocolate chips. Microwave in 30-second intervals, stirring between each, until the mixture is smooth and completely melted. Alternatively, you can heat the mixture over simmering water, stirring constantly until combined. Once melted and smooth, stir in the vanilla extract and salt. This creates a rich, glossy chocolate mixture that will bind everything together. Be careful not to overheat, as this can cause the chocolate to seize or become grainy.
Fourth Step: Assembling the Bars
Pour the warm chocolate mixture over the prepared graham cracker crust, spreading it evenly with a spatula. While the chocolate is still warm, sprinkle approximately 1 cup of the mini M&Ms over the top, pressing them gently into the chocolate to ensure they adhere properly. Reserve the remaining 1/2 cup of M&Ms for later. This initial layer of candies will melt slightly into the chocolate, creating a beautiful marbled effect while maintaining their signature crunch. For those with dietary restrictions, this is when you would add any special ingredients or substitutions as discussed in the ingredients section.
Fifth Step: Adding the Final Touch
Once the chocolate has cooled slightly but is still tacky, sprinkle the remaining M&Ms over the top of the bars. This final layer will stay crunchy and colorful, creating a beautiful presentation. For an extra professional touch, you could press a few whole M&Ms into specific patterns or arrange them in rows. Place the pan in the refrigerator and chill for at least 2-3 hours, or until completely set. The bars should be firm to the touch and hold their shape when cut.
Final Step: Cutting and Serving
Once fully chilled, remove the pan from the refrigerator. Using the parchment paper overhang, lift the bars out of the pan and place on a cutting board. For clean cuts, use a sharp knife dipped in hot water and wiped clean between each slice. Cut the bars into 24 squares or rectangles, depending on your preferred size. For the best presentation, wipe the knife clean after each cut. These no bake m&ms dessert bars are now ready to serve! They can be enjoyed immediately or stored for later. Serve them on a decorative platter for a beautiful presentation that showcases their colorful appearance.
Protein and Main Component Alternatives
While traditional Mm Chocolate Bars follow a specific formula, there are numerous alternatives you can explore to customize the recipe to your preferences or dietary needs. These substitutions allow you to create a version of the m&m dessert that suits your specific requirements while maintaining the delicious essence of the original.
Chocolate Alternatives
The chocolate component forms the backbone of these no bake bars. If you prefer different chocolate varieties, consider substituting the semi-sweet chips with milk chocolate for a sweeter profile or dark chocolate for those who enjoy a more intense cocoa flavor with less sweetness. White chocolate can also be used exclusively for those who prefer a lighter, creamier taste. For a more complex flavor profile, try using chocolate chunks instead of chips for varied melting points and texture differences.
Candy Variations
While traditional M&Ms provide the signature crunch and color, other candies can create equally delicious chocolate m&m bars. Consider using Reese’s Pieces for a peanut butter twist, chopped peanut butter cups for added richness, or crushed candy canes for a festive holiday version. For nut-free options, try colorful sprinkles or crushed cookies instead of candies. These alternatives can significantly alter the flavor profile while maintaining the structural integrity of the bars.
Base Substitutions
The graham cracker crust can be modified to suit different tastes or dietary requirements. Oreo crumbs create a darker, richer base with added chocolate flavor. Vanilla wafer crumbs offer a lighter, more subtle taste that lets the chocolate filling shine. For a healthier twist, try using crushed nuts mixed with a small amount of sweetener, or a combination of coconut and almond flour for a gluten-free, lower-carb alternative that still provides necessary structure to the bars.
Vegetable, Sauce, and Seasoning Modifications
Though not typically associated with vegetables or sauces in traditional recipes, Mm Chocolate Bars can benefit from thoughtful additions and modifications that enhance their flavor profile and nutritional value. These creative adaptations can transform this simple m&m bar dessert recipe into something uniquely your own.
Nut and Seed Additions
Incorporating nuts and seeds into your chocolate m&m bars no bake recipe adds protein, healthy fats, and interesting texture contrasts. Chopped almonds, pecans, or walnuts pair beautifully with chocolate and add a sophisticated crunch. For a softer texture, consider adding chopped macadamia nuts or cashews. Seeds like chia, hemp, or flax can be incorporated into the crust layer for an undetectable nutritional boost. When adding these ingredients, ensure they’re roughly chopped to maintain structural integrity while providing satisfying texture throughout each bite.
Flavor Enhancers
Extracts and seasonings can dramatically alter the flavor profile of your m&m dessert without changing the texture. Peppermint extract creates a refreshing variation reminiscent of thin mint cookies. Almond extract adds a subtle nutty undertone that complements the chocolate beautifully. For a warming spice variation, consider adding cinnamon, nutmeg, or a pinch of cayenne pepper to the chocolate mixture. Coffee powder or instant espresso can intensify the chocolate flavor without adding a distinct coffee taste. These additions should be used sparingly to enhance rather than overpower the primary flavors.
Sauce and Drizzle Options
Adding sauce elements to your no bake m&ms dessert bars creates visual appeal and additional flavor dimensions. A caramel drizzle over the top before the final candy addition creates a salted caramel chocolate variation that’s particularly sophisticated. Peanut butter drizzle provides a salty contrast to the sweet chocolate and candy. For a fruit-forward twist, consider a berry reduction or raspberry sauce swirled into the chocolate before it sets. These additions should be applied after the chocolate has begun to set slightly to create distinct layers rather than incorporating completely into the chocolate mixture.
Mastering Mm Chocolate Bars: Advanced Tips and Variations
Once you’ve mastered the basic easy no bake m&m bars recipe, you can explore advanced techniques and creative variations that elevate this simple dessert into something truly spectacular. These expert tips will help you achieve professional results every time.
Pro Cooking Techniques
For the smoothest chocolate filling, tempering your chocolate before combining it with sweetened condensed milk creates a glossy finish and better texture. This involves melting the chocolate to a specific temperature, then cooling it slightly before working with it. Another professional technique is to create layers within your bars. You could make a striped pattern by alternating chocolate and white chocolate mixtures, or create a marble effect by swirling two different colored chocolates together. For added sophistication, consider infusing your cream with herbs like mint or lavender before combining with chocolate, then straining out the solids before adding to your mixture.
Flavor Variations
Beyond basic substitutions, consider these creative flavor combinations that transform traditional chocolate m&m bars. Try adding orange zest and a splash of orange extract for a chocolate orange variation. Incorporate toasted coconut and macadamia nuts for a tropical twist. For adults, a splash of coffee liqueur or bourbon adds depth and complexity. A peanut butter swirl pattern creates a visually striking and delicious variation. You could also incorporate freeze-dried fruit powder into the white chocolate layer for natural color and intense fruit flavor without changing the texture.
Presentation Tips
Beautiful presentation begins with clean, uniform cutting. Use a ruler to mark cutting lines for perfectly sized bars. For extra flair, consider cutting shapes with cookie cutters for special occasions. Dusting the finished bars with edible gold or silver powder creates an elegant finish appropriate for holidays and celebrations. Serving on slate boards or white platters allows the colorful M&Ms to pop visually. For gifting, wrap individual bars in clear cellophane with ribbon or stack in clear boxes with parchment paper between layers.
Make-Ahead Options
These no bake m&ms dessert bars are ideal for advance preparation. The crust can be made and frozen for up to a month before adding the filling. Fully assembled bars keep well in the refrigerator for up to a week or in the freezer for up to three months. To freeze, cut the bars first, then freeze in single layers separated by parchment paper in airtight containers. This makes it easy to grab just one or two bars as needed. For special occasions, you can prepare the bars two days in advance and store them in the refrigerator, allowing you to focus on other preparations closer to your event.
How to Store Mm Chocolate Bars: Best Practices
Proper storage ensures your Mm Chocolate Bars maintain their texture, flavor, and appearance for as long as possible. Following these guidelines will help you enjoy your m&m dessert at its best, whether you’re saving leftovers or preparing for future events.
Refrigeration
For short-term storage, keep your chocolate m&m bars in an airtight container in the refrigerator. Place parchment paper between layers to prevent sticking. Properly stored, these no bake bars will maintain their quality for 5-7 days. The refrigerator helps maintain the firm texture of the chocolate filling and keeps the M&Ms crunchy. Before serving, allow the bars to sit at room temperature for about 10 minutes for the best flavor and texture experience.
Freezing
For long-term storage, these simple m&m bar dessert recipes freeze exceptionally well. Wrap the entire uncut slab tightly in plastic wrap and aluminum foil, or cut into individual portions and store in freezer-safe containers with parchment between layers. When properly frozen, the bars will maintain their quality for up to 3 months. To thaw, transfer to the refrigerator overnight, then bring to room temperature before serving. This method is perfect for batch cooking or preparing for holidays well in advance.
Meal Prep Considerations
For efficient meal prep, consider making multiple batches of your easy dessert recipe at once. Prepare the crust in advance and store it in the freezer for up to a month. You can also prep the chocolate mixture and store it separately, then combine when ready to assemble. Portion your finished bars into individual servings in small containers for convenient grab-and-go treats throughout the week. This approach makes it easy to enjoy homemade treats without daily preparation time.

FAQs: Frequently Asked Questions About Mm Chocolate Bars
Print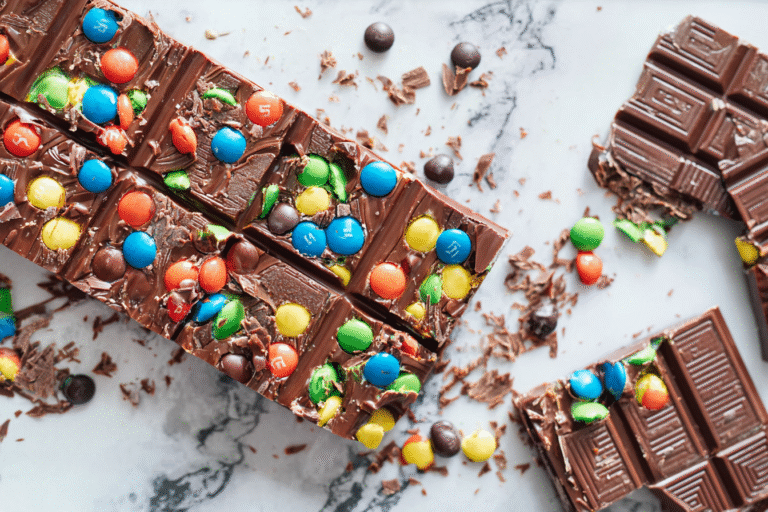
Mm Chocolate Bars
🍬🍫 Irresistible no-bake M&Ms bars with crunchy cereal base, creamy peanut butter, and colorful candy topping – fun explosion of flavors!
⏱️ Ready in minutes without oven; perfect easy dessert for parties, kids, or sweet cravings anytime.
- Total Time: 1 hour 15 minutes
- Yield: 24 bars
Ingredients
– 2 cups Graham cracker crumbs – Forms the sturdy, crunchy base for your chocolate m&ms bars
– 1/2 cup Unsalted butter, melted – Binds the crust together and adds richness
– 14 oz Sweetened condensed milk – Creates the sweet, creamy layer that holds everything together
– 1 1/2 cups Semi-sweet chocolate chips – Provides the rich chocolate foundation
– 1/2 cup White chocolate chips – Adds a lovely contrast in both color and flavor
– 1 1/2 cups Mini M&Ms – The star ingredient that gives these bars their signature crunch and colorful appearance
– 1 teaspoon Vanilla extract – Enhances and balances the overall sweetness
– 1/4 teaspoon Salt – Intensifies the chocolate flavor and balances sweetness
Instructions
1-First Step: Preparation and Organization Before diving into the recipe, prepare your workspace and gather all necessary equipment. You’ll need a 9×13 inch baking pan, parchment paper, mixing bowls, a rubber spatula, and measuring cups and spoons. Line your baking pan with parchment paper, leaving an overhang on two sides. This will make removing the bars much easier later. Prepare your ingredients by measuring everything in advance, which streamlines the process and ensures accuracy. For the best results, have your butter melted and your chocolate chips ready to pour. This preparation step might seem simple, but it sets the foundation for a smooth cooking experience.
2-Second Step: Creating the Crust Start by combining the graham cracker crumbs with melted butter in a medium mixing bowl. Mix thoroughly until all the crumbs are evenly coated and the mixture resembles wet sand. Press this mixture firmly and evenly into the bottom of your prepared pan using the back of a spoon or the bottom of a measuring cup. Creating an even layer is crucial for the structural integrity of your m&m chocolate bars no bake. Place the pan in the refrigerator while you prepare the filling, which helps the crust set slightly.
3-Third Step: Preparing the Chocolate Filling In a microwave-safe bowl or using a double boiler, combine the sweetened condensed milk with both types of chocolate chips. Microwave in 30-second intervals, stirring between each, until the mixture is smooth and completely melted. Alternatively, you can heat the mixture over simmering water, stirring constantly until combined. Once melted and smooth, stir in the vanilla extract and salt. This creates a rich, glossy chocolate mixture that will bind everything together. Be careful not to overheat, as this can cause the chocolate to seize or become grainy.
4-Fourth Step: Assembling the Bars Pour the warm chocolate mixture over the prepared graham cracker crust, spreading it evenly with a spatula. While the chocolate is still warm, sprinkle approximately 1 cup of the mini M&Ms over the top, pressing them gently into the chocolate to ensure they adhere properly. Reserve the remaining 1/2 cup of M&Ms for later. This initial layer of candies will melt slightly into the chocolate, creating a beautiful marbled effect while maintaining their signature crunch. For those with dietary restrictions, this is when you would add any special ingredients or substitutions as discussed in the ingredients section.
5-Fifth Step: Adding the Final Touch Once the chocolate has cooled slightly but is still tacky, sprinkle the remaining M&Ms over the top of the bars. This final layer will stay crunchy and colorful, creating a beautiful presentation. For an extra professional touch, you could press a few whole M&Ms into specific patterns or arrange them in rows. Place the pan in the refrigerator and chill for at least 2-3 hours, or until completely set. The bars should be firm to the touch and hold their shape when cut.
6-Final Step: Cutting and Serving Once fully chilled, remove the pan from the refrigerator. Using the parchment paper overhang, lift the bars out of the pan and place on a cutting board. For clean cuts, use a sharp knife dipped in hot water and wiped clean between each slice. Cut the bars into 24 squares or rectangles, depending on your preferred size. For the best presentation, wipe the knife clean after each cut. These no bake m&ms dessert bars are now ready to serve! They can be enjoyed immediately or stored for later. Serve them on a decorative platter for a beautiful presentation that showcases their colorful appearance.
Last Step:
Please leave a rating and comment letting us know how you liked this recipe! This helps our business to thrive and continue providing free, high-quality recipes for you.Notes
🍬 Press mixture tightly into pan for bars that hold together perfectly.
❄️ Chill longer in hot weather for easier cutting without crumbling.
🎨 Use themed M&M’s for holidays to make festive, eye-catching treats.
- Prep Time: 15 minutes
- Chill: 1 hour
- Category: Dessert
- Method: No-Bake
- Cuisine: American
- Diet: Vegetarian
Nutrition
- Serving Size: 1 bar
- Calories: 220 calories
- Sugar: 22g
- Sodium: 140mg
- Fat: 10g
- Saturated Fat: 4g
- Unsaturated Fat: 5g
- Trans Fat: 0g
- Carbohydrates: 32g
- Fiber: 1g
- Protein: 4g
- Cholesterol: 0mg


