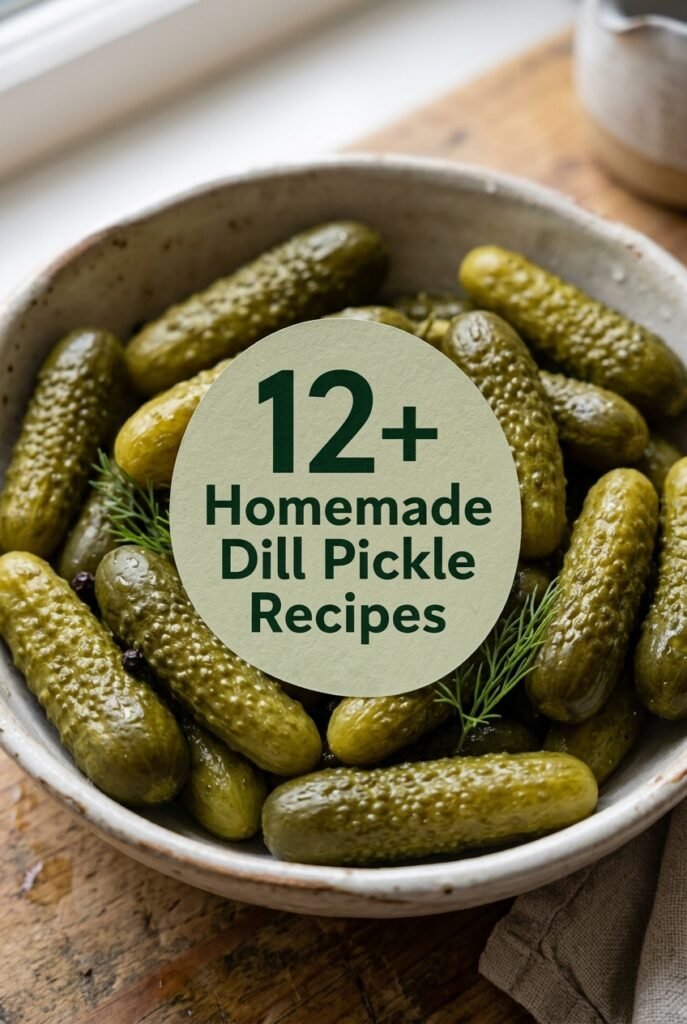
Why You’ll Love These Homemade Dill Pickle Recipes
If you have been looking for Homemade Dill Pickle Recipes that are quick, crisp, and packed with that classic tangy flavor, this one is a real winner. These quick refrigerator pickles come together in just minutes, and the fridge does the rest of the work. I love recipes like this because they feel low-effort but still make the whole kitchen smell amazing.
- Easy to make: This dill pickle recipe uses a simple hot brine, so there is no canning equipment or complicated step-by-step process to worry about. You just slice, pack, heat, pour, and chill.
- Fresh and satisfying: Cucumbers stay crisp, and the vinegar brine gives them that bright, punchy bite people expect from crunchy dill pickles.
- Flexible for different eaters: These homemade pickles are naturally vegetarian and vegan, and you can adjust the sugar level to fit your taste or diet.
- Great flavor payoff: Fresh dill, garlic, mustard seeds, and peppercorns create a classic pickle flavor that tastes far better than most store-bought jars.
These tasty homemade pickles turned out so much better than the ones from the store that I can’t wait to whip up another batch this weekend!
Another reason this easy homemade dill pickle recipe is so popular is that it works well for busy people. The prep time is only about 10 minutes, the cook time is about 1 minute, and the rest is just chilling in the fridge. That makes it a smart recipe for home cooks, students, newlyweds, and anyone who wants a quick kitchen win.
For readers who enjoy simple make-ahead food, this recipe also fits nicely beside other easy comfort dishes like slow cooker Italian lemon chicken or a cozy dinner such as au gratin potatoes. A jar of homemade pickles on the side can brighten up any meal.
Jump to:
- Why You’ll Love These Homemade Dill Pickle Recipes
- Essential Ingredients for Homemade Dill Pickle Recipes
- Main ingredients
- Special dietary options
- How to Prepare the Perfect Homemade Dill Pickle Recipes: Step-by-Step Guide
- First step: prep the cucumbers
- Second step: pack the jars
- Third step: make the brine
- Fourth step: cool slightly and pour
- Fifth step: cool to room temperature
- Final step: refrigerate and wait
- Dietary Substitutions to Customize Your Homemade Dill Pickle Recipes
- Protein and main component alternatives
- Vegetable, sauce, and seasoning modifications
- Mastering Homemade Dill Pickle Recipes: Advanced Tips and Variations
- Pro cooking techniques
- Flavor variations
- Presentation tips
- Make-ahead options
- How to Store Homemade Dill Pickle Recipes: Best Practices
- Refrigeration
- Freezing
- Reheating
- Meal prep considerations
- FAQs: Frequently Asked Questions About Homemade Dill Pickle Recipes
- How do I make homemade dill pickles from scratch?
- What are the best jars for making homemade dill pickles?
- How long do homemade dill pickles last in the fridge?
- Can I make dill pickles without vinegar?
- What cucumbers are best for homemade dill pickles?
- Homemade Dill Pickle Recipes
- Ingredients
- Instructions
- Last Step:
- Notes
- Nutrition
- Did you make this recipe?
Essential Ingredients for Homemade Dill Pickle Recipes
Below is the full ingredient list for this simple dill pickles recipe. I have included every item from the recipe so you can gather everything before you start.
Main ingredients
- 12 to 14 Persian cucumbers or 8 to 10 pickling cucumbers – Persian cucumbers or small pickling cucumbers work best because they stay firm and crisp.
- 4 garlic cloves, halved – Garlic adds a bold, savory flavor that gives the pickles more depth.
- 2 teaspoons mustard seeds – Mustard seeds bring a classic pickle taste and a little extra aroma.
- 2 teaspoons peppercorns – Peppercorns add mild heat and a lightly spicy finish.
- Fresh dill sprigs, a few per jar – Fresh dill is what gives these homemade dill pickle recipes their signature flavor.
- 2 cups water – Water helps balance the brine so it is not too sharp.
- 2 cups white vinegar – White vinegar gives the pickles their tangy base and helps preserve them in the fridge.
- 1/4 cup sugar – Sugar softens the vinegar bite and balances the salt.
- 2 tablespoons salt – Salt seasons the brine and helps create that classic pickle taste.
Special dietary options
- Vegan: This recipe is already vegan since it uses only plant-based ingredients.
- Gluten-free: The recipe is naturally gluten-free as written.
- Low-calorie: Reduce the sugar a little if you want a lighter version with less sweetness.
If you enjoy learning about ingredients, you may also like this simple read on the health benefits of cucumber and why this crisp vegetable works so well in refreshing recipes.
How to Prepare the Perfect Homemade Dill Pickle Recipes: Step-by-Step Guide
This quick refrigerator pickle method is beginner-friendly and gives you crunchy dill pickles without a water bath or long canning process. Before you start, gather your jars, cucumbers, and brine ingredients so everything is ready to go.
First step: prep the cucumbers
Wash the cucumbers well and trim the ends. Slice them lengthwise into quarters if you want spears, or slice them thinly across for chips. Spears take a little longer to pickle, while chips are ready much sooner.
Second step: pack the jars
Divide the cucumbers among 4 8-ounce jars or 2 16-ounce jars. Add the halved garlic cloves, mustard seeds, peppercorns, and fresh dill sprigs to each jar. Try to pack the cucumbers fairly snugly so the brine surrounds them evenly.
Third step: make the brine
Set a medium saucepan over medium heat. Add 2 cups water, 2 cups white vinegar, 1/4 cup sugar, and 2 tablespoons salt. Stir and heat the mixture for about 1 minute, just until the sugar and salt dissolve. You do not need to boil it hard.
Fourth step: cool slightly and pour
Take the pan off the heat and let the brine cool slightly. Then pour it over the cucumbers in the jars, making sure the vegetables are covered as much as possible. Leaving them fully submerged helps the flavor develop evenly.
Fifth step: cool to room temperature
Let the jars sit out until they reach room temperature. This helps prevent sudden temperature changes and gives the brine time to settle around the cucumbers.
Final step: refrigerate and wait
Seal the jars and store them in the fridge. For chips, the pickles are ready in 1 day and keep improving over time. For spears, wait 2 days before tasting, but the best flavor usually shows up around day 5 or 6. That little bit of patience is worth it for homemade crunchy dill pickles that taste bright and fresh.
| Pickle style | Cut style | Ready in | Best flavor |
|---|---|---|---|
| Slices or chips | Thin horizontal slices | 1 day | Improves over time |
| Spears | Lengthwise quarters | 2 days | Day 5 or 6 |
For the crispest results, use Persian cucumbers or small pickling cucumbers and keep everything in airtight jars in the refrigerator.

Dietary Substitutions to Customize Your Homemade Dill Pickle Recipes
Protein and main component alternatives
This recipe does not include a protein, which makes it easy for many kinds of eaters. If you want to pack more vegetables into the same brine, you can add cauliflower florets, carrot sticks, green beans, or sliced radishes. These vegetables pickle well and fit right in with the same dill-garlic flavor.
If you do not have Persian cucumbers, use any small pickling cucumbers you can find. Kirby cucumbers also work well. The most important thing is to choose firm cucumbers that feel fresh and crisp, since soft ones can turn mushy in the jar.
Vegetable, sauce, and seasoning modifications
You can tweak the seasonings in easy homemade dill pickle recipe batches without changing the method. Add crushed red pepper if you like heat, or toss in sliced shallots for a sweeter onion note. If you want a less sweet pickle, reduce the sugar a bit and keep the rest of the brine the same.
You can also play with the dill level. Fresh dill gives the best flavor, but if you are making a batch on a weeknight and only have a little on hand, use what you have and let the garlic and spices do the rest. For another flavorful dinner idea that pairs well with pickled sides, try sweet spicy sticky chicken.
Mastering Homemade Dill Pickle Recipes: Advanced Tips and Variations
Once you make this dill pickle recipe once, it gets even easier the next time. The process is simple, but a few small tricks can make a big difference in texture and flavor.
Pro cooking techniques
- Use crisp cucumbers only. Fresh cucumbers give you the best crunch and the cleanest flavor.
- Cut the blossom ends off the cucumbers before slicing. This helps reduce softening during storage.
- Do not overheat the brine. The goal is just to dissolve the sugar and salt, not to cook the cucumbers.
- Use airtight jars. This helps the pickles stay fresh longer in the fridge.
Flavor variations
If you want to switch things up, try adding crushed red pepper for a little heat or shallots for a mild sweet bite. You can also increase the dill a little if you love that classic herbal flavor. For a bolder batch, add a few extra peppercorns or a little more mustard seed.
Presentation tips
Serve your homemade pickles in a small bowl with a fork or tongs, especially if you are using them as a sandwich side or snack board item. A few fresh dill sprigs on top make the jar look nice when you bring it to the table. They also look great beside burgers, grilled chicken, potato dishes, and casual party spreads.
Make-ahead options
This is one of the best make-ahead recipes because the flavor gets better in the fridge. Make a batch on Sunday and use it all week for lunches, dinners, and snacks. The pickles improve over time, so they are perfect for busy schedules and meal prep.
How to Store Homemade Dill Pickle Recipes: Best Practices
Refrigeration
Store these refrigerator pickles in airtight jars in the fridge. They keep for several weeks, and the flavor usually gets better after the first few days. Since this is a quick refrigerator pickle method, the jars should stay chilled at all times.
Freezing
Freezing is not a good fit for this recipe. Cucumbers lose their crunch after freezing and thawing, so the texture will not be the same. For the best results, stick with refrigerator storage only.
Reheating
There is no reheating step for this recipe. Pickles are meant to be eaten cold or at room temperature, straight from the fridge.
Meal prep considerations
Because the recipe is fast and budget-friendly, it is a nice addition to weekly meal prep. Make a small batch to keep in the refrigerator for sandwiches, grain bowls, wraps, and snack plates. Just remember that these are refrigerator pickles only and should not be processed for long-term keeping.

FAQs: Frequently Asked Questions About Homemade Dill Pickle Recipes
How do I make homemade dill pickles from scratch?
What are the best jars for making homemade dill pickles?
How long do homemade dill pickles last in the fridge?
Can I make dill pickles without vinegar?
What cucumbers are best for homemade dill pickles?

Homemade Dill Pickle Recipes
🥒🌿 Crunchy homemade dill pickles deliver fresh snap, bold tangy spice—probiotic gut-friendly, preservative-free crunch.
❄️ 10-min brine + fridge 2 days: endless customizable jars, peaks flavor week 1!
- Total Time: 2 days 11 minutes
- Yield: 4 (8-oz) jars
Ingredients
– 12 to 14 Persian cucumbers or 8 to 10 pickling cucumbers
– 4 garlic cloves, halved
– 2 teaspoons mustard seeds
– 2 teaspoons peppercorns
– Fresh dill sprigs, a few per jar
– 2 cups water
– 2 cups white vinegar
– 1/4 cup sugar
– 2 tablespoons salt
Instructions
1-First step: prep the cucumbers Wash the cucumbers well and trim the ends. Slice them lengthwise into quarters if you want spears, or slice them thinly across for chips. Spears take a little longer to pickle, while chips are ready much sooner.
2-Second step: pack the jars Divide the cucumbers among 4 8-ounce jars or 2 16-ounce jars. Add the halved garlic cloves, mustard seeds, peppercorns, and fresh dill sprigs to each jar. Try to pack the cucumbers fairly snugly so the brine surrounds them evenly.
3-Third step: make the brine Set a medium saucepan over medium heat. Add 2 cups water, 2 cups white vinegar, 1/4 cup sugar, and 2 tablespoons salt. Stir and heat the mixture for about 1 minute, just until the sugar and salt dissolve. You do not need to boil it hard.
4-Fourth step: cool slightly and pour Take the pan off the heat and let the brine cool slightly. Then pour it over the cucumbers in the jars, making sure the vegetables are covered as much as possible. Leaving them fully submerged helps the flavor develop evenly.
5-Fifth step: cool to room temperature Let the jars sit out until they reach room temperature. This helps prevent sudden temperature changes and gives the brine time to settle around the cucumbers.
6-Final step: refrigerate and wait Seal the jars and store them in the fridge. For chips, the pickles are ready in 1 day and keep improving over time. For spears, wait 2 days before tasting, but the best flavor usually shows up around day 5 or 6. That little bit of patience is worth it for homemade crunchy dill pickles that taste bright and fresh.
Last Step:
Please leave a rating and comment letting us know how you liked this recipe! This helps our business to thrive and continue providing free, high-quality recipes for you.Notes
🥒 Persian/pickling cukes = superior crispness.
🍯 Reduce sugar for extra tang; omit for savory.
❄️ Peaks day 5; fridge-stable 3+ weeks.
- Prep Time: 10 minutes
- Chilling Time: 2 days
- Cook Time: 1 minute
- Category: Condiments
- Method: Quick Pickle
- Cuisine: American
- Diet: Vegan, Gluten-Free, Low-Calorie
Nutrition
- Serving Size: 4-5 spears
- Calories: 5 kcal
- Sugar: 1g
- Sodium: 450mg
- Fat: 0g
- Saturated Fat: 0g
- Unsaturated Fat: 0g
- Trans Fat: 0g
- Carbohydrates: 1g
- Fiber: 0g
- Protein: 0g
- Cholesterol: 0mg


