Why You’ll Love This Easter No-Bake Mini Egg Cheesecake
If your Easter week already feels packed, this Easter No-Bake Mini Egg Cheesecake is the kind of dessert that makes life easier. It gives you a festive, creamy treat without turning on the oven, which is a big win for busy home cooks, parents, students, and anyone who wants a simple dessert that still looks special. The mix of buttery crust, fluffy cheesecake filling, and crunchy chocolate Mini Eggs makes every bite feel like a holiday moment.
- Easy to make: This no bake cheesecake comes together in about 15 minutes, then the fridge does the rest. That makes it a great choice when you need a dessert that fits around work, school runs, or meal prep.
- Rich but balanced: The filling uses full-fat cream cheese, whipped cream, and a little sour cream or Greek yogurt for a smooth texture and a tangy finish. If you want a quick read on cream cheese nutrition, this Healthline guide to cream cheese is helpful.
- Flexible for different needs: You can swap the crust cookies, use Greek yogurt, or even go dairy-free with plant-based products. That makes this Mini Egg cheesecake easy to adapt for different diets and pantry situations.
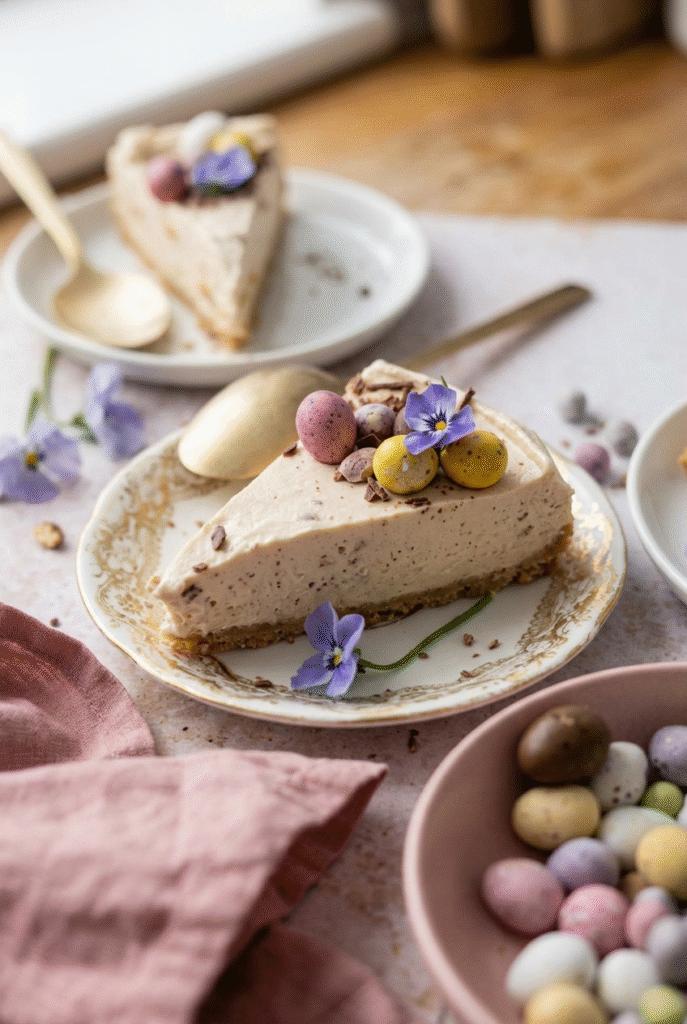
- Festive flavor and texture: Crushed mini eggs add color, crunch, and chocolate flavor, while the creamy filling keeps each slice soft and light. It is the kind of Easter cheesecake that feels cheerful on any dessert table.
If you need a dessert that looks impressive but stays low-stress, this Easter No-Bake Mini Egg Cheesecake is a great one to keep in your back pocket.
It also works well as a make-ahead dessert, which means less rush on the day you serve it. For readers who love easy bakes and no-fuss sweets, this recipe fits right in with other simple treats like easy chocolate muffins for busy days.
Jump to:
- Why You’ll Love This Easter No-Bake Mini Egg Cheesecake
- Essential Ingredients for Easter No-Bake Mini Egg Cheesecake
- Cheesecake Base
- Cheesecake Filling
- Optional Garnish
- Ingredient Notes That Matter
- Special Dietary Options
- How to Prepare the Perfect Easter No-Bake Mini Egg Cheesecake: Step-by-Step Guide
- First Step: Prep the pan and crust
- Second Step: Beat the cream cheese until smooth
- Third Step: Whip the filling until thick and fluffy
- Fourth Step: Fold in the tangy ingredients and Mini Eggs
- Fifth Step: Assemble and chill
- Final Step: Remove, decorate, and serve
- Quick recipe timing
- Dietary Substitutions to Customize Your Easter No-Bake Mini Egg Cheesecake
- Protein and Main Component Alternatives
- Vegetable, Sauce, and Seasoning Modifications
- Mastering Easter No-Bake Mini Egg Cheesecake: Advanced Tips and Variations
- Pro cooking techniques
- Flavor variations
- Presentation tips
- Make-ahead options
- How to Store Easter No-Bake Mini Egg Cheesecake: Best Practices
- FAQs: Frequently Asked Questions About Easter No-Bake Mini Egg Cheesecake
- What can I use instead of digestive biscuits for the crust in no-bake Mini Egg cheesecake?
- Can I make no-bake Mini Egg cheesecake in a 9-inch pan instead of 7 or 8-inch?
- How long does no-bake Mini Egg cheesecake last in the fridge?
- Can I freeze no-bake Mini Egg cheesecake for later?
- Can I make dairy-free no-bake Mini Egg cheesecake?
- Easter No-Bake Mini Egg Cheesecake
- Ingredients
- Instructions
- Last Step:
- Notes
- Nutrition
- Did you make this recipe?
Essential Ingredients for Easter No-Bake Mini Egg Cheesecake
Here is everything you need for this Easter No-Bake Mini Egg Cheesecake, with each ingredient listed clearly so you can prep quickly and avoid missing anything.
Cheesecake Base
- 2 cups graham cracker crumbs, for a classic sweet crust that holds the filling well
- 2 tablespoons granulated sugar, to lightly sweeten the base
- 1/2 cup melted butter, to bind the crumbs and help the crust set
Cheesecake Filling
- 3 blocks of 8-ounce full-fat cream cheese, softened, for a thick and creamy base
- 1 cup well-chilled heavy whipping cream, for a light and fluffy texture
- 1 cup powdered sugar, to sweeten the filling smoothly
- 1 tablespoon instant pudding mix, to help the cheesecake set and stay stable
- 1 teaspoon vanilla extract, for warm flavor
- 1/4 cup sour cream or Greek yogurt, for a slight tang and extra creaminess
- 1 bag of 10-ounce crushed mini eggs, for crunch, color, and Easter flavor
Optional Garnish
- Whipped cream, for a pretty topping
- Mini eggs, for extra festive decoration
- Chocolate shavings, for a richer finish
- Sprinkles, for a fun holiday look
Ingredient Notes That Matter
Use full-fat cream cheese blocks instead of spreadable cream cheese. The block style gives this no bake cheesecake the right body so it slices cleanly. Keep the heavy whipping cream cold until you are ready to whip it, because cold cream whips faster and holds more air. If you want a lighter swap, Greek yogurt works well in place of sour cream.
| Ingredient | What it does | Easy swap |
|---|---|---|
| Graham cracker crumbs | Forms the crust | Digestive biscuits, vanilla wafers, or Oreos |
| Full-fat cream cheese | Creates the creamy filling | Vegan cream cheese |
| Heavy whipping cream | Makes the filling fluffy | Whipped topping or coconut cream |
| Mini eggs | Adds crunch and chocolate flavor | Vegan chocolate eggs or chopped chocolate |
Special Dietary Options
- Vegan: Use vegan cream cheese, plant-based butter, coconut cream, and vegan chocolate eggs.
- Gluten-free: Use gluten-free cookies instead of graham crackers.
- Low-calorie: Use a lighter cream cheese, Greek yogurt, and a reduced-sugar cookie crust if needed.
If you like easy dessert recipes that work for family gatherings, you might also enjoy this simple monkey bread recipe for another crowd-pleasing option.
How to Prepare the Perfect Easter No-Bake Mini Egg Cheesecake: Step-by-Step Guide
This recipe is easy, but a few little details make the difference between a soft filling and a sliceable cheesecake. Take your time with the chilling steps, and you will get a neat, creamy dessert that feels like it came from a bakery.
First Step: Prep the pan and crust
Line the bottom of a 7- or 8-inch springform pan with parchment paper. This helps the cheesecake release cleanly later. In a medium bowl, mix the graham cracker crumbs, granulated sugar, and melted butter until the crumbs look evenly coated. The texture should feel like damp sand.
Press the crumb mixture firmly into the bottom of the pan and a little way up the sides. A flat tool like the bottom of a measuring cup works well here and helps stop the crust from crumbling later. Once the crust is packed in, place the pan in the fridge while you make the filling.
Second Step: Beat the cream cheese until smooth
In a large mixing bowl, beat the full-fat cream cheese until it looks creamy and smooth. Scrape down the sides of the bowl as needed so no lumps stay behind. Starting with softened cream cheese helps a lot here, because cold blocks can leave bits that are hard to blend out.
This step is what gives the Easter No-Bake Mini Egg Cheesecake its rich, velvety texture. If the cream cheese is smooth at this point, the rest of the filling will come together more easily. For busy cooks, this is also where a stand mixer or hand mixer can save a little time and arm work.
Third Step: Whip the filling until thick and fluffy
Add the well-chilled heavy whipping cream, powdered sugar, instant pudding mix, and vanilla extract. Beat everything on high speed for about 4 minutes, or until the mixture looks thick, fluffy, and holds its shape. This is the stage that gives the cheesecake its light texture.
If you want to know more about why heavy cream behaves this way in recipes, this Healthline article on heavy whipping cream gives a helpful overview. Cold cream whips better, so keep it in the fridge until the moment you need it. If you are using the shortcut with whipped topping, you can skip this whipping step and move straight to folding.
Fourth Step: Fold in the tangy ingredients and Mini Eggs
Gently fold in the sour cream or Greek yogurt by hand. Then add the crushed mini eggs and fold them in just until they are spread through the filling. Try not to overmix at this stage, because you want to keep the airy texture you built during whipping.
Crushing the mini eggs in a sealed bag with a rolling pin gives you the best texture. Some pieces can be small and sandy, while others stay a little larger for crunch. That mix makes each bite of this Mini Egg cheesecake more interesting and gives the filling a fun speckled look.
Fifth Step: Assemble and chill
Spoon the filling onto the chilled crust and spread it evenly with a spatula. Smooth the top if you want a neat finish, or leave a few soft swirls for a more homemade look. Cover the pan and refrigerate the cheesecake for at least 6 hours, though overnight is even better.
This chilling time is not just a waiting game. It helps the filling firm up so the cheesecake can be sliced cleanly. If you are making this for a holiday meal, it is smart to prep it the day before so dessert is ready when you are.
Final Step: Remove, decorate, and serve
Once the cheesecake is fully chilled, carefully remove the outer ring of the springform pan. Lift off the parchment paper if needed, then move the cheesecake to a serving plate. Add whipped cream, extra mini eggs, chocolate shavings, or sprinkles if you want a more festive finish.
For the cleanest slices, run a knife under hot water, wipe it dry, and cut. Repeat between slices if needed. Serve the cheesecake chilled for the best texture and flavor. Each slice should feel creamy, rich, and a little crunchy from the mini eggs.
Quick recipe timing
- Prep time: 15 minutes
- Chilling time: 6 hours
- Total time: 6 hours 15 minutes
That makes this no bake cheesecake a smart choice for holiday planning, potlucks, and make-ahead dessert trays. It also pairs nicely with a brunch menu if you are already making other easy dishes.

Dietary Substitutions to Customize Your Easter No-Bake Mini Egg Cheesecake
Protein and Main Component Alternatives
If you need to adjust this Easter cheesecake for dietary needs or ingredient availability, there are several easy swaps that still keep the dessert creamy and sliceable. For a dairy-free version, use 600g vegan cream cheese, 300ml chilled coconut cream whipped until stiff, and 100g melted plant-based butter for the crust. If you want a lighter filling, Greek yogurt can stand in for sour cream, and it gives a nice tang too.
If you do not have Mini Eggs, try chopped chocolate candy, chocolate chips, or another coated chocolate egg. For the crust, you can use graham crackers, vanilla wafers, chocolate digestives, or Oreos. Just keep the cookie-to-butter ratio balanced so the base still holds together. This is especially handy for busy families who need to work with what is already in the pantry.
Vegetable, Sauce, and Seasoning Modifications
This is a dessert recipe, so there are no vegetables to swap, but you can still change the flavor profile in simple ways. Add a little citrus zest for brightness, use chocolate cookie crumbs for a deeper flavor, or fold in finely chopped white chocolate for extra sweetness. If you want a stronger vanilla note, add a touch more extract, but do not overdo it.
For the shortcut version, you can replace the heavy cream, powdered sugar, pudding mix, and vanilla with a 12-ounce tub of thawed whipped topping. This makes the recipe even faster, which is useful for students, working professionals, or anyone trying to get dessert done quickly. If you are serving people with dairy issues, use dairy-free cream cheese and a vegan egg-shaped candy topping instead of Mini Eggs.
Small swaps can make a big difference, but the key is keeping the filling thick enough to set well in the fridge.
Mastering Easter No-Bake Mini Egg Cheesecake: Advanced Tips and Variations
Pro cooking techniques
The best Easter No-Bake Mini Egg Cheesecake starts with cold ingredients where needed and properly softened cream cheese. Beat the filling long enough, about 3 to 4 minutes on high, so it becomes fluffy instead of dense. Press the crust firmly with steady pressure so it does not fall apart when you slice it.
Do not skip the full chill time. Six hours is the minimum, but overnight gives you the neatest slices and the best texture. If your kitchen runs warm, keep the bowl and beaters cool before whipping the cream.
Flavor variations
You can change the flavor in easy ways without changing the method. Try a chocolate crust, swap in a little orange zest for a springy citrus note, or mix crushed chocolate sandwich cookies into the base. If you like a stronger chocolate taste, scatter chocolate shavings over the top before serving.
For a fun party version, make the recipe as no bake mini cheesecakes in small cups or muffin liners. That turns the same filling into portioned treats that work well for school events, Easter brunch, or buffet tables.
Presentation tips
A little garnish goes a long way with this Easter dessert. Pipe whipped cream around the edge, pile a few mini eggs in the center, and add a pinch of sprinkles for color. If you want a neat bakery-style look, smooth the top with an offset spatula before chilling.
For a prettier serving plate, wipe away any crumbs after transferring the cheesecake. A simple white plate or cake stand helps the pastel colors stand out.
Make-ahead options
This is one of the best make-ahead desserts for spring. You can make the crust a day ahead, store it in the fridge, and add the filling later. You can also make the full cheesecake a day or two ahead of time, then add the toppings right before serving.
If you are planning a bigger Easter menu, a dessert like this saves time and mental energy. That leaves more room for the main meal and less last-minute rushing.
How to Store Easter No-Bake Mini Egg Cheesecake: Best Practices
Store your Easter No-Bake Mini Egg Cheesecake in the fridge, covered well with plastic wrap or in an airtight container. It tastes best within 2 days, especially because the candy shells can start to bleed color into the filling after that. Keep it cold until serving and do not leave it out for more than 2 hours.
If you want to freeze it, wrap the fully set cheesecake tightly in plastic wrap and foil, then freeze for up to 1 month. For slices, freeze them first on a tray, then transfer them to a freezer bag once solid. Thaw overnight in the fridge before serving.
There is no reheating needed for this no bake cheesecake. It is meant to be served chilled, and warming it will soften the texture too much. If you are making it for meal prep, portion slices into separate containers so grabbing dessert later is easy.

FAQs: Frequently Asked Questions About Easter No-Bake Mini Egg Cheesecake
What can I use instead of digestive biscuits for the crust in no-bake Mini Egg cheesecake?
Can I make no-bake Mini Egg cheesecake in a 9-inch pan instead of 7 or 8-inch?
How long does no-bake Mini Egg cheesecake last in the fridge?
Can I freeze no-bake Mini Egg cheesecake for later?
Can I make dairy-free no-bake Mini Egg cheesecake?

Easter No-Bake Mini Egg Cheesecake
🍰 Creamy no-bake cheesecakes bursting with crushed mini eggs offer indulgent chocolate-crunch texture without oven hassle.
🥚 Festive Easter showstopper that’s make-ahead, sliceable, and perfect for holiday gatherings or sweet cravings!
- Total Time: 6 hours 15 minutes
- Yield: 8 servings
Ingredients
– 2 cups graham cracker crumbs for a classic sweet crust that holds the filling well
– 2 tablespoons granulated sugar to lightly sweeten the base
– 1/2 cup melted butter to bind the crumbs and help the crust set
– 3 blocks of 8-ounce full-fat cream cheese, softened for a thick and creamy base
– 1 cup well-chilled heavy whipping cream for a light and fluffy texture
– 1 cup powdered sugar to sweeten the filling smoothly
– 1 tablespoon instant pudding mix to help the cheesecake set and stay stable
– 1 teaspoon vanilla extract for warm flavor
– 1/4 cup sour cream or Greek yogurt for a slight tang and extra creaminess
– 1 bag of 10-ounce crushed mini eggs for crunch, color, and Easter flavor
– Whipped cream for a pretty topping
– Mini eggs for extra festive decoration
– Chocolate shavings for a richer finish
– Sprinkles for a fun holiday look
Instructions
1-First Step: Prep the pan and crust. Line the bottom of a 7- or 8-inch springform pan with parchment paper. In a medium bowl, mix the graham cracker crumbs, granulated sugar, and melted butter until the crumbs look evenly coated. Press the crumb mixture firmly into the bottom of the pan and a little way up the sides. Once the crust is packed in, place the pan in the fridge while you make the filling.
2-Second Step: Beat the cream cheese until smooth. In a large mixing bowl, beat the full-fat cream cheese until it looks creamy and smooth. Scrape down the sides of the bowl as needed so no lumps stay behind.
3-Third Step: Whip the filling until thick and fluffy. Add the well-chilled heavy whipping cream, powdered sugar, instant pudding mix, and vanilla extract. Beat everything on high speed for about 4 minutes, or until the mixture looks thick, fluffy, and holds its shape.
4-Fourth Step: Fold in the tangy ingredients and Mini Eggs. Gently fold in the sour cream or Greek yogurt by hand. Then add the crushed mini eggs and fold them in just until they are spread through the filling.
5-Fifth Step: Assemble and chill. Spoon the filling onto the chilled crust and spread it evenly with a spatula. Smooth the top if you want a neat finish, or leave a few soft swirls for a more homemade look. Cover the pan and refrigerate the cheesecake for at least 6 hours, though overnight is even better.
6-Final Step: Remove, decorate, and serve. Once the cheesecake is fully chilled, carefully remove the outer ring of the springform pan. Lift off the parchment paper if needed, then move the cheesecake to a serving plate. Add whipped cream, extra mini eggs, chocolate shavings, or sprinkles if you want a more festive finish. For the cleanest slices, run a knife under hot water, wipe it dry, and cut. Repeat between slices if needed. Serve the cheesecake chilled for the best texture and flavor.
Last Step:
Please leave a rating and comment letting us know how you liked this recipe! This helps our business to thrive and continue providing free, high-quality recipes for you.Notes
🧀 Use full-fat cream cheese blocks (not tubs) for stable, sliceable texture.
❄️ Keep heavy cream ice-cold and beat on high for airy, mousse-like filling.
🥄 Press crust firmly but evenly; chill fully before adding filling to prevent crumbling.
- Prep Time: 15 minutes
- Chilling Time: 6 hours
- Category: Desserts
- Method: No Bake
- Cuisine: American
- Diet: Vegetarian
Nutrition
- Serving Size: 1 slice
- Calories: 521 kcal
- Sugar: 42g
- Sodium: 699mg
- Fat: 28g
- Saturated Fat: 17g
- Unsaturated Fat: 11g
- Trans Fat: 0.4g
- Carbohydrates: 54g
- Fiber: 1g
- Protein: 14g
- Cholesterol: 67mg


