Why You’ll Love This Disneyland Grilled Cheese
If you are craving a Disneyland Grilled Cheese that feels fun, cozy, and totally doable on a busy weeknight, this Toy Story Grilled Cheese Sandwich Recipe is such a win. It brings together creamy cheese, garlicky spread, and golden toasted bread in a way that tastes special without asking for a lot of time in the kitchen. With just 10 minutes of prep and 16 minutes of cooking, you can have a melty sandwich that feels like a treat for kids and adults alike.
- Easy to make: The steps are simple, and the whole recipe comes together in about 26 minutes. That makes this Disneyland Grilled Cheese a great pick for busy parents, students, and working professionals who want something comforting fast.
- Comforting and satisfying: Each serving delivers rich flavor and plenty of protein, so it is filling enough for lunch or dinner. The mix of cheddar, provolone, cream cheese, and garlic spread gives this grilled sandwich a cozy, diner-style feel.
- Flexible for different needs: You can swap the bread, adjust the cheese, or use lighter options if needed. That makes this grilled cheese recipe easy to tailor for different diets and preferences.
- Big flavor in every bite: The creamy cheese spread and garlic mayo layer make this more exciting than a basic grilled cheese. It has that bold, melty flavor people love in a Disneyland Grilled Cheese.
If you love gooey cheese and crisp golden bread, this recipe is the kind of sandwich that disappears fast at the table.
For more cozy recipe ideas, you can also check out more easy recipes on Recipes Valentina and keep your meal rotation simple and fun.
According to WebMD’s guide to the health benefits of cheese, cheese can offer protein and important nutrients when eaten in sensible portions, which makes this sandwich a tasty comfort food option worth enjoying now and then.
Jump to:
- Why You’ll Love This Disneyland Grilled Cheese
- Essential Ingredients for Disneyland Grilled Cheese
- Cream Cheese Spread
- Garlic Spread
- Sandwich
- Special Dietary Options
- How to Prepare the Perfect Disneyland Grilled Cheese: Step-by-Step Guide
- First Step: Make the cream cheese spread
- Second Step: Mix the garlic spread
- Third Step: Set up the bread and cheese
- Fourth Step: Add the cream cheese spread
- Fifth Step: Build the sandwiches
- Sixth Step: Coat the outside with garlic spread
- Seventh Step: Heat the pan and cook
- Eighth Step: Serve while hot
- Quick timing guide
- Dietary Substitutions to Customize Your Disneyland Grilled Cheese
- Protein and Main Component Alternatives
- Vegetable, Sauce, and Seasoning Modifications
- Mastering Disneyland Grilled Cheese: Advanced Tips and Variations
- Pro cooking techniques
- Flavor variations
- Presentation tips
- Make-ahead options
- How to Store Disneyland Grilled Cheese: Best Practices
- FAQs: Frequently Asked Questions About Disneyland Grilled Cheese
- Disneyland Grilled Cheese
- Ingredients
- Instructions
- Last Step:
- Notes
- Nutrition
- Did you make this recipe?
Essential Ingredients for Disneyland Grilled Cheese
This Disneyland Grilled Cheese uses two flavorful spreads plus the sandwich build itself. Every ingredient matters because the creamy filling and garlic butter style coating are what make this recipe taste so rich and satisfying.
Cream Cheese Spread
- 1/2 cup cream cheese – adds smooth texture and helps create that rich, creamy center.
- 1/2 cup shredded Double Gloucester or sharp cheddar cheese – brings sharp flavor and extra meltiness.
- 2 tablespoons heavy cream – loosens the spread so it blends easily in the food processor.
- 1/4 teaspoon coarse salt – balances the dairy flavors and boosts taste.
Garlic Spread
- 1 cup mayonnaise – creates the golden, crisp outer layer when grilled.
- 1 1/2 teaspoons minced garlic – adds bold savory flavor.
- 1/2 teaspoon coarse salt – seasons the garlic spread so it does not taste flat.
Sandwich
- 8 slices artisan bread – sturdy enough to hold the cheese and toast beautifully.
- 8 medium cheddar cheese slices – give the sandwich a classic sharp cheese flavor.
- 8 provolone cheese slices – melt smoothly and help create that stretchy, gooey bite.
| Ingredient Group | What It Does |
|---|---|
| Cream cheese spread | Makes the filling smooth, creamy, and rich |
| Garlic spread | Helps the bread brown and adds savory flavor |
| Cheddar and provolone | Create layers of flavor and a great melt |
| Artisan bread | Gives structure and a crisp toasted finish |
Special Dietary Options
- Vegan: Use dairy-free cream cheese, vegan cheddar, vegan provolone, and egg-free vegan mayonnaise with plant-based bread.
- Gluten-free: Swap in your favorite gluten-free sandwich bread and check that all packaged cheeses and mayo are certified gluten-free.
- Low-calorie: Use reduced-fat cheese, light mayo, and thinner bread slices to bring down the richness.
If you like checking nutrition before cooking, this grilled cheese calorie reference can give you a helpful starting point for planning your meal.
How to Prepare the Perfect Disneyland Grilled Cheese: Step-by-Step Guide
First Step: Make the cream cheese spread
Start by placing the 1/2 cup cream cheese, 1/2 cup shredded Double Gloucester or sharp cheddar cheese, 2 tablespoons heavy cream, and 1/4 teaspoon coarse salt into a food processor. Blend until the mixture is smooth and creamy. This step gives the sandwich its rich center, so take a few seconds to scrape down the bowl if needed.
Second Step: Mix the garlic spread
In a separate bowl, combine 1 cup mayonnaise, 1 1/2 teaspoons minced garlic, and 1/2 teaspoon coarse salt. Stir well until the garlic is evenly mixed through the mayo. The result should be thick, punchy, and ready to spread on the bread.
Third Step: Set up the bread and cheese
Lay out 8 slices artisan bread on a clean work surface. On 4 slices, place 2 medium cheddar cheese slices each. On the other 4 slices, place 2 provolone cheese slices each. This gives you a balanced mix of cheeses and makes assembly much easier.
If your cheese slices are larger than the bread, use one slice of each cheese per sandwich and tear it into two pieces. That little trick helps the cheese fit neatly without hanging far over the edges.
Fourth Step: Add the cream cheese spread
Divide the cream cheese spread evenly among the provolone halves. Spread it gently so it sits on top of the provolone layer. This creamy layer helps create that soft, melty middle people love in a Disneyland Grilled Cheese.
Fifth Step: Build the sandwiches
Place the cheddar slices on top of the cream cheese spread so each sandwich has one cheddar side and one provolone side. Then close each sandwich with the remaining bread slices. Press lightly so everything sticks together without squeezing out the filling.
Sixth Step: Coat the outside with garlic spread
Spread the garlic mayo mixture on each bread slice, covering the outside of every sandwich. Make sure the layer is even from edge to edge. This is what helps the bread turn golden and crisp while adding savory flavor.
Seventh Step: Heat the pan and cook
Set a skillet or non-stick pan over medium heat. A heavy-duty skillet may cause sticking, so a griddle or non-stick pan is a safer choice here. Once the pan is warm, place the sandwiches in the skillet and cook for about 2 minutes per side.
Flip carefully using a wide spatula. The goal is a deep golden crust and fully melted cheese. If your heat is too high, the bread may brown too fast before the cheese softens, so keep the burner at medium.
Eighth Step: Serve while hot
Once both sides are golden brown and the cheese is melted, move the sandwiches to a cutting board. Let them rest for a minute so the filling settles a bit. Slice and serve right away while the cheese is still gooey and warm.
A great grilled cheese is all about balance: crisp bread outside, soft melted cheese inside, and just enough garlic flavor to make every bite pop.
Quick timing guide
- Prep time: 10 minutes
- Cook time: 16 minutes
- Total time: 26 minutes

Dietary Substitutions to Customize Your Disneyland Grilled Cheese
Protein and Main Component Alternatives
Since this is a cheese-forward sandwich, the main changes usually come from the bread, cheese, and spread. For a lighter version, use reduced-fat cheddar and provolone, plus light mayonnaise in the garlic spread. You can also swap in a plant-based cream cheese and vegan cheese slices if you want a dairy-free version that still feels rich and melty.
For gluten-free eaters, the easiest switch is gluten-free artisan-style bread. Just make sure it is sturdy enough to hold the filling without falling apart in the skillet. If you want extra protein, add a thin layer of sliced turkey or cooked chicken, though that will change the classic grilled cheese feel a bit.
Vegetable, Sauce, and Seasoning Modifications
Want to add more color or flavor? Try thin tomato slices, caramelized onions, sautéed mushrooms, or baby spinach. Keep the add-ins light so the bread still browns well. You can also mix a little black pepper, smoked paprika, or dried parsley into the garlic spread for a small flavor boost.
For people who like less salt, cut back slightly on the coarse salt in both spreads and choose a lower-sodium cheese if possible. If you are making this for kids, you can also keep the garlic a little lighter and let everyone add extra dipping sauce on the side.
Mastering Disneyland Grilled Cheese: Advanced Tips and Variations
Pro cooking techniques
For the best results, let the bread come to room temperature before assembling. That helps the sandwich brown more evenly. Also, keep the heat at medium so the outside turns crisp at the same time the cheese melts. If your pan runs hot, lower the flame a bit after the first sandwich and keep an eye on the color.
Using a non-stick pan or griddle can make flipping easier and cut down on sticking. A thin spatula also helps keep the sandwich intact. If you want extra crunch, press the sandwich gently with the spatula during the first 30 seconds of cooking.
Flavor variations
You can switch up the cheese blend depending on what you have at home. Mild cheddar gives a softer flavor, while sharp cheddar adds more bite. Swiss, mozzarella, or fontina can also work well with provolone if you want a different melt. For a bolder taste, add a pinch of garlic powder or a small swipe of Dijon mustard inside the sandwich.
Presentation tips
Slice the sandwich on the diagonal for that classic diner look. Serve it with tomato soup, pickles, or a simple side salad. A little chopped parsley on the plate can make the meal feel special without adding extra work.
Make-ahead options
You can mix both spreads ahead of time and store them in the fridge for easy assembly later. The cream cheese spread can be made a day or two in advance, and the garlic spread keeps well for quick lunches. That makes this Disneyland Grilled Cheese a smart option for meal planning when your week gets busy.
How to Store Disneyland Grilled Cheese: Best Practices
If you have leftovers, let the sandwiches cool fully before storing. Wrap each one in foil or place them in an airtight container. Refrigerate for up to 3 days for the best texture and flavor.
Freezing is possible, but the bread may soften a bit after reheating. To freeze, wrap each cooled sandwich tightly and place it in a freezer-safe bag. Use within 1 month for the best taste.
To reheat, use a skillet over low to medium heat so the bread can crisp back up. You can also use an air fryer or toaster oven. Avoid the microwave if possible, since it tends to make the bread soggy and the cheese uneven.
For meal prep, store the spreads separately and assemble the sandwiches fresh when you are ready to cook. That keeps the bread from getting soggy and helps the grilled cheese taste more like it just came off the pan.

FAQs: Frequently Asked Questions About Disneyland Grilled Cheese
Print
Disneyland Grilled Cheese
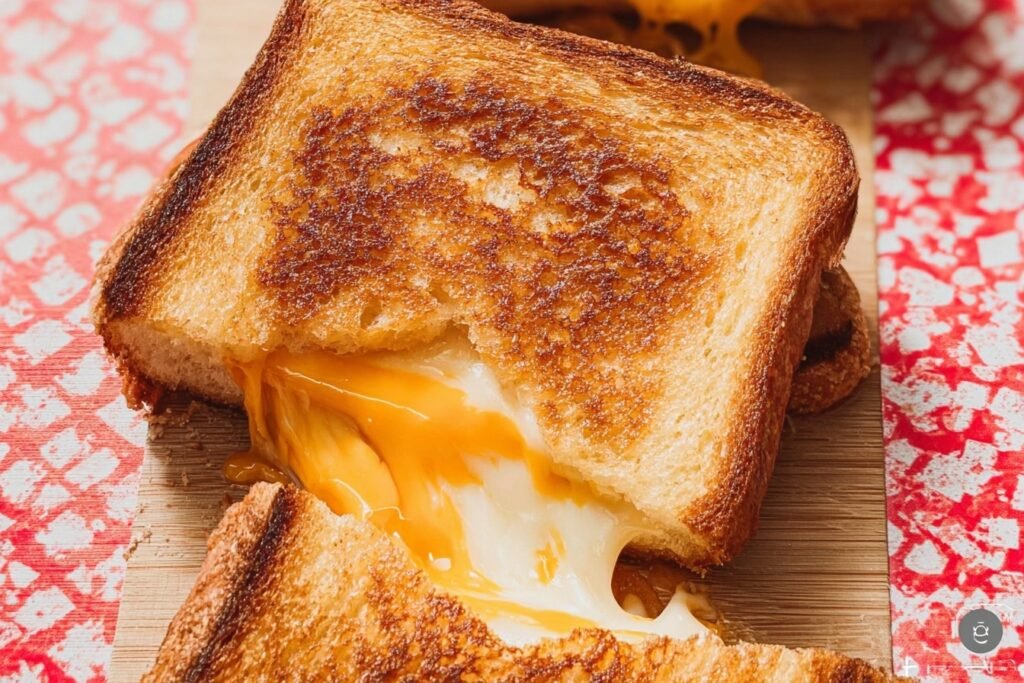
🥪 Savor the playful Toy Story magic in this gooey four-cheese grilled cheese sandwich – perfect for kids’ movie nights and quick comfort food!
🧀 Layers of cheddar, provolone, and creamy spreads deliver ultimate melty bliss with garlic butter crunch – try it for a fun family favorite!
- Total Time: 26 minutes
- Yield: 8 servings
Ingredients
– 1/2 cup cream cheese for smooth texture and rich, creamy center
– 1/2 cup shredded Double Gloucester or sharp cheddar cheese for sharp flavor and extra meltiness
– 2 tablespoons heavy cream for loosening the spread
– 1/4 teaspoon coarse salt for balancing dairy flavors
– 1 cup mayonnaise for golden, crisp outer layer
– 1 1/2 teaspoons minced garlic for bold savory flavor
– 1/2 teaspoon coarse salt for seasoning the garlic spread
– 8 slices artisan bread for sturdy hold and beautiful toast
– 8 medium cheddar cheese slices for classic sharp cheese flavor
– 8 provolone cheese slices for smooth melt and stretchy, gooey bite
Instructions
1-First Step: Make the cream cheese spread Start by placing the 1/2 cup cream cheese, 1/2 cup shredded Double Gloucester or sharp cheddar cheese, 2 tablespoons heavy cream, and 1/4 teaspoon coarse salt into a food processor. Blend until the mixture is smooth and creamy. This step gives the sandwich its rich center, so take a few seconds to scrape down the bowl if needed.
2-Second Step: Mix the garlic spread In a separate bowl, combine 1 cup mayonnaise, 1 1/2 teaspoons minced garlic, and 1/2 teaspoon coarse salt. Stir well until the garlic is evenly mixed through the mayo. The result should be thick, punchy, and ready to spread on the bread.
3-Third Step: Set up the bread and cheese Lay out 8 slices artisan bread on a clean work surface. On 4 slices, place 2 medium cheddar cheese slices each. On the other 4 slices, place 2 provolone cheese slices each. This gives you a balanced mix of cheeses and makes assembly much easier. If your cheese slices are larger than the bread, use one slice of each cheese per sandwich and tear it into two pieces. That little trick helps the cheese fit neatly without hanging far over the edges.
4-Fourth Step: Add the cream cheese spread Divide the cream cheese spread evenly among the provolone halves. Spread it gently so it sits on top of the provolone layer. This creamy layer helps create that soft, melty middle people love in a Disneyland Grilled Cheese.
5-Fifth Step: Build the sandwiches Place the cheddar slices on top of the cream cheese spread so each sandwich has one cheddar side and one provolone side. Then close each sandwich with the remaining bread slices. Press lightly so everything sticks together without squeezing out the filling.
6-Sixth Step: Coat the outside with garlic spread Spread the garlic mayo mixture on each bread slice, covering the outside of every sandwich. Make sure the layer is even from edge to edge. This is what helps the bread turn golden and crisp while adding savory flavor.
7-Seventh Step: Heat the pan and cook Set a skillet or non-stick pan over medium heat. A heavy-duty skillet may cause sticking, so a griddle or non-stick pan is a safer choice here. Once the pan is warm, place the sandwiches in the skillet and cook for about 2 minutes per side. Flip carefully using a wide spatula. The goal is a deep golden crust and fully melted cheese. If your heat is too high, the bread may brown too fast before the cheese softens, so keep the burner at medium.
8-Eighth Step: Serve while hot Once both sides are golden brown and the cheese is melted, move the sandwiches to a cutting board. Let them rest for a minute so the filling settles a bit. Slice and serve right away while the cheese is still gooey and warm.
Last Step:
Please leave a rating and comment letting us know how you liked this recipe! This helps our business to thrive and continue providing free, high-quality recipes for you.Notes
🧀 If cheese slices are larger than the bread, use one slice of each cheese per sandwich and tear into two pieces for better fit.
🔥 Prevent sticking by using a non-stick pan or griddle instead of a heavy-duty skillet.
🥪 For extra fun, cut the sandwiches into Toy Story-themed shapes like stars or rocket ships to delight kids!
- Prep Time: 10 minutes
- Cook Time: 16 minutes
- Category: Sandwich
- Method: Stovetop
- Cuisine: American
- Diet: Vegetarian
Nutrition
- Serving Size: 1 serving
- Calories: 663 calories
- Sugar: 3g
- Sodium: 1185mg
- Fat: 54g
- Saturated Fat: 23g
- Unsaturated Fat: 28g
- Trans Fat: 1g
- Carbohydrates: 19g
- Fiber: 1g
- Protein: 25g
- Cholesterol: 106mg


