Why You’ll Love These Deviled Brownies
Deviled Brownies are a fun, party-ready treat that turns a simple box mix into something playful and memorable. They look like deviled eggs, taste rich and chocolatey, and come together with very little fuss. If you need a dessert that feels special without keeping you in the kitchen all afternoon, this recipe fits the bill.
- Easy to make: You only need a few pantry staples, one bowl for the batter, and about 20 minutes of prep time. The brownies bake in about 22 minutes at 350°F, so you can go from mixing to serving in under an hour.
- Great for sharing: The recipe makes 24 servings, which is ideal for potlucks, school events, family gatherings, and holiday trays.
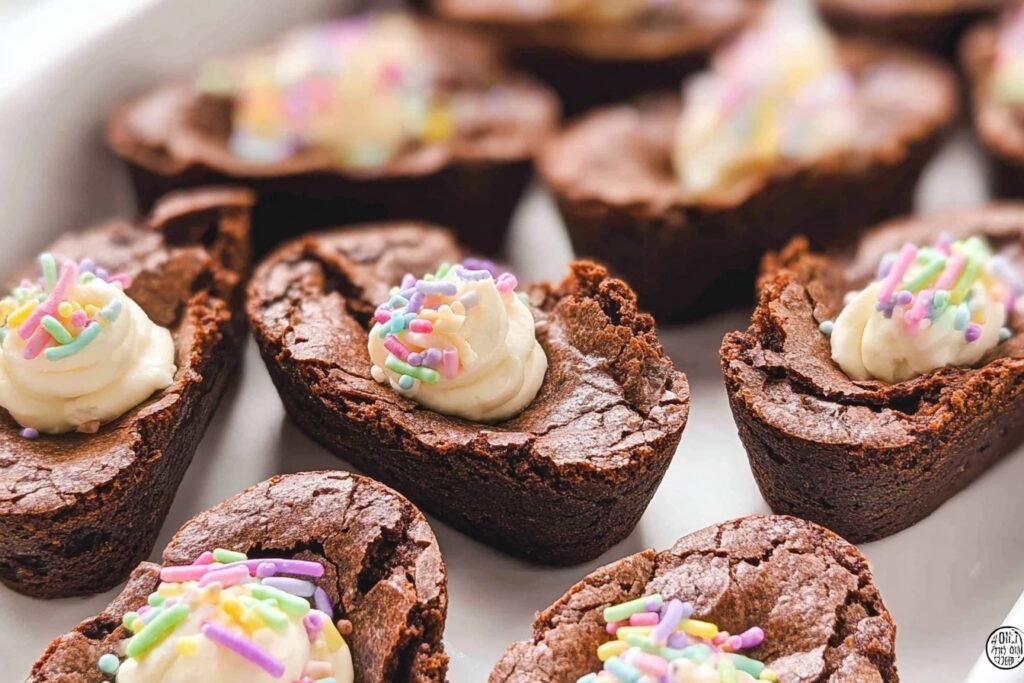
- Fun presentation: The egg-shaped molds, creamy filling, and festive sprinkles make these brownies stand out on a deviled egg tray.
- Flexible for many tastes: You can use homemade frosting, store-bought frosting, or tint the filling with food coloring to match different holidays and themes.
These brownies are the kind of dessert that gets people smiling before they even take a bite.
If you enjoy easy desserts with a playful twist, you may also like simple homemade treats from Recipes Valentina for more family-friendly baking ideas.
Chocolate lovers can also read about the benefits of having a healthy relationship with chocolate and enjoy sweet treats in a balanced way.
Jump to:
- Why You’ll Love These Deviled Brownies
- Essential Ingredients for Deviled Brownies
- Brownie base, frosting, and garnish
- Special dietary options
- How to Prepare the Perfect Deviled Brownies: Step-by-Step Guide
- First Step: Get the oven and pan ready
- Second Step: Mix the brownie batter
- Third Step: Fill the molds
- Fourth Step: Bake until just set
- Fifth Step: Create the center cavity while warm
- Sixth Step: Cool completely
- Seventh Step: Make the frosting
- Eighth Step: Pipe and decorate
- Final Step: Serve and enjoy
- Protein and Main Component Alternatives
- Brownie mix alternatives
- Frosting alternatives
- Egg and binder swaps
- Vegetable, Sauce, and Seasoning Modifications
- Flavor changes for the frosting
- Decoration ideas for the top
- Pan and shape options
- Mastering Deviled Brownies: Advanced Tips and Variations
- Pro cooking techniques
- Flavor variations
- Presentation tips
- Make-ahead options
- How to Store Deviled Brownies: Best Practices
- Refrigeration
- Freezing
- Reheating
- Meal prep considerations
- FAQs: Frequently Asked Questions About Deviled Brownies
- What are deviled brownies?
- How do you make deviled brownies at home?
- What’s the difference between deviled brownies and regular brownies?
- Can kids eat deviled brownies or are they too spicy?
- How should I store deviled brownies and how long do they last?
- Deviled Brownies
- Ingredients
- Instructions
- Last Step:
- Notes
- Nutrition
- Did you make this recipe?
Essential Ingredients for Deviled Brownies
Brownie base, frosting, and garnish
Here is the full ingredient list for this egg-shaped brownie recipe. Every item is included with the exact measurement so you can prep quickly and avoid guessing.
- 18.3 ounce box fudgy brownie mix – A fudgy mix helps the brownies hold their shape well in silicone molds and gives them a rich, chewy texture.
- 2 large eggs – Eggs help bind the batter and add structure.
- 2/3 cup vegetable oil – This keeps the brownies moist and tender.
- 3 tablespoons water – Water helps the batter mix smoothly and stay balanced.
- 8 ounces softened cream cheese – This creates the creamy filling that goes into the center cavity.
- 1/2 cup powdered sugar – Adds sweetness and helps the frosting pipe neatly.
- 1 teaspoon vanilla – Brings warm flavor to the frosting.
- 1 to 2 teaspoons festive sprinkles – Adds color and a cheerful finish.
Special dietary options
- Vegan: Use a vegan brownie mix, replace eggs with a plant-based egg substitute, swap in dairy-free cream cheese, and choose vegan sprinkles.
- Gluten-free: Use a certified gluten-free brownie mix and check that your sprinkles and powdered sugar are gluten-free.
- Low-calorie: Use a lighter brownie mix, reduced-fat cream cheese, and a smaller amount of sprinkles for a lighter finish.
For another easy dessert idea, check out more quick recipes at Recipes Valentina when you want simple sweets that do not take much time.
| Ingredient | Amount | Purpose |
|---|---|---|
| Fudgy brownie mix | 18.3 ounce box | Forms the rich chocolate base |
| Eggs | 2 large | Bind and structure the batter |
| Vegetable oil | 2/3 cup | Adds moisture and softness |
| Water | 3 tablespoons | Helps mix the batter |
| Cream cheese | 8 ounces, softened | Makes the creamy filling |
| Powdered sugar | 1/2 cup | Sweetens and smooths the frosting |
| Vanilla | 1 teaspoon | Adds warm flavor |
| Festive sprinkles | 1 to 2 teaspoons | Provides color and decoration |
How to Prepare the Perfect Deviled Brownies: Step-by-Step Guide
First Step: Get the oven and pan ready
Start by preheating your oven according to the brownie mix package instructions. The recipe works well at 350°F for about 22 minutes, but it is smart to follow the box if your mix gives a slightly different temperature or timing. Spray your egg-shaped silicone molds with nonstick spray so the brownies release easily after baking.
Set all your ingredients on the counter before you begin. This makes the process smoother and helps you move from one step to the next without stopping. Since this is a molded dessert, having everything measured ahead of time is especially helpful.
Second Step: Mix the brownie batter
Prepare the brownie batter using the ingredients from the box: the 18.3 ounce box fudgy brownie mix, 2 large eggs, 2/3 cup vegetable oil, and 3 tablespoons water. Stir until the batter looks smooth and evenly combined. Try not to overmix, since that can make brownies tougher.
If you like a richer result, use a fudgy mix rather than a cakier one. A fudgy base holds its shape better in the molds and gives you that dense chocolate texture that works so well for this recipe.
Third Step: Fill the molds
Spoon the batter into each silicone egg cavity, filling each one about 3/4 full. Leave a little space at the top so the brownies can rise without spilling over. If you are using a standard brownie pan instead of molds, bake the batter in a greased pan and cut out egg shapes once cooled.
For best results, tap the mold lightly on the counter to release any trapped air bubbles. This helps the brownies bake evenly and keeps the shape neat.
Fourth Step: Bake until just set
Place the molds in the oven and bake for approximately 22 minutes at 350°F, or according to the package directions. The edges should look set, and a toothpick inserted into the center should come out with a few moist crumbs. You want them cooked through but still soft enough to stay fudgy.
Keep in mind that baking time can vary based on your mold size and oven. If your brownies are slightly underbaked, they may sink too much when you press the center. If they are overbaked, they can dry out and crack.
Fifth Step: Create the center cavity while warm
When the brownies come out of the oven, let them rest just long enough to handle safely. Then use the back of a spoon to gently press a small cavity into the center of each warm brownie. This step should happen while the brownies are still warm so the center forms without cracking the edges.
Do not press too deeply. You only need enough room to hold the frosting filling later. If the spoon sticks, lightly grease it before pressing.
Sixth Step: Cool completely
Let the brownies cool fully before you add the frosting. This part matters because warm brownies can melt the filling and make the centers slide out of place. Set them on a wire rack if possible, and give them plenty of time to cool to room temperature.
If you are in a hurry, you can place them in the refrigerator for a short time after they reach room temperature. Still, full cooling on the counter gives the best texture.
Seventh Step: Make the frosting
Beat together 8 ounces softened cream cheese, 1/2 cup powdered sugar, and 1 teaspoon vanilla until the mixture is smooth and fluffy. You can use a hand mixer or stand mixer for this step. The frosting should be soft enough to pipe but thick enough to hold its shape.
If you want a colorful version, add a few drops of food coloring. Pastel pink, yellow, or green works nicely for spring gatherings, while red and green look great for holidays.
Eighth Step: Pipe and decorate
Fit a piping bag with a 1M piping tip, then pipe the frosting into the brownie cavities. The swirl from the tip gives a polished look and makes the brownies feel bakery-style. If you do not have a piping bag, you can spoon the frosting into the centers, but piping gives a cleaner finish.
Top each brownie with 1 to 2 teaspoons festive sprinkles. Match the sprinkles to your theme or holiday for an extra cheerful touch. Once finished, arrange the brownies on a deviled egg tray for a playful presentation.
Final Step: Serve and enjoy
Serve the brownies at room temperature for the best flavor and texture. The chocolate base stays soft, the cream cheese filling stays smooth, and the sprinkles add just enough crunch. These brownies are perfect for birthdays, Easter, classroom treats, holiday parties, or any day that calls for a fun dessert.
For the best shape, create the indentations while the brownies are still warm and wait until they are fully cool before piping the frosting.
Protein and Main Component Alternatives
Even though this recipe is built around a boxed brownie mix and cream cheese frosting, there are several easy ways to adapt it to different needs or ingredients on hand. These swaps can help if you need a different texture, a dairy-free option, or a simpler pantry solution.
Brownie mix alternatives
If you do not have an 18.3 ounce box fudgy brownie mix, use a different fudgy brownie mix of a similar size. A fudgy style works best because it stays dense and holds the egg shape better than a light, cake-like mix. If you are baking from scratch, use your favorite rich brownie batter that has enough structure to slice cleanly.
For gluten-free baking, choose a certified gluten-free brownie mix. Just check the package instructions, since some mixes need slightly different baking times or added ingredients.
Frosting alternatives
The cream cheese frosting gives this dessert its classic filling, but you can switch it up if needed. A buttercream frosting works well if you want a sweeter filling. Store-bought frosting can save time on busy days, while homemade frosting gives you more control over sweetness.
For dairy-free guests, use a plant-based cream cheese alternative. Make sure it is soft enough to beat smoothly, or the piping bag may clog. If you want a lighter filling, whipped frosting can be a good choice, though it will have a softer texture.
Egg and binder swaps
If you need an egg substitute for the brownie batter, use a product made for baking, such as flax eggs or a commercial egg replacer. These options are helpful for vegan baking or for anyone avoiding eggs. Keep in mind that the final texture may be slightly softer.
Since the brownies are molded, the batter needs enough structure to hold the shape. If your substitute makes the batter too loose, let it sit for a few minutes before baking so it thickens slightly.
Vegetable, Sauce, and Seasoning Modifications
This dessert does not include vegetables or sauce in the usual savory sense, but there are still many ways to change the flavor profile and decoration. Small adjustments can make the brownies feel seasonal, festive, or better suited to different guests.
Flavor changes for the frosting
Vanilla is a classic choice, but you can add other extracts in small amounts if you want a new flavor. Peppermint works well during winter, almond adds a bakery-style note, and lemon gives the cream cheese filling a bright finish. If you use a stronger extract, start with just a few drops so it does not overpower the chocolate.
You can also fold cocoa powder into the frosting for a double-chocolate effect. Another option is to swirl in a bit of melted chocolate for a richer center.
Decoration ideas for the top
Festive sprinkles are the easiest garnish, but they are only one option. Try crushed peppermint, mini chocolate chips, colored sanding sugar, or tiny candy pieces. If you want a more polished look, keep the top simple with a smooth frosting swirl and just a few sprinkles.
Seasonal colors make these brownies easy to match to different events. Pastel sprinkles work for Easter, red and pink work for Valentine’s Day, and orange, black, or gold fit Halloween gatherings.
Pan and shape options
Silicone egg molds give the best shape for this recipe, but you can still make the dessert without them. Bake the batter in a standard pan, let it cool, then cut out egg shapes with a cookie cutter or knife template. This method is helpful if you only make shaped brownies once in a while and do not want to buy a special mold.
If your brownies tend to spread, chill the batter for a few minutes before baking. That can help the shape hold better and make the edges cleaner after cutting.
Mastering Deviled Brownies: Advanced Tips and Variations
Pro cooking techniques
A few small tricks can make a big difference with this recipe. First, use a fudgy brownie mix because it gives you a sturdier base. Second, do not overbake. Brownies that bake just until set stay soft in the middle and are easier to shape.
Another helpful step is to press the cavity while the brownies are still warm. If you wait too long, the brownies firm up and the edges may crack. A light touch is best, since the center only needs enough room for a piped swirl of frosting.
Flavor variations
You can make these brownies feel different with simple changes to the filling and garnish. Add a few drops of food coloring to the frosting for a themed dessert. Swirl in strawberry, mint, or caramel-flavored frosting if you want something a little different from the standard version.
For a richer flavor, top with a drizzle of melted chocolate before the sprinkles go on. You can also add a pinch of cinnamon to the brownie mix for a warm background note.
Presentation tips
The deviled egg tray is part of what makes this dessert so charming. It turns a brownie into a conversation piece. If you want a neat finish, pipe the frosting in a circular motion from the outer edge toward the center. Then finish with a tiny cluster of sprinkles right on top.
For party platters, arrange the brownies with fresh berries, mini cookies, or chocolate eggs around the tray. That adds color and makes the dessert table feel complete.
Make-ahead options
These brownies are easy to prepare ahead of time. Bake the brownie shells a day in advance, then cool and store them without frosting. When you are ready to serve, pipe on the frosting and add the sprinkles. This keeps the presentation fresh and helps the filling stay neat.
You can also make the frosting ahead and refrigerate it in a sealed container. Just let it soften slightly before piping so it moves smoothly through the tip.
How to Store Deviled Brownies: Best Practices
Refrigeration
Because the filling contains cream cheese, these brownies should be stored in the refrigerator if you are keeping them for more than a short time. Place them in an airtight container and layer parchment between rows if needed. They will stay fresh for up to 4 days when chilled.
Freezing
If you want to keep them longer, freeze the brownies without the sprinkles if possible. Wrap each one individually, then place them in a freezer-safe container or bag. They can be frozen for up to 2 to 3 months. Thaw in the refrigerator or at room temperature before serving.
Reheating
These brownies are usually best served cold or at room temperature, but if you want a slightly softer bite, warm one briefly in the microwave for about 10 seconds. Do not heat them too long, or the frosting may melt.
Meal prep considerations
If you are making a large batch for a party, keep the brownie shells and frosting separate until the day of serving. That way the texture stays fresh and the decoration looks clean. If you are packing them for transport, use a tray with a lid or a snug container to protect the piped topping.
| Storage method | How long it lasts | Best tip |
|---|---|---|
| Room temperature | Up to 1 day | Best only if serving soon |
| Refrigerator | Up to 4 days | Store in airtight container |
| Freezer | 2 to 3 months | Wrap individually first |

FAQs: Frequently Asked Questions About Deviled Brownies
What are deviled brownies?
How do you make deviled brownies at home?
What’s the difference between deviled brownies and regular brownies?
Can kids eat deviled brownies or are they too spicy?
How should I store deviled brownies and how long do they last?

Deviled Brownies
🍫 Dive into sinfully rich chocolate brownies shaped like deviled eggs for a playful, decadent treat that wows at parties!
🥚 Quick assembly with box mix and cream cheese frosting delivers fudgy bliss in under 45 minutes – ideal for holidays or fun surprises.
- Total Time: 42 minutes
- Yield: 24 brownies
Ingredients
– 18.3 ounce box Fudgy brownie mix Forms the rich chocolate base
– 2 large Eggs Bind and structure the batter
– 2/3 cup Vegetable oil Adds moisture and softness
– 3 tablespoons Water Helps mix the batter
– 8 ounces, softened Cream cheese Makes the creamy filling
– 1/2 cup Powdered sugar Sweetens and smooths the frosting
– 1 teaspoon Vanilla Adds warm flavor
– 1 to 2 teaspoons Festive sprinkles Provides color and decoration
Instructions
1-First Step: Get the oven and pan ready Start by preheating your oven according to the brownie mix package instructions. The recipe works well at 350°F for about 22 minutes, but it is smart to follow the box if your mix gives a slightly different temperature or timing. Spray your egg-shaped silicone molds with nonstick spray so the brownies release easily after baking. Set all your ingredients on the counter before you begin. This makes the process smoother and helps you move from one step to the next without stopping. Since this is a molded dessert, having everything measured ahead of time is especially helpful.
2-Second Step: Mix the brownie batter Prepare the brownie batter using the ingredients from the box: the 18.3 ounce box fudgy brownie mix, 2 large eggs, 2/3 cup vegetable oil, and 3 tablespoons water. Stir until the batter looks smooth and evenly combined. Try not to overmix, since that can make brownies tougher. If you like a richer result, use a fudgy mix rather than a cakier one. A fudgy base holds its shape better in the molds and gives you that dense chocolate texture that works so well for this recipe.
3-Third Step: Fill the molds Spoon the batter into each silicone egg cavity, filling each one about 3/4 full. Leave a little space at the top so the brownies can rise without spilling over. If you are using a standard brownie pan instead of molds, bake the batter in a greased pan and cut out egg shapes once cooled. For best results, tap the mold lightly on the counter to release any trapped air bubbles. This helps the brownies bake evenly and keeps the shape neat.
4-Fourth Step: Bake until just set Place the molds in the oven and bake for approximately 22 minutes at 350°F, or according to the package directions. The edges should look set, and a toothpick inserted into the center should come out with a few moist crumbs. You want them cooked through but still soft enough to stay fudgy. Keep in mind that baking time can vary based on your mold size and oven. If your brownies are slightly underbaked, they may sink too much when you press the center. If they are overbaked, they can dry out and crack.
5-Fifth Step: Create the center cavity while warm When the brownies come out of the oven, let them rest just long enough to handle safely. Then use the back of a spoon to gently press a small cavity into the center of each warm brownie. This step should happen while the brownies are still warm so the center forms without cracking the edges. Do not press too deeply. You only need enough room to hold the frosting filling later. If the spoon sticks, lightly grease it before pressing.
6-Sixth Step: Cool completely Let the brownies cool fully before you add the frosting. This part matters because warm brownies can melt the filling and make the centers slide out of place. Set them on a wire rack if possible, and give them plenty of time to cool to room temperature. If you are in a hurry, you can place them in the refrigerator for a short time after they reach room temperature. Still, full cooling on the counter gives the best texture.
7-Seventh Step: Make the frosting Beat together 8 ounces softened cream cheese, 1/2 cup powdered sugar, and 1 teaspoon vanilla until the mixture is smooth and fluffy. You can use a hand mixer or stand mixer for this step. The frosting should be soft enough to pipe but thick enough to hold its shape. If you want a colorful version, add a few drops of food coloring. Pastel pink, yellow, or green works nicely for spring gatherings, while red and green look great for holidays.
8-Eighth Step: Pipe and decorate Fit a piping bag with a 1M piping tip, then pipe the frosting into the brownie cavities. The swirl from the tip gives a polished look and makes the brownies feel bakery-style. If you do not have a piping bag, you can spoon the frosting into the centers, but piping gives a cleaner finish. Top each brownie with 1 to 2 teaspoons festive sprinkles. Match the sprinkles to your theme or holiday for an extra cheerful touch. Once finished, arrange the brownies on a deviled egg tray for a playful presentation.
9-Final Step: Serve and enjoy Serve the brownies at room temperature for the best flavor and texture. The chocolate base stays soft, the cream cheese filling stays smooth, and the sprinkles add just enough crunch. These brownies are perfect for birthdays, Easter, classroom treats, holiday parties, or any day that calls for a fun dessert.
Last Step:
Please leave a rating and comment letting us know how you liked this recipe! This helps our business to thrive and continue providing free, high-quality recipes for you.Notes
🍫 Choose a fudgy brownie mix to help the brownies hold their egg shape without cracking.
❄️ Create indentations while brownies are warm and cool completely before frosting to prevent melting.
🎉 Customize frosting color and sprinkles to match holidays or themes for extra fun.
- Prep Time: 20 minutes
- Cook Time: 22 minutes
- Category: Desserts
- Method: Oven
- Cuisine: American
Nutrition
- Serving Size: 1 brownie
- Calories: 198 kcal
- Sugar: 14g
- Sodium: 99mg
- Fat: 12g
- Saturated Fat: 4g
- Unsaturated Fat: 8g
- Trans Fat: 0g
- Carbohydrates: 20g
- Fiber: 1g
- Protein: 2g
- Cholesterol: 25mg


