Ingredients
– 4 tablespoons all-purpose flour for structure
– 4 tablespoons granulated sugar for sweetness and browning
– 2 tablespoons unsweetened cocoa powder for rich chocolate flavor
– 1/4 teaspoon baking powder for rising
– 1/8 teaspoon salt to enhance chocolate flavor
– 3 tablespoons milk (dairy or plant-based) for batter consistency
– 2 tablespoons vegetable oil or melted butter for moisture and richness
– 1/4 teaspoon vanilla extract to round out chocolate flavor
– 2 tablespoons chocolate chips or chunks for extra indulgence (optional)
Instructions
1-First Step: Dry Ingredients Combination Start by adding your dry ingredients to the mug. Combine 4 tablespoons of all-purpose flour, 4 tablespoons of granulated sugar, 2 tablespoons of unsweetened cocoa powder, 1/4 teaspoon of baking powder, and a pinch of salt (about 1/8 teaspoon). Using a small fork or whisk, mix these ingredients thoroughly until well combined. This step ensures that the leavening agent is evenly distributed throughout the flour, which helps the cake rise uniformly. For those with dietary restrictions, this is the time to make your substitutions. If you’re using gluten-free flour, ensure it’s a blend designed for baking that includes xanthan gum. For a lower sugar version, substitute the granulated sugar with your preferred sweetener, keeping in mind that some alternatives may affect the final texture slightly.
2-Second Step: Adding Wet Ingredients Once your dry ingredients are well mixed, it’s time to add the wet components. Pour in 3 tablespoons of milk (dairy or plant-based), 2 tablespoons of vegetable oil or melted butter, and 1/4 teaspoon of vanilla extract. If you’re making a vegan version, ensure your milk choice is plant-based and your chocolate chips are dairy-free. Using your fork or whisk, stir the mixture until just combined. Be careful not to overmix, as this can develop gluten in the flour and result in a tougher texture. The batter should be smooth but still slightly thick. If it seems too dry, add another tablespoon of milk. If it’s too runny, add a small sprinkle of flour. The perfect consistency should slowly fall off your fork.
3-Third Step: Adding Chocolate Chips For extra indulgence, fold in 2 tablespoons of chocolate chips or chunks into the batter. This step is optional but highly recommended for that melty, gooey chocolate center that makes mug cakes so special. You can use semi-sweet, milk, or dark chocolate chips depending on your preference. For a healthier twist, try cacao nibs or sugar-free chocolate chips. If you’re feeling adventurous, this is also the time to add any additional mix-ins. A tablespoon of peanut butter, a sprinkle of sea salt, or even a dash of cinnamon can take your mug cake to the next level. However, be mindful not to add too many extras, as this can affect the cooking time and final texture.
4-Fourth Step: Microwave Cooking Place your mug in the microwave and cook on high power for 70-90 seconds. Microwave ovens vary significantly in power, so start checking at the 70-second mark to prevent overcooking. The cake is done when it has risen and the edges look set but the center still appears slightly moist or jiggles slightly when you gently tap the mug. For a more evenly cooked cake, try using 80% power for a longer time rather than full power. This can help prevent the outer edges from becoming tough while the center remains undercooked. If you’re unsure about your microwave’s power, it’s better to undercook slightly and add 10-second increments as needed.
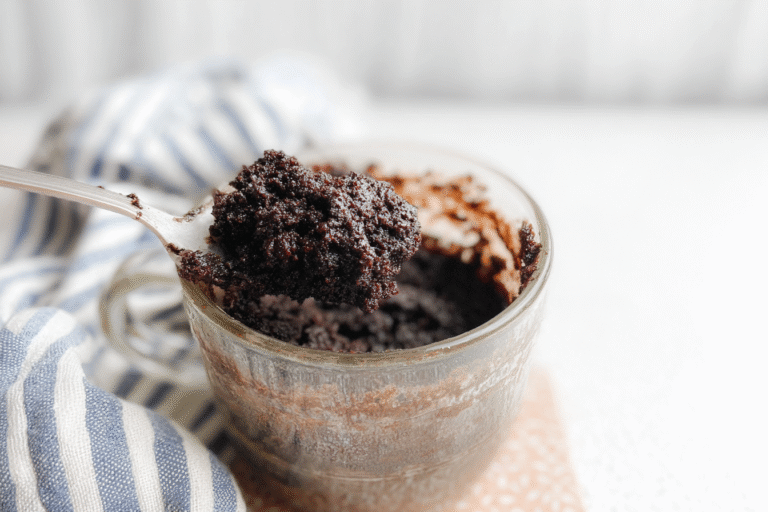
5-Final Step: Cooling and Serving Allow the cake to cool in the mug for about 1 minute. This resting period is crucial as it allows the cake to finish cooking with residual heat and the texture to set properly. During this time, the cake will deflate slightly, which is normal. Serve your chocolate mug cake directly from the mug, or if you prefer a more elegant presentation, carefully invert it onto a small plate. Top with a scoop of vanilla ice cream, a dollop of whipped cream, or fresh berries for a complete dessert experience. For a decadent finish, drizzle with chocolate sauce or sprinkle with powdered sugar. Remember, this single-serve chocolate cake is best enjoyed fresh from the microwave when it’s at its fudgiest and most delicious. The contrast between the warm cake and cold ice cream creates a restaurant-worthy dessert in minutes!
Last Step:
Please leave a rating and comment letting us know how you liked this recipe! This helps our business to thrive and continue providing free, high-quality recipes for you.Notes
⏱️ Microwave times vary by wattage – check at 70 seconds to avoid overcooking.
🥛 Room temp milk and oil mix smoother; batter should be thick like brownie batter.
🍦 Let rest 2 minutes for perfect texture; serve warm for gooey bliss.
- Prep Time: 2 minutes
- Cool: 2 minutes
- Cook Time: 1.5 minutes
- Category: Dessert
- Method: Microwave
- Cuisine: American
- Diet: Vegetarian
Nutrition
- Serving Size: 1 cake
- Calories: 450 calories
- Sugar: 28g
- Sodium: 150mg
- Fat: 24g
- Saturated Fat: 6g
- Unsaturated Fat: 17g
- Trans Fat: 0g
- Carbohydrates: 54g
- Fiber: 3g
- Protein: 6g
- Cholesterol: 5mg