Ingredients
– 1 cup butter for rich, tender base
– 1 cup white sugar for sweetness and crispy edges
– 1 cup brown sugar for moisture and depth of flavor
– 2 eggs to bind ingredients and add structure
– 1 teaspoon vanilla extract to enhance flavor
– 2 cups all-purpose flour for structure
– 1 cup cocoa powder for intense chocolate flavor
– 1 teaspoon baking soda to help cookies rise
– 1/2 teaspoon salt to balance sweetness
– 1.5 cups chopped Andes mints for minty goodness
– Powdered sugar for dusting (optional)
Instructions
1-First Step: Preparation and Mise en Place Before you begin mixing, prepare your baking space. Preheat your oven to 350°F (175°C) and line your baking sheets with parchment paper or silicone baking mats. This ensures your cookies won’t stick and makes cleanup effortless. Chop your Andes mints into small, uniform pieces about the size of regular chocolate chips. This ensures even distribution throughout the dough and consistent melting during baking. Having everything measured and ready before you start makes the process more enjoyable and helps prevent mistakes.
2-Second Step: Creaming the Butter and Sugars In a large mixing bowl, combine the softened butter, white sugar, and brown sugar. Using an electric mixer on medium speed, beat these ingredients together until the mixture is light and fluffy, about 2-3 minutes. This process, called creaming, incorporates air into the dough, which helps create a lighter texture. The sugars should be well-dissolved into the butter, and the mixture should appear pale in color. Scrape down the sides of the bowl periodically to ensure all ingredients are incorporated evenly. This step is crucial for achieving the right cookie texture, so don’t rush it.
3-Third Step: Adding Eggs and Vanilla Add the eggs one at a time to the creamed butter mixture, beating well after each addition. This ensures proper emulsification and distribution. After the eggs are fully incorporated, add the vanilla extract and mix briefly to combine. The mixture should appear glossy and smooth. Avoid overmixing at this stage, as too much air incorporation can lead to cookies that spread too much in the oven. If you’re looking for more baking inspiration for simple and accessible recipes, this technique is foundational to many successful cookie recipes.
4-Fourth Step: Mixing the Dry Ingredients In a separate medium bowl, whisk together the flour, cocoa powder, baking soda, and salt until well combined. This step ensures that the leavening agent is evenly distributed throughout the flour, which helps the cookies rise uniformly. The cocoa powder tends to clump, so thorough whisking is essential for a consistent chocolate flavor throughout your cookies. Sifting these ingredients together can also help achieve a lighter texture, especially if your flour or cocoa has settled in the pantry.
5-Fifth Step: Combining Wet and Dry Ingredients With your mixer on low speed, gradually add the dry ingredients to the wet mixture. Mix only until just combined, being careful not to overmix. Overmixing develops gluten in the flour, which can lead to tough cookies. You should stop mixing as soon as you no longer see streaks of dry flour. The dough will be thick and dark chocolate in color. This gentle mixing approach preserves the tender texture that makes these cookies so delightful. If you notice any dry pockets at the bottom of the bowl, finish mixing by hand with a spatula to avoid overworking the dough.
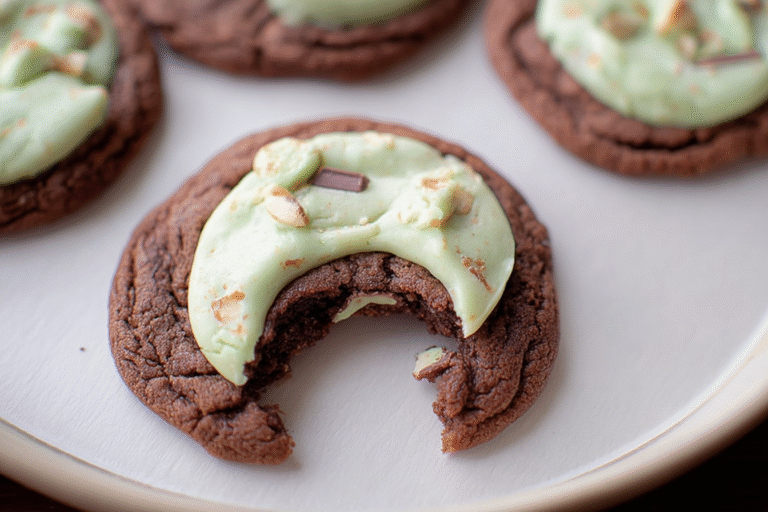
6-Sixth Step: Folding in the Andes Mints Remove the bowl from the mixer and use a spatula to fold in the chopped Andes mints by hand. This gentle folding technique prevents the mints from breaking down too much and ensures they’re evenly distributed throughout the dough. The contrast between the dark chocolate dough and the green and white mint pieces creates a beautiful visual appeal. If you prefer larger chunks of melted mint, reserve some of the larger pieces to press onto the tops of the cookies before baking. This technique creates extra pockets of minty goodness on the surface of each cookie.
7-Seventh Step: Shaping and Baking For optimal results, chill the dough for at least 30 minutes before baking. This step prevents the cookies from spreading too much in the oven and helps develop the flavors. Once chilled, scoop tablespoon-sized portions of dough onto your prepared baking sheets, spacing them about 2 inches apart to allow for spreading. For uniform cookies, use a cookie scoop or measure the dough with a tablespoon. Bake at 350°F for 10-12 minutes, or until the edges are set but the centers still look slightly soft. The cookies will continue to cook on the baking sheet after removal from the oven, so removing them while slightly underbaked ensures a perfectly chewy texture.
8-Final Step: Cooling and Serving Allow the cookies to cool on the baking sheet for about 5 minutes before transferring them to a wire rack to cool completely. This short rest period allows them to set and makes them easier to move without breaking. Once cooled, you can dust them lightly with powdered sugar for a snowy appearance that’s perfect for holiday occasions. These Andes Mint Cookies are delicious served warm, when the chocolate is still slightly melted, or at room temperature. Pair them with a glass of cold milk or a cup of hot coffee for the ultimate treat. Enjoy the compliments that will surely follow when you share these delightful cookies with friends and family.
Last Step:
Please leave a rating and comment letting us know how you liked this recipe! This helps our business to thrive and continue providing free, high-quality recipes for you.Notes
❄️ Chill dough 30 minutes if too soft for thicker cookies.
🍫 Chop Andes mints into varied sizes for gooey pockets.
🌿 Press extra mint pieces on top before baking for visual pop.
- Prep Time: 15 minutes
- Chill: 30 minutes
- Cook Time: 10 minutes
- Category: Dessert
- Method: Baking
- Cuisine: American
- Diet: Vegetarian
Nutrition
- Serving Size: 1 cookie
- Calories: 160 calories
- Sugar: 14g
- Sodium: 130mg
- Fat: 8g
- Saturated Fat: 5g
- Unsaturated Fat: 2g
- Trans Fat: 0g
- Carbohydrates: 21g
- Fiber: 1g
- Protein: 2g
- Cholesterol: 25mg