Why You Will Love This Zucchini Relish
If you have extra garden zucchini, this Zucchini Relish is a smart way to turn it into something tasty, tangy, and useful all year long. It is the kind of homemade condiment that fits right in with burgers, hot dogs, sandwiches, grilled meats, and even simple crackers and cheese.
- Easy to make: This recipe uses basic ingredients and a simple brining and simmering process, so it works well for busy home cooks.
- Good way to use extra produce: It helps cut down on waste when your garden is full of zucchini and peppers.
- Fresh, balanced flavor: The mix of sugar, vinegar, turmeric, mustard, and celery seed gives this relish a sweet-tangy taste with just the right amount of spice.
- Flexible for many meals: You can spoon it over burgers, serve it with roasted meats, or use it as a bright side condiment for everyday meals.
If you like homemade condiments that bring a little sweet tang and crunch to the table, this Homemade Zucchini Relish is a great one to keep on hand.
For readers who enjoy making fresh vegetables part of everyday cooking, zucchini is a great ingredient to keep in rotation. You can also read more about its nutrition benefits in this helpful guide to zucchini benefits.
Jump to:
- Why You Will Love This Zucchini Relish
- Essential Ingredients for Zucchini Relish
- Main Ingredients
- Special Dietary Options
- How to Prepare the Perfect Zucchini Relish: Step-by-Step Guide
- First Step: Prep the vegetables
- Second Step: Drain the mixture well
- Third Step: Make the relish mixture
- Fourth Step: Cook the relish
- Fifth Step: Taste and adjust
- Final Step: Pack and cool
- Helpful tips while cooking
- Dietary Substitutions to Customize Your Zucchini Relish
- Protein and Main Component Alternatives
- Vegetable, Sauce, and Seasoning Modifications
- Mastering Zucchini Relish: Advanced Tips and Variations
- Pro cooking techniques
- Flavor variations
- Presentation tips
- Make-ahead options
- How to Store Zucchini Relish: Best Practices
- Refrigeration
- Freezing
- Reheating
- Meal prep considerations
- FAQs: Frequently Asked Questions About Zucchini Relish
- Zucchini Relish
- Ingredients
- Instructions
- Last Step:
- Notes
- Nutrition
- Did you make this recipe?
Essential Ingredients for Zucchini Relish
This Zucchini Relish Recipe uses simple pantry items and garden vegetables. The ingredients work together to create a flavorful pickle-style relish with a nice balance of sweetness, acid, and spice.
Main Ingredients
- 10 cups grated zucchini – the base of the relish and the main source of texture.
- 3 cups grated onions – adds sharpness and depth.
- 4 red bell peppers – bring color, sweetness, and a little crunch.
- 5 tablespoons canning or pickling salt for brining – draws out extra moisture and helps the vegetables firm up.
- 3 cups sugar – balances the vinegar and creates the classic relish flavor.
- 3 cups apple cider vinegar or white vinegar – gives the relish its tangy pickle taste.
- 1 teaspoon turmeric – adds color and a warm, earthy note.
- 1 teaspoon dry mustard – gives the relish a gentle savory bite.
- 1 teaspoon black pepper – adds light heat.
- 1 teaspoon celery seed – gives that familiar pickle relish flavor.
Special Dietary Options
- Vegan: This recipe is naturally vegan since it uses only vegetables, vinegar, sugar, and spices.
- Gluten-free: All listed ingredients are naturally gluten-free, but always check labels on spices and vinegar if you are cooking for someone with celiac disease.
- Low-calorie: For a lighter version, you can use a reduced-sugar sweetener approved for canning only if it is suitable for your preservation method. If not, make the full recipe and use smaller servings.
| Ingredient | Purpose | What It Adds |
|---|---|---|
| Zucchini | Main vegetable | Soft texture and mild flavor |
| Onions | Flavor base | Sharp, savory taste |
| Red bell peppers | Color and sweetness | Bright look and gentle crunch |
| Vinegar and sugar | Relish liquid | Sweet-tangy balance |
| Spices | Seasoning | Classic pickle relish flavor |
How to Prepare the Perfect Zucchini Relish: Step-by-Step Guide
This Easy Zucchini Relish Recipe is straightforward once you get the vegetables prepped. The main time goes into draining the vegetables well, which helps the final texture stay crisp and not watery.
First Step: Prep the vegetables
Grate the zucchini, grate the onions, and finely chop or grate the red bell peppers. Place the zucchini, onions, and peppers in a large bowl. Sprinkle the vegetables with 5 tablespoons of canning or pickling salt and mix well. Cover the bowl and let it sit for several hours or overnight. This brining step pulls out excess water and helps the relish keep a better texture.
Second Step: Drain the mixture well
After the brining time is done, pour the vegetables into a colander and drain them thoroughly. Press with your hands or use a clean towel to squeeze out as much liquid as you can. This step matters a lot because too much water can make the relish thin and less flavorful.
Third Step: Make the relish mixture
Transfer the drained vegetables into a large pot. Add 3 cups sugar, 3 cups apple cider vinegar or white vinegar, 1 teaspoon turmeric, 1 teaspoon dry mustard, 1 teaspoon black pepper, and 1 teaspoon celery seed. Stir everything well so the spices are spread evenly through the vegetables.
Fourth Step: Cook the relish
Bring the mixture to a gentle boil over medium heat, then lower the heat and let it simmer. Stir often so the sugar does not stick to the bottom of the pot. Cook until the relish thickens and the vegetables look tender, usually about 30 to 45 minutes. The exact time can vary depending on how much liquid remains after draining.
Fifth Step: Taste and adjust
Before you move the relish into jars, taste a small spoonful. If you want a slightly sweeter relish, you can add a little more sugar. If you like a sharper pickle flavor, add a small splash more vinegar. Keep in mind that if you are canning, ingredient changes may affect the final preservation balance, so it is best to follow safe canning guidelines closely.
Final Step: Pack and cool
Spoon the hot relish into clean jars or storage containers. Let it cool before sealing and refrigerating, or follow proper canning procedures if you plan to store it in the pantry. Once cooled, the flavor gets even better after a day or two in the fridge.
For the best texture, do not skip the draining step. It is the difference between a watery relish and a spoonable one with real body.
Helpful tips while cooking
- Keep the heat at a steady simmer so the relish thickens slowly.
- Stir often to stop the sugar from sticking.
- Use a wide pot if possible, since more surface area helps the mixture reduce faster.
- Let the relish cool before tasting again, because the flavor changes a bit as it rests.
If you enjoy simple homemade sides that go well with everyday dinners, you may also like this comforting easy au gratin potatoes recipe or this flavorful slow cooker Italian lemon chicken for a full meal idea.

Dietary Substitutions to Customize Your Zucchini Relish
Protein and Main Component Alternatives
Since this dish is a vegetable relish rather than a main protein recipe, the best substitutions focus on the produce itself. If zucchini is not available, yellow summer squash can work in a similar way. You can also mix zucchini with grated cucumber, though cucumber may release more water and need extra draining time.
Vegetable, Sauce, and Seasoning Modifications
There are many easy ways to change up the flavor of Homemade Zucchini Pickle Relish while keeping the same basic method.
- Swap the peppers: Green bell peppers give a sharper flavor, while orange or yellow peppers add a sweeter note.
- Change the vinegar: Apple cider vinegar gives a softer, fruitier tang, while white vinegar gives a cleaner pickle taste.
- Adjust the spice: Add a pinch of red pepper flakes if you like a little heat.
- Lower the sweetness: Reduce the sugar slightly if you want a less sweet pickle relish, though the texture and preservation balance may change.
- Make it more aromatic: Add a small amount of mustard seed or dill seed for a different pickle profile.
For people who like to cook with what is already in the pantry, this kind of recipe is a handy one. It works well with seasonal produce and simple ingredients you probably already have on hand.
Mastering Zucchini Relish: Advanced Tips and Variations
Pro cooking techniques
If you want your Zucchini Relish to taste like something from a classic deli jar, focus on texture and balance. Drain the vegetables really well, cook the mixture slowly, and stir often so the sugar dissolves fully. A wider pot helps the moisture cook off faster, which can give you a thicker finish without overcooking the vegetables.
For a smoother relish, grate the zucchini and onions more finely. For a chunkier style, chop the peppers a little larger so the relish has more bite. Either way, keep the cut size consistent so everything cooks evenly.
Flavor variations
- Sweeter style: Add a little extra sugar for a softer, sweeter pickle flavor.
- Sharper style: Use white vinegar and a bit more black pepper for a brighter edge.
- Warm spice style: Add a tiny pinch of cloves or allspice for a deeper old-fashioned taste.
- Garden mix style: Add grated carrots or finely diced celery for extra color and crunch.
Presentation tips
Spoon the relish into small glass jars for a neat homemade look. It also makes a nice gift for neighbors, family, or anyone who likes pantry staples. If you are serving it at a cookout, place it in a small bowl with a spoon so guests can add it to burgers, sausages, or sandwiches.
Make-ahead options
This is one of those recipes that gets easier when you make it ahead of time. You can grate and salt the vegetables the night before, then drain and cook them the next day. You can also make a larger batch during peak zucchini season and store extra jars for later. That makes this Homemade Zucchini Relish a great fit for busy weeks.
For another meal that works well with a sweet and tangy side, try pairing this relish with slow cooker beef brisket or serve it alongside sticky orange chicken for a fun family dinner.
How to Store Zucchini Relish: Best Practices
Refrigeration
Once the relish has cooled, store it in clean, airtight jars or containers in the refrigerator. It will keep well for short-term use, and the flavor often improves after a day or two. Always use a clean spoon when serving so it stays fresh longer.
Freezing
If you want a longer storage option and are not planning to can the relish, freezing can work. Use freezer-safe containers and leave a little room at the top for expansion. Keep in mind that the texture may soften after thawing, but the flavor will still be good for burgers, sandwiches, and cooked dishes.
Reheating
Most of the time, you will serve this relish cold or at room temperature. If you want to warm it slightly for a hot dish, use low heat on the stove and stir gently. Do not boil it again unless you are following a proper canning or preserving step.
Meal prep considerations
This recipe is a nice batch-cooking option because it uses simple ingredients and stores well. Make it when zucchini is cheap or abundant, then keep jars ready for quick meals. A spoonful can bring life to grilled meats, sandwiches, wraps, and even rice bowls.

FAQs: Frequently Asked Questions About Zucchini Relish
Print
Zucchini Relish
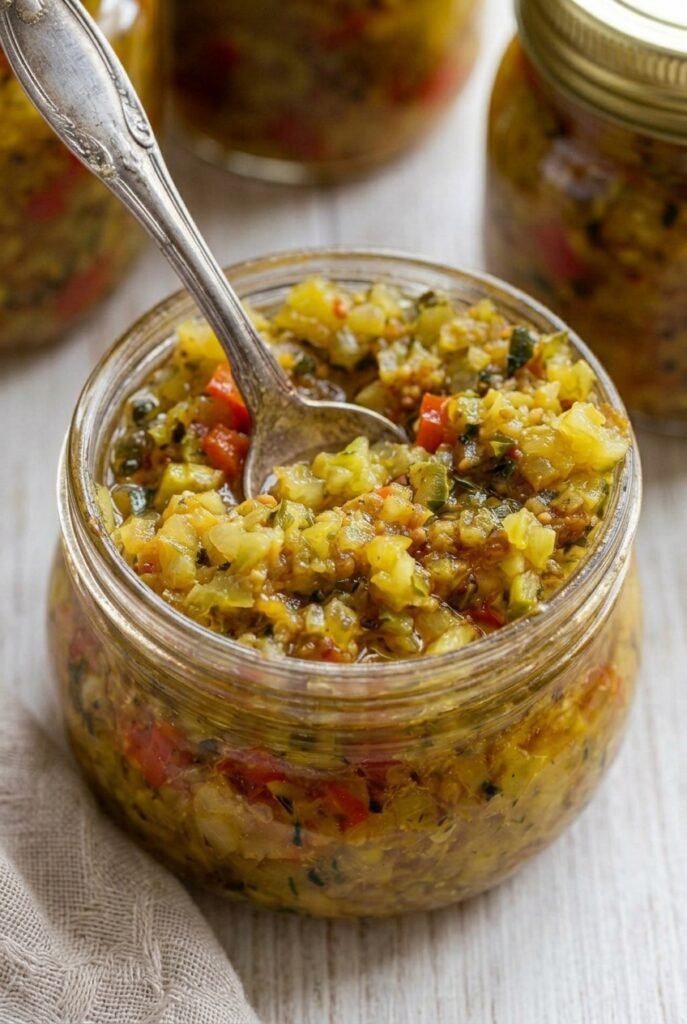
🥒 Overflowing garden zucchini transforms into sweet-tangy relish—versatile condiment amps up burgers, hot dogs, and salads.
🫙 Easy homemade pickling yields shelf-stable jars of crunchy, flavorful pickle relish year-round!
- Total Time: 13 hours
- Yield: 6 pints
Ingredients
– 10 cups grated zucchini
– 3 cups grated onions
– 4 red bell peppers
– 5 tablespoons canning or pickling salt for brining
– 3 cups sugar
– 3 cups apple cider vinegar or white vinegar
– 1 teaspoon turmeric
– 1 teaspoon dry mustard
– 1 teaspoon black pepper
– 1 teaspoon celery seed
Instructions
1-First Step: Prep the vegetables Grate the zucchini, grate the onions, and finely chop or grate the red bell peppers. Place the zucchini, onions, and peppers in a large bowl. Sprinkle the vegetables with 5 tablespoons of canning or pickling salt and mix well. Cover the bowl and let it sit for several hours or overnight. This brining step pulls out excess water and helps the relish keep a better texture.
2-Second Step: Drain the mixture well After the brining time is done, pour the vegetables into a colander and drain them thoroughly. Press with your hands or use a clean towel to squeeze out as much liquid as you can. This step matters a lot because too much water can make the relish thin and less flavorful.
3-Third Step: Make the relish mixture Transfer the drained vegetables into a large pot. Add 3 cups sugar, 3 cups apple cider vinegar or white vinegar, 1 teaspoon turmeric, 1 teaspoon dry mustard, 1 teaspoon black pepper, and 1 teaspoon celery seed. Stir everything well so the spices are spread evenly through the vegetables.
4-Fourth Step: Cook the relish Bring the mixture to a gentle boil over medium heat, then lower the heat and let it simmer. Stir often so the sugar does not stick to the bottom of the pot. Cook until the relish thickens and the vegetables look tender, usually about 30 to 45 minutes. The exact time can vary depending on how much liquid remains after draining.
5-Fifth Step: Taste and adjust Before you move the relish into jars, taste a small spoonful. If you want a slightly sweeter relish, you can add a little more sugar. If you like a sharper pickle flavor, add a small splash more vinegar. Keep in mind that if you are canning, ingredient changes may affect the final preservation balance, so it is best to follow safe canning guidelines closely.
6-Final Step: Pack and cool Spoon the hot relish into clean jars or storage containers. Let it cool before sealing and refrigerating, or follow proper canning procedures if you plan to store it in the pantry. Once cooled, the flavor gets even better after a day or two in the fridge.
Last Step:
Please leave a rating and comment letting us know how you liked this recipe! This helps our business to thrive and continue providing free, high-quality recipes for you.Notes
🥒 Use a food processor for quick, uniform grating of zucchini and onions.
🧂 Rinse and squeeze veggies very well after brining to prevent watery relish.
🔥 Always sterilize jars and process properly for safe canning shelf life.
- Prep Time: 30 minutes
- Brining Time: 12 hours
- Cook Time: 30 minutes
- Category: Condiments & Sauces
- Method: Canning
- Cuisine: American
- Diet: Vegan, Gluten-Free, Vegetarian
Nutrition
- Serving Size: 1 tablespoon
- Calories: 20 kcal
- Sugar: 4g
- Sodium: 100mg
- Fat: 0g
- Saturated Fat: 0g
- Unsaturated Fat: 0g
- Trans Fat: 0g
- Carbohydrates: 5g
- Fiber: 0g
- Protein: 0g
- Cholesterol: 0mg


