Why You’ll Love Deviled Brownies
Deviled Brownies are a fun, fudgy chocolate treat that feels right at home at parties, holiday trays, bake sales, and weeknight dessert tables. They have all the comfort of a classic brownie, but the creamy filling and festive look make them stand out in a big way. If you want a recipe that looks special without asking for a lot of extra work, this one is a sweet win.
- Easy to make: The recipe starts with a fudgy brownie mix, so you can get dessert on the table fast. The prep takes about 20 minutes, and the total time is only 42 minutes.
- Great for gatherings: The egg-shaped molds and deviled egg tray make these brownies a perfect fit for Easter, spring parties, birthdays, and potlucks.
- Rich and satisfying: Each bite gives you dense chocolate brownie, smooth cream cheese frosting, and a pop of festive sprinkles.
- Flexible for busy kitchens: You can use silicone molds, a standard brownie pan, homemade frosting, or even a store-bought frosting shortcut when time is tight.
According to Johns Hopkins Medicine, chocolate can be part of a positive and balanced approach to enjoying sweets, especially when you keep portions reasonable. That makes these brownies a nice treat for special occasions.
These brownies are the kind of dessert that makes people smile before they even take a bite.
For readers who enjoy classic chocolate bakes, you may also like our easy homemade dessert recipes for more family-friendly ideas.
Ease of preparation
This recipe keeps things simple from start to finish. The brownie batter comes from an 18.3 ounce box fudgy brownie mix, and the frosting uses just three ingredients. If you can stir, bake, and pipe, you can make these with confidence.
Health benefits
While this is still a dessert, the portion size is friendly and the nutrition is easy to track. Each serving comes in at 198 calories, with 20g carbohydrates, 2g protein, and 12g fat. That makes it a manageable sweet treat for people who like to keep an eye on portions.
Versatility
You can change the sprinkles for any holiday, tint the frosting with food gel, or shape the brownies from a standard pan if you do not have silicone molds. This is also a nice recipe for busy parents, students, and anyone who wants a cute dessert without a long ingredient list.
Distinctive flavor
The real charm of Deviled Brownies is the mix of textures. The dense brownie base pairs beautifully with the soft cream cheese frosting, and the festive sprinkles give each brownie a playful finish. It is rich, creamy, and fun all at once.
Jump to:
- Why You’ll Love Deviled Brownies
- Ease of preparation
- Health benefits
- Versatility
- Distinctive flavor
- Essential Ingredients for Deviled Brownies
- For the Brownies
- For the Frosting
- For Garnish
- Special Dietary Options
- How to Prepare the Perfect Deviled Brownies: Step-by-Step Guide
- First Step: Prepare your pan and gather your ingredients
- Second Step: Mix the brownie batter
- Third Step: Fill the molds and bake
- Fourth Step: Create the center cavity while the brownies are warm
- Fifth Step: Make the cream cheese frosting
- Sixth Step: Pipe the frosting into the brownies
- Seventh Step: Add the finishing touches
- Serving tip
- Dietary Substitutions to Customize Your Deviled Brownies
- Protein and main component alternatives
- Vegetable, sauce, and seasoning modifications
- Mastering Deviled Brownies: Advanced Tips and Variations
- Pro cooking techniques
- Flavor variations
- Presentation tips
- Make-ahead options
- How to Store Deviled Brownies: Best Practices
- Refrigeration
- Freezing
- Reheating
- Meal prep considerations
- FAQs: Frequently Asked Questions About Deviled Brownies
- What are deviled brownies and how do they differ from regular brownies?
- Can I use store-bought frosting for deviled brownies?
- How long do deviled brownies last and what’s the best way to store them?
- Can I make deviled brownies ahead of time?
- Why is my deviled brownie frosting too soft and how do I fix it?
- Deviled Brownies
- Ingredients
- Instructions
- Last Step:
- Notes
- Nutrition
- Did you make this recipe?
Essential Ingredients for Deviled Brownies
Here is the full ingredient list, clearly measured so you can gather everything before you begin.
For the Brownies
- 1 box, 18.3 ounces fudgy brownie mix – Gives the dessert its rich chocolate base and dense texture.
- 2 large eggs – Help bind the brownie batter and add structure.
- 2/3 cup vegetable oil – Keeps the brownies moist and fudgy.
- 3 tablespoons water – Helps bring the batter together.
For the Frosting
- 8 ounces cream cheese, softened – Makes the frosting smooth, tangy, and pipeable.
- 1/2 cup powdered sugar – Adds sweetness and body to the filling.
- 1 teaspoon vanilla – Brings warm flavor to the cream cheese frosting.
For Garnish
- 1 to 2 teaspoons festive sprinkles – Adds color and a party-ready finish.
Special Dietary Options
- Vegan: Use a plant-based brownie mix, egg replacer, dairy-free cream cheese, and a vegan vanilla frosting substitute.
- Gluten-free: Choose a certified gluten-free brownie mix and check that your sprinkles and powdered sugar are gluten-free too.
- Low-calorie: Use a lighter brownie mix, reduced-fat cream cheese, and a smaller amount of frosting per brownie.
If you enjoy checking nutrition before baking, you can compare general brownie values on NutritionValue for a helpful reference point.
How to Prepare the Perfect Deviled Brownies: Step-by-Step Guide
These Deviled Brownies are simple to put together, but the little details matter. A soft center, smooth frosting, and clean piping make the final dessert look polished and taste amazing. Follow these steps closely, and you will end up with a tray of brownies that looks ready for a celebration.
First Step: Prepare your pan and gather your ingredients
Start by preheating the oven according to the brownie mix package directions. Spray egg-shaped silicone molds with nonstick spray so the brownies release easily after baking. If you do not have silicone molds, you can also bake the batter in a standard pan and cut the brownies into egg shapes later.
Set out all your ingredients before mixing. This includes the brownie mix, eggs, vegetable oil, water, cream cheese, powdered sugar, vanilla, and festive sprinkles. Having everything ready saves time and makes the process feel calm and easy.
Second Step: Mix the brownie batter
Prepare the brownie batter according to the instructions on the box. For this recipe, that means combining the 18.3 ounce box fudgy brownie mix with 2 large eggs, 2/3 cup vegetable oil, and 3 tablespoons water. Stir just until the batter comes together. Overmixing can make brownies tough, so keep the mixing gentle.
Because these are meant to be fudgy Deviled Brownies, a dense brownie mix works best. The thicker batter also helps the brownies hold their shape in the molds and gives you a good base for the frosting later.
Third Step: Fill the molds and bake
Spoon the brownie batter into each silicone cavity until it is about 3/4 full. This gives the brownies enough room to rise without spilling over. Smooth the tops lightly if needed, then place the molds on a baking sheet for support.
Bake the brownies as directed on the package. Since different brands can vary a bit, begin checking for doneness near the end of the suggested bake time. The brownies should look set at the edges and still feel soft in the center. That softness is what makes them fudgy and rich.
For the best texture, pull the brownies when they are just baked through. A fudgy brownie is much better than a dry one for this recipe.
Fourth Step: Create the center cavity while the brownies are warm
As soon as the brownies come out of the oven, let them rest for a moment, but do not wait too long. While they are still warm, press a small cavity into the center of each brownie. You can use the back of a spoon or a small measuring spoon for this step.
This part matters because warm brownies are easier to shape and less likely to crack. If you wait until they are fully cool, the surface can break when you press down. A neat cavity gives you the perfect place for the frosting filling.
Fifth Step: Make the cream cheese frosting
In a mixing bowl, beat together 8 ounces softened cream cheese, 1/2 cup powdered sugar, and 1 teaspoon vanilla until smooth. The frosting should be creamy, thick, and easy to pipe. If you want a little color, you can add food gel at this stage and mix until the color is even.
If you prefer a shortcut, canned frosting can work too. Just stir it well before piping so it feels smooth and fluffy. Homemade frosting gives you the freshest flavor, but store-bought frosting is a great time-saver for busy days.
Sixth Step: Pipe the frosting into the brownies
Spoon the frosting into a piping bag fitted with a 1M piping tip. Pipe the frosting into the center cavities of each brownie. If you do not have a piping bag, a zip-top bag with the corner snipped off can work in a pinch, though the swirl may not look as neat.
Take your time here. A smooth, even swirl gives the brownies that classic deviled egg look. If the frosting feels too soft, chill it for a few minutes before piping.
Seventh Step: Add the finishing touches
Top each brownie with 1 to 2 teaspoons festive sprinkles. Match the sprinkle colors to your holiday or event theme for an extra cheerful look. Then arrange the brownies on a deviled egg tray for the cutest presentation on the table.
Allow the brownies to cool completely before serving if you have not already done so. This helps the frosting stay in place and makes the brownies easier to pick up. The full recipe makes 24 servings, so it is a great choice for sharing.
Serving tip
These brownies are lovely on their own, but they also pair well with cold milk, coffee, or hot cocoa. If you are serving a crowd, place them on a platter with a few extra sprinkles around the tray for a festive finish.
| Recipe Detail | Amount |
|---|---|
| Prep Time | 20 minutes |
| Cook Time | 22 minutes |
| Total Time | 42 minutes |
| Servings | 24 |
| Calories per serving | 198 |

Dietary Substitutions to Customize Your Deviled Brownies
Protein and main component alternatives
If you need to adjust the recipe, the brownie base is the easiest place to start. A gluten-free brownie mix can replace the standard mix without changing much else. For a dairy-free version, use a plant-based cream cheese and a dairy-free vanilla frosting.
If you want to cut back on sugar, choose a brownie mix with less added sugar and use a smaller amount of frosting in each cavity. You can also try a lighter sprinkle topping or skip the garnish entirely. The brownies will still look lovely and taste great.
Vegetable, sauce, and seasoning modifications
The original recipe uses vegetable oil for moisture, but melted coconut oil can work in some brownie mixes if you like a slight coconut note. For the frosting, a little almond extract can replace part of the vanilla if you want a different flavor profile. Food gel is also a fun way to tint the frosting for Easter, birthdays, school events, or baby showers.
If you want a softer sweetness, reduce the powdered sugar slightly and add a touch more vanilla. For a stronger color contrast, choose bright sprinkles or themed candies. These small changes make the recipe fit different seasons and tastes without losing the cute deviled look.
Mastering Deviled Brownies: Advanced Tips and Variations
Once you have made Deviled Brownies once, it is easy to play with the recipe and make it your own. A few smart tricks can help you get cleaner shapes, better texture, and a more polished finish.
Pro cooking techniques
Use a fudgy brownie mix whenever possible. Dense brownies hold their shape better and taste richer in the center. Create the cavity while the brownies are still warm, then let them cool fully before adding the frosting. That two-step cooling process helps prevent cracks and keeps the filling looking neat.
If your kitchen runs warm, chill the frosting for 10 to 15 minutes before piping. This gives you cleaner swirls and helps the shape hold longer. For the neatest look, pipe from the outside edge inward in a circular motion.
Flavor variations
You can tint the frosting pink, pale yellow, green, or blue for holidays and special events. A tiny bit of espresso powder in the brownie batter can make the chocolate taste deeper. You can also swap the sprinkles for mini chocolate chips, chopped nuts, or sanding sugar.
For a more playful dessert, try matching the colors to a seasonal theme. Pastels work well for spring, red and green are great for Christmas, and orange sprinkles fit Halloween perfectly.
Presentation tips
Serving these brownies on a deviled egg tray makes the whole idea come together. It is a clever presentation that gets people talking right away. If you want a bakery-style finish, pipe the frosting in tall swirls and add sprinkles only at the top.
Make-ahead options
These brownies are great for planning ahead. Bake the brownies one day and frost them the next. You can also make the frosting in advance and keep it chilled in the fridge. When party day comes, just pipe, sprinkle, and serve.
How to Store Deviled Brownies: Best Practices
Because these brownies have cream cheese frosting, storing them the right way helps keep them fresh and safe to eat. A little planning goes a long way, especially if you are making them for an event or meal prep.
Refrigeration
Place the brownies in an airtight container and store them in the refrigerator for up to 5 to 7 days. This is the best option if your kitchen is warm or if you need them to last through the week. Keep them in a single layer if possible so the frosting stays neat.
Freezing
For longer storage, freeze the brownie bases without frosting. Wrap each one tightly in plastic wrap, then place them in a freezer-safe bag or container. They can stay frozen for up to 2 months. When you are ready, thaw them overnight in the fridge and add the frosting after they have fully defrosted.
Reheating
These brownies are usually best served chilled or at room temperature, not heated. If they have been in the refrigerator, let them sit out for 15 to 20 minutes before serving so the texture softens a little. This gives you the best fudgy bite.
Meal prep considerations
If you are baking ahead for a party, make the brownies and frosting separately. Store the brownie bases covered at room temperature for a short time or in the fridge if needed. Assemble close to serving time for the neatest look and freshest taste.

FAQs: Frequently Asked Questions About Deviled Brownies
What are deviled brownies and how do they differ from regular brownies?
Can I use store-bought frosting for deviled brownies?
How long do deviled brownies last and what’s the best way to store them?
Can I make deviled brownies ahead of time?
Why is my deviled brownie frosting too soft and how do I fix it?

Deviled Brownies
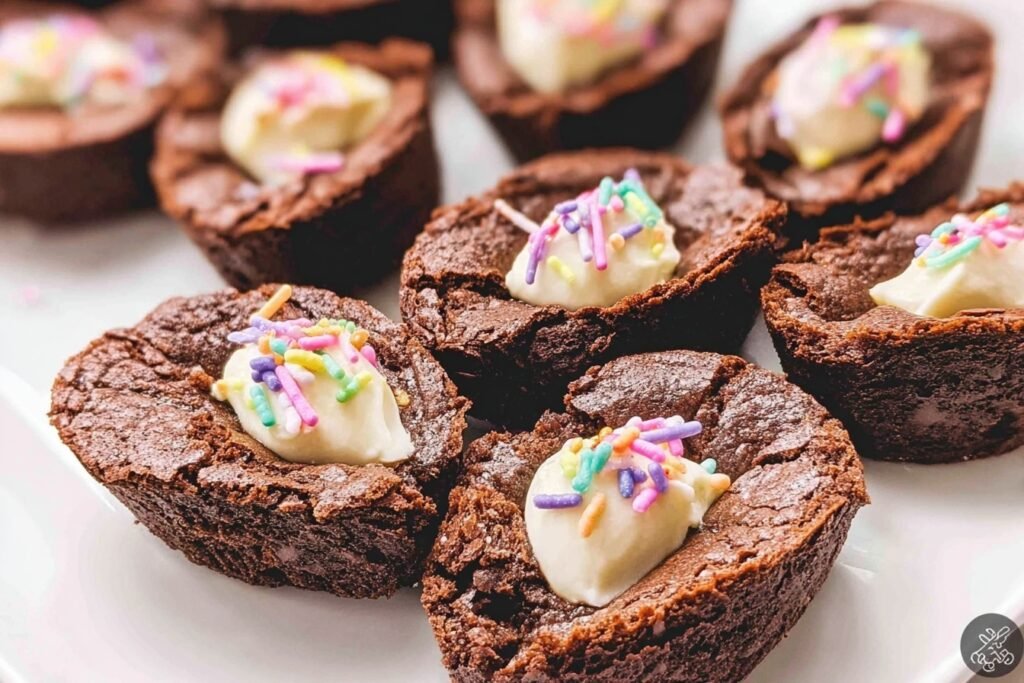
🍫 Indulge in fudgy, chocolate-packed brownies cleverly shaped like deviled eggs for a playful twist on a beloved classic.
🎉 Fun, crowd-pleasing treat that’s easy to make and perfect for parties, holidays, or surprise guests with its festive frosting and sprinkles.
- Total Time: 42 minutes
- Yield: 24 servings
Ingredients
– 1 box, 18.3 ounces fudgy brownie mix – Gives the dessert its rich chocolate base and dense texture.
– 2 large eggs – Help bind the brownie batter and add structure.
– 2/3 cup vegetable oil – Keeps the brownies moist and fudgy.
– 3 tablespoons water – Helps bring the batter together.
– 8 ounces cream cheese, softened – Makes the frosting smooth, tangy, and pipeable.
– 1/2 cup powdered sugar – Adds sweetness and body to the filling.
– 1 teaspoon vanilla – Brings warm flavor to the cream cheese frosting.
– 1 to 2 teaspoons festive sprinkles – Adds color and a party-ready finish.
Instructions
1-First Step: Prepare your pan and gather your ingredients Start by preheating the oven according to the brownie mix package directions. Spray egg-shaped silicone molds with nonstick spray so the brownies release easily after baking. If you do not have silicone molds, you can also bake the batter in a standard pan and cut the brownies into egg shapes later. Set out all your ingredients before mixing. This includes the brownie mix, eggs, vegetable oil, water, cream cheese, powdered sugar, vanilla, and festive sprinkles. Having everything ready saves time and makes the process feel calm and easy.
2-Second Step: Mix the brownie batter Prepare the brownie batter according to the instructions on the box. For this recipe, that means combining the 18.3 ounce box fudgy brownie mix with 2 large eggs, 2/3 cup vegetable oil, and 3 tablespoons water. Stir just until the batter comes together. Overmixing can make brownies tough, so keep the mixing gentle. Because these are meant to be fudgy Deviled Brownies, a dense brownie mix works best. The thicker batter also helps the brownies hold their shape in the molds and gives you a good base for the frosting later.
3-Third Step: Fill the molds and bake Spoon the brownie batter into each silicone cavity until it is about 3/4 full. This gives the brownies enough room to rise without spilling over. Smooth the tops lightly if needed, then place the molds on a baking sheet for support. Bake the brownies as directed on the package. Since different brands can vary a bit, begin checking for doneness near the end of the suggested bake time. The brownies should look set at the edges and still feel soft in the center. That softness is what makes them fudgy and rich.
4-Fourth Step: Create the center cavity while the brownies are warm As soon as the brownies come out of the oven, let them rest for a moment, but do not wait too long. While they are still warm, press a small cavity into the center of each brownie. You can use the back of a spoon or a small measuring spoon for this step. This part matters because warm brownies are easier to shape and less likely to crack. If you wait until they are fully cool, the surface can break when you press down. A neat cavity gives you the perfect place for the frosting filling.
5-Fifth Step: Make the cream cheese frosting In a mixing bowl, beat together 8 ounces softened cream cheese, 1/2 cup powdered sugar, and 1 teaspoon vanilla until smooth. The frosting should be creamy, thick, and easy to pipe. If you want a little color, you can add food gel at this stage and mix until the color is even. If you prefer a shortcut, canned frosting can work too. Just stir it well before piping so it feels smooth and fluffy. Homemade frosting gives you the freshest flavor, but store-bought frosting is a great time-saver for busy days.
6-Sixth Step: Pipe the frosting into the brownies Spoon the frosting into a piping bag fitted with a 1M piping tip. Pipe the frosting into the center cavities of each brownie. If you do not have a piping bag, a zip-top bag with the corner snipped off can work in a pinch, though the swirl may not look as neat. Take your time here. A smooth, even swirl gives the brownies that classic deviled egg look. If the frosting feels too soft, chill it for a few minutes before piping.
7-Seventh Step: Add the finishing touches Top each brownie with 1 to 2 teaspoons festive sprinkles. Match the sprinkle colors to your holiday or event theme for an extra cheerful look. Then arrange the brownies on a deviled egg tray for the cutest presentation on the table. Allow the brownies to cool completely before serving if you have not already done so. This helps the frosting stay in place and makes the brownies easier to pick up. The full recipe makes 24 servings, so it is a great choice for sharing.
Last Step:
Please leave a rating and comment letting us know how you liked this recipe! This helps our business to thrive and continue providing free, high-quality recipes for you.Notes
🔥 Press cavities into warm brownies to avoid cracking.
🧁 Use a fudgy brownie mix for the densest, most chocolatey texture.
🎨 Tint the frosting with food gel and match sprinkles to any holiday theme.
- Prep Time: 20 minutes
- Cook Time: 22 minutes
- Category: Desserts
- Method: Baking
- Cuisine: American
- Diet: Vegetarian
Nutrition
- Serving Size: 1 brownie
- Calories: 198 calories
- Sugar: 14g
- Sodium: 99mg
- Fat: 12g
- Saturated Fat: 4g
- Unsaturated Fat: 8g
- Trans Fat: 0g
- Carbohydrates: 20g
- Fiber: 1g
- Protein: 2g
- Cholesterol: 25mg


