Why You’ll Love This Peanut Butter Cookies
If you’re looking for a treat that combines simplicity with incredible flavor, these soft peanut butter cookies are exactly what you need. This recipe delivers perfectly chewy cookies with a rich peanut butter taste that will have everyone reaching for seconds. Whether you’re an experienced baker or just starting your journey in the kitchen, this easy peanut butter cookie recipe will become your go-to favorite.
- Ease of preparation: This recipe requires only basic ingredients and comes together in under 30 minutes. No special equipment or complicated techniques are needed, making it perfect for busy weeknights or unexpected cravings. Even beginners will feel confident baking these delicious treats with the straightforward steps provided.
- Health benefits: Peanuts are packed with protein, healthy fats, and essential nutrients like vitamin E and magnesium. By using quality ingredients, you can enjoy these cookies as a more nutritious indulgence compared to highly processed alternatives. The protein content helps keep you satisfied longer, making these cookies a reasonable snack when enjoyed in moderation.
- Versatility: This simple peanut butter cookies recipe adapts beautifully to various dietary preferences. Whether you need gluten-free, vegan, or lower sugar options, you can easily customize the ingredients without sacrificing texture or flavor. The base recipe serves as a perfect canvas for your creativity in the kitchen.
- Distinctive flavor: The combination of brown sugar and peanut butter creates a deeply satisfying taste profile with notes of caramel and nutty richness. These best soft peanut butter cookies have that perfect balance of sweetness and saltiness that makes them absolutely irresistible. The texture is soft and chewy in the middle with slightly crisp edges, providing the ultimate cookie experience.
Baking is more than just following recipes it’s about creating memories in the kitchen. These cookies have become a staple in my home because they bring joy to everyone who tries them, and I’m confident they’ll become a favorite in yours too.
Check out this excellent peanut butter cookie recipe for additional inspiration and techniques.
Jump to:
- Why You’ll Love This Peanut Butter Cookies
- Essential Ingredients for Peanut Butter Cookies
- Main Ingredients
- Special Dietary Options
- How to Prepare the Perfect Peanut Butter Cookies: Step-by-Step Guide
- First Step: Preparation and Mise en Place
- Second Step: Creaming the Base
- Third Step: Adding Wet Ingredients
- Fourth Step: Incorporating Dry Ingredients
- Fifth Step: Shaping and Baking
- Final Step: Serving and Enjoying
- Dietary Substitutions to Customize Your Peanut Butter Cookies
- Protein and Main Component Alternatives
- Vegetable, Sauce, and Seasoning Modifications
- Mastering Peanut Butter Cookies: Advanced Tips and Variations
- Pro Cooking Techniques
- Flavor Variations
- Presentation Tips
- Make-Ahead Options
- How to Store Peanut Butter Cookies: Best Practices
- Refrigeration
- Freezing
- Reheating
- Meal Prep Considerations
- FAQs: Frequently Asked Questions About Peanut Butter Cookies
- Peanut Butter Cookies
- Ingredients
- Instructions
- Last Step:
- Notes
- Nutrition
- Did you make this recipe?
Essential Ingredients for Peanut Butter Cookies
Creating the perfect batch of soft chewy peanut butter cookies starts with gathering the right ingredients. Each component plays a crucial role in achieving that ideal texture and flavor you’re craving. Here’s everything you’ll need to make these delightful treats at home.
Main Ingredients
- 1 cup creamy peanut butter – Provides the rich, nutty base flavor and contributes to the chewy texture
- 1/2 cup unsalted butter, softened – Adds richness and helps create the tender crumb structure
- 1/2 cup brown sugar, packed – Imparts moisture and deep caramel notes for chewiness
- 1/2 cup granulated sugar – Creates crisp edges while balancing sweetness
- 1 large egg, room temperature – Binds ingredients together and provides structure
- 1 teaspoon vanilla extract – Enhances the overall flavor profile
- 1 1/2 cups all-purpose flour – Forms the base structure of the cookie
- 1/2 teaspoon baking soda – Helps the cookies rise slightly and spread
- 1/4 teaspoon salt – Balances sweetness and intensifies flavors
Special Dietary Options
| Dietary Need | Substitution |
|---|---|
| Vegan | Replace egg with flax egg (1 tbsp ground flaxseed + 3 tbsp water), use vegan butter and plant-based peanut butter |
| Gluten-free | Substitute all-purpose flour with 1-to-1 gluten-free flour blend containing xanthan gum |
| Low-calorie | Use powdered peanut butter mixed with water, reduce sugar by 25%, or use natural zero-calorie sweeteners |
| Dairy-free | Replace butter with coconut oil or dairy-free margarine alternatives |
Using high-quality ingredients makes a noticeable difference in the final result. For the best flavor, opt for natural peanut butter without added oils or sugars, though commercial varieties will work perfectly well too. If you’re watching your sodium intake, you can reduce or omit the added salt, especially if your peanut butter already contains it.
How to Prepare the Perfect Peanut Butter Cookies: Step-by-Step Guide
Now that we have our ingredients ready, let’s dive into creating these easy chewy peanut butter cookies. Following these steps carefully will help you achieve consistent, delicious results every time. The process is straightforward, but paying attention to the details will make all the difference in texture and taste.
First Step: Preparation and Mise en Place
Start by preheating your oven to 350°F (175°C) and lining two baking sheets with parchment paper or silicone baking mats. This preparation step ensures your cookies won’t stick and makes cleanup effortless. Measure all ingredients beforehand, having them at room temperature for optimal blending. Room temperature ingredients incorporate more smoothly, creating a uniform dough texture that bakes evenly.
While the oven heats, clear your workspace and set out your mixing bowls, measuring cups, and utensils. Having everything organized before you begin makes the baking process more enjoyable and helps prevent mistakes. If you’re making dietary adaptations, prepare your substitutions now so they’re ready to use.
Second Step: Creaming the Base
In a large mixing bowl, combine the softened butter and both sugars. Using an electric mixer on medium speed, beat these ingredients together for about 2-3 minutes until the mixture is light and fluffy. This step incorporates air into the batter, which contributes to the soft texture we want in our peanut butter cookie recipe.
Add the peanut butter to the creamed mixture and continue beating until fully combined and smooth. The mixture should appear cohesive and creamy at this stage. Scrape down the sides of the bowl with a rubber spatula to ensure all ingredients are well incorporated. For those following dessert recipes that require precise timing, this creaming process is essential for achieving the perfect cookie texture.
Third Step: Adding Wet Ingredients
Add the egg and vanilla extract to the peanut butter mixture. Beat on medium speed for another minute until the egg is fully incorporated and the mixture appears glossy. This step is crucial for binding the dough and providing structure to your cookies. Be careful not to overmix at this stage, which could develop too much gluten in the flour when we add it next.
If you’re using any liquid substitutions for dietary needs, add them at this point. Vegan egg replacements should be fully prepared and added just like a regular egg. The batter should now be smooth and slightly thick, holding its shape when lifted with a spatula.
Fourth Step: Incorporating Dry Ingredients
In a separate medium bowl, whisk together the flour, baking soda, and salt. This step ensures the leavening agent and salt are evenly distributed throughout the flour, which prevents pockets of saltiness or uneven rising in your finished cookies.
Gradually add the dry ingredients to the wet mixture, mixing on low speed just until combined. Overmixing at this stage will result in tough cookies, so stop as soon as no flour streaks remain visible. The dough should be thick and slightly sticky but hold its shape when rolled into balls. For gluten-free versions, pay close attention to the dough consistency as alternative flours may absorb moisture differently.
Fifth Step: Shaping and Baking
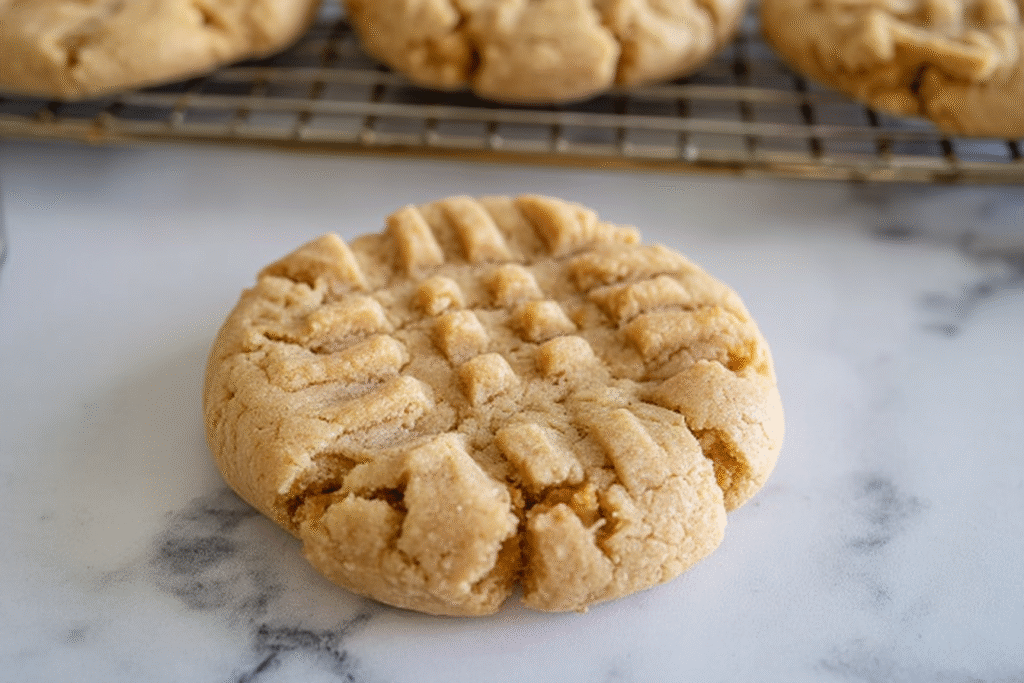
Scoop portions of dough using a cookie scoop or tablespoon, rolling each portion into smooth balls about 1.5 inches in diameter. Place the dough balls on the prepared baking sheets, spacing them about 2 inches apart to allow for spreading. For that classic peanut butter cookie appearance, use a fork to create a crisscross pattern on top of each ball, dipping the fork in sugar between presses to prevent sticking.
Bake the cookies for 10-12 minutes, or until the edges are set but the centers still look slightly soft. They will continue to firm up as they cool on the baking sheet. Remove from the oven and let cool on the pans for 5 minutes before transferring to a wire rack to cool completely. This resting period helps set the structure, ensuring your cookies maintain their perfect texture.
Final Step: Serving and Enjoying
Once completely cooled, these soft peanut butter cookies are ready to enjoy. They pair wonderfully with a glass of cold milk, a hot cup of coffee, or your favorite tea. For an extra special presentation, you can drizzle melted chocolate over the cooled cookies or sandwich two together with a layer of chocolate ganache or peanut butter frosting.
These cookies keep well at room temperature for several days, making them perfect for bake sales, cookie exchanges, or simply having a homemade treat on hand throughout the week. The recipe yields approximately 24 cookies, depending on size, making it ideal for sharing with family and friends.

Dietary Substitutions to Customize Your Peanut Butter Cookies
One of the wonderful aspects of this simple peanut butter cookies recipe is its adaptability to various dietary needs and preferences. Whether you’re accommodating allergies, following a specific eating plan, or simply working with ingredients you have on hand, these substitutions will help you create delicious cookies that meet your requirements.
Protein and Main Component Alternatives
For those looking to modify the protein content or use alternative nut butters, several excellent options exist. Almond butter creates a slightly sweeter, more delicate flavor profile while maintaining the creamy texture we love. Cashew butter offers an even smoother consistency and milder taste that works beautifully for those who find traditional peanut butter too overwhelming. Sunflower seed butter provides an excellent nut-free alternative that still delivers that rich, creamy element essential to the cookie’s structure.
If you’re following a higher protein diet, consider adding a scoop of your favorite unflavored or vanilla protein powder to the dough. You may need to slightly increase the liquid ingredients to compensate for the powder’s absorbency. Collagen peptides are another protein boost option that blends seamlessly without altering flavor. For a lower fat version, powdered peanut butter reconstituted with water can replace up to half of the regular peanut butter, though the texture will be slightly different.
Vegetable, Sauce, and Seasoning Modifications
While traditional peanut butter cookies rely on simple ingredients, adding vegetables might sound unconventional, but pureed pumpkin or sweet potato can be incorporated to increase fiber and nutrients while adding moisture. When using vegetable purees, reduce the butter slightly to maintain the proper dough consistency. These additions also work well with complementary spices like cinnamon, nutmeg, or ginger for a fall-inspired variation.
For those interested in sauce-like additions, a small amount of tahini (sesame paste) can be blended with the peanut butter for a more complex, nutty flavor profile. Fruit preserves can be swirled into the dough before baking for a jelly-filled cookie experience, though this works best when making thumbprint-style variations. Regarding seasonings, sea salt flakes sprinkled on top before baking create a delightful sweet-salty contrast, while a pinch of cayenne pepper adds a surprising kick for adventurous eaters.
Sugar alternatives like coconut sugar, maple syrup, or honey can replace traditional sugars, though they may slightly alter the final texture and browning. When using liquid sweeteners, reduce other liquids in the recipe and expect a slightly softer, more cake-like cookie. These modifications allow you to customize the recipe to your taste preferences while still enjoying the fundamental experience of homemade chewy peanut butter cookies.
Mastering Peanut Butter Cookies: Advanced Tips and Variations
Once you’ve mastered the basic easy peanut butter cookies recipe, you might want to experiment with techniques to elevate your results. These pro tips and creative variations will help you take your baking skills to the next level and create cookies that stand out from the ordinary.
Pro Cooking Techniques
For exceptionally soft peanut butter cookies, try slightly underbaking them by 1-2 minutes and allowing them to finish setting on the hot baking sheet. This technique preserves moisture and prevents over-drying. If you prefer a crispier texture, extend baking time by 2-3 minutes and roll the dough balls thinner before baking.
Chilling the dough for 30 minutes before baking can help control spreading and intensify flavors. This step is especially helpful in warm kitchens or if you’ve added ingredients that might make the dough softer. Simply scoop the dough onto a plate or baking sheet, cover, and refrigerate until slightly firm before proceeding with the baking instructions.
For uniform cookies, use a kitchen scale to weigh your dough portions. This ensures each cookie bakes evenly and looks professionally presented. If you don’t have a scale, a standard cookie scoop provides consistency in size and shape.
Flavor Variations
The basic peanut butter cookie recipe serves as an excellent foundation for countless flavor combinations. Try adding mini chocolate chips, white chocolate chunks, or chopped peanut butter cups to the dough before baking. Nuts like chopped peanuts, pecans, or walnuts add extra crunch and complement the peanut butter flavor beautifully.
For a sophisticated twist, incorporate spices like cinnamon, nutmeg, or cardamom into the dry ingredients. Citrus zest from orange or lemon adds brightness that balances the richness of the peanut butter. Espresso powder amplifies the chocolate flavor if you’re adding chocolate chips, while a splash of rum or bourbon extract creates an adult version with depth and complexity.
Presentation Tips
Transform your cookies from home-style to bakery-worthy with simple presentation techniques. After baking and cooling, drizzle melted dark, milk, or white chocolate over the cookies in an artistic pattern. Sprinkle with crushed peanuts, sea salt flakes, or colored sugar immediately after drizzling so the toppings adhere to the chocolate.
For sandwich cookies, pair two cooled cookies with a filling of chocolate ganache, peanut butter frosting, or marshmallow fluff. These impressive treats are perfect for special occasions or when you want to create something truly memorable. Dusting with powdered sugar creates an elegant finish that contrasts beautifully with the golden-brown cookie color.
Make-Ahead Options
Busy schedules don’t have to prevent you from enjoying fresh homemade cookies. The dough can be prepared up to 3 days in advance and stored in the refrigerator, tightly wrapped. This actually improves the flavor as the ingredients meld together. When ready to bake, simply scoop and bake as directed, adding 1-2 minutes to the baking time if the dough is very cold.
For longer storage, scoop the dough onto a baking sheet and freeze until solid, then transfer to an airtight container or freezer bag. Frozen dough balls can be baked directly from the freezer, adding 2-3 minutes to the baking time. This method allows you to have fresh-baked cookies anytime with minimal effort, perfect for unexpected guests or sudden cravings.
Learn more about the benefits of peanut butter for athletes and how these cookies can fit into an active lifestyle.
How to Store Peanut Butter Cookies: Best Practices
Proper storage ensures your soft peanut butter cookies maintain their delightful texture and flavor for as long as possible. Whether you’ve baked a large batch for a special event or just want to keep a few treats on hand, these storage methods will help preserve quality and freshness.
Refrigeration
For short-term storage (up to 1 week), keep your chewy peanut butter cookies in an airtight container at room temperature. Place a piece of parchment paper or wax paper between layers to prevent sticking. Adding a slice of white bread to the container can help maintain moisture and keep cookies soft for several days. The bread absorbs excess humidity while releasing moisture back into the cookies, creating an ideal microenvironment.
If your kitchen is particularly warm or humid, refrigeration might be necessary to prevent the cookies from becoming too soft or the chocolate add-ins from melting. However, be aware that refrigeration can cause cookies to dry out more quickly, so consume within 3-4 days when stored this way.
Freezing
For long-term storage (up to 3 months), freezing is an excellent option that preserves both texture and flavor. Place cooled cookies in a single layer on a baking sheet and freeze until solid, then transfer to freezer-safe containers or bags. This prevents the cookies from sticking together and allows you to remove just the number you need. For added protection against freezer burn, wrap each cookie individually in plastic wrap before placing in the container.
When ready to enjoy frozen cookies, let them thaw at room temperature for about 15-20 minutes. For a freshly baked taste, warm thawed cookies in a 300°F (150°C) oven for 5-7 minutes. This revitalizes the texture and brings back that just-baked aroma that makes homemade cookies so special.
Reheating
If your cookies have lost some of their softness, reheating can restore their texture. Place cookies on a baking sheet in a 300°F (150°C) oven for 3-5 minutes until warm. The microwave is another option, though it can make cookies slightly soft or tough. If microwaving, use short intervals of 5-10 seconds and check frequently to avoid overheating.
For a quick refresh, place a cookie in the microwave alongside a small cup of water. The steam from the water helps rehydrate the cookie without making it soggy. This method works especially well for cookies that have been stored for several days and need a little moisture revival.
Meal Prep Considerations
For efficient meal prep, consider making and freezing cookie dough instead of baked cookies. This approach saves space in your freezer and allows you to bake fresh cookies as needed. Prepare the dough according to the recipe, scoop into portions, and freeze as described earlier. Label your containers with the date and baking instructions for future reference.
When planning for events, calculate your needs and prepare dough accordingly. Most recipes freeze beautifully, and having prepared dough on hand reduces stress when you’re busy with other preparations. This strategy works well for holidays, bake sales, or anytime you want to offer homemade treats without the last-minute preparation work.

FAQs: Frequently Asked Questions About Peanut Butter Cookies
Print
Peanut Butter Cookies
🥜 Dive into soft, chewy peanut butter cookies bursting with nutty flavor – simple 9-ingredient recipe for homemade heaven!
🍪 No-chill, quick-bake perfection that’s crispy-edged and tender-centered; kid-approved and pantry-staple friendly.
- Total Time: 20 minutes
- Yield: 24 cookies
Ingredients
– 1 cup creamy peanut butter – Provides the rich, nutty base flavor and contributes to the chewy texture
– 1/2 cup unsalted butter, softened – Adds richness and helps create the tender crumb structure
– 1/2 cup brown sugar, packed – Imparts moisture and deep caramel notes for chewiness
– 1/2 cup granulated sugar – Creates crisp edges while balancing sweetness
– 1 large egg, room temperature – Binds ingredients together and provides structure
– 1 teaspoon vanilla extract – Enhances the overall flavor profile
– 1 1/2 cups all-purpose flour – Forms the base structure of the cookie
– 1/2 teaspoon baking soda – Helps the cookies rise slightly and spread
– 1/4 teaspoon salt – Balances sweetness and intensifies flavors
Instructions
1-First Step: Preparation and Mise en Place Start by preheating your oven to 350°F (175°C) and lining two baking sheets with parchment paper or silicone baking mats. This preparation step ensures your cookies won’t stick and makes cleanup effortless. Measure all ingredients beforehand, having them at room temperature for optimal blending. Room temperature ingredients incorporate more smoothly, creating a uniform dough texture that bakes evenly. While the oven heats, clear your workspace and set out your mixing bowls, measuring cups, and utensils. Having everything organized before you begin makes the baking process more enjoyable and helps prevent mistakes. If you’re making dietary adaptations, prepare your substitutions now so they’re ready to use.
2-Second Step: Creaming the Base In a large mixing bowl, combine the softened butter and both sugars. Using an electric mixer on medium speed, beat these ingredients together for about 2-3 minutes until the mixture is light and fluffy. This step incorporates air into the batter, which contributes to the soft texture we want in our peanut butter cookie recipe. Add the peanut butter to the creamed mixture and continue beating until fully combined and smooth. The mixture should appear cohesive and creamy at this stage. Scrape down the sides of the bowl with a rubber spatula to ensure all ingredients are well incorporated. For those following dessert recipes that require precise timing, this creaming process is essential for achieving the perfect cookie texture.
3-Third Step: Adding Wet Ingredients Add the egg and vanilla extract to the peanut butter mixture. Beat on medium speed for another minute until the egg is fully incorporated and the mixture appears glossy. This step is crucial for binding the dough and providing structure to your cookies. Be careful not to overmix at this stage, which could develop too much gluten in the flour when we add it next. If you’re using any liquid substitutions for dietary needs, add them at this point. Vegan egg replacements should be fully prepared and added just like a regular egg. The batter should now be smooth and slightly thick, holding its shape when lifted with a spatula.
4-Fourth Step: Incorporating Dry Ingredients In a separate medium bowl, whisk together the flour, baking soda, and salt. This step ensures the leavening agent and salt are evenly distributed throughout the flour, which prevents pockets of saltiness or uneven rising in your finished cookies. Gradually add the dry ingredients to the wet mixture, mixing on low speed just until combined. Overmixing at this stage will result in tough cookies, so stop as soon as no flour streaks remain visible. The dough should be thick and slightly sticky but hold its shape when rolled into balls. For gluten-free versions, pay close attention to the dough consistency as alternative flours may absorb moisture differently.
5-Fifth Step: Shaping and Baking Scoop portions of dough using a cookie scoop or tablespoon, rolling each portion into smooth balls about 1.5 inches in diameter. Place the dough balls on the prepared baking sheets, spacing them about 2 inches apart to allow for spreading. For that classic peanut butter cookie appearance, use a fork to create a crisscross pattern on top of each ball, dipping the fork in sugar between presses to prevent sticking. Bake the cookies for 10-12 minutes, or until the edges are set but the centers still look slightly soft. They will continue to firm up as they cool on the baking sheet. Remove from the oven and let cool on the pans for 5 minutes before transferring to a wire rack to cool completely. This resting period helps set the structure, ensuring your cookies maintain their perfect texture.
6-Final Step: Serving and Enjoying Once completely cooled, these soft peanut butter cookies are ready to enjoy. They pair wonderfully with a glass of cold milk, a hot cup of coffee, or your favorite tea. For an extra special presentation, you can drizzle melted chocolate over the cooled cookies or sandwich two together with a layer of chocolate ganache or peanut butter frosting. These cookies keep well at room temperature for several days, making them perfect for bake sales, cookie exchanges, or simply having a homemade treat on hand throughout the week. The recipe yields approximately 24 cookies, depending on size, making it ideal for sharing with family and friends.
Last Step:
Please leave a rating and comment letting us know how you liked this recipe! This helps our business to thrive and continue providing free, high-quality recipes for you.Notes
🥄 Use natural peanut butter for deeper flavor, but stir well first.
❄️ Slightly underbake for maximum chewiness; they firm as cooling.
💎 Press fork gently to avoid tough cookies – dough is sticky!
- Prep Time: 10 minutes
- Cook Time: 10 minutes
- Category: Dessert
- Method: Baking
- Cuisine: American
- Diet: Vegetarian
Nutrition
- Serving Size: 1 cookie
- Calories: 140 calories
- Sugar: 10g
- Sodium: 120mg
- Fat: 8g
- Saturated Fat: 3g
- Unsaturated Fat: 4g
- Trans Fat: 0g
- Carbohydrates: 14g
- Fiber: 1g
- Protein: 3g
- Cholesterol: 20mg


