
Why You’ll Love This Sopapilla Cheesecake
If you’ve been searching for a dessert that combines the flaky, buttery layers of traditional Mexican sopapillas with the creamy indulgence of cheesecake, this sopapilla cheesecake recipe is about to become your new favorite. This delightful fusion brings together the best of both worlds in a simple yet impressive treat that will have your family and friends begging for seconds. Perfect for home cooks, busy parents, students, and food enthusiasts alike, this recipe delivers exceptional results with minimal effort.
What Makes This Special
- Ease of preparation: This easy sopapilla cheesecake bars recipe comes together in just minutes using simple ingredients you likely already have in your pantry. Unlike traditional cheesecake that requires water baths and precise temperature control, this crescent roll dessert bakes beautifully in about 30 minutes with minimal effort. The no-fuss approach makes it perfect for beginner bakers and experienced cooks alike. With prep time taking only 10-15 minutes, you can have a delicious dessert in the oven almost instantly. The simplified assembly process means you can even involve children in the kitchen, making it a fun family activity that creates lasting memories around the table.
- Health benefits: While still an indulgent treat, this flaky pastry cheesecake can be modified to suit various dietary needs without sacrificing flavor. The portion-controlled nature of bar-style desserts makes it easier to enjoy in moderation, and you can incorporate substitutions like reduced-fat cream cheese or natural sweeteners to create a lighter version that still delivers on taste. The recipe doesn’t require excessive amounts of sugar or butter compared to many traditional desserts, making it a somewhat smarter choice for those watching their intake. Additionally, the inclusion of vanilla extract provides antioxidants, while cinnamon offers anti-inflammatory properties and can help regulate blood sugar levels, adding small nutritional benefits to this delightful treat.
- Versatility: This cinnamon bliss sopapilla dessert adapts beautifully to different occasions, from casual family dinners to festive holiday gatherings. You can easily customize the flavors to match seasons or preferences, adding ingredients like pumpkin puree for autumn or fresh berries for summer. The recipe also works well for various dietary restrictions with simple substitutions. Whether you’re hosting a Fourth of July barbecue, Thanksgiving dinner, or simply want a sweet treat for a Tuesday night movie, this dessert fits seamlessly. The recipe scales easily, so you can make a smaller batch for intimate gatherings or double it for large parties without changing the technique.
- Distinctive flavor: What sets this flaky layered sopapilla cheesecake apart is the perfect harmony of textures and tastes. The buttery, flaky crescent dough creates a delightful contrast with the creamy cheesecake filling, while the cinnamon-sugar topping adds that classic sopapilla crunch. Each bite delivers a satisfying combination of sweetness and spice that will transport your taste buds to dessert heaven. The subtle honey notes in the background add depth and complexity that elevates this dessert beyond ordinary cheesecake bars. This recipe captures the essence of traditional sopapillas while offering the comforting familiarity of cheesecake, creating a unique flavor profile that appeals to both adventurous eaters and traditional dessert lovers.
This recipe represents everything we love about simple, accessible cooking at RecipesValentina.com it delivers impressive results without requiring advanced techniques or hard-to-find ingredients. Whether you’re a busy parent looking for a quick dessert or a student wanting to impress friends, this recipe fits the bill perfectly. The combination of textures and flavors creates a memorable dessert experience that will have everyone asking for your recipe. Check out this classic sopapilla cheesecake recipe for another variation of this delicious dessert.
Jump to:
- Why You’ll Love This Sopapilla Cheesecake
- What Makes This Special
- Essential Ingredients for Sopapilla Cheesecake
- Main Ingredients
- Special Dietary Options
- Vegan
- Gluten-free
- Low-calorie
- How to Prepare the Perfect Sopapilla Cheesecake: Step-by-Step Guide
- Preparation Phase
- First Step: Preheat and Prepare Your Baking Dish
- Second Step: Create the Bottom Layer
- Third Step: Prepare the Cream Cheese Filling
- Fourth Step: Add the Filling Layer
- Fifth Step: Add the Top Pastry Layer
- Sixth Step: Add Butter and Cinnamon-Sugar Topping
- Final Step: Bake and Cool
- Dietary Substitutions to Customize Your Sopapilla Cheesecake
- Protein and Main Component Alternatives
- Vegetable, Sauce, and Seasoning Modifications
- Mastering Sopapilla Cheesecake: Advanced Tips and Variations
- Pro Cooking Techniques
- Flavor Variations
- Presentation Tips
- Make-Ahead Options
- How to Store Sopapilla Cheesecake: Best Practices
- Refrigeration
- Freezing
- Reheating
- Meal Prep Considerations
- FAQs: Frequently Asked Questions About Sopapilla Cheesecake
- What is sopapilla cheesecake?
- What ingredients do I need for sopapilla cheesecake?
- How do you make sopapilla cheesecake step by step?
- How long does sopapilla cheesecake last and how should I store it?
- Can I make variations of sopapilla cheesecake?
- Sopapilla Cheesecake
- Ingredients
- Instructions
- Last Step:
- Notes
- Nutrition
- Did you make this recipe?
Essential Ingredients for Sopapilla Cheesecake
Creating the perfect sopapilla cheesecake requires just a handful of simple ingredients that come together to create something truly magical. The beauty of this recipe lies in its simplicity you don’t need specialty items or complex components to achieve delicious results. Each ingredient plays a crucial role in building the layers of flavor and texture that make this dessert so special.
Main Ingredients
- Two 8-ounce cans refrigerated crescent roll dough – Creates the flaky pastry layers that mimic traditional sopapilla texture
- 16 ounces softened cream cheese – Forms the creamy, rich cheesecake filling that balances the sweetness
- 1 cup white sugar (divided) – Provides sweetness throughout the dessert, with portion in the filling and portion in the topping
- 1 teaspoon vanilla extract – Adds depth and enhances the overall flavor profile
- ½ cup unsalted butter (melted) – Contributes richness and helps create the golden, buttery crust
- 1 tablespoon ground cinnamon – Delivers the classic sopapilla flavor that defines this dessert
- Honey (optional) – For drizzling over the finished dessert to enhance the authentic sopapilla experience
Special Dietary Options
Our collection of easy dessert recipes is designed to be adaptable, and this sopapilla cheesecake is no exception. Here are some simple substitutions to accommodate different dietary needs without sacrificing the delicious taste and texture of this beloved dessert.
Vegan
- Use plant-based cream cheese alternative made from nuts or soy
- Replace crescent dough with vegan puff pastry or homemade vegan dough
- Swap regular butter for vegan butter sticks or refined coconut oil
- Use maple syrup or agave nectar instead of honey for topping
- Ensure your sugar is certified vegan, as some conventional sugars use bone char in processing
Gluten-free
- Choose gluten-free crescent roll dough alternatives, available at many specialty stores
- Verify all ingredients, including cinnamon, are certified gluten-free to avoid cross-contamination
- Consider using a gluten-free puff pastry as a substitute for the crescent rolls
- If making your own dough, use a 1:1 gluten-free flour blend with xanthan gum added for structure
- Be aware that gluten-free doughs may require slightly different baking times and temperatures
Low-calorie
- Opt for reduced-fat cream cheese or Greek yogurt blended with a small amount of regular cream cheese
- Use a natural sweetener like stevia, monk fruit, or erythritol to replace some or all of the sugar
- Reduce the amount of butter slightly or use a light butter alternative
- Increase cinnamon for flavor without added calories, as cinnamon adds sweetness without sugar
- Consider using a thinner layer of dough to reduce the overall carbohydrate count
- Top with fresh fruit instead of additional honey to add natural sweetness with fewer calories
| Original Ingredient | Vegan Alternative | Gluten-Free Alternative | Low-Calorie Alternative |
|---|---|---|---|
| Refrigerated crescent roll dough | Vegan puff pastry | Gluten-free pastry dough | Thin layer of reduced-fat dough |
| Cream cheese | Plant-based cream cheese | Regular cream cheese (naturally GF) | Reduced-fat cream cheese or Greek yogurt blend |
| White sugar | Organic cane sugar | Regular sugar (naturally GF) | Stevia or monk fruit sweetener |
| Unsalted butter | Vegan butter or coconut oil | Regular butter (naturally GF) | Light butter alternative |
How to Prepare the Perfect Sopapilla Cheesecake: Step-by-Step Guide
Making this delicious sopapilla cheesecake recipe is a straightforward process that yields impressive results. The technique is simple enough for beginners yet produces a dessert that looks and tastes like it came from a professional bakery. Follow these detailed steps to create a dessert that will have everyone asking for your recipe.
Preparation Phase
First Step: Preheat and Prepare Your Baking Dish
Begin by preheating your oven to 350°F (175°C). While the oven warms up, thoroughly grease a 9×13-inch baking dish with butter or cooking spray. This ensures your cheesecake bars will release easily after baking. For even easier removal, line the dish with parchment paper, leaving an overhang on the sides. This paper handles make lifting the entire cheesecake out of the pan simple and mess-free, allowing for cleaner cuts and more attractive presentation.
Preparing your workspace before you begin will make the assembly process smoother. Clear your countertop and have all your ingredients and tools ready. You’ll need a mixing bowl, electric mixer or whisk, spatula, and measuring cups and spoons. Having everything at your fingertips prevents the frustration of searching for items while working with sticky dough and filling. For more preparation tips, check out our collection of easy dessert recipes.
Second Step: Create the Bottom Layer
Open one can of refrigerated crescent roll dough and unroll it onto the bottom of your prepared baking dish. Carefully press the perforated seams together to create one solid sheet of dough. Use your fingers to gently stretch the dough to reach the edges of the pan, creating an even layer. Work slowly and carefully to avoid tearing the dough. If tears occur, simply press the dough back together with your fingers.
This bottom layer will serve as the foundation of your flaky layered sopapilla cheesecake, so take care to create an even surface. Uneven dough can lead to some areas being too thick and others too thin, which affects both baking time and texture consistency. If you’re adding any mix-ins to the bottom layer, such as chopped nuts or a thin layer of fruit preserves, now is the time to sprinkle them over the dough before proceeding to the next step.
Third Step: Prepare the Cream Cheese Filling
In a medium mixing bowl, combine the softened cream cheese, ½ cup of the white sugar, and vanilla extract. Using an electric mixer or sturdy whisk, beat the ingredients until completely smooth and well combined. This should take about 2-3 minutes. Ensure the cream cheese is fully softened to prevent lumps in your filling. The mixture should be creamy and spreadable, not stiff.
For the smoothest filling, let your cream cheese sit at room temperature for at least 30 minutes before starting. Cold cream cheese will create lumps that are difficult to eliminate, resulting in a grainy texture. If you’re short on time, you can microwave the cream cheese for 10-15 seconds to soften it, but be careful not to melt it. The filling should have a consistency similar to thick frosting creamy enough to spread easily but firm enough to stay in place on the dough layer.
Fourth Step: Add the Filling Layer
Spread the cream cheese mixture evenly over the bottom crescent dough layer. Use an offset spatula or the back of a spoon to create a smooth, even surface. Try to leave a small border around the edges to prevent the filling from leaking out during baking. This creamy middle layer is what transforms the simple crescent dough into a luscious cheesecake bars experience.
Take your time with this step to ensure the filling is distributed evenly. Uneven filling will result in some bites being too sweet while others lack that creamy cheesecake flavor. If you’re planning to add any swirls or ribbons of fruit sauce or chocolate, now is the time to gently spoon them over the cream cheese layer and use a knife to create a marbled effect. This adds visual interest and complementary flavors to your finished dessert.
Fifth Step: Add the Top Pastry Layer
Open the second can of crescent roll dough and unroll it over the cream cheese filling. As you did with the bottom layer, press the seams together firmly to create a solid sheet. Gently press the dough down to adhere it to the filling layer. This creates the sandwich structure that makes this crescent roll dessert so special creamy cheesecake filling between two layers of flaky pastry.
Be gentle when placing the top layer to avoid disturbing the filling underneath. If the dough seems resistant to unrolling, let it sit for a few minutes to soften slightly. Once the top layer is in place, use a fork to prick the dough lightly in several places. This allows steam to escape during baking, preventing air bubbles from forming between the layers and ensuring that the top crust adheres nicely to the filling.
Sixth Step: Add Butter and Cinnamon-Sugar Topping
Pour the melted butter evenly over the top layer of crescent dough, using a pastry brush to spread it to all corners. Make sure the entire surface is coated, as this butter helps the cinnamon sugar adhere and contributes to the beautiful golden color during baking. In a small bowl, combine the remaining ½ cup of sugar with the ground cinnamon. Sprinkle this cinnamon sugar mixture generously over the buttered dough, ensuring even coverage.
This combination creates the signature cinnamon sugar topping that gives sopapilla cheesecake its characteristic flavor and slightly crunchy texture. For a more textured topping, consider adding a tablespoon of turbinado sugar along with the cinnamon mixture. This coarse sugar creates a delightful crunch that mimics the crispy exterior of traditional fried sopapillas. You can also add a pinch of nutmeg or cardamom to the cinnamon sugar for an extra layer of flavor complexity.
Final Step: Bake and Cool
Place your assembled sopapilla cheesecake in the preheated oven and bake for approximately 30 minutes. The top should become golden brown and bubbly, with a slightly caramelized appearance around the edges. If the top browns too quickly, loosely tent with aluminum foil for the last few minutes of baking to prevent burning while allowing the center to finish cooking.
Remove the dish from the oven and allow it to cool completely at room temperature, which takes about 1 hour. This cooling period is essential for the cheesecake to set properly. Cutting into the dessert while it’s still warm will cause the filling to ooze out and the structure to collapse. For the best results, refrigerate the cooled cheesecake for an additional 2-4 hours before cutting. This chilling period helps the flavors meld and makes for cleaner slices. When ready to serve, cut into squares and drizzle with honey if desired. Serve cold or at room temperature for the most enjoyable experience. For more creative sweet crescent roll dessert ideas, explore our related recipes.

Dietary Substitutions to Customize Your Sopapilla Cheesecake
One of the wonderful aspects of this sopapilla cheesecake recipe is its adaptability. Whether you’re following specific dietary guidelines or simply want to experiment with different flavors, these substitutions will help you create a version that suits your needs perfectly. The basic structure of this dessert flaky layers, creamy filling, and spiced topping provides endless opportunities for customization while maintaining the essence of what makes this dessert so beloved.
Protein and Main Component Alternatives
The cream cheese filling is the heart of this dessert, but there are several ways to modify it based on your preferences or dietary requirements. For a lighter version, try substituting Greek yogurt for half of the cream cheese. This reduces calories while maintaining a creamy texture and adding a subtle tang that complements the sweetness. When using Greek yogurt, consider adding a tablespoon of cornstarch to the mixture to help it set properly during baking.
If you’re avoiding dairy, look for high-quality plant-based cream cheese alternatives that have a similar consistency to traditional cream cheese. Cashew-based versions tend to work particularly well in baking applications, as they mimic the rich texture of dairy cream cheese. For a homemade option, blend soaked cashews with a touch of lemon juice, coconut oil, and a natural sweetener until smooth, then use this mixture in place of the cream cheese filling.
For those watching their fat intake, reduced-fat or fat-free cream cheese can be used, though the texture may be slightly less rich. To compensate for the reduction in fat content, consider adding an extra half teaspoon of vanilla extract to boost the flavor profile. You can also incorporate a teaspoon of cornstarch or flour into the filling to help stabilize it and prevent it from becoming too soft.
For the crescent roll layers, you might consider using puff pastry for an even flakier result. Just note that puff pastry will create a lighter, airier texture compared to the slightly denser crescent dough. If you’re feeling adventurous, you could even make your own simple dough using flour, butter, and a touch of sugar, though this adds considerable time to the preparation. Homemade dough allows you to control the ingredients completely and can be customized with additions like citrus zest or a pinch of cardamom for extra flavor.
Vegetable, Sauce, and Seasoning Modifications
While the classic cinnamon-sugar topping is undeniably delicious, there are countless ways to customize the flavor profile of your cheesecake bars. For a fall-inspired variation, try adding a tablespoon of pumpkin pie spice to the cinnamon sugar mixture. This warm spice blend adds depth and creates a seasonal twist that’s perfect for autumn gatherings. You can even swirl a half cup of pumpkin puree into the cream cheese filling for an extra boost of pumpkin flavor and a beautiful orange swirl pattern.
Fruit lovers can incorporate sliced apples, peaches, or berries between the cream cheese layer and top dough. The fruit will become tender and release natural juices during baking, creating a lovely jam-like layer that adds moisture and flavor. Just pat the fruit dry before adding to prevent excess liquid from making the dessert soggy. For a special touch, toss the fruit in a tablespoon of cornstarch before placing it on the cream cheese layer. This helps thicken the fruit juices as they cook, preventing them from making the crust soggy.
For chocolate enthusiasts, consider drizzling melted chocolate over the finished cheesecake or mixing chocolate chips into the cream cheese filling. A tablespoon of cocoa powder added to the cinnamon sugar creates a chocolate-cinnamon variation that’s both unique and delicious. For a Mexican chocolate twist, add a pinch of cayenne pepper along with the cocoa powder. The subtle heat complements the cinnamon and creates a sophisticated flavor profile that will surprise and delight your guests.
Nut lovers can sprinkle chopped pecans, walnuts, or almonds over the cinnamon sugar layer before baking for added crunch and flavor. The nuts will toast in the oven, developing a rich, nutty flavor that pairs perfectly with the cinnamon and cream cheese. For an extra layer of sophistication, try using candied pecans or pecans roasted with a touch of maple syrup before adding them to your cheesecake.
If you prefer a citrusy variation, add the zest of one orange or lemon to the cream cheese filling. This bright, fresh flavor cuts through the richness and creates a refreshing dessert option, especially during warmer months. You can also add a few drops of citrus extract to the cinnamon sugar mixture for an additional burst of flavor. For a sophisticated Meyer lemon variation, use Meyer lemon zest in the filling and add a tablespoon of lemon curd swirled into the cream cheese mixture before adding the top layer of dough.
Mastering Sopapilla Cheesecake: Advanced Tips and Variations
Once you’ve mastered the basic sopapilla cheesecake recipe, you can start experimenting with these professional techniques and creative variations to elevate your dessert-making skills even further. These tips will help you achieve bakery-quality results at home and inspire you to create your own unique versions of this beloved dessert.
Pro Cooking Techniques
For an extra flaky texture, try lightly chilling your crescent dough before unrolling it. This makes it easier to handle and helps prevent stretching that can lead to uneven layers. Simply place the unopened cans in the refrigerator for 15-20 minutes before beginning your recipe. When pressing the dough into the pan, work gently and use your fingertips rather than the palm of your hand to avoid tearing the delicate pastry. This technique helps maintain the structural integrity of the dough layers, resulting in more defined layers in the finished dessert.
For a more refined presentation, create a lattice pattern with the top layer of dough instead of covering it completely. This allows the creamy filling to peek through and creates an attractive bakery-style appearance. To do this, cut the top dough into strips and weave them in an over-and-under pattern before brushing with butter and adding the cinnamon sugar. This technique does take a bit more time and patience, but the visual impact is stunning and makes the dessert perfect for special occasions.
Another professional tip is to brush the bottom dough layer with a beaten egg before adding the filling. This creates a barrier that prevents the filling from making the bottom soggy, ensuring every layer maintains its distinct texture. Similarly, brushing the top with a mixture of beaten egg and milk before adding the cinnamon sugar will help create a beautiful, golden finish. For an extra shine, brush the hot cheesecake with a simple syrup made from equal parts sugar and water immediately after removing it from the oven.
Temperature control is crucial for achieving the perfect texture in your sopapilla cheesecake. Use an oven thermometer to ensure your oven is actually at 350°F, as many ovens run hotter or colder than their settings indicate. If your oven has hot spots, rotate the pan halfway through baking to ensure even cooking. For the most consistent results, bake on the center rack of your oven, where the heat circulation is most even.
Flavor Variations
The versatility of sopapilla cheesecake extends far beyond the traditional cinnamon flavor. For a tropical twist, replace the cinnamon with a mixture of nutmeg, allspice, and a pinch of clove, then top with toasted coconut flakes after baking. This creates a flavor profile reminiscent of tropical desserts while maintaining the comforting elements of the original recipe. You can also add a tablespoon of coconut extract to the cream cheese filling for an even more pronounced coconut flavor.
Coffee lovers can add a tablespoon of instant espresso powder to the cream cheese filling for a mocha-inspired variation. Pair this with a chocolate drizzle on top for a sophisticated dessert that’s perfect for after-dinner entertaining. The subtle coffee notes complement the creamy cheesecake beautifully without overpowering it. For an extra special touch, serve this variation with a dollop of coffee-flavored whipped cream on top.
For a citrusy variation, add the zest of one orange or lemon to the cream cheese filling. This bright, fresh flavor cuts through the richness and creates a refreshing dessert option, especially during warmer months. You can also add a few drops of citrus extract to the cinnamon sugar mixture for an additional burst of flavor. For a blood orange variation, use blood orange zest and a drop of red food coloring in the filling for a stunning pink color and a unique, berry-like citrus flavor.
For a sophisticated adult version, try adding a tablespoon of your favorite liqueur to the cream cheese filling. Amaretto adds a lovely almond flavor that complements the cinnamon perfectly, while Grand Marnier or orange liqueur enhances the citrus notes of the dessert. Kahlúa creates a coffee-tinged variation that’s perfect after dinner. Remember that the alcohol will mostly cook off during baking, leaving just the subtle flavor behind.
Presentation Tips
Serving your sopapilla cheesecake with style can elevate the entire experience. Consider dusting the cooled cheesecake with powdered sugar just before serving for an elegant finish. This simple addition creates a beautiful contrast against the golden topping and adds a touch of sophistication. For a more dramatic presentation, create a stencil from parchment paper in a decorative shape, place it on the cheesecake, and dust with powdered sugar through the stencil.
For individual portions, use a round biscuit cutter to create perfectly shaped servings, then place each on a small dessert plate with a drizzle of honey and a fresh mint leaf. This restaurant-style presentation transforms a simple home-baked dessert into something truly special. You can also use cookie cutters in fun shapes for themed occasions star shapes for Independence Day, hearts for Valentine’s Day, or leaf shapes for autumn gatherings.
When serving at gatherings, create a topping bar with options like whipped cream, fresh berries, chocolate sauce, and additional cinnamon sugar. This interactive element allows guests to customize their portions and adds a fun element to the dining experience. Provide small spoons or tongs for each topping to keep everything sanitary and organized. Label each topping clearly and consider providing small cards with suggested flavor combinations to inspire your guests.
For a stunning layered presentation, cut the cheesecake into squares and arrange them in a glass trifle dish, alternating layers of cheesecake with fresh berries and whipped cream. This transforms the simple bars into an elegant dessert parfait that’s perfect for dinner parties. The layers create a beautiful visual effect and allow guests to see all the components of the dessert before digging in.
Make-Ahead Options
This sopapilla cheesecake recipe is ideal for advance preparation, making it perfect for busy schedules and entertaining. The entire dessert can be prepared up to 24 hours before serving without compromising quality. Simply bake, cool, and refrigerate until needed, then bring to room temperature for 30 minutes before serving. This make-ahead capability is one of the reasons why this dessert is so popular for holidays and special occasions.
For even more convenience, you can assemble the entire dessert the night before, cover it tightly, and bake it fresh the next day. This approach ensures the flakiest possible crust while still saving you time on the day of your event. Just remember to add about 5-10 minutes to the baking time if baking from the refrigerator, as the cold dough will take a bit longer to cook through completely.
Freezing individual portions in advance is another excellent make-ahead strategy. Cut the cheesecake into squares, wrap each piece separately in plastic wrap and foil, and freeze for up to 3 months. Thaw overnight in the refrigerator when needed for a quick, impressive dessert solution. This method is perfect for having homemade treats on hand for unexpected guests or sudden dessert cravings. For more cheesecake variations to try, check out our related recipes.
If you’re planning a large event, consider baking multiple batches of sopapilla cheesecake in different flavors. This variety adds interest to your dessert table and accommodates different taste preferences among your guests. Prepare the classic cinnamon version alongside a chocolate variation and a fruit-topped option for a stunning dessert display that looks impressive and tastes delicious.
How to Store Sopapilla Cheesecake: Best Practices
Proper storage is essential for maintaining the quality and safety of your sopapilla cheesecake. Following these guidelines will help you enjoy your delicious dessert for days after baking, with minimal loss of texture or flavor. Whether you’re storing leftovers or preparing in advance for future enjoyment, these storage tips will ensure your cheesecake stays fresh and delicious.
Refrigeration
Store your sopapilla cheesecake in the refrigerator for up to 5 days to maintain freshness and food safety. Cover the dish tightly with plastic wrap or aluminum foil, or transfer individual pieces to an airtight container. For best results, place a sheet of wax paper or parchment between layers if stacking pieces to prevent sticking. This method keeps the cheesecake from absorbing odors from other foods in your refrigerator while maintaining its moisture content.
The cream cheese filling makes this dessert perishable, so it should not be left at room temperature for more than 2 hours. If you’re serving at a party, consider placing the cheesecake on ice or returning it to the refrigerator between servings to ensure it stays safe to eat throughout your event. During hot weather or outdoor events, this becomes even more important, so plan accordingly and keep an eye on how long the dessert has been out of refrigeration.
For optimal flavor and texture, allow refrigerated cheesecake to come to room temperature for about 20-30 minutes before serving. This softens the butter in the pastry layers and takes the chill off the cream cheese filling, resulting in a more enjoyable eating experience. However, if you prefer a firmer texture, serving it chilled is perfectly acceptable and some people actually prefer it that way.
Freezing
For longer storage, sopapilla cheesecake freezes beautifully for 2-3 months. Wrap the entire uncut cheesecake tightly in plastic wrap followed by aluminum foil, or cut into individual portions and wrap each piece separately. Double wrapping prevents freezer burn and protects the delicate flavors. If freezing the whole cheesecake, consider cutting it into portions first, as this makes thawing more convenient and prevents you from having to thaw more than you need at one time.
When freezing individual pieces, arrange them on a baking sheet and freeze until solid before transferring to a freezer bag. This prevents them from sticking together and allows you to remove just the number of pieces you need without thawing the entire batch. Label your freezer containers or bags with the date and contents so you can easily identify them later. Frozen cheesecake should be consumed within 3 months for the best quality, though it will remain safe to eat beyond that timeframe.
To prevent condensation from forming on your cheesecake during thawing (which can make the topping soggy), place the wrapped pieces in the refrigerator to thaw overnight rather than leaving them on the counter. This slow thawing method helps maintain the texture of both the filling and the pastry layers. Once thawed, consume the cheesecake within 3-4 days for the best quality.
Reheating
While delicious cold, some people prefer to warm their sopapilla cheesecake slightly before serving. To reheat individual pieces, place them in a 300°F (150°C) oven for 5-7 minutes. This method warms the dessert without making it soggy and helps restore some of the flaky texture to the pastry layers. For extra crispy edges, you can finish with a minute or two under the broiler, but watch carefully to prevent burning.
Avoid using the microwave for reheating, as this tends to make the dough tough and the filling rubbery. If you only have a microwave available, use the lowest power setting and heat in short intervals of 10-15 seconds, checking frequently to prevent overheating. Place a paper towel between the cheesecake and the turntable to catch any melted butter or sugar that might drip during microwaving.
For the best results when reheating, place the cheesecake on a baking sheet lined with parchment paper. This allows for even heating and makes cleanup easier. If the cheesecake has been frozen, let it thaw completely in the refrigerator before reheating, as trying to reheat from frozen will result in uneven heating and potentially burnt edges with a frozen center.
Meal Prep Considerations
For those who enjoy meal prepping, sopapilla cheesecake can be prepared in large batches and portioned for the week ahead. Cut the cooled cheesecake into individual servings and store each in a separate container for grab-and-go convenience throughout the week. This approach is particularly helpful for those who like to include a small treat in their daily meal plan without the temptation of having an entire dessert sitting on the counter.
When meal prepping, consider storing the topping separately if you prefer maximum crunch. Sprinkle fresh cinnamon sugar just before eating to maintain the crispy texture. This small extra step makes a significant difference in the overall eating experience, especially after several days of storage. You can store the cinnamon-sugar mixture in a small airtight container and give it a quick stir before sprinkling to ensure it remains clump-free.
For variety in your meal prep, consider making half a batch of traditional cinnamon cheesecake and half of a flavored variation. This provides variety throughout the week and prevents flavor fatigue. Flavored versions like chocolate or fruit-topped cheesecakes can be especially nice to have on hand for days when you want something a little different from your usual routine.
FAQs: Frequently Asked Questions About Sopapilla Cheesecake
What is sopapilla cheesecake?
What ingredients do I need for sopapilla cheesecake?
How do you make sopapilla cheesecake step by step?
How long does sopapilla cheesecake last and how should I store it?
Can I make variations of sopapilla cheesecake?

Sopapilla Cheesecake
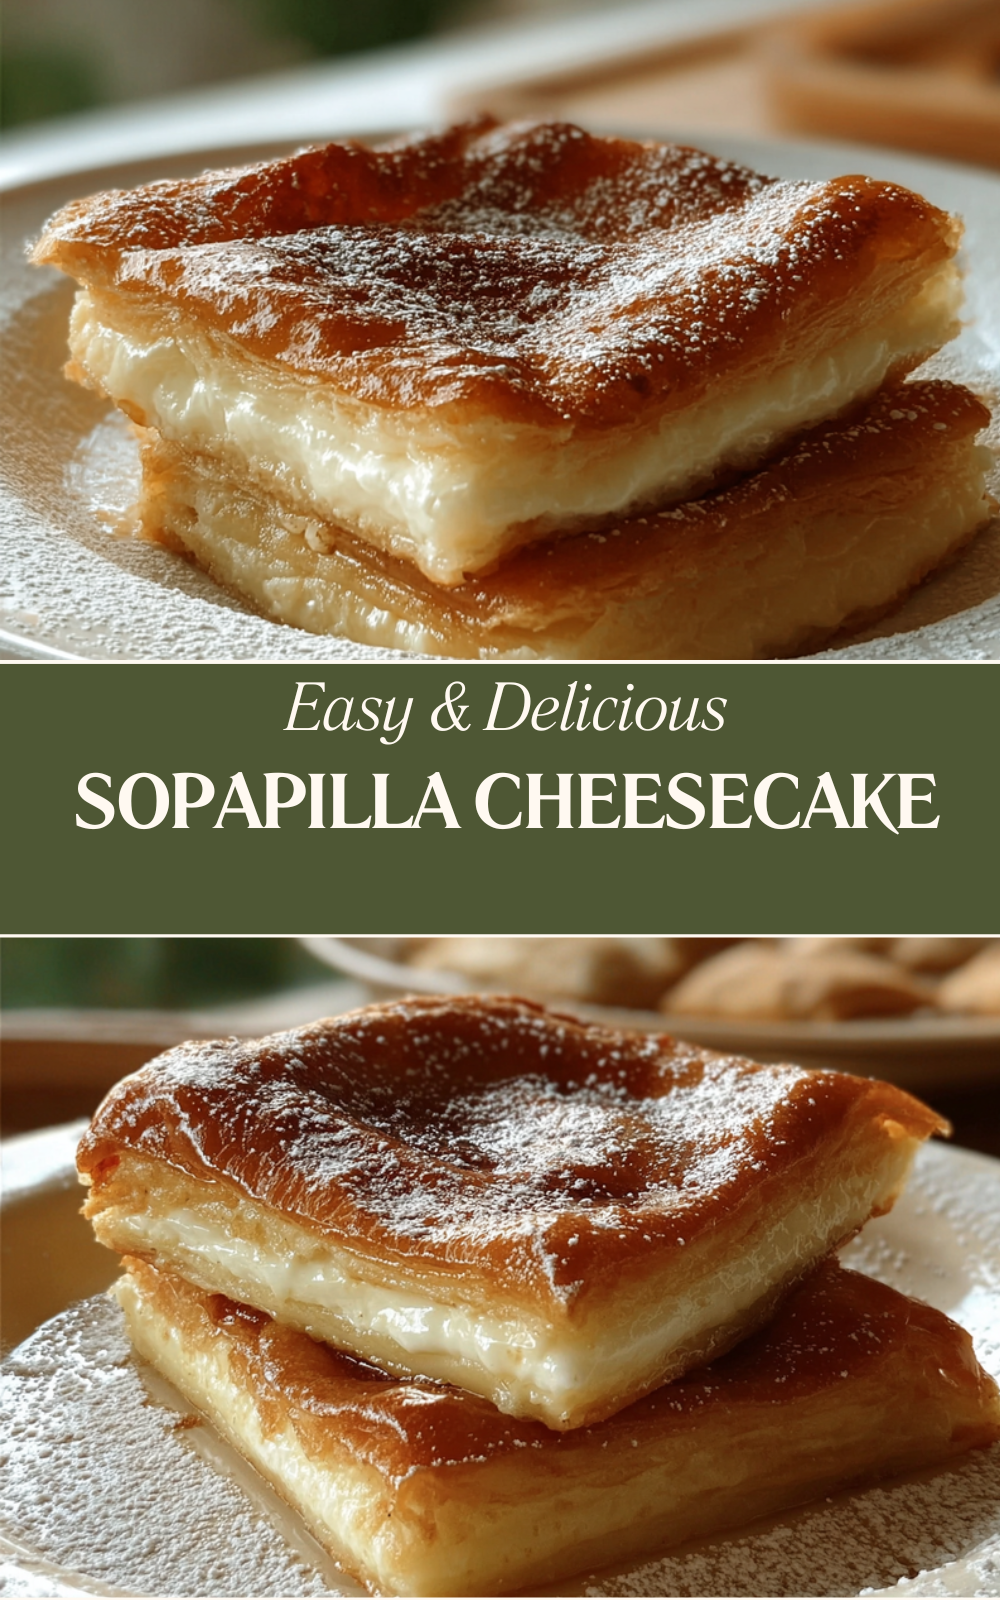
🥮 Dive into flaky crescent layers cradling creamy cheesecake with a crunchy cinnamon sugar topping for ultimate dessert bliss!
🍯 Quick and easy to make, this crowd-pleasing treat combines sopapilla texture with cheesecake indulgence in under an hour.
- Total Time: 45 minutes
- Yield: 12 servings
Ingredients
– Two 8-ounce cans refrigerated crescent roll dough for flaky pastry layers
– 16 ounces softened cream cheese for creamy cheesecake filling
– 1 cup white sugar (divided) for sweetness
– 1 teaspoon vanilla extract for flavor
– ½ cup unsalted butter (melted) for buttery crust
– 1 tablespoon ground cinnamon for sopapilla flavor
– Honey (optional) for drizzling
Instructions
1-First Step: Preheat and Prepare Your Baking Dish Begin by preheating your oven to 350°F (175°C). While the oven warms up, thoroughly grease a 9×13-inch baking dish with butter or cooking spray. This ensures your cheesecake bars will release easily after baking. For even easier removal, line the dish with parchment paper, leaving an overhang on the sides. This paper handles make lifting the entire cheesecake out of the pan simple and mess-free, allowing for cleaner cuts and more attractive presentation. Preparing your workspace before you begin will make the assembly process smoother. Clear your countertop and have all your ingredients and tools ready. You’ll need a mixing bowl, electric mixer or whisk, spatula, and measuring cups and spoons. Having everything at your fingertips prevents the frustration of searching for items while working with sticky dough and filling. For more preparation tips, check out our collection of easy dessert recipes.
2-Second Step: Create the Bottom Layer Open one can of refrigerated crescent roll dough and unroll it onto the bottom of your prepared baking dish. Carefully press the perforated seams together to create one solid sheet of dough. Use your fingers to gently stretch the dough to reach the edges of the pan, creating an even layer. Work slowly and carefully to avoid tearing the dough. If tears occur, simply press the dough back together with your fingers. This bottom layer will serve as the foundation of your flaky layered sopapilla cheesecake, so take care to create an even surface. Uneven dough can lead to some areas being too thick and others too thin, which affects both baking time and texture consistency. If you’re adding any mix-ins to the bottom layer, such as chopped nuts or a thin layer of fruit preserves, now is the time to sprinkle them over the dough before proceeding to the next step.
3-Third Step: Prepare the Cream Cheese Filling In a medium mixing bowl, combine the softened cream cheese, ½ cup of the white sugar, and vanilla extract. Using an electric mixer or sturdy whisk, beat the ingredients until completely smooth and well combined. This should take about 2-3 minutes. Ensure the cream cheese is fully softened to prevent lumps in your filling. The mixture should be creamy and spreadable, not stiff. For the smoothest filling, let your cream cheese sit at room temperature for at least 30 minutes before starting. Cold cream cheese will create lumps that are difficult to eliminate, resulting in a grainy texture. If you’re short on time, you can microwave the cream cheese for 10-15 seconds to soften it, but be careful not to melt it. The filling should have a consistency similar to thick frosting creamy enough to spread easily but firm enough to stay in place on the dough layer.
4-Fourth Step: Add the Filling Layer Spread the cream cheese mixture evenly over the bottom crescent dough layer. Use an offset spatula or the back of a spoon to create a smooth, even surface. Try to leave a small border around the edges to prevent the filling from leaking out during baking. This creamy middle layer is what transforms the simple crescent dough into a luscious cheesecake bars experience. Take your time with this step to ensure the filling is distributed evenly. Uneven filling will result in some bites being too sweet while others lack that creamy cheesecake flavor. If you’re planning to add any swirls or ribbons of fruit sauce or chocolate, now is the time to gently spoon them over the cream cheese layer and use a knife to create a marbled effect. This adds visual interest and complementary flavors to your finished dessert.
5-Fifth Step: Add the Top Pastry Layer Open the second can of crescent roll dough and unroll it over the cream cheese filling. As you did with the bottom layer, press the seams together firmly to create a solid sheet. Gently press the dough down to adhere it to the filling layer. This creates the sandwich structure that makes this crescent roll dessert so special creamy cheesecake filling between two layers of flaky pastry. Be gentle when placing the top layer to avoid disturbing the filling underneath. If the dough seems resistant to unrolling, let it sit for a few minutes to soften slightly. Once the top layer is in place, use a fork to prick the dough lightly in several places. This allows steam to escape during baking, preventing air bubbles from forming between the layers and ensuring that the top crust adheres nicely to the filling.
6-Sixth Step: Add Butter and Cinnamon-Sugar Topping Pour the melted butter evenly over the top layer of crescent dough, using a pastry brush to spread it to all corners. Make sure the entire surface is coated, as this butter helps the cinnamon sugar adhere and contributes to the beautiful golden color during baking. In a small bowl, combine the remaining ½ cup of sugar with the ground cinnamon. Sprinkle this cinnamon sugar mixture generously over the buttered dough, ensuring even coverage. This combination creates the signature cinnamon sugar topping that gives sopapilla cheesecake its characteristic flavor and slightly crunchy texture. For a more textured topping, consider adding a tablespoon of turbinado sugar along with the cinnamon mixture. This coarse sugar creates a delightful crunch that mimics the crispy exterior of traditional fried sopapillas. You can also add a pinch of nutmeg or cardamom to the cinnamon sugar for an extra layer of flavor complexity.
7-Final Step: Bake and Cool Place your assembled sopapilla cheesecake in the preheated oven and bake for approximately 30 minutes. The top should become golden brown and bubbly, with a slightly caramelized appearance around the edges. If the top browns too quickly, loosely tent with aluminum foil for the last few minutes of baking to prevent burning while allowing the center to finish cooking. Remove the dish from the oven and allow it to cool completely at room temperature, which takes about 1 hour. This cooling period is essential for the cheesecake to set properly. Cutting into the dessert while it’s still warm will cause the filling to ooze out and the structure to collapse. For the best results, refrigerate the cooled cheesecake for an additional 2-4 hours before cutting. This chilling period helps the flavors meld and makes for cleaner slices. When ready to serve, cut into squares and drizzle with honey if desired. Serve cold or at room temperature for the most enjoyable experience. For more creative sweet crescent roll dessert ideas, explore our related recipes.
Last Step:
Please leave a rating and comment letting us know how you liked this recipe! This helps our business to thrive and continue providing free, high-quality recipes for you.Notes
💡 Use softened cream cheese at room temperature for the smoothest filling.
🔥 For extra crunch, broil the top for 1-2 minutes after baking, watching closely.
❄️ Store in the refrigerator for up to 5 days; serve chilled or at room temperature.
- Prep Time: 15 minutes
- Cook Time: 30 minutes
- Category: Dessert
- Method: Baking
- Cuisine: American
- Diet: Vegetarian
Nutrition
- Serving Size: 1 piece
- Calories: 450 calories
- Sugar: 28g
- Sodium: 420mg
- Fat: 28g
- Saturated Fat: 15g
- Unsaturated Fat: 10g
- Trans Fat: 1g
- Carbohydrates: 42g
- Fiber: 0g
- Protein: 5g
- Cholesterol: 80mg


