
Why You’ll Love This Peanut Butter Rice Krispie Treats
Looking for a sweet treat that satisfies your peanut butter cravings and brings back childhood memories? These Peanut Butter Rice Krispie Treats combine the nostalgic crunch of the classic treat with rich, nutty flavor. Here’s why this recipe will become a family favorite:
- Ease of preparation: These no-bake treats come together in just 15 minutes with minimal cleanup. Simply melt, mix, press, and cool. Perfect for busy weeknights or last-minute gatherings.
- Health benefits: Peanut butter adds protein and healthy fats to these treats, making them slightly more nutritious than traditional versions. With about 3 grams of protein per serving, they’re a satisfying snack that won’t spike your blood sugar as dramatically as many other desserts.
- Versatility: This recipe adapts easily to different dietary needs. You can make them gluten-free by using certified gluten-free cereal, dairy-free with plant-based butter and marshmallows, or adjust for lower sugar content.
- Distinctive flavor: The combination of creamy peanut butter with the classic marshmallow sweetness creates a perfectly balanced flavor profile that’s nutty without being overwhelming and sweet without being cloying.
These Peanut Butter Rice Krispie Treats are the perfect balance of nostalgic comfort and delicious indulgence. Once you try this version, you’ll never go back to the plain ones again!
Jump to:
- Why You’ll Love This Peanut Butter Rice Krispie Treats
- Essential Ingredients for Peanut Butter Rice Krispie Treats
- Main Ingredients:
- Special Dietary Options:
- Vegan:
- Gluten-free:
- Low-calorie:
- How to Prepare the Perfect Peanut Butter Rice Krispie Treats: Step-by-Step Guide
- Preparation
- Melting the Base
- Adding Marshmallows
- Combining with Cereal
- Pressing into Pan
- Optional Chocolate Topping
- Cooling and Serving
- Protein and Main Component Alternatives
- Peanut Butter Substitutes
- Cereal Alternatives
- Vegetable, Sauce, and Seasoning Modifications
- Sauce Variations
- Add-ins and Seasonings
- Mastering Peanut Butter Rice Krispie Treats: Advanced Tips and Variations
- Pro Cooking Techniques
- Flavor Variations
- Presentation Tips
- Make-Ahead Options
- How to Store Peanut Butter Rice Krispie Treats: Best Practices
- Refrigeration
- Freezing
- Meal Prep Considerations
- FAQs: Frequently Asked Questions About Peanut Butter Rice Krispie Treats
- How do you make peanut butter Rice Krispie treats?
- Can you use crunchy peanut butter in Rice Krispie treats?
- How long do peanut butter Rice Krispie treats last?
- Are peanut butter Rice Krispie treats gluten-free?
- Can you freeze peanut butter Rice Krispie treats?
- Peanut Butter Rice Krispie Treats
- Ingredients
- Instructions
- Last Step:
- Notes
- Nutrition
- Did you make this recipe?
Essential Ingredients for Peanut Butter Rice Krispie Treats
The success of your peanut butter treats starts with quality ingredients. Here’s everything you need to create these delicious krispie bars:
Main Ingredients:
- 6 cups Rice Krispies cereal – The base of our treats that provides the signature crispy texture
- 1/2 cup unsalted butter – Creates the binder that holds the treats together and adds richness
- 1 cup creamy peanut butter – The star ingredient that gives these treats their distinctive flavor
- 10 oz mini marshmallows – Melt to create the sticky binder that coats the cereal
- 1 cup chocolate chips (optional) – For topping if you want to add a chocolatey layer
| Ingredient | Amount | Purpose |
|---|---|---|
| Rice Krispies Cereal | 6 cups | Provides the classic crispy texture and structure |
| Unsalted Butter | 1/2 cup | Binder that adds richness and holds treats together |
| Creamy Peanut Butter | 1 cup | Key flavor component with protein and healthy fats |
| Mini Marshmallows | 10 oz | Creates the sticky coating that binds cereal pieces |
| Chocolate Chips | 1 cup (optional) | Optional topping for extra sweetness and visual appeal |
Special Dietary Options:
Vegan:
- Use plant-based butter (such as Miyoko’s or Earth Balance) instead of dairy butter
- Choose vegan marshmallows (like Dandies) rather than traditional gelatin-based ones
- Select certified vegan chocolate chips for the topping
Gluten-free:
- Use certified gluten-free Rice Krispies cereal (the original version contains barley malt)
- Ensure all other ingredients are labeled gluten-free, especially the marshmallows
Low-calorie:
- Use a reduced-calorie butter alternative
- Consider using a peanut powder reconstituted with water for less fat content
- Increase the cereal ratio slightly while decreasing the marshmallows for more volume per calorie
How to Prepare the Perfect Peanut Butter Rice Krispie Treats: Step-by-Step Guide
Creating the perfect easy peanut butter rice krispie treats requires minimal effort but follows a specific process to ensure the right texture. Follow these detailed instructions for homemade peanut butter krispie bars that turn out perfectly every time.
Preparation
First Step: Prepare your workspace and ingredients before beginning. Measure out all ingredients to ensure everything is ready when you need it. Lightly grease a 9×13-inch baking pan with butter or cooking spray. You can also line the pan with parchment paper, leaving an overhang on two sides for easy removal later. This preparation step prevents frustration during the process.
Melting the Base
Second Step: In a large pot over low heat, melt the unsalted butter. Once melted, add the peanut butter. Stir continuously until both ingredients are fully combined and smooth. This usually takes about 2-3 minutes. Keeping the heat low is crucial to prevent scorching the mixture. If you prefer, you can use a microwave-safe bowl and heat in 30-second intervals, stirring between each, until melted and smooth.
Adding Marshmallows
Third Step: Add the mini marshmallows to the butter and peanut butter mixture. Continue stirring over low heat until the marshmallows are completely melted and the mixture is smooth, approximately 5 minutes. The mixture should be glossy and fully integrated. Resist the urge to turn up the heat to speed up this process, as high heat can make the treats hard instead of chewy.
Combining with Cereal
Fourth Step: Remove the pot from heat immediately after the marshmallows have melted. Add the Rice Krispies cereal to the pot. Using a rubber spatula, gently fold the cereal into the marshmallow mixture until all pieces are evenly coated. Work quickly but gently to avoid crushing the cereal, which would affect the final texture. The goal is to coat every piece of cereal without making the mixture too compact.
Pressing into Pan
Fifth Step: Transfer the mixture to your prepared pan. Using a spatula or greased hands, press the mixture evenly into the pan. For best results, place a piece of wax paper or parchment paper over the mixture and press down firmly. This technique prevents sticking and helps achieve an even thickness without compacting the treats too tightly. Press firmly enough to ensure the bars hold their shape when cut, but not so hard that they become dense.
Optional Chocolate Topping
Sixth Step: If you want to add a chocolate layer, melt 1 cup of chocolate chips in the microwave or a double boiler. Pour the melted chocolate over the cereal mixture and spread evenly with a spatula. Allow to cool until the chocolate sets before cutting.
Cooling and Serving
Final Step: Let the treats cool completely at room temperature for at least 30 minutes. For faster results, you can place the pan in the refrigerator for 15-20 minutes. Once cooled and set, use a sharp knife to cut into 24 squares. For clean cuts, wipe the knife between cuts or use a pizza cutter. Serve immediately or store according to the guidelines below.
Protein and Main Component Alternatives
One of the beauties of no bake peanut butter rice krispies treats is their adaptability. Here are some alternatives to customize these treats based on your preferences or dietary needs.
Peanut Butter Substitutes
If you’re allergic to peanuts or simply want to try something different, several alternatives work well in this recipe. Almond butter creates a slightly milder, more sophisticated flavor profile. Cashew butter offers a creamier texture with a subtle sweetness. Sunflower seed butter provides a similar consistency to peanut butter and is completely nut-free, making it school-safe. Coconut butter adds a tropical twist and natural sweetness, though it may make the treats slightly more dense.
Cereal Alternatives
While Rice Krispies are the traditional choice, you can experiment with other cereals for different textures and flavors. Crispix cereal works similarly and may be easier to find in gluten-free versions. Chex rice or corn cereal provides a slightly larger crunch. For a healthier twist, try using a puffed brown rice cereal for more whole grains. If you want extra protein, consider mixing in some protein-packed puffed quinoa or kamut.
Vegetable, Sauce, and Seasoning Modifications
These chocolate peanut butter rice krispie treats can be customized with various additions to create unique flavor profiles. Here are some creative modifications to try.
Sauce Variations
While the traditional marshmallow coating is delicious, you can enhance or replace it with other sticky binders. For caramel lovers, try replacing half the marshmallows with caramel sauce or melted caramel bits. Maple syrup combined with brown sugar creates a deeper, richer flavor profile. Honey adds natural sweetness and a subtle floral note. For adults, a splash of bourbon or rum can add complexity to the marshmallow mixture.
Add-ins and Seasonings
Incorporate mix-ins to add texture and flavor. Chopped salted peanuts amplify the peanut butter taste and add crunch. Mini chocolate chips create pockets of melted chocolate throughout the treats. Dried fruit like cranberries or chopped dates add sweetness and chewiness. For a salty-sweet combination, finish the treats with flaky sea salt before they set. Spices like cinnamon or nutmeg can add warmth and depth, especially during fall months.
Mastering Peanut Butter Rice Krispie Treats: Advanced Tips and Variations
Take your peanut butter rice krispie treats recipe to the next level with these professional techniques and creative variations.
Pro Cooking Techniques
For the most consistent results, use a kitchen scale to measure your ingredients. This ensures the perfect ratio of binder to cereal every time. When melting your ingredients, maintain the lowest possible heat to preserve the marshmallows’ elasticity, resulting in softer treats. If your treats turn out too hard, you can rescue them by placing them in the microwave for a few seconds before serving to soften them slightly.
Flavor Variations
Elevate the basic recipe with these flavor combinations. For a Thai-inspired twist, add a pinch of cayenne pepper and some chopped salted peanuts. Create a “Fluffer-Nutter” version by adding a layer of marshmallow fluff on top of the peanut butter mixture before pressing in the pan. For an Elvis-inspired variation, add crumbled bacon and banana chips. Make them s’mores-style by adding graham cracker crumbs and using chocolate chips on top.
Presentation Tips
Transform these simple treats into something special with thoughtful presentation. Cut them into fun shapes using cookie cutters for special occasions. For a polished look, trim the edges of the pan before cutting to create perfectly uniform squares. Wrap individual squares in parchment paper or wax paper tied with baker’s twine for a homemade gift feel. When serving at a party, display them on a wooden board with complementary treats like chocolate-dipped pretzels.
Make-Ahead Options
These treats are excellent for meal prep and advance planning. Prepare them up to three days before an event and store them properly to maintain freshness. For longer storage, freeze the uncut slab and cut fresh squares when needed. You can also pre-cut and individually wrap portions for convenient grab-and-go snacks throughout the week.
How to Store Peanut Butter Rice Krispie Treats: Best Practices
Proper storage ensures your peanut butter treats maintain their texture and flavor. Follow these guidelines for the best results.
Refrigeration
For short-term storage (3-5 days), keep treats at room temperature in an airtight container. If you prefer them firmer or your kitchen is particularly warm, refrigeration is an option. Store in an airtight container with wax paper between layers to prevent sticking. Note that refrigeration may cause the treats to firm up slightly due to the oils in the peanut butter solidifying.
Freezing
These treats freeze exceptionally well for long-term storage (up to 2-3 months). Cut into squares first, then wrap each individually in plastic wrap to prevent sticking and freezer burn. Place wrapped squares in a freezer-safe zip-top bag, removing as much air as possible. Label with the date for easy tracking. Thaw at room temperature for 1-2 hours before serving, or microwave individual portions for 10-15 seconds to soften slightly.
Meal Prep Considerations
For batch cooking and meal prep, consider making a double batch and freezing half for later. Pre-portion treats before freezing for easy grab-and-go snacks. Avoid storing near strongly scented foods in the refrigerator or freezer, as the treats may absorb odors. If preparing for a special event, make them 2-3 days in advance for optimal freshness.

FAQs: Frequently Asked Questions About Peanut Butter Rice Krispie Treats
How do you make peanut butter Rice Krispie treats?
Can you use crunchy peanut butter in Rice Krispie treats?
How long do peanut butter Rice Krispie treats last?
Are peanut butter Rice Krispie treats gluten-free?
Can you freeze peanut butter Rice Krispie treats?
Peanut Butter Rice Krispie Treats
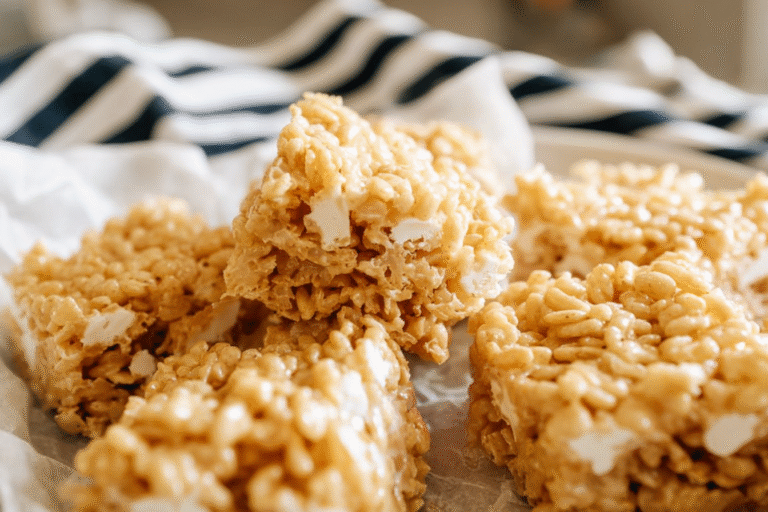
🥜🍬 Irresistible peanut butter-infused rice krispies treats with gooey marshmallow bind and crunchy texture – PB heaven!
⭐ No-bake bliss ready in minutes; kid-friendly snack or party pleaser with endless add-on options.
- Total Time: 20 minutes
- Yield: 16 treats
Ingredients
– 6 cups Rice Krispies Cereal Provides the classic crispy texture and structure
– 1/2 cup Unsalted Butter Binder that adds richness and holds treats together
– 1 cup Creamy Peanut Butter Key flavor component with protein and healthy fats
– 10 oz Mini Marshmallows Creates the sticky coating that binds cereal pieces
– 1 cup (optional) Chocolate Chips Optional topping for extra sweetness and visual appeal
Instructions
1-First Step: Prepare your workspace and ingredients before beginning. Measure out all ingredients to ensure everything is ready when you need it. Lightly grease a 9×13-inch baking pan with butter or cooking spray. You can also line the pan with parchment paper, leaving an overhang on two sides for easy removal later. This preparation step prevents frustration during the process.
2-Second Step: In a large pot over low heat, melt the unsalted butter. Once melted, add the peanut butter. Stir continuously until both ingredients are fully combined and smooth. This usually takes about 2-3 minutes. Keeping the heat low is crucial to prevent scorching the mixture. If you prefer, you can use a microwave-safe bowl and heat in 30-second intervals, stirring between each, until melted and smooth.
3-Third Step: Add the mini marshmallows to the butter and peanut butter mixture. Continue stirring over low heat until the marshmallows are completely melted and the mixture is smooth, approximately 5 minutes. The mixture should be glossy and fully integrated. Resist the urge to turn up the heat to speed up this process, as high heat can make the treats hard instead of chewy.
4-Fourth Step: Remove the pot from heat immediately after the marshmallows have melted. Add the Rice Krispies cereal to the pot. Using a rubber spatula, gently fold the cereal into the marshmallow mixture until all pieces are evenly coated. Work quickly but gently to avoid crushing the cereal, which would affect the final texture. The goal is to coat every piece of cereal without making the mixture too compact.
5-Fifth Step: Transfer the mixture to your prepared pan. Using a spatula or greased hands, press the mixture evenly into the pan. For best results, place a piece of wax paper or parchment paper over the mixture and press down firmly. This technique prevents sticking and helps achieve an even thickness without compacting the treats too tightly. Press firmly enough to ensure the bars hold their shape when cut, but not so hard that they become dense.
6-Sixth Step: If you want to add a chocolate layer, melt 1 cup of chocolate chips in the microwave or a double boiler. Pour the melted chocolate over the cereal mixture and spread evenly with a spatula. Allow to cool until the chocolate sets before cutting.
7-Final Step: Let the treats cool completely at room temperature for at least 30 minutes. For faster results, you can place the pan in the refrigerator for 15-20 minutes. Once cooled and set, use a sharp knife to cut into 24 squares. For clean cuts, wipe the knife between cuts or use a pizza cutter. Serve immediately or store according to the guidelines below.
Last Step:
Please leave a rating and comment letting us know how you liked this recipe! This helps our business to thrive and continue providing free, high-quality recipes for you.Notes
🔥 Keep heat low to avoid scorching marshmallows or separating peanut butter.
👐 Use wet hands or spatula to press evenly without sticking.
📦 Store in airtight container up to 4 days; they stay chewy.
- Prep Time: 5 minutes
- Set: 15 minutes
- Category: Dessert
- Method: No-Bake
- Cuisine: American
- Diet: Vegetarian
Nutrition
- Serving Size: 1 treat
- Calories: 170 calories
- Sugar: 13g
- Sodium: 140mg
- Fat: 9g
- Saturated Fat: 4g
- Unsaturated Fat: 4g
- Trans Fat: 0g
- Carbohydrates: 22g
- Fiber: 1g
- Protein: 3g
- Cholesterol: 10mg


