Why You’ll Love This Peanut Butter Frosting
If you have ever wanted to take your cakes and cupcakes to the next level, homemade peanut butter frosting is the secret ingredient you need. This rich, creamy, and nutty topping transforms simple desserts into extraordinary treats that everyone will rave about. Unlike store-bought versions that can taste artificial or overly greasy, making it at home allows you to control the texture and sweetness perfectly. Whether you are a busy parent looking for a quick icing for a birthday cake or a student wanting to impress roommates, this recipe fits the bill.Unmatched Ease of Preparation
One of the main reasons you will fall in love with this peanut butter buttercream is how incredibly simple it is to make. You do not need fancy equipment or culinary training to get professional results. With just a few basic ingredients and about ten minutes, you can whip up a batch that rivals any bakery. The process involves beating softened butter and peanut butter together, adding sugar, and thinning it with cream. It is so straightforward that even baking enthusiasts new to the kitchen will feel confident making it. This quick cooking time means you can focus more on decorating and less on complex preparations.Surprising Health Benefits
While frosting is typically considered an indulgence, this peanut butter frosting recipe offers some nutritional advantages compared to standard vanilla or chocolate options. Peanut butter is packed with protein and healthy fats, which can help keep you satisfied. When you use natural peanut butter without added oils or sugars, you reduce the amount of processed ingredients in your diet. Additionally, you can easily adjust the amount of powdered sugar to suit your preferences, making it a smarter choice for those watching their sugar intake. It is a small way to add a bit of nutritional value to your dessert while still enjoying a sweet treat.Incredible Versatility for Everyone
This recipe shines because of its adaptability to various dietary needs and preferences. It is naturally gluten-free, which is a huge win for anyone with gluten sensitivities or celiac disease. For those following a plant-based diet, swapping out dairy butter for a vegan butter alternative creates a completely vegan frosting without sacrificing flavor or texture. You can also make a lighter version by using a sugar substitute or reducing the amount of butter slightly. Whether you are preparing treats for a school party, a family gathering, or just a quiet night in, this versatile recipe works for every occasion and guest list.A Distinctive and Bold Flavor
The flavor profile of this creamy peanut butter frosting is truly what sets it apart. It offers a robust, nutty taste that pairs exceptionally well with chocolate, banana, and even vanilla bases. Unlike subtle icings, this frosting makes a statement. The balance of salty peanut butter and sweet sugar creates a complex taste that keeps you coming back for another bite. It is not just a topping, it is a main character in your dessert. If you are tired of the same old buttercream, this variation will bring a new level of excitement to your baking repertoire.Jump to:
- Why You’ll Love This Peanut Butter Frosting
- Unmatched Ease of Preparation
- Surprising Health Benefits
- Incredible Versatility for Everyone
- A Distinctive and Bold Flavor
- Essential Ingredients for Peanut Butter Frosting
- Main Ingredients
- Special Dietary Options
- Vegan Substitutes
- Gluten-Free Alternatives
- Low-Calorie Options
- How to Prepare the Perfect Peanut Butter Frosting: Step-by-Step Guide
- First Step: Preparation and Mise en Place
- Second Step: Creaming the Butter and Peanut Butter
- Third Step: Incorporating the Sugar
- Fourth Step: Adding Flavor and Liquid
- Final Step: Whipping for Fluffiness
- Dietary Substitutions to Customize Your Peanut Butter Frosting
- Protein and Main Component Alternatives
- Vegetable, Sauce, and Seasoning Modifications
- Mastering Peanut Butter Frosting: Advanced Tips and Variations
- Pro Cooking Techniques
- Flavor Variations
- Presentation Tips
- Make-Ahead Options
- How to Store Peanut Butter Frosting: Best Practices
- Refrigeration Guidelines
- Freezing Techniques
- Reheating and Re-whipping
- Meal Prep Considerations
- FAQs: Frequently Asked Questions About Peanut Butter Frosting
- How do you make peanut butter frosting from scratch?
- Can you use natural peanut butter for frosting?
- How long does peanut butter frosting last?
- What’s the best way to fix peanut butter frosting that’s too thick?
- What cakes pair best with peanut butter frosting?
- Peanut Butter Frosting
- Ingredients
- Instructions
- Last Step:
- Notes
- Nutrition
- Did you make this recipe?
Essential Ingredients for Peanut Butter Frosting
Creating the best peanut butter frosting starts with gathering the right components. Using high-quality ingredients ensures a smooth texture and a rich, authentic peanut taste. Below is the structured list of everything you need to make this delicious topping.Main Ingredients
1 cup creamy peanut butter 1/2 cup unsalted butter (softened) 2 cups powdered sugar 1 teaspoon vanilla extract 2-3 tablespoons heavy creamSpecial Dietary Options
Vegan Substitutes
To make this recipe plant-based, simply swap the unsalted butter for a high-quality vegan butter stick or margarine. Ensure the heavy cream is replaced with full-fat coconut milk, almond milk, or a soy-based creamer. Keep in mind that the flavor profile might shift slightly depending on the vegan butter you choose, but the peanut butter remains the dominant flavor.Gluten-Free Alternatives
Great news for those avoiding gluten: this recipe is naturally gluten-free as long as your specific brands of peanut butter and vanilla extract are certified gluten-free. Always check labels to ensure there has been no cross-contamination during processing, particularly with the vanilla extract.Low-Calorie Options
For a lighter version, consider using a powdered sugar substitute designed for baking, such as stevia or erythritol blends. You can also use a powdered peanut butter, which has had the oil removed, to lower the fat content significantly. You may need to adjust the liquid amounts slightly to achieve the right consistency when using these alternatives.How to Prepare the Perfect Peanut Butter Frosting: Step-by-Step Guide
Making your own frosting from scratch is rewarding and easier than you might think. Follow these detailed instructions to achieve a smooth, pipeable, and delicious result every time. This method works well whether you are using a stand mixer or a simple hand mixer.First Step: Preparation and Mise en Place
Before you start mixing, it is crucial to prepare your ingredients. Take the unsalted butter out of the fridge at least an hour beforehand so it softens to room temperature. Cold butter creates lumps and makes it difficult to achieve a smooth texture. Measure out your creamy peanut butter, powdered sugar, vanilla extract, and heavy cream. Sifting the powdered sugar beforehand is a pro tip that prevents lumps from forming in the final mixture. Having everything ready and within arm’s reach will make the process seamless and enjoyable.Second Step: Creaming the Butter and Peanut Butter
Place the softened unsalted butter and the creamy peanut butter into a large mixing bowl. If you are using a stand mixer, fit it with the paddle attachment. If you are using a hand mixer, ensure you have a sturdy bowl. Start beating the two fats together on medium speed. You want to mix them for about 2 minutes until they are completely combined and the mixture looks smooth and creamy. Scrape down the sides of the bowl with a spatula to ensure no bits of butter are stuck to the sides. This step creates the base structure for your frosting, ensuring it is light and airy rather than dense.Third Step: Incorporating the Sugar
Turn your mixer down to the lowest speed setting. Gradually add the powdered sugar to the bowl, about half a cup at a time. Adding it slowly is vital because it keeps the sugar clouds from flying out of the bowl and covering your kitchen. Once all the sugar is added, the mixture might look thick and crumbly, which is completely normal. Keep the mixer on low until the sugar is mostly incorporated, then increase the speed to medium and mix for another minute to smooth it out. Taste the mixture at this point to see if it is sweet enough for your liking.Fourth Step: Adding Flavor and Liquid
Pour in the vanilla extract while the mixer is running on low speed. The vanilla adds a wonderful fragrance that complements the nutty peanut butter. Next, add the heavy cream one tablespoon at a time. You want to watch the texture closely as you add the liquid. The goal is to transform the thick mixture into a fluffy, spreadable consistency. After adding the first tablespoon, check the frosting. If it is still too stiff, add the second tablespoon. Most recipes require 2 to 3 tablespoons, but humidity and ingredient brands can affect this. For a dairy-free or vegan version, add your chosen milk alternative in the same gradual manner.Final Step: Whipping for Fluffiness
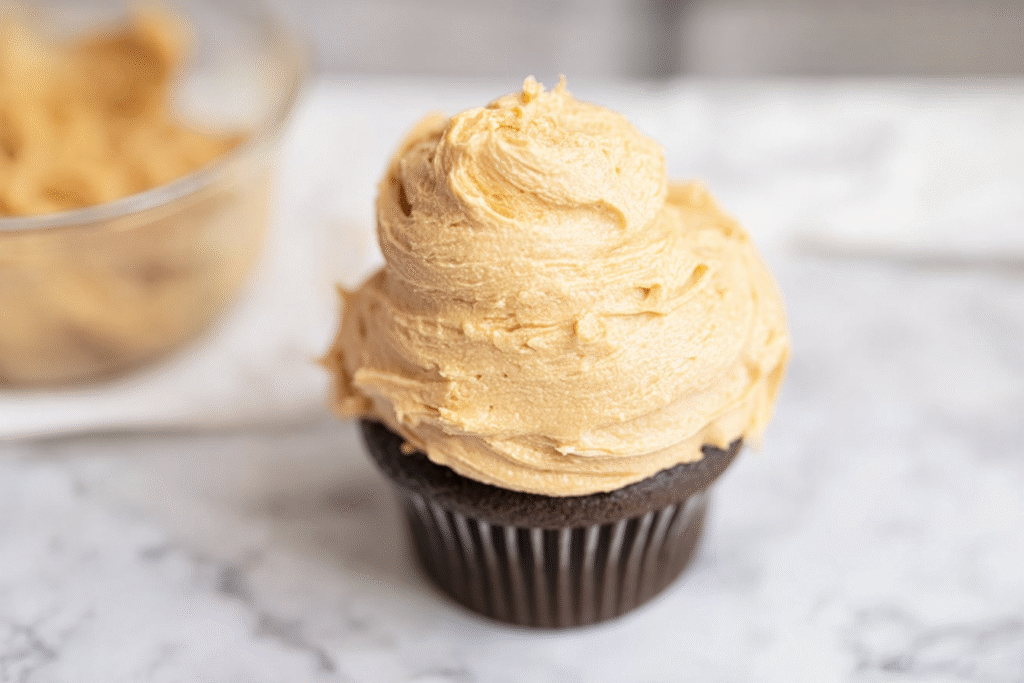
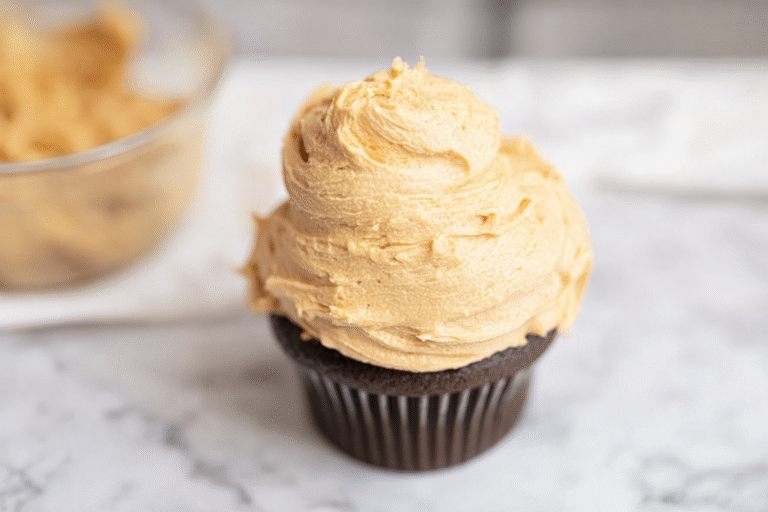
Once all ingredients are added, turn the mixer to high speed. Whip the frosting for 1 to 2 minutes. This step is essential for incorporating air into the mixture, making it light, fluffy, and easy to pipe onto cupcakes or spread over a cake. You will notice the color lighten slightly and the texture become silky smooth. Stop the mixer and lift the beaters to check if the frosting holds a soft peak. If it does, it is ready to use. If you are not using it immediately, cover the bowl to prevent it from drying out. This batch yields enough to generously frost a 9×13-inch sheet cake or about 24 standard cupcakes.
Dietary Substitutions to Customize Your Peanut Butter Frosting
Protein and Main Component Alternatives
The primary flavor and texture of this frosting come from the peanut butter and butter. If you or your guests have allergies or specific preferences, there are easy swaps you can make. For those with a peanut allergy, sunflower seed butter is an excellent alternative that mimics the texture and nuttiness remarkably well. Almond butter or cashew butter can also be used, though they will impart a distinct flavor of their own. If you are looking to boost the protein content further, you can stir in a scoop of vanilla or chocolate protein powder. However, this may alter the sweetness, so you should reduce the powdered sugar accordingly. For a dairy-free option, as mentioned, vegan butter works perfectly, but you can also try using coconut oil if you want a stiffer frosting that sets up harder in the fridge.Vegetable, Sauce, and Seasoning Modifications
While peanut butter frosting is delicious on its own, you can modify it with add-ins to create unique flavor profiles. If you love chocolate, you can mix in melted cooled chocolate or cocoa powder to create a chocolate peanut butter frosting. For a spicy kick, try adding a pinch of cinnamon or cayenne pepper, which pairs surprisingly well with the nutty notes. Maple extract or a tablespoon of real maple syrup can give the frosting a warm, breakfast-cake vibe. If you want a fruity twist, fold in a tablespoon of strawberry or raspberry jam. This adds a beautiful swirl of color and a tart contrast to the rich peanut butter. You can also add crunch by mixing in chopped peanuts, pretzels, or bacon bits for a savory-sweet dessert topping that is sure to impress.Mastering Peanut Butter Frosting: Advanced Tips and Variations
Once you have mastered the basic recipe, there are several pro techniques and creative variations you can try to elevate your baking game. These tips will help you achieve professional results and customize the frosting to suit any occasion.Pro Cooking Techniques
For the smoothest peanut butter frosting, always start with ingredients at the exact same temperature. If your butter is soft but your peanut butter is cold from the pantry, the emulsion can break, leading to a curdled appearance. To fix this, warm the peanut butter slightly in the microwave for ten seconds before mixing. Another technique is to “sea salt” your frosting. Adding a generous pinch of high-quality flaky sea salt at the very end cuts through the sweetness and highlights the roasted peanut flavor. This is a simple trick that makes a huge difference in taste perception.Flavor Variations
Do not be afraid to get creative with your flavors. A popular variation is the “PB&J” frosting, where you swirl a ribbon of your favorite fruit jam through the finished peanut butter mixture. For coffee lovers, adding a teaspoon of instant espresso powder dissolved in the cream gives a mocha-peanut butter twist. If you are making a fall dessert, mix in pumpkin pie spice or a bit of molasses for a deeper, earthier flavor. You can also make a cookies and cream version by crushing up chocolate sandwich cookies and folding them into the frosting at the end.Presentation Tips
Presentation is key when serving desserts. To make your cupcakes look like they came from a bakery, use a large star tip to pipe a tall swirl of frosting. Place a miniature peanut butter cup or a piece of chocolate bark on top for garnish. For cakes, consider using an offset spatula to create rustic swirls in the frosting. You can also dip the edges of the frosted cake in chopped peanuts or chocolate sprinkles for a fun and textured look. If you are serving the frosting with a rich chocolate cake, a light dusting of cocoa powder on top adds a sophisticated finish.Make-Ahead Options
Busy schedules often require planning ahead. Fortunately, peanut butter frosting stores beautifully. You can make the frosting up to a week in advance and store it in the refrigerator. When you are ready to use it, let it come to room temperature and give it a quick whip with a mixer to restore its fluffiness. You can also freeze the frosting for up to two months. Portion it into freezer-safe bags, flatten them to save space, and thaw overnight in the fridge before using. This makes preparing for birthday parties or holidays much less stressful.How to Store Peanut Butter Frosting: Best Practices
Proper storage ensures your hard work does not go to waste and keeps the frosting safe to eat. Because this recipe contains dairy products like butter and cream, handling it correctly is important for both safety and quality.Refrigeration Guidelines
For short-term storage, keep the peanut butter frosting in an airtight container in the refrigerator. It will stay fresh for up to one week. Before storing, press a piece of plastic wrap directly onto the surface of the frosting. This prevents a skin from forming and stops the frosting from absorbing other smells in your fridge. If you have already frosted a cake or cupcakes, you can store them in the fridge as well. Cover the cake loosely with a cake dome or foil to protect it. Just remember to remove the cake from the fridge about 30 minutes before serving to let the frosting soften, as cold frosting can feel hard and waxy on the tongue.Freezing Techniques
Freezing is an excellent option for long-term storage. Scoop the frosting into a heavy-duty freezer bag, squeeze out the excess air, and seal it flat. This shape makes it easy to thaw quickly and takes up minimal space in your freezer. Label the bag with the date so you know how fresh it is. The frosting will maintain its best quality for about two months in the freezer. When you are ready to use it, move the bag to the refrigerator to thaw overnight. Never thaw it at room temperature, as condensation can form and make the frosting too runny.Reheating and Re-whipping
There is no need to “reheat” frosting in the traditional sense, but bringing it back to the right temperature is crucial. After refrigerating or freezing, the butter in the frosting hardens. To restore the creamy texture, let the frosting sit at room temperature until it is pliable. Then, place it in a bowl and beat it with a hand mixer for a minute or two. This re-incorporates air and smooths out any graininess that might have developed during storage. If it seems a bit stiff after sitting out, add a teaspoon of cream while mixing to loosen it up.Meal Prep Considerations
Meal prepping is not just for dinners; it works for baking too. If you are planning a large event, you can make the frosting a few days early and focus on baking the cakes the day before. This breaks up the work and makes the process more manageable. Portioning the frosting into piping bags before freezing is a great hack. When you need it, just snip the corner of the frozen bag and pipe directly onto thawed cupcakes for a quick and beautiful finish. This strategy is perfect for busy parents or working professionals who love to entertain but have limited time.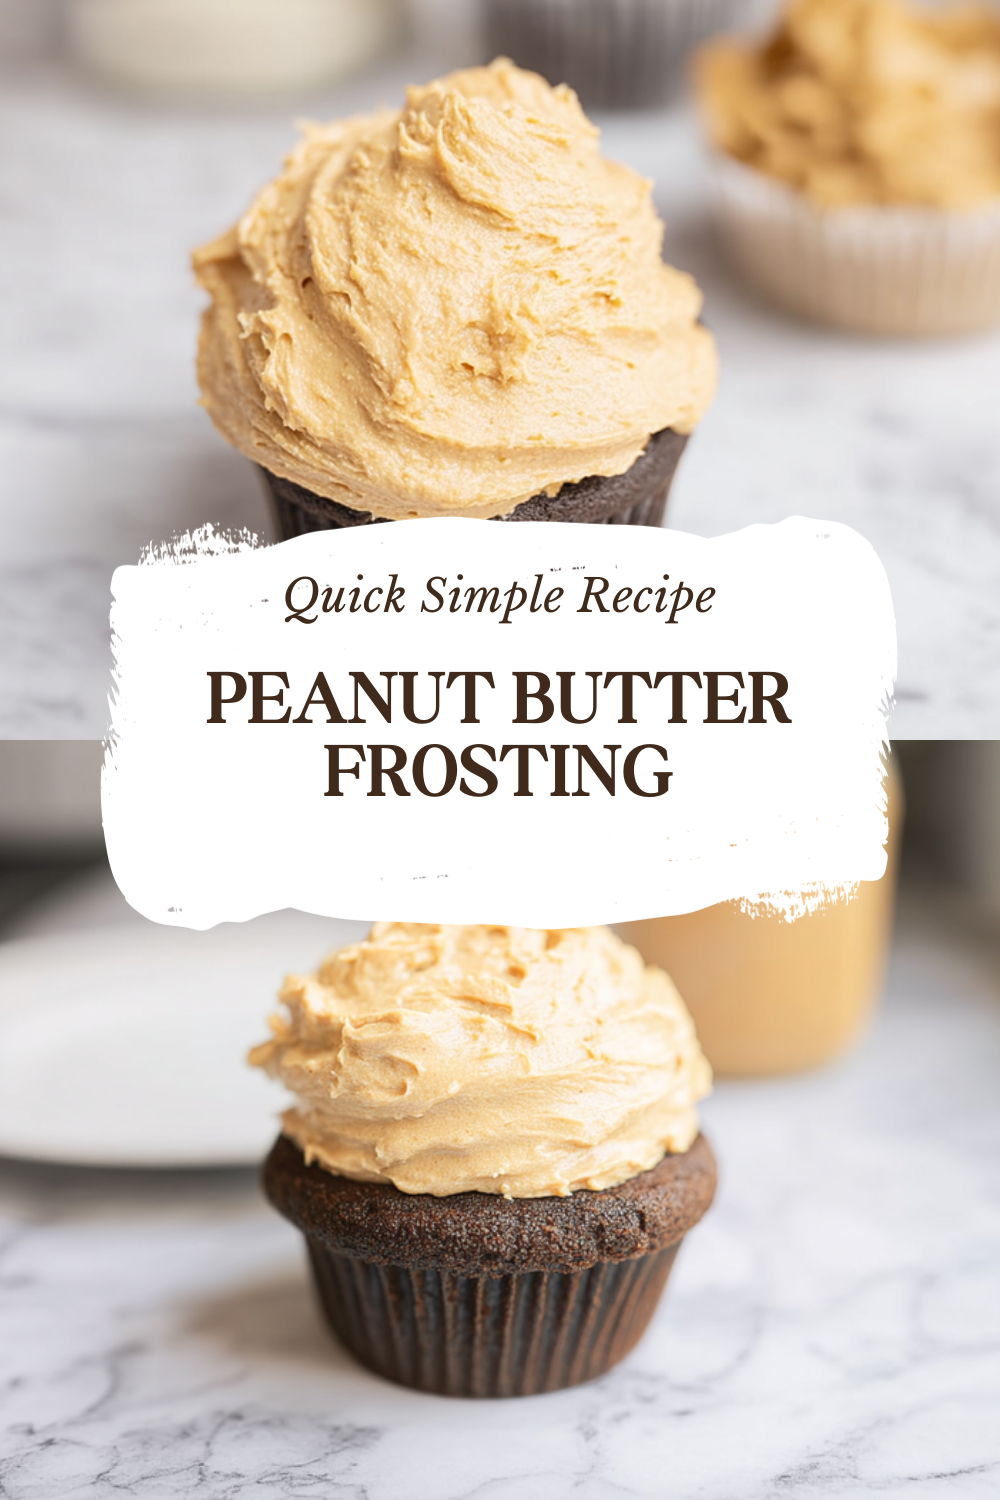
FAQs: Frequently Asked Questions About Peanut Butter Frosting
How do you make peanut butter frosting from scratch?
Can you use natural peanut butter for frosting?
How long does peanut butter frosting last?
What’s the best way to fix peanut butter frosting that’s too thick?
What cakes pair best with peanut butter frosting?
Peanut Butter Frosting
🥜 Creamy, nutty peanut butter frosting that pipes beautifully and elevates any cake or cupcake to peanut butter paradise!
🍦 Quick 5-minute recipe with fluffy texture everyone loves – perfect for chocolate cakes or brownies.
- Total Time: 10 minutes
- Yield: 3 cups (enough for 24 cupcakes)
Ingredients
– 1 cup creamy peanut butter
– 1/2 cup unsalted butter (softened)
– 2 cups powdered sugar
– 1 teaspoon vanilla extract
– 2-3 tablespoons heavy cream
Instructions
1-First Step: Preparation and Mise en Place Before you start mixing, it is crucial to prepare your ingredients. Take the unsalted butter out of the fridge at least an hour beforehand so it softens to room temperature. Cold butter creates lumps and makes it difficult to achieve a smooth texture. Measure out your creamy peanut butter, powdered sugar, vanilla extract, and heavy cream. Sifting the powdered sugar beforehand is a pro tip that prevents lumps from forming in the final mixture. Having everything ready and within arm’s reach will make the process seamless and enjoyable.
2-Second Step: Creaming the Butter and Peanut Butter Place the softened unsalted butter and the creamy peanut butter into a large mixing bowl. If you are using a stand mixer, fit it with the paddle attachment. If you are using a hand mixer, ensure you have a sturdy bowl. Start beating the two fats together on medium speed. You want to mix them for about 2 minutes until they are completely combined and the mixture looks smooth and creamy. Scrape down the sides of the bowl with a spatula to ensure no bits of butter are stuck to the sides. This step creates the base structure for your frosting, ensuring it is light and airy rather than dense.
3-Third Step: Incorporating the Sugar Turn your mixer down to the lowest speed setting. Gradually add the powdered sugar to the bowl, about half a cup at a time. Adding it slowly is vital because it keeps the sugar clouds from flying out of the bowl and covering your kitchen. Once all the sugar is added, the mixture might look thick and crumbly, which is completely normal. Keep the mixer on low until the sugar is mostly incorporated, then increase the speed to medium and mix for another minute to smooth it out. Taste the mixture at this point to see if it is sweet enough for your liking.
4-Fourth Step: Adding Flavor and Liquid Pour in the vanilla extract while the mixer is running on low speed. The vanilla adds a wonderful fragrance that complements the nutty peanut butter. Next, add the heavy cream one tablespoon at a time. You want to watch the texture closely as you add the liquid. The goal is to transform the thick mixture into a fluffy, spreadable consistency. After adding the first tablespoon, check the frosting. If it is still too stiff, add the second tablespoon. Most recipes require 2 to 3 tablespoons, but humidity and ingredient brands can affect this. For a dairy-free or vegan version, add your chosen milk alternative in the same gradual manner.
5-Final Step: Whipping for Fluffiness Once all ingredients are added, turn the mixer to high speed. Whip the frosting for 1 to 2 minutes. This step is essential for incorporating air into the mixture, making it light, fluffy, and easy to pipe onto cupcakes or spread over a cake. You will notice the color lighten slightly and the texture become silky smooth. Stop the mixer and lift the beaters to check if the frosting holds a soft peak. If it does, it is ready to use. If you are not using it immediately, cover the bowl to prevent it from drying out. This batch yields enough to generously frost a 9×13-inch sheet cake or about 24 standard cupcakes.
Last Step:
Please leave a rating and comment letting us know how you liked this recipe! This helps our business to thrive and continue providing free, high-quality recipes for you.Notes
🥄 Use natural peanut butter for richer flavor, but creamy works best for smooth texture.
🍦 Chill frosting 15 minutes if too soft for piping; re-beat for fluffiness.
💡 Thin with more milk or thicken with extra powdered sugar as needed.
- Prep Time: 10 minutes
- Category: Dessert
- Method: No-Bake
- Cuisine: American
- Diet: Vegetarian
Nutrition
- Serving Size: 2 tablespoons
- Calories: 180 calories
- Sugar: 20g
- Sodium: 110mg
- Fat: 12g
- Saturated Fat: 5g
- Unsaturated Fat: 6g
- Trans Fat: 0g
- Carbohydrates: 18g
- Fiber: 1g
- Protein: 2g
- Cholesterol: 25mg


