
Why You’ll Love This Peanut Butter Cookies
There’s something undeniably comforting about the aroma of freshly baked peanut butter cookies wafting through the kitchen. This classic recipe combines simplicity with incredible flavor, making it a favorite for bakers of all skill levels. Whether you’re craving a quick sweet treat or need a reliable dessert for gatherings, these homemade peanut butter cookies deliver every single time. Easy preparation: This peanut butter cookie recipe comes together in minutes with minimal cleanup. You don’t need any special equipment or advanced baking skills just a bowl, spoon, and basic ingredients. The entire process takes less than 30 minutes from start to finish, perfect for busy weeknights or unexpected cravings. Health benefits: Despite their indulgent taste, these cookies offer surprising nutritional value. Peanut butter provides protein and healthy fats that help keep you satisfied. By controlling the ingredients, you avoid the preservatives and artificial additives found in store-bought versions. The recipe can easily be adapted with natural sweeteners and whole grain options for a more nutritious twist. Versatility: This classic peanut butter cookie dough serves as an excellent base for countless variations. You can transform it into peanut butter blossoms with chocolate kisses, add mix-ins like chocolate chips or chopped nuts, or adapt it for various dietary needs. The simple formula welcomes creativity while maintaining that distinctive peanut butter flavor everyone loves. Distinctive flavor: What sets these cookies apart is the perfect balance of sweet and savory notes. The roasted peanut flavor shines through, complemented by just the right amount of sweetness. The texture is exceptional crisp edges give way to a soft, chewy center that melts in your mouth. Each bite delivers that nostalgic taste that brings back childhood memories.The magic of peanut butter cookies lies in their perfect balance of simplicity and satisfaction. With just a handful of ingredients, you create a treat that feels both nostalgic and new every single time.
Jump to:
- Why You’ll Love This Peanut Butter Cookies
- Essential Ingredients for Peanut Butter Cookies
- Main Ingredients
- Special Dietary Options
- How to Prepare the Perfect Peanut Butter Cookies: Step-by-Step Guide
- Preparation and Mixing
- Shaping and Baking
- Cooling and Serving
- Dietary Substitutions to Customize Your Peanut Butter Cookies
- Protein and Main Component Alternatives
- Vegetable, Sauce, and Seasoning Modifications
- Mastering Peanut Butter Cookies: Advanced Tips and Variations
- Pro Cooking Techniques
- Flavor Variations
- Presentation Tips
- Make-Ahead Options
- How to Store Peanut Butter Cookies: Best Practices
- Refrigeration Guidelines
- Freezing Methods
- Reheating Best Practices
- Meal Prep Considerations
- FAQs: Frequently Asked Questions About Peanut Butter Cookies
- How do you make simple peanut butter cookies from scratch?
- What makes peanut butter cookies soft and chewy?
- Why do peanut butter cookies have crisscross fork marks?
- Can you make peanut butter cookies without flour or gluten?
- How should you store peanut butter cookies to keep them fresh?
- Peanut Butter Cookies
- Ingredients
- Instructions
- Last Step:
- Notes
- Nutrition
- Did you make this recipe?
Essential Ingredients for Peanut Butter Cookies
Creating the perfect batch of soft peanut butter cookies starts with quality ingredients. Each component plays a crucial role in achieving that ideal texture and flavor we all crave. Below you’ll find everything you need for this classic recipe, plus tips for dietary adaptations.Main Ingredients
1 cup creamy peanut butter – The star ingredient that provides rich flavor, natural oils for moisture, and structure to the cookie dough 1 cup granulated sugar – Sweetens the cookies while creating a slight crispness on the edges 3/4 cup brown sugar, packed – Adds moisture and depth of flavor, contributing to the chewy texture 1 large egg – Acts as a binder while providing structure and richness to the dough 1/2 teaspoon baking soda – Helps the cookies rise slightly and spread evenly 1/4 teaspoon salt – Enhances the peanut butter flavor and balances sweetness 1 teaspoon vanilla extract – Adds depth and rounds out the overall flavor profileSpecial Dietary Options
For those following specific eating plans, this easy peanut butter cookies recipe can be easily adapted: Vegan: Replace the egg with a flax egg (1 tablespoon ground flaxseed mixed with 3 tablespoons water) or a commercial egg replacer. Use organic sugar to ensure it’s vegan-friendly. Gluten-free: This classic recipe is naturally gluten-free as it doesn’t contain wheat flour. Simply ensure all ingredients, especially the peanut butter, are certified gluten-free to avoid cross-contamination. Low-calorie: Substitute half the sugar with a natural zero-calorie sweetener like monk fruit or stevia. Use natural peanut butter without added oils or sugars. Reduce the portion size slightly while still enjoying that classic taste. For more inspiration on creating best cookie recipes that fit your dietary preferences, explore our collection of homemade treats designed for every lifestyle.How to Prepare the Perfect Peanut Butter Cookies: Step-by-Step Guide
Making chewy peanut butter cookies from scratch is easier than you might think. This foolproof method ensures consistent results every time, whether you’re a baking novice or an experienced cook. Follow these detailed instructions to create cookies that are crispy on the edges and perfectly soft in the center.Preparation and Mixing
First Step: Preheat and Prepare Begin by preheating your oven to 350°F (175°C). Line a baking sheet with parchment paper or lightly grease it with cooking spray. This preparation ensures your cookies won’t stick and makes cleanup simple. Gather all your ingredients and measuring tools before starting this mise en place approach makes the baking process smooth and enjoyable. Second Step: Cream the Base In a large mixing bowl, combine the creamy peanut butter, granulated sugar, and packed brown sugar. Using a hand mixer on medium speed or a sturdy wooden spoon, beat these ingredients together until well combined and slightly fluffy. This process usually takes 2-3 minutes and helps create a lighter texture in the finished cookies. The mixture should be smooth and free of large sugar lumps. Third Step: Add Wet Ingredients Add the large egg and vanilla extract to the peanut butter mixture. Beat on medium speed until fully incorporated, about 1 minute. Scrape down the sides of the bowl to ensure all ingredients are evenly distributed. The dough should become glossy and hold together well. At this point, you can also add any optional mix-ins like chocolate chips or chopped nuts if you’re creating a variation of the classic recipe. Fourth Step: Add Dry Ingredients In a small separate bowl, whisk together the baking soda and salt. Add these dry ingredients to the peanut butter mixture and mix on low speed just until combined. Be careful not to overmix once the dry ingredients are added, as this can affect the texture of your cookies. The dough should be thick and hold its shape when molded.Shaping and Baking
Fifth Step: Form the Cookies Scoop tablespoon-sized portions of dough and roll them into smooth balls between your palms. Place the dough balls on the prepared baking sheet, spacing them about 2 inches apart to allow for spreading. For uniform cookies, use a cookie scoop or measure each portion carefully. This attention to detail ensures all cookies bake at the same rate. Sixth Step: Create the Signature Pattern Dip the tines of a fork into granulated sugar (this prevents sticking). Press the fork into each dough ball once, then rotate 90 degrees and press again to create the classic crisscross pattern. Flatten the cookies to about 1/2 inch thickness. This traditional technique isn’t just for aesthetics it helps the thick dough bake evenly and creates those signature cracks on top. Seventh Step: Bake to Perfection Place the baking sheet in the preheated oven and bake for 10-12 minutes. The edges should be lightly golden, while the centers may still look slightly soft. This slight underbaking is crucial for achieving that soft, chewy texture in the finished cookies. Avoid the temptation to bake longer, as they will continue to set as they cool on the pan.Cooling and Serving
Final Step: Cool and Enjoy Remove the baking sheet from the oven and let the cookies cool on the pan for 5 minutes. This resting period allows them to firm up slightly without overcooking. Transfer the cookies to a wire rack to cool completely, or enjoy them warm for a truly decadent experience. These peanut butter cookies are delicious on their own, or you can sandwich two together with a dollop of chocolate frosting for an extra special treat. For another variation that will become a family favorite, check out our collection of easy dessert ideas that transform simple ingredients into memorable sweets.The key to perfect peanut butter cookies is patience resist the urge to overbake, and let them cool completely before storing. These simple steps ensure that ideal texture that keeps everyone coming back for more.

Dietary Substitutions to Customize Your Peanut Butter Cookies
One of the beauties of this classic peanut butter cookie recipe is its adaptability. With a few simple swaps, you can tailor these treats to meet various dietary needs or use ingredients you have on hand. These substitutions allow everyone to enjoy these delicious cookies regardless of their eating preferences.Protein and Main Component Alternatives
The star of this recipe is undoubtedly the peanut butter, but it can be substituted with other nut or seed butters to create different flavor profiles. Almond butter creates a slightly sweeter, more delicate cookie with a sophisticated taste. Cashew butter yields an exceptionally creamy texture and mild flavor that pairs beautifully with vanilla. For those with nut allergies, sunflower seed butter makes an excellent alternative that mimics the texture of peanut butter while being school-safe. If you’re looking to boost the protein content, try adding a scoop of vanilla protein powder to the dough. You may need to slightly increase the amount of peanut butter or add a tablespoon of milk to maintain the right consistency. Another option is incorporating hemp hearts or ground flaxseed, which not only add protein but also beneficial omega-3 fatty acids.Vegetable, Sauce, and Seasoning Modifications
While traditional peanut butter cookies don’t typically include vegetables, you can actually incorporate pumpkin puree or mashed sweet potato for added nutrients and moisture. These additions work particularly well in fall variations and create a softer, cake-like texture. Start with 1/4 cup and adjust as needed the dough should still hold its shape when scooped. For flavor variations, consider adding a teaspoon of cinnamon or a pinch of sea salt on top of the cookies before baking. A drizzle of melted chocolate or a dollop of fruit jam in the center transforms these simple treats into elegant desserts. You can also mix in chopped dried fruit, coconut flakes, or even a pinch of espresso powder for a sophisticated twist on the classic. The following table shows some common substitutions and their effects on the final product:| Ingredient to Replace | Substitution | Ratio | Effect on Texture |
|---|---|---|---|
| Peanut Butter | Almond Butter | 1:1 | Slightly crisper, lighter texture |
| White Sugar | Coconut Sugar | 1:1 | Denser, more caramel flavor |
| Egg | Flax Egg | 1:1 | Chewier, slightly denser |
| All-purpose Flour | Almond Flour | 1:1 | More tender, nuttier taste |
Mastering Peanut Butter Cookies: Advanced Tips and Variations
Once you’ve mastered the basic peanut butter cookie recipe, you might want to elevate your baking skills with these professional techniques and creative variations. These tips will help you achieve bakery-quality results at home and inspire you to experiment with new flavor combinations.Pro Cooking Techniques
Temperature control is crucial for perfect results. For thick, soft cookies, chill the dough for 30 minutes before baking. This prevents excessive spreading and helps maintain a soft center. Conversely, if you prefer thinner, crispier cookies, use room temperature dough and press it flatter before baking. The dough temperature directly affects how the cookies spread in the oven. Another professional tip is to rotate your baking sheet halfway through the baking time. This ensures even heat distribution, especially if your oven has hot spots. For consistent thickness, use a kitchen scale to portion your dough aiming for exactly 1.5 ounces per cookie will give you uniform results every time.Flavor Variations
Transform your basic recipe into something extraordinary with these flavor combinations:- Chocolate Lover’s: Add 1/2 cup semi-sweet chocolate chips and replace 1 tablespoon of sugar with 1 tablespoon of cocoa powder
- PB&J Twist: Make thumbprint cookies by pressing a well in the center of each ball and filling with your favorite jam
- Salted Caramel: Drizzle melted caramel over baked cookies and sprinkle with sea salt
- Coffee Infused: Add 1 teaspoon instant coffee dissolved in 1 teaspoon hot water to the dough
Presentation Tips
For a polished look, roll the dough balls in turbinado sugar or colored sanding sugar before creating the fork marks. This adds a delightful sparkle and extra crunch to the edges. If you’re serving these at a party, consider sandwiching two cookies together with peanut butter buttercream frosting for an impressive dessert.Make-Ahead Options
Peanut butter cookie dough freezes beautifully. Scoop the dough into balls and freeze on a baking sheet, then transfer to a freezer bag for storage. You can bake them directly from frozen, adding just 1-2 minutes to the baking time. This approach lets you enjoy fresh-baked cookies whenever the craving strikes, without starting from scratch each time.How to Store Peanut Butter Cookies: Best Practices
Proper storage ensures your peanut butter cookies maintain their delicious texture and flavor for as long as possible. Whether you’ve baked a large batch or have leftovers from a party, these storage techniques will help you enjoy every last crumb without compromising quality.Refrigeration Guidelines
For short-term storage (up to one week), keep your cookies in an airtight container at room temperature. Place a piece of parchment paper between layers to prevent sticking. Avoid refrigerating peanut butter cookies unless absolutely necessary, as the cold air can make them dry and hard. The oils in the peanut butter provide natural preservation when stored properly at room temperature.Freezing Methods
Freezing is an excellent option for long-term storage. You can freeze both baked cookies and unbaked dough balls. For baked cookies, wrap them tightly in plastic wrap and place in a freezer bag for up to three months. Thaw at room temperature for about 30 minutes before serving. Unbaked dough balls can be frozen directly on a baking sheet, then transferred to a freezer bag bake from frozen, adding 1-2 minutes to the usual baking time.Reheating Best Practices
If your cookies have lost some freshness, a quick refresh in the microwave can restore their soft texture. Microwave for just 5-10 seconds, checking frequently to avoid overheating. For a crispier texture, place cookies in a 300°F oven for 5-7 minutes. This method also helps revive cookies that have been stored in the refrigerator or freezer.Meal Prep Considerations
For busy bakers, preparing dough ahead of time is a game-changer. Portion dough into balls and store in the refrigerator for up to 3 days before baking, or freeze for longer storage. This approach lets you enjoy fresh-baked cookies throughout the week without the full preparation time each day. It’s perfect for school lunches, afternoon snacks, or unexpected guests.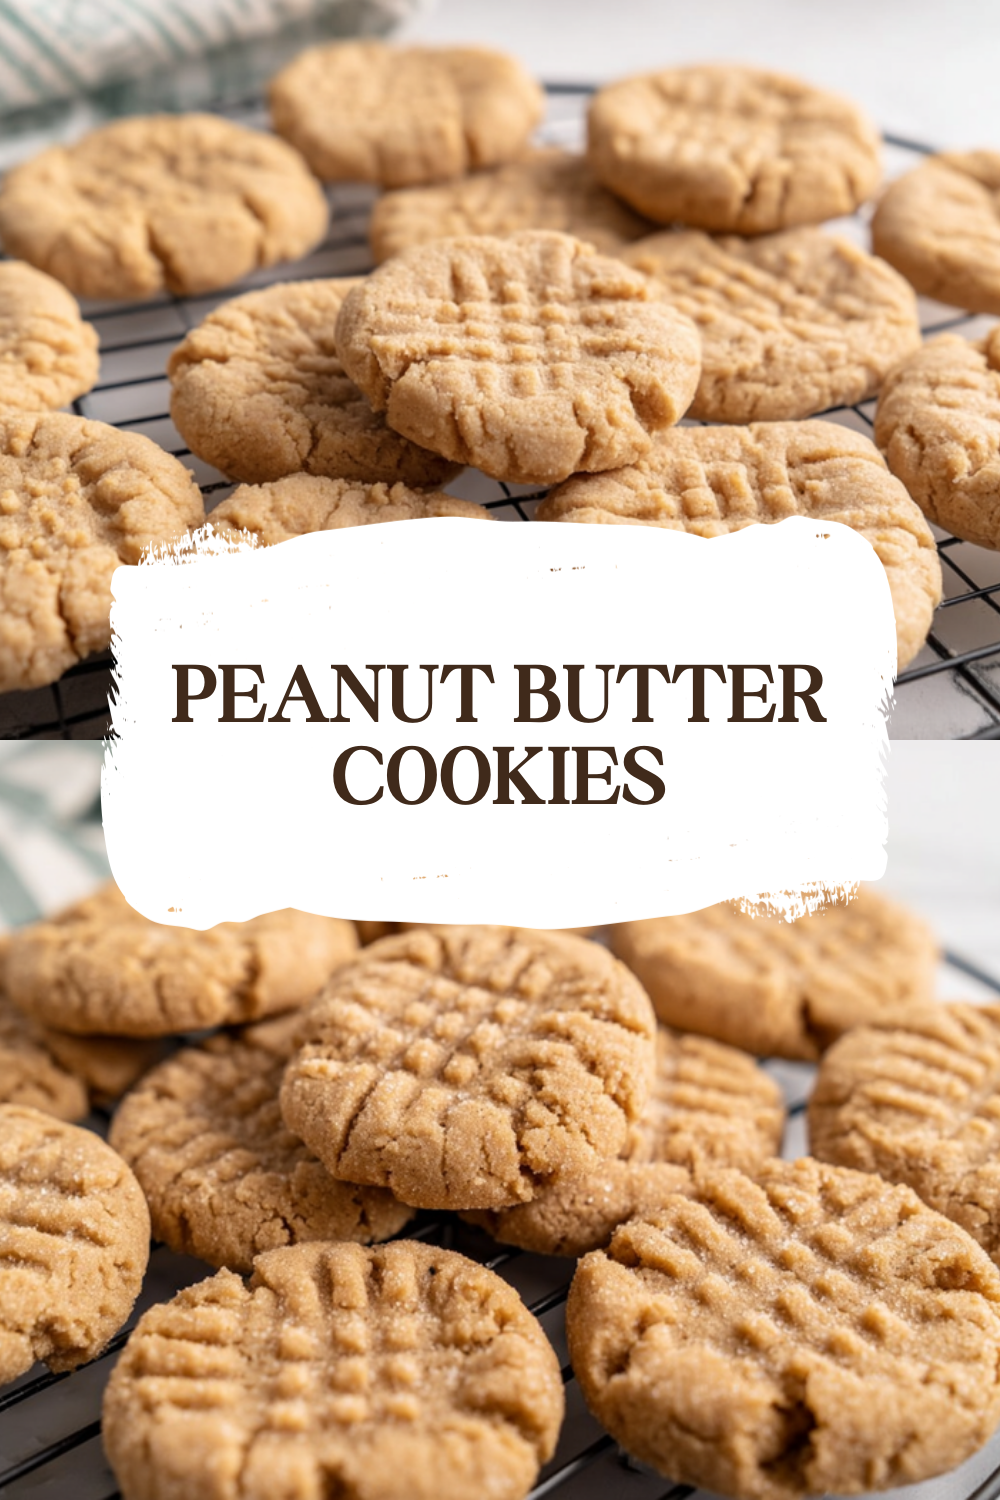
FAQs: Frequently Asked Questions About Peanut Butter Cookies
How do you make simple peanut butter cookies from scratch?
What makes peanut butter cookies soft and chewy?
Why do peanut butter cookies have crisscross fork marks?
Can you make peanut butter cookies without flour or gluten?
How should you store peanut butter cookies to keep them fresh?
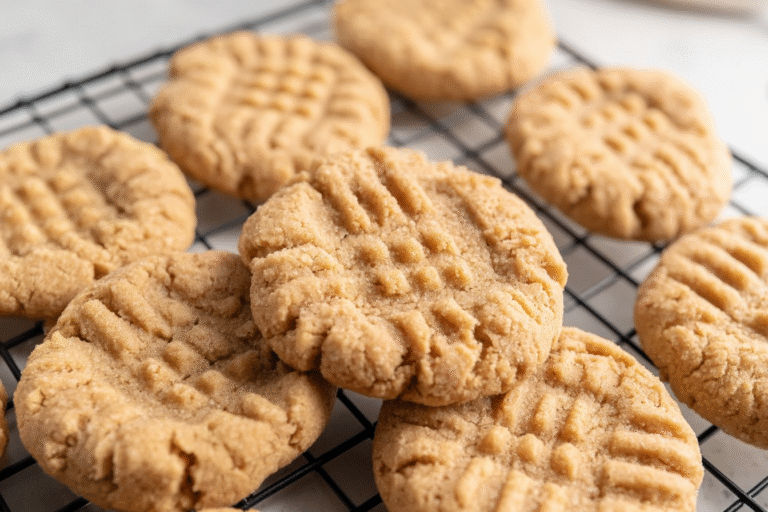
Peanut Butter Cookies
🥜🍪 Classic peanut butter cookies with signature crisscross tops, chewy centers, and nutty flavor – timeless treat!
✨ Just 3 ingredients for effortless baking; crispy edges please every peanut butter lover.
- Total Time: 19 minutes
- Yield: 24 cookies
Ingredients
– 1 cup creamy peanut butter for rich flavor, natural oils for moisture, and structure
– 1 cup granulated sugar for sweetening and crispness on the edges
– 3/4 cup brown sugar, packed for moisture and depth of flavor, chewy texture
– 1 large egg for binding, structure, and richness
– 1/2 teaspoon baking soda for rising slightly and spreading evenly
– 1/4 teaspoon salt for enhancing peanut butter flavor and balancing sweetness
– 1 teaspoon vanilla extract for depth and rounding out flavor
Instructions
1-First Step: Preheat and Prepare: Begin by preheating your oven to 350°F (175°C). Line a baking sheet with parchment paper or lightly grease it with cooking spray. This preparation ensures your cookies won’t stick and makes cleanup simple. Gather all your ingredients and measuring tools before starting this mise en place approach makes the baking process smooth and enjoyable.
2-Second Step: Cream the Base: In a large mixing bowl, combine the creamy peanut butter, granulated sugar, and packed brown sugar. Using a hand mixer on medium speed or a sturdy wooden spoon, beat these ingredients together until well combined and slightly fluffy. This process usually takes 2-3 minutes and helps create a lighter texture in the finished cookies. The mixture should be smooth and free of large sugar lumps.
3-Third Step: Add Wet Ingredients: Add the large egg and vanilla extract to the peanut butter mixture. Beat on medium speed until fully incorporated, about 1 minute. Scrape down the sides of the bowl to ensure all ingredients are evenly distributed. The dough should become glossy and hold together well. At this point, you can also add any optional mix-ins like chocolate chips or chopped nuts if you’re creating a variation of the classic recipe.
4-Fourth Step: Add Dry Ingredients: In a small separate bowl, whisk together the baking soda and salt. Add these dry ingredients to the peanut butter mixture and mix on low speed just until combined. Be careful not to overmix once the dry ingredients are added, as this can affect the texture of your cookies. The dough should be thick and hold its shape when molded.
5-Fifth Step: Form the Cookies: Scoop tablespoon-sized portions of dough and roll them into smooth balls between your palms. Place the dough balls on the prepared baking sheet, spacing them about 2 inches apart to allow for spreading. For uniform cookies, use a cookie scoop or measure each portion carefully. This attention to detail ensures all cookies bake at the same rate.
6-Sixth Step: Create the Signature Pattern: Dip the tines of a fork into granulated sugar (this prevents sticking). Press the fork into each dough ball once, then rotate 90 degrees and press again to create the classic crisscross pattern. Flatten the cookies to about 1/2 inch thickness. This traditional technique isn’t just for aesthetics it helps the thick dough bake evenly and creates those signature cracks on top.
7-Seventh Step: Bake to Perfection: Place the baking sheet in the preheated oven and bake for 10-12 minutes. The edges should be lightly golden, while the centers may still look slightly soft. This slight underbaking is crucial for achieving that soft, chewy texture in the finished cookies. Avoid the temptation to bake longer, as they will continue to set as they cool on the pan.
8-Final Step: Cool and Enjoy: Remove the baking sheet from the oven and let the cookies cool on the pan for 5 minutes. This resting period allows them to firm up slightly without overcooking. Transfer the cookies to a wire rack to cool completely, or enjoy them warm for a truly decadent experience. These peanut butter cookies are delicious on their own, or you can sandwich two together with a dollop of chocolate frosting for an extra special treat.
Last Step:
Please leave a rating and comment letting us know how you liked this recipe! This helps our business to thrive and continue providing free, high-quality recipes for you.Notes
🔥 Don’t overbake for chewy texture; they’ll firm as they cool.
🥄 Use natural peanut butter for richer flavor but stir well first.
❄️ Dough freezes perfectly; bake from frozen adding 1-2 minutes.
- Prep Time: 10 minutes
- Cook Time: 9 minutes
- Category: Dessert
- Method: Baking
- Cuisine: American
- Diet: Vegetarian
Nutrition
- Serving Size: 1 cookie
- Calories: 110 calories
- Sugar: 10g
- Sodium: 70mg
- Fat: 7g
- Saturated Fat: 1g
- Unsaturated Fat: 5g
- Trans Fat: 0g
- Carbohydrates: 10g
- Fiber: 1g
- Protein: 3g
- Cholesterol: 9mg


