
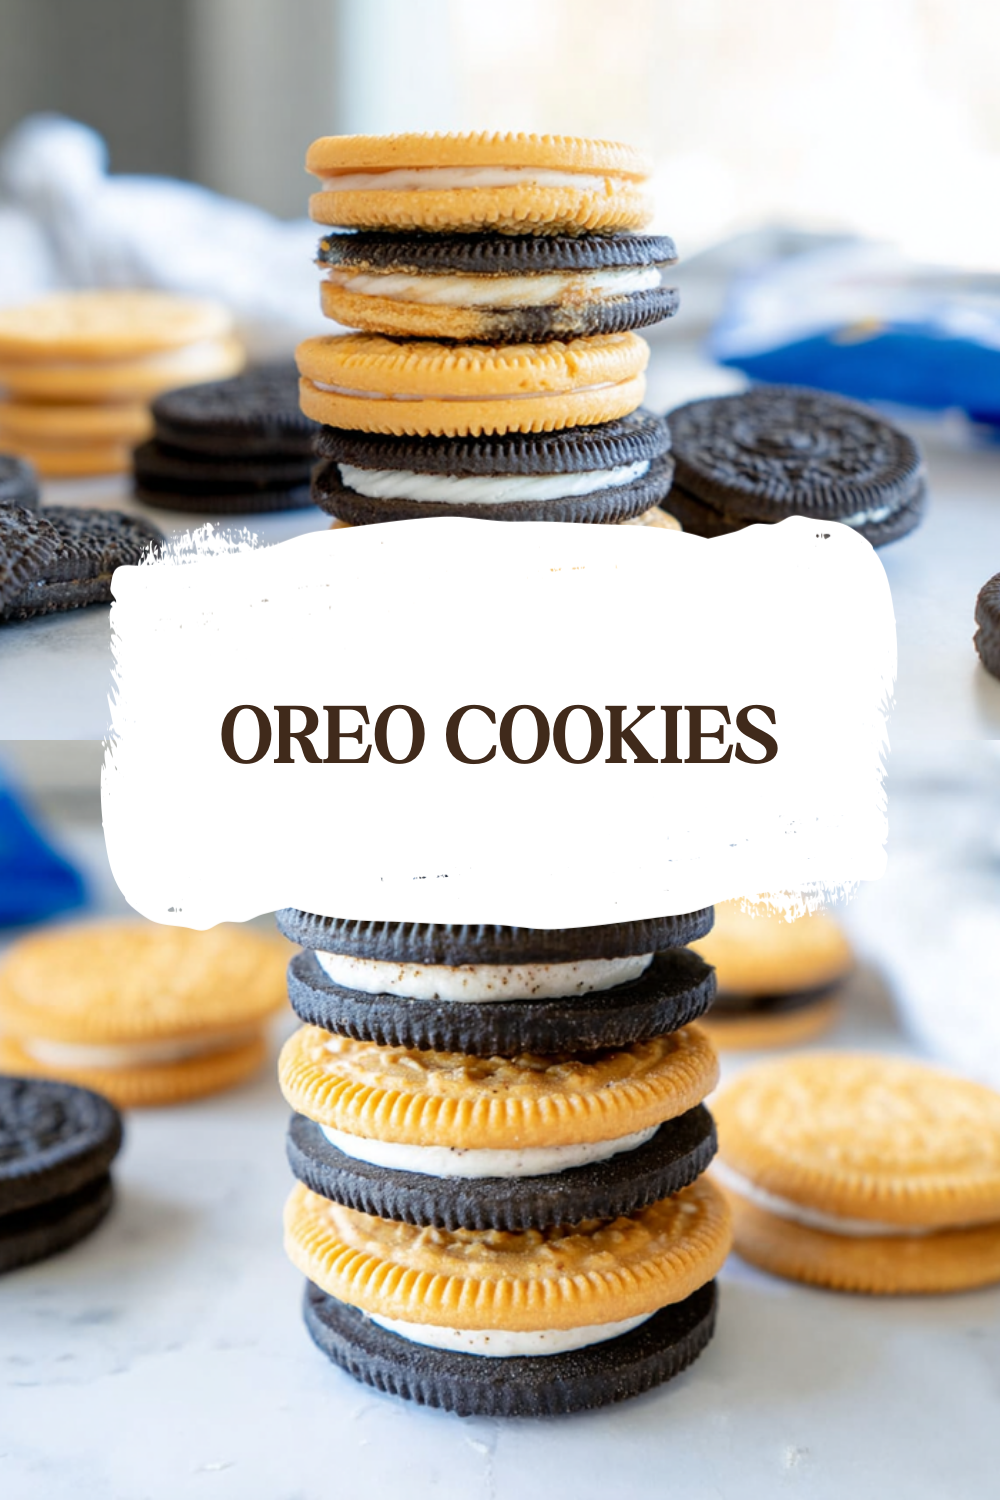
Why You’ll Love This Oreo Cookies
If you have ever craved that classic chocolate sandwich cookie but wanted something fresher and more customizable, this homemade Oreo cookie recipe is your perfect solution. Making these treats at home brings satisfaction that store-bought versions simply cannot match. The process allows you to control every ingredient while creating something special for your family and friends.
Benefits of Making Homemade Oreo Cookies:
- Ease of preparation: Unlike many complex baked goods, these homemade oreos come together with straightforward steps and common kitchen equipment. Even beginners can master this recipe in under two hours, with most of that time being chilling rather than active work. The simple process makes it perfect for busy parents who want to create something special without spending all day in the kitchen.
- Health benefits: By making oreo cookies from scratch, you eliminate preservatives, artificial flavors, and excessive sweeteners found in commercial versions. You control the quality of chocolate, the type of sweetener, and can even reduce sugar content without compromising taste. This copycat oreos recipe lets you enjoy the classic flavor while knowing exactly what’s in each bite.
- Versatility: This easy oreo cookies recipe adapts beautifully to various dietary needs without sacrificing texture or flavor. Whether you need vegan, gluten-free, or reduced sugar options, the base recipe provides an excellent foundation for modifications. The filling can also be customized with different flavors, colors, and additions to match any occasion or preference.
- Distinctive flavor: These classic homemade oreo cookies offer a richer chocolate taste and a creamier filling than mass-produced alternatives. The balance between the slightly bitter chocolate cookie and the sweet vanilla filling creates that perfect combination we all love. You can even experiment with different cocoa percentages to find your ideal flavor profile.
Creating your own Oreo-style cookies at home connects you to a timeless treat while allowing personalization that makes the experience uniquely yours. The process itself is rewarding, filling your kitchen with irresistible aromas and ending with a cookie that tastes remarkably like the classic but with that special homemade touch.
Jump to:
- Why You’ll Love This Oreo Cookies
- Essential Ingredients for Oreo Cookies
- Main Ingredients:
- Filling Ingredients:
- Special Dietary Options:
- Vegan:
- Gluten-free:
- Low-calorie:
- How to Prepare the Perfect Oreo Cookies: Step-by-Step Guide
- Preparation Phase
- Shaping the Cookies
- Baking and Assembly
- Dietary Substitutions to Customize Your Oreo Cookies
- Protein and Main Component Alternatives
- Vegetable, Sauce, and Seasoning Modifications
- Mastering Oreo Cookies: Advanced Tips and Variations
- Pro Cooking Techniques
- Flavor Variations
- Presentation Tips
- Make-Ahead Options
- How to Store Oreo Cookies: Best Practices
- Refrigeration
- Freezing
- Meal Prep Considerations
- FAQs: Frequently Asked Questions About Oreo Cookies
- Oreo Cookies
- Ingredients
- Instructions
- Last Step:
- Notes
- Nutrition
- Did you make this recipe?
Essential Ingredients for Oreo Cookies
Creating the perfect homemade Oreo cookies requires specific ingredients that work together to achieve that iconic texture and taste. Each component plays a crucial role in recreating the sandwich cookie experience you remember from childhood. Below is the complete list of what you’ll need to make approximately 24-30 sandwich cookies.
Main Ingredients:
- 2 cups all-purpose flour – Provides structure to the cookies while maintaining the characteristic crunch
- 3/4 cup unsweetened cocoa powder – Delivers the deep chocolate flavor typical of Oreo-style cookies
- 1 teaspoon baking soda – Helps the cookies maintain their thin, crispy texture
- 1/2 teaspoon salt – Balances the sweetness and enhances the chocolate flavor
- 1 cup unsalted butter, room temperature – Creates the cookie’s texture and richness
- 1 1/2 cups granulated sugar – Provides sweetness and helps create the crisp exterior
- 1 large egg, room temperature – Binds the ingredients together and adds structure
- 1 teaspoon vanilla extract – Complements the chocolate with subtle warmth
Filling Ingredients:
- 1/2 cup unsalted butter, room temperature – Forms the creamy base of the filling
- 2 cups powdered sugar – Creates the smooth, sweet center of the sandwich cookies
- 2 teaspoons vanilla extract – Provides the classic vanilla flavor of the filling
- 2 tablespoons milk or cream – Adjusts the filling to the perfect spreading consistency
Special Dietary Options:
Vegan:
- Replace butter with vegan butter sticks in equal amounts
- Use a flax egg (1 tablespoon ground flaxseed mixed with 3 tablespoons water) instead of the regular egg
- Choose plant-based milk alternatives for the filling
Gluten-free:
- Substitute all-purpose flour with a 1-to-1 gluten-free flour blend that includes xanthan gum
- Ensure your cocoa powder is certified gluten-free
Low-calorie:
- Replace half the butter in cookies with Greek yogurt or applesauce
- Use a natural zero-calorie sweetener approved for baking in place of sugar
- Create a lighter filling using reduced-fat cream cheese with less powdered sugar
For those looking to perfect their chocolate sandwich cookie technique, this Homemade Oreo-style Cookies Recipe from Serious Eats provides additional insights into the science behind achieving that perfect texture. The right combination of ingredients makes all the difference when creating easy homemade oreo cookies that rival the original.
How to Prepare the Perfect Oreo Cookies: Step-by-Step Guide
Making your own oreo cookie recipe at home might seem intimidating, but the process is quite manageable when broken down into clear steps. This guide will walk you through creating classic homemade oreo cookies with that signature crunch and creamy filling. The entire process takes about 2 hours, including chilling time.
Preparation Phase
First Step: Begin by preparing your workspace and equipment. Line two baking sheets with parchment paper or silicone baking mats. This prevents the cookies from sticking and makes cleanup easier. Measure all ingredients before starting to ensure the process flows smoothly. For the cookies, sift together the flour, cocoa powder, baking soda, and salt in a medium bowl. This step ensures dry ingredients are evenly distributed and removes any lumps in the cocoa powder.
Second Step: In a separate large bowl, beat the softened butter and sugar together using an electric mixer on medium speed until the mixture is light and fluffy. This usually takes about 3-5 minutes and incorporates air into the dough, creating a better texture. Add the egg and vanilla extract, beating until well combined. The mixture should look smooth and glossy.
Third Step: Gradually add the dry ingredients to the wet mixture on low speed, mixing just until combined. The dough will be dark and slightly crumbly. Avoid overmixing, which can make the cookies tough. If the dough seems too dry to hold together when squeezed, add 1-2 teaspoons of milk and mix briefly. The dough should hold its shape when formed into a ball without being sticky.
Shaping the Cookies
Fourth Step: Gather the dough and form it into a disk about 1-inch thick. Wrap tightly in plastic wrap and refrigerate for at least 30 minutes. Chilling the dough is crucial for easy homemade oreo cookies because it prevents spreading and helps achieve that characteristic crisp texture. While the dough chills, you can prepare the filling by beating the butter, powdered sugar, vanilla, and milk until smooth and creamy. Adjust the consistency with more milk if needed.
Fifth Step: After chilling, remove the dough from the refrigerator and let it sit for 5-10 minutes to soften slightly. Roll the dough out on a lightly floured surface to about 1/8-inch thickness. Use a 2-inch round cookie cutter to cut circles from the dough. Gather the scraps, re-roll, and cut more circles until all dough is used. This should yield approximately 48-60 individual cookies.
Baking and Assembly
Sixth Step: Place the cut cookies on the prepared baking sheets, leaving about 1 inch of space between them. Bake at 325°F (165°C) for 12-15 minutes, rotating the pans halfway through baking. The cookies are done when they are set and slightly firm to the touch. They will crisp as they cool. Allow the cookies to cool on the baking sheets for 5 minutes before transferring to a wire rack to cool completely.
Seventh Step: Once completely cooled, pair the cookies by size. Turn half of the cookies upside down and spread or pipe about 1-2 teaspoons of filling onto each. Top with the remaining cookies, pressing gently to spread the filling to the edges. For the classic look, you can twist the top cookie slightly to create the filling ridges.
Final Step: Allow the assembled cookies to set for about 30 minutes so the filling firms slightly. Store your easy oreo cookies in an airtight container. They will stay fresh for several days, though they rarely last that long! For an extra touch, you can dip half of each assembled cookie in melted chocolate and sprinkle with crushed cookies or sprinkles.
This process creates simple oreo cookies for beginners that taste remarkably like the classic treat. The key is patience during the chilling phase and attention to detail when rolling the dough thinly. The result is a chocolate sandwich cookie with that perfect crunch and creamy center we all love.

Dietary Substitutions to Customize Your Oreo Cookies
One of the greatest advantages of making homemade oreos is the ability to adapt the recipe to suit various dietary preferences and restrictions. Whether you’re accommodating allergies, following a specific diet, or simply working with ingredients you have on hand, these substitutions will help you create the perfect customized version of this classic treat.
Protein and Main Component Alternatives
The traditional Oreo cookie recipe relies on wheat flour and butter as its primary structural components, but several excellent alternatives exist for those with different dietary needs. For a protein boost, consider replacing a portion of the all-purpose flour with almond flour or protein powder designed for baking. This substitution adds nutritional value while maintaining a pleasing texture. When using alternative flours, remember they may absorb liquid differently, so you might need to adjust the amount slightly.
For those avoiding dairy, several excellent butter alternatives work well in this easy oreo cookies recipe. Coconut oil adds a subtle tropical flavor and creates a slightly crisper cookie, while vegan butter sticks provide results nearly identical to traditional butter. When using coconut oil, you may need to chill the dough slightly longer as it softens faster at room temperature.
Egg replacements offer another customization opportunity. A flax egg (1 tablespoon ground flaxseed mixed with 3 tablespoons water) works perfectly in this recipe and adds fiber and omega-3 fatty acids. Commercial egg replacers, mashed banana, or applesauce can also bind the ingredients, though they may slightly alter the final texture. Each option brings its own characteristics, allowing you to find the perfect match for your taste preferences and dietary requirements.
Vegetable, Sauce, and Seasoning Modifications
While vegetables aren’t typically added to Oreo-style cookies, the filling offers endless opportunities for flavor customization. For a minty twist, add 1/2 teaspoon peppermint extract to the filling in place of some vanilla extract. Chocolate lovers can incorporate melted chocolate or cocoa powder into the filling for a double-chocolate version. Fruit extracts like raspberry or lemon create delightful variations that pair surprisingly well with the chocolate cookies.
The seasoning aspect of these copycat oreos primarily involves the cocoa and vanilla balance. Experimenting with different types of cocoa powder can dramatically change the flavor profile. Dutch-processed cocoa provides a milder, smoother chocolate taste, while natural cocoa powder offers a more intense, slightly acidic chocolate flavor. For adults, a pinch of espresso powder enhances the chocolate depth without making the cookies taste like coffee.
For those watching their sugar intake, several alternatives work well in the filling. Monk fruit sweetener, stevia blends, or erythritol can replace powdered sugar, though the texture may be slightly grainier. Coconut sugar adds a subtle caramel flavor and lower glycemic impact than refined sugar. When using alternative sweeteners, you may need to adjust the liquid in the filling to achieve the right consistency.
Mastering Oreo Cookies: Advanced Tips and Variations
Once you’ve mastered the basic technique for making homemade oreos, you might want to expand your skills and try some creative variations. These advanced techniques will help you take your chocolate sandwich cookies to the next level, creating treats that are both visually stunning and delicious.
Pro Cooking Techniques
For professional-looking cookies, consider investing in a small offset spatula for spreading filling evenly. This tool allows you to create a perfectly smooth layer without dragging crumbs into the cream. When pairing cookies, try to match them by size and thickness to create uniform sandwiches. For perfectly round cookies, use a round cutter to trim any irregular edges after baking while the cookies are still slightly warm.
Temperature control plays a crucial role in achieving the perfect texture. If your cookies are spreading too much during baking, try chilling the cut shapes on the baking sheet for 10-15 minutes before placing them in the oven. Conversely, if they seem too thick or tough, try rolling the dough slightly thinner and reducing the baking time by 1-2 minutes. Each oven performs differently, so you may need to experiment to find the ideal temperature for your specific setup.
Flavor Variations
The possibilities for customizing your easy homemade oreo cookies recipe are nearly endless. Consider adding 1/2 teaspoon of instant coffee powder to the cookie dough for a mocha variation, or replace some of the cocoa powder with matcha powder for a unique green tea chocolate combination. Spices like cinnamon, chili powder, or orange zest can transform the classic flavor profile into something unexpectedly delightful.
The filling offers even more opportunities for creativity. Peanut butter filling pairs beautifully with chocolate cookies, while cream cheese frosting creates a tangy contrast. For a seasonal twist, try pumpkin spice filling in autumn or peppermint during the holidays. You can even divide the filling and color different portions with food coloring for a fun, festive appearance.
The secret to truly exceptional homemade oreos lies in the details taking the time to properly chill the dough, rolling it to the perfect thickness, and finding the ideal balance between cookie crunch and filling creaminess.
Presentation Tips
Transform your simple oreo cookies for beginners into impressive treats with thoughtful presentation. Consider dipping half of each assembled sandwich cookie in melted white, dark, or milk chocolate for an elegant finish. Sprinkle with crushed cookies, colorful sprinkles, or sea salt immediately after dipping while the chocolate is still wet. For a sophisticated look, use a piping bag fitted with a decorative tip to apply the filling, creating beautiful patterns between the cookie layers.
Presentation extends beyond the cookies themselves. Arrange them on a vintage serving plate or tiered stand for a charming display. For gift-giving, package them in clear cellophane bags tied with coordinating ribbon, or place them in decorative cookie tins with parchment paper between layers. A handwritten label describing the flavor variety adds a personal touch that recipients will appreciate.
Make-Ahead Options
One of the advantages of homemade oreos from scratch is that they can be prepared in stages to fit your schedule. The cookie dough can be made ahead and refrigerated for up to 3 days or frozen for up to 1 month. When freezing dough, form it into a disk before wrapping tightly in plastic and placing in a freezer bag. Thaw overnight in the refrigerator before rolling and baking.
The baked cookies can be stored unfilled for up to 1 week in an airtight container at room temperature. Prepare the filling separately and assemble the cookies shortly before serving for the freshest taste. Alternatively, freeze fully assembled cookies in a single layer on a baking sheet before transferring to a freezer container. They will keep for up to 3 months and can be enjoyed straight from the freezer or thawed at room temperature.
This make-ahead flexibility makes classic homemade oreo cookies an excellent choice for holiday baking, party preparation, or simply ensuring you always have homemade treats on hand. With these advanced techniques and variations, you can customize the recipe to suit any occasion or preference while maintaining that distinctive Oreo character we all love.
How to Store Oreo Cookies: Best Practices
Proper storage ensures your homemade oreos maintain their texture and flavor for as long as possible. Unlike many baked goods that dry out quickly, these chocolate sandwich cookies have good keeping qualities when stored correctly. Following these guidelines will help you enjoy your creations at their best, whether you’re planning to eat them within a few days or save them for a special occasion.
Refrigeration
For short-term storage of 1-2 weeks, keep your easy oreo cookies in an airtight container at room temperature. Store them in a cool, dry place away from direct sunlight and heat sources. If your kitchen is particularly warm or humid, the refrigerator may be preferable. When refrigerating, place the cookies in a sealed container with a piece of parchment paper between layers to prevent sticking. Bring them to room temperature about 30 minutes before serving for the best texture and flavor.
The filling can soften slightly at room temperature in humid environments, which is why refrigeration might be necessary in certain climates. However, refrigeration can sometimes cause the chocolate cookies to lose some of their crunch over time. If you notice this happening, try placing a silica gel packet (often found in vitamin bottles) in the container to absorb excess moisture.
Freezing
For long-term storage, freezing works exceptionally well for homemade oreos from scratch. Flash-freeze assembled cookies in a single layer on a baking sheet until firm, then transfer them to a freezer-safe container or bag. Separate layers with parchment paper to prevent them from sticking together. When properly frozen, these cookies will maintain their quality for up to 3 months.
For even longer storage, consider freezing the components separately. Store baked cookie rounds in one container and the filling in another. This prevents the cookies from becoming soggy and allows you to assemble them fresh when needed. Thaw cookie rounds at room temperature for about 30 minutes before filling. The filling can be used straight from the freezer with a brief stir to restore spreadability.
To thaw frozen assembled cookies, simply remove the desired number from the freezer and let them sit at room temperature for 15-20 minutes. For best results, consume thawed cookies within 2-3 days. Avoid repeatedly freezing and thawing the same cookies, as this can negatively affect their texture.
Meal Prep Considerations
For busy households, incorporating homemade oreos into meal prep routines can ensure you always have homemade treats available without last-minute baking. The dough can be prepared and frozen in log form wrapped tightly in plastic and foil. When you’re ready to bake, simply slice the frozen log into rounds and bake, adding a minute or two to the baking time if needed.
Another efficient approach is to bake a large batch of cookie rounds on a weekend and store them unfilled. Prepare the filling fresh when needed, ensuring maximum freshness. This method works particularly well for those who enjoy experimenting with different filling flavors throughout the week using the same batch of cookie bases.
For portion control, pre-assemble a single serving’s worth of cookies and store them in individual bags or containers. This approach helps prevent overindulgence while making it easy to grab a treat for lunchboxes or afternoon snacks. Consider labeling containers with preparation dates to ensure you always use the oldest cookies first.
FAQs: Frequently Asked Questions About Oreo Cookies
Print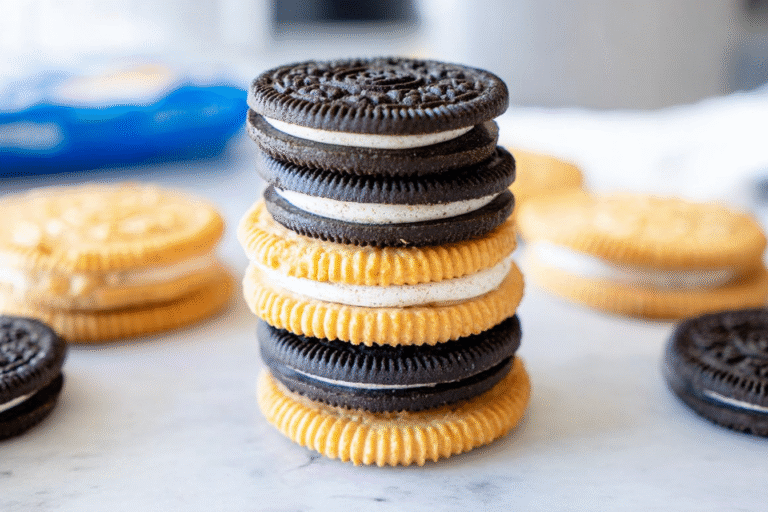
Oreo Cookies
🍪🏠 Foolproof easy homemade classic cookies with chewy centers and crisp edges – timeless family favorite!
✨ Just 10 minutes prep using pantry basics; bakes soft and stays fresh for days of snacking joy.
- Total Time: 55 minutes
- Yield: 48 cookies
Ingredients
– 2 cups all-purpose flour – Provides structure to the cookies while maintaining the characteristic crunch
– 3/4 cup unsweetened cocoa powder – Delivers the deep chocolate flavor typical of Oreo-style cookies
– 1 teaspoon baking soda – Helps the cookies maintain their thin, crispy texture
– 1/2 teaspoon salt – Balances the sweetness and enhances the chocolate flavor
– 1 cup unsalted butter, room temperature – Creates the cookie’s texture and richness
– 1 1/2 cups granulated sugar – Provides sweetness and helps create the crisp exterior
– 1 large egg, room temperature – Binds the ingredients together and adds structure
– 1 teaspoon vanilla extract – Complements the chocolate with subtle warmth
– 1/2 cup unsalted butter, room temperature – Forms the creamy base of the filling
– 2 cups powdered sugar – Creates the smooth, sweet center of the sandwich cookies
– 2 teaspoons vanilla extract – Provides the classic vanilla flavor of the filling
– 2 tablespoons milk or cream – Adjusts the filling to the perfect spreading consistency
Instructions
1-First Step: Begin by preparing your workspace and equipment. Line two baking sheets with parchment paper or silicone baking mats. This prevents the cookies from sticking and makes cleanup easier. Measure all ingredients before starting to ensure the process flows smoothly. For the cookies, sift together the flour, cocoa powder, baking soda, and salt in a medium bowl. This step ensures dry ingredients are evenly distributed and removes any lumps in the cocoa powder.
2-Second Step: In a separate large bowl, beat the softened butter and sugar together using an electric mixer on medium speed until the mixture is light and fluffy. This usually takes about 3-5 minutes and incorporates air into the dough, creating a better texture. Add the egg and vanilla extract, beating until well combined. The mixture should look smooth and glossy.
3-Third Step: Gradually add the dry ingredients to the wet mixture on low speed, mixing just until combined. The dough will be dark and slightly crumbly. Avoid overmixing, which can make the cookies tough. If the dough seems too dry to hold together when squeezed, add 1-2 teaspoons of milk and mix briefly. The dough should hold its shape when formed into a ball without being sticky.
4-Fourth Step: Gather the dough and form it into a disk about 1-inch thick. Wrap tightly in plastic wrap and refrigerate for at least 30 minutes. Chilling the dough is crucial for easy homemade oreo cookies because it prevents spreading and helps achieve that characteristic crisp texture. While the dough chills, you can prepare the filling by beating the butter, powdered sugar, vanilla, and milk until smooth and creamy. Adjust the consistency with more milk if needed.
5-Fifth Step: After chilling, remove the dough from the refrigerator and let it sit for 5-10 minutes to soften slightly. Roll the dough out on a lightly floured surface to about 1/8-inch thickness. Use a 2-inch round cookie cutter to cut circles from the dough. Gather the scraps, re-roll, and cut more circles until all dough is used. This should yield approximately 48-60 individual cookies.
6-Sixth Step: Place the cut cookies on the prepared baking sheets, leaving about 1 inch of space between them. Bake at 325°F (165°C) for 12-15 minutes, rotating the pans halfway through baking. The cookies are done when they are set and slightly firm to the touch. They will crisp as they cool. Allow the cookies to cool on the baking sheets for 5 minutes before transferring to a wire rack to cool completely.
7-Seventh Step: Once completely cooled, pair the cookies by size. Turn half of the cookies upside down and spread or pipe about 1-2 teaspoons of filling onto each. Top with the remaining cookies, pressing gently to spread the filling to the edges. For the classic look, you can twist the top cookie slightly to create the filling ridges.
8-Final Step: Allow the assembled cookies to set for about 30 minutes so the filling firms slightly. Store your easy oreo cookies in an airtight container. They will stay fresh for several days, though they rarely last that long! For an extra touch, you can dip half of each assembled cookie in melted chocolate and sprinkle with crushed cookies or sprinkles.
Last Step:
Please leave a rating and comment letting us know how you liked this recipe! This helps our business to thrive and continue providing free, high-quality recipes for you.Notes
🥄 Cream sugars and butter extra long for tender, airy texture.
❄️ Always chill dough to prevent spreading into thin pancakes.
🍫 Mix milk and semisweet chips for varied melt and chew.
- Prep Time: 15 minutes
- Chill: 30 minutes
- Cook Time: 10 minutes
- Category: Dessert
- Method: Baking
- Cuisine: American
- Diet: Vegetarian
Nutrition
- Serving Size: 1 cookie
- Calories: 160 calories
- Sugar: 16g
- Sodium: 130mg
- Fat: 9g
- Saturated Fat: 5g
- Unsaturated Fat: 3g
- Trans Fat: 0g
- Carbohydrates: 19g
- Fiber: 1g
- Protein: 2g
- Cholesterol: 25mg


