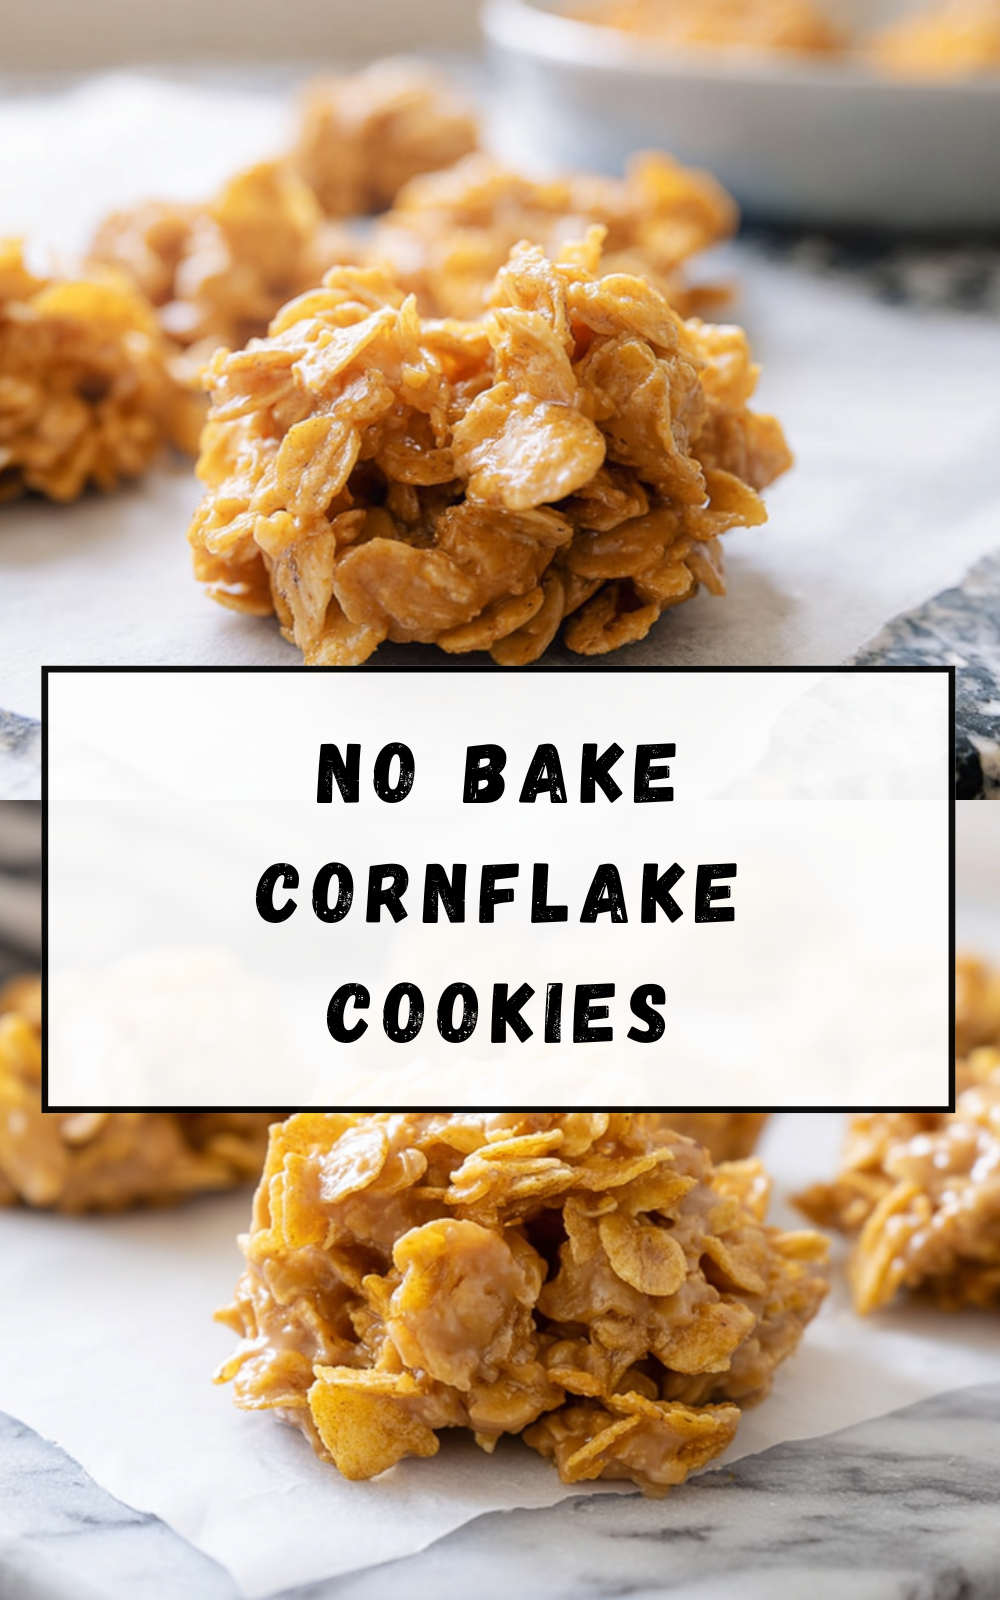
Why You’ll Love This No Bake Cornflake Cookies
If you’re looking for a quick, delicious treat that satisfies your sweet tooth without heating up the kitchen, these no bake cornflake cookies are the perfect solution. Whether you’re a busy parent, student, or simply someone who loves easy desserts, this recipe offers several compelling benefits.
- Ease of preparation: These peanut butter cornflake cookies require no oven time and can be made in just 15 minutes. The simple process involves heating the sugar and corn syrup mixture, combining with peanut butter and vanilla, then folding in the cornflakes. This straightforward method makes it ideal for beginner bakers or those with limited time in the kitchen.
- Health benefits: While these cookies are certainly a treat, they contain peanut butter which provides protein and healthy fats. Cornflakes add essential B vitamins and iron. By controlling the ingredients, you can create a more wholesome snack compared to store-bought alternatives with artificial additives and preservatives.
- Versatility: This recipe adapts easily to different dietary needs. You can create vegan versions using maple syrup and plant-based butters, or gluten-free options by ensuring your cornflakes are certified gluten-free. The base recipe serves as a canvas for various add-ins like chocolate chips, coconut, or dried fruit.
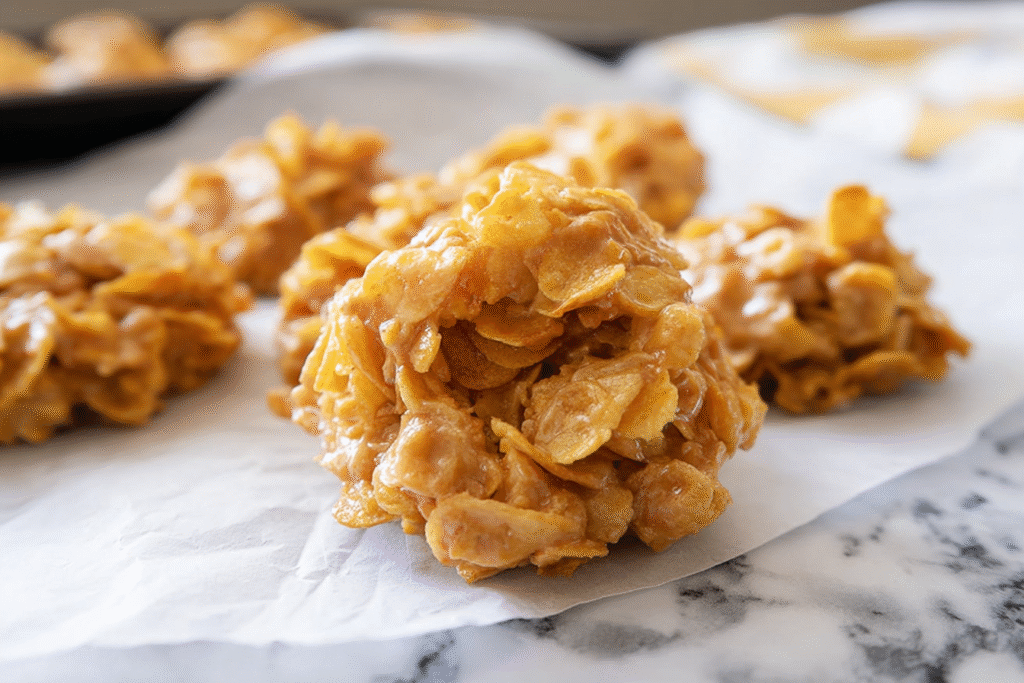
- Distinctive flavor: The combination of salty-sweet peanut butter, crunchy cornflakes, and sweet sugar syrup creates an addictive texture and taste profile. The contrast between the sticky binding mixture and crisp cereal makes these cookies uniquely satisfying and different from traditional baked goods.
These easy no bake cornflake cookies are perfect for last-minute gatherings, school events, or when you need a simple homemade dessert that feels special.
Jump to:
- Why You’ll Love This No Bake Cornflake Cookies
- Essential Ingredients for No Bake Cornflake Cookies
- Special Dietary Options
- How to Prepare the Perfect No Bake Cornflake Cookies: Step-by-Step Guide
- First Step: Preparation and Mise en Place
- Second Step: Creating the Sugar Mixture
- Third Step: Adding Peanut Butter and Vanilla
- Fourth Step: Combining with Cornflakes
- Fifth Step: Forming the Cookies
- Final Step: Cooling and Serving
- Dietary Substitutions to Customize Your No Bake Cornflake Cookies
- Protein and Main Component Alternatives
- Vegetable, Sauce, and Seasoning Modifications
- Mastering No Bake Cornflake Cookies: Advanced Tips and Variations
- Pro Cooking Techniques
- Flavor Variations
- Presentation Tips
- Make-Ahead Options
- How to Store No Bake Cornflake Cookies: Best Practices
- Refrigeration
- Freezing
- Reheating
- Meal Prep Considerations
- FAQs: Frequently Asked Questions About No Bake Cornflake Cookies
- What ingredients do I need for no bake cornflake cookies?
- How do you make no bake cornflake cookies step by step?
- Do no bake cornflake cookies need to be refrigerated?
- Can I make no bake cornflake cookies without peanut butter?
- Why are my no bake cornflake cookies too soft or sticky?
- No Bake Cornflake Cookies
- Ingredients
- Instructions
- Last Step:
- Notes
- Nutrition
- Did you make this recipe?
Essential Ingredients for No Bake Cornflake Cookies
Creating delicious no bake peanut butter cornflake cookies requires just a handful of pantry staples. Here’s what you’ll need:
Main Ingredients:- 1 cup granulated sugar
- 1 cup light corn syrup
- 1 cup creamy peanut butter
- 1 teaspoon vanilla extract
- 5-6 cups cornflakes (about one 18-oz box)
- ½ cup chocolate chips
- ½ cup shredded coconut
- ¼ cup chopped peanuts
For the best results, measure your cornflakes loosely rather than packing them down. This ensures your cookies have the right consistency without becoming too dense. Smooth peanut butter creates the best binding effect, though crunchy varieties work if you prefer more texture throughout your cornflake cookies.
Special Dietary Options
One of the greatest advantages of this recipe is its adaptability to various dietary restrictions:
Vegan:- Replace light corn syrup with maple syrup or agave nectar (1:1 ratio)
- Use a vegan peanut butter or sunflower seed butter
- Ensure cornflakes are vegan (some brands contain vitamin D from animal sources)
- Choose certified gluten-free cornflakes, as regular varieties may contain malt flavoring
- Verify all other ingredients are certified gluten-free if necessary
- Use a sugar substitute in place of granulated sugar
- Reduce corn syrup by half and replace with water or a sugar-free liquid sweetener
- Use natural peanut butter without added sugars or oils
These simple substitutions allow you to enjoy corn flakes cookies regardless of your dietary needs, making this recipe truly inclusive for all your family and friends.
How to Prepare the Perfect No Bake Cornflake Cookies: Step-by-Step Guide
Creating no bake cornflake cookies is a straightforward process that yields delicious results every time. Follow these detailed instructions for perfect cookies:
First Step: Preparation and Mise en Place
Before you begin, line two baking sheets with parchment paper or silicone baking mats. This prevents sticking and makes cleanup effortless. Measure all your ingredients beforehand, as the process moves quickly once the sugar mixture begins boiling. Measure cornflakes loosely into a large mixing bowl, ensuring you have between 5-6 cups ready. Having everything prepared before turning on the heat is essential because the syrup mixture sets rapidly once combined with the cereal.
Second Step: Creating the Sugar Mixture
In a large saucepan over medium heat, combine 1 cup granulated sugar and 1 cup light corn syrup. Stir continuously as the mixture heats. You’ll notice the sugar dissolving into the syrup. Continue stirring until the mixture comes to a full rolling boil, which typically takes 1-2 minutes. Allow it to boil for exactly one more minute, which ensures the mixture reaches the right temperature (approximately 235°F if using a candy thermometer). This brief boiling period is crucial because it creates the right consistency for the cookies to set properly. Avoid boiling longer, as this can make the cookies too hard once cooled.
Third Step: Adding Peanut Butter and Vanilla
Remove the saucepan from heat immediately after boiling for one minute. Add 1 cup creamy peanut butter and 1 teaspoon vanilla extract to the hot sugar mixture. Stir vigorously until the peanut butter is completely melted and the mixture becomes smooth and glossy. This should take about 30 seconds to 1 minute. The heat from the sugar syrup will melt the peanut butter easily. Ensure there are no lumps remaining in the mixture. For those using alternative nut or seed butters, they may require slightly more stirring to achieve a smooth consistency.
Fourth Step: Combining with Cornflakes
Pour the hot peanut butter mixture over the prepared cornflakes in your large bowl. Using a rubber spatula or wooden spoon, fold the mixture gently to coat all the cornflakes evenly. Work quickly but gently to avoid crushing the cereal. The goal is to coat each flake without breaking them into tiny pieces. If you’re adding optional ingredients like chocolate chips or shredded coconut, fold them in at this stage. For vegan adaptations using maple syrup, the mixture might be slightly thinner, so add an extra ½ cup of cornflakes if needed to achieve the right consistency.
Pro Tip: If the mixture seems too wet or doesn’t hold together when forming cookies, add additional cornflakes in ¼ cup increments until you reach the desired consistency. Conversely, if it’s too dry to coat the cereal, the sugar syrup may have boiled too long. Next time, reduce the boiling time slightly.
Fifth Step: Forming the Cookies
Using a tablespoon or cookie scoop, drop rounded mounds of the cornflake mixture onto your prepared baking sheets. Space them about 1-2 inches apart to prevent them from sticking together. You can make them larger or smaller depending on your preference, but tablespoon-sized portions yield about 24-30 cookies. If you prefer uniform cookies, use a cookie scoop. For a more rustic look, simply drop them with a spoon. Work quickly as the mixture begins to set as it cools. If the mixture becomes too firm to scoop, you can briefly reheat it in the microwave for 10-15 seconds.
Final Step: Cooling and Serving
Allow the cookies to cool completely on the baking sheets for 20-30 minutes until they are firm to the touch. The cooling process is essential for achieving the right texture. They should feel set and hold their shape when picked up but still maintain a slightly chewy interior with a crunchy exterior. Once cooled, store them in an airtight container or serve immediately. These peanut butter cornflake cookies make excellent additions to holiday cookie platters, classroom treats, or simple after-school snacks. The contrast between the sweet, gooey interior and crispy cereal exterior makes them irresistible to both children and adults.
This entire process from start to finish takes approximately 15-20 minutes of active preparation, plus cooling time. The quick assembly makes them perfect for unexpected guests or when you need a sweet treat without heating up the oven. For another variation on this classic treat, check out this classic peanut butter cornflake cookies recipe that offers a slightly different approach to the same delicious combination.

Dietary Substitutions to Customize Your No Bake Cornflake Cookies
The versatility of peanut butter cornflake cookies recipe allows for numerous modifications to accommodate various dietary needs and preferences. Here are some creative ways to customize your treats:
Protein and Main Component Alternatives
The peanut butter in this recipe can be substituted with several alternatives depending on your needs or allergies. Sunflower seed butter provides a similar creamy texture and nutty flavor while being completely nut-free, making it ideal for schools with nut restrictions. Almond butter offers a slightly more sophisticated flavor with additional nutritional benefits like vitamin E and magnesium. Cashew butter creates a richer, creamier result with a milder taste profile.
For those looking to reduce fat content, powdered peanut butter reconstituted with water can work, though you may need to adjust the sweetener slightly. Soy nut butter provides another nut-free alternative with comparable protein content. If you’re following a strict paleo diet, try using almond butter with honey instead of corn syrup. Coconut butter offers a unique tropical twist, though it will significantly change the flavor profile. Each substitution may slightly alter the binding properties, so be prepared to adjust the quantity of cereal or sweetener accordingly.
Vegetable, Sauce, and Seasoning Modifications
While traditional cornflake cookies don’t typically include vegetables, creative bakers have incorporated ingredients like shredded carrot or zucchini for added nutrition and moisture. These additions work best in small quantities (¼ cup) and should be well-drained to prevent affecting the cookie structure. For sauce variations, consider swapping light corn syrup with maple syrup, honey, or agave nectar, keeping in mind that each alternative will slightly change the flavor profile.
Seasoning modifications can transform these simple treats into sophisticated confections. A pinch of sea salt enhances the sweet-salty contrast, while cinnamon adds warmth and depth. For a Mexican-inspired variation, add a pinch of cayenne pepper alongside the vanilla extract. Citrus zest, whether lemon, orange, or lime, brightens the overall flavor. Almond or coconut extract can replace or complement the vanilla for different aromatic notes. For a mocha version, dissolve 1 teaspoon of instant coffee in the peanut butter before combining with the sugar mixture.
Mastering No Bake Cornflake Cookies: Advanced Tips and Variations
Once you’ve mastered the basic recipe for no bake cornflake cookies, these expert tips and creative variations will help you create exceptional treats:
Pro Cooking Techniques
For perfectly consistent results every time, use a candy thermometer to ensure your sugar syrup reaches exactly 235°F (the softball stage) before removing from heat. This precision guarantees the cookies will set properly without becoming too hard or too soft. When folding the cornflakes into the hot mixture, use a figure-eight motion with your spatula to coat evenly without crushing the cereal. If you’re making multiple batches, work in small portions to prevent the mixture from setting before you’ve formed all the cookies.
To create uniform cookies every time, use a cookie scoop with a release mechanism. This tool not only ensures consistent sizing but also speeds up the process significantly. For a professional presentation, dip the bottom of your cookie scoop in hot water between scoops to prevent sticking. If you prefer a smoother appearance, lightly wet your hands and gently press the tops of the cookies after scooping to create a more rounded shape.
| Problem | Cause | Solution |
|---|---|---|
| Cookies too soft | Underboiled sugar mixture | Boil mixture for full 2 minutes next time |
| Cookies too hard | Overboiled sugar mixture | Reduce boiling time to 1 minute |
| Mixture won’t hold together | Too many cornflakes | Add ¼ cup more syrup mixture |
| Mixture too sticky | Too few cornflakes | Add ½ cup more cornflakes |
Flavor Variations
Transform your no bake cornflake cookies with these exciting flavor combinations. For a chocolate-peanut version, add ½ cup chocolate chips to the mixture along with the cornflakes, or drizzle melted chocolate over the formed cookies after they’ve cooled. The chocolate-peanut butter combination is a classic favorite that never disappoints. For a s’mores-inspired treat, add 1 cup mini marshmallows and ½ cup graham cracker crumbs to the mixture.
Seasonal variations make these cookies perfect for any holiday. Add peppermint extract and crushed candy canes for a festive winter version. In autumn, incorporate pumpkin spice seasoning and a dollop of pumpkin puree. Springtime calls for lemon zest and pastel sprinkles, while summer versions might include coconut and tropical fruit flavors. For a coffee lover’s version, replace the vanilla extract with coffee or mocha extract and fold in chocolate-covered espresso beans.
Presentation Tips
Elevate the appearance of your cookies with simple presentation techniques. Drizzle melted white or dark chocolate over the cooled cookies in decorative patterns using a fork or piping bag. For a nutty garnish, press a whole peanut or almond into the center of each cookie before they set. Colorful sprinkles or edible glitter transform these simple treats into party-worthy desserts. For gift-giving, place the cookies in clear treat bags tied with ribbon or arrange them in decorative tins separated by parchment paper.
Make-Ahead Options
These 3 ingredient peanut butter cornflake cookies are excellent for advance preparation. You can prepare the sugar and peanut butter mixture up to 2 days ahead and store it in the refrigerator. When ready to use, reheat gently in the microwave until pourable, then proceed with adding the cornflakes. For longer storage, form the cookies and freeze them in a single layer before transferring to freezer bags. They’ll keep for up to 3 months and thaw at room temperature in about 30 minutes, making them perfect for holiday prep or unexpected guests.
How to Store No Bake Cornflake Cookies: Best Practices
Proper storage ensures your easy no bake cornflake cookies maintain their texture and flavor for as long as possible. Here are the best methods for storing your treats:
Refrigeration
For short-term storage, place your cooled cookies in an airtight container with sheets of parchment paper between layers to prevent sticking. They will stay fresh at room temperature for up to 5 days in a cool, dry place away from direct sunlight. The sugar syrup in the recipe acts as a natural preservative, helping maintain freshness. In warmer weather or humid climates, refrigeration is recommended to prevent softening, where they’ll maintain their quality for 1-2 weeks.
When refrigerating, allow the cookies to come to room temperature for 15-20 minutes before serving for the best texture and flavor. Cold storage can make them slightly firmer than when freshly made, but they will soften as they reach room temperature. For maximum freshness, avoid storing cookies near strong-smelling foods, as they can absorb odors through the container.
Freezing
For long-term storage, freezing is an excellent option for no bake cornflake cookies. First, arrange the cooled cookies in a single layer on a baking sheet and place them in the freezer for 1-2 hours until firm. This flash-freezing method prevents the cookies from sticking together. Once firm, transfer them to freezer-safe bags or containers, separating layers with parchment paper. Properly frozen cookies will maintain their quality for up to 3 months.
Thaw frozen cookies at room temperature for 30-45 minutes before serving. Avoid microwaving to thaw, as this can make them soggy. For best results, thaw only the amount you’ll consume within a few days, as repeated temperature fluctuations can affect texture. Label your storage containers with the date so you can track freshness and enjoy them at their best quality.
Reheating
While these cookies are typically enjoyed at room temperature, you can gently warm them if desired. Place them on a microwave-safe plate and heat for 5-10 seconds to soften slightly. Be careful not to overheat, as the peanut butter can become too soft and the cookies may lose their shape. Alternatively, warm them in a 200°F oven for 3-5 minutes, watching carefully to prevent overheating. Warming enhances the aroma and can restore some crispness if they’ve become slightly stale.
Meal Prep Considerations
These cookies are excellent for batch cooking and meal prep. Double or triple the recipe to create enough for several weeks of snacks or dessert. Portion them into individual serving sizes in small containers or bags for easy grab-and-go snacks throughout the week. The recipe’s simplicity makes it perfect for preparing large quantities without significant time investment.
For school lunches or workplace snacks, consider making smaller, bite-sized versions that are easier to pack and eat on the go. These maintain their texture well when stored in lunchboxes and don’t require refrigeration for short periods, making them convenient for various situations. The combination of protein from the peanut butter and carbohydrates from the cornflakes also provides sustained energy, making them a satisfying snack option.
FAQs: Frequently Asked Questions About No Bake Cornflake Cookies
What ingredients do I need for no bake cornflake cookies?
How do you make no bake cornflake cookies step by step?
Do no bake cornflake cookies need to be refrigerated?
Can I make no bake cornflake cookies without peanut butter?
Why are my no bake cornflake cookies too soft or sticky?

No Bake Cornflake Cookies
🥜🍪 Indulge in crispy, crunchy no-bake peanut butter cornflake cookies that are quick to make and bursting with nutty sweetness – a perfect guilt-free treat! 🌽🍪 Effortless recipe using simple pantry ingredients, ideal for kids’ snacks, parties, or anytime cravings without turning on the oven!
- Total Time: 40 minutes
- Yield: 36 cookies
Ingredients
– 1 cup granulated sugar
– 1 cup light corn syrup
– 1 cup creamy peanut butter
– 1 teaspoon vanilla extract
– 5-6 cups cornflakes (about one 18-oz box)
– ½ cup chocolate chips
– ½ cup shredded coconut
– ¼ cup chopped peanuts
Instructions
1-First Step: Preparation and Mise en Place Before you begin, line two baking sheets with parchment paper or silicone baking mats. This prevents sticking and makes cleanup effortless. Measure all your ingredients beforehand, as the process moves quickly once the sugar mixture begins boiling. Measure cornflakes loosely into a large mixing bowl, ensuring you have between 5-6 cups ready. Having everything prepared before turning on the heat is essential because the syrup mixture sets rapidly once combined with the cereal.
2-Second Step: Creating the Sugar Mixture In a large saucepan over medium heat, combine 1 cup granulated sugar and 1 cup light corn syrup. Stir continuously as the mixture heats. You’ll notice the sugar dissolving into the syrup. Continue stirring until the mixture comes to a full rolling boil, which typically takes 1-2 minutes. Allow it to boil for exactly one more minute, which ensures the mixture reaches the right temperature (approximately 235°F if using a candy thermometer). This brief boiling period is crucial because it creates the right consistency for the cookies to set properly. Avoid boiling longer, as this can make the cookies too hard once cooled.
3-Third Step: Adding Peanut Butter and Vanilla Remove the saucepan from heat immediately after boiling for one minute. Add 1 cup creamy peanut butter and 1 teaspoon vanilla extract to the hot sugar mixture. Stir vigorously until the peanut butter is completely melted and the mixture becomes smooth and glossy. This should take about 30 seconds to 1 minute. The heat from the sugar syrup will melt the peanut butter easily. Ensure there are no lumps remaining in the mixture. For those using alternative nut or seed butters, they may require slightly more stirring to achieve a smooth consistency.
4-Fourth Step: Combining with Cornflakes Pour the hot peanut butter mixture over the prepared cornflakes in your large bowl. Using a rubber spatula or wooden spoon, fold the mixture gently to coat all the cornflakes evenly. Work quickly but gently to avoid crushing the cereal. The goal is to coat each flake without breaking them into tiny pieces. If you’re adding optional ingredients like chocolate chips or shredded coconut, fold them in at this stage. For vegan adaptations using maple syrup, the mixture might be slightly thinner, so add an extra ½ cup of cornflakes if needed to achieve the right consistency.
5-Fifth Step: Forming the Cookies Using a tablespoon or cookie scoop, drop rounded mounds of the cornflake mixture onto your prepared baking sheets. Space them about 1-2 inches apart to prevent them from sticking together. You can make them larger or smaller depending on your preference, but tablespoon-sized portions yield about 24-30 cookies. If you prefer uniform cookies, use a cookie scoop. For a more rustic look, simply drop them with a spoon. Work quickly as the mixture begins to set as it cools. If the mixture becomes too firm to scoop, you can briefly reheat it in the microwave for 10-15 seconds.
6-Final Step: Cooling and Serving Allow the cookies to cool completely on the baking sheets for 20-30 minutes until they are firm to the touch. The cooling process is essential for achieving the right texture. They should feel set and hold their shape when picked up but still maintain a slightly chewy interior with a crunchy exterior. Once cooled, store them in an airtight container or serve immediately. These peanut butter cornflake cookies make excellent additions to holiday cookie platters, classroom treats, or simple after-school snacks. The contrast between the sweet, gooey interior and crispy cereal exterior makes them irresistible to both children and adults.
Last Step:
Please leave a rating and comment letting us know how you liked this recipe! This helps our business to thrive and continue providing free, high-quality recipes for you.Notes
🔥 Stir the sugar and corn syrup constantly to prevent burning and ensure smooth texture.
🍪 Use a cookie scoop for uniform cookie sizes and easier portioning.
❄️ Let cookies cool completely before storing to maintain crispiness.
- Prep Time: 5 minutes
- Cooling: 30 minutes
- Cook Time: 5 minutes
- Category: Desserts
- Method: No Bake
- Cuisine: American
- Diet: Vegetarian
Nutrition
- Serving Size: 1 cookie
- Calories: 120 kcal
- Sugar: 18g
- Sodium: 90mg
- Fat: 4g
- Saturated Fat: 1g
- Unsaturated Fat: 2.5g
- Trans Fat: 0g
- Carbohydrates: 22g
- Fiber: 1g
- Protein: 2g
- Cholesterol: 0mg


