
Why You’ll Love This Milk Bar Cornflake Cookies
If you’re looking for a cookie that combines nostalgia with gourmet flair, this milk bar cornflake cookies recipe will quickly become your go-to treat. These cookies offer a perfect balance of sweet and salty, with a texture that keeps you coming back for more. Here’s why they’re special:
- Ease of preparation: Despite their complex flavor profile, these cookies are surprisingly simple to make. With clear steps and common ingredients, you can whip up a batch in about 45 minutes. Even beginners will feel confident following this straightforward recipe.
- Health benefits: While cookies are typically considered indulgent treats, this recipe includes some nutritious elements. Cornflakes provide fiber and iron, while coconut offers healthy fats and minerals. The recipe can also be adapted to include whole grain options for added nutritional value.
- Versatility: This recipe adapts beautifully to various dietary needs. Whether you need vegan, gluten-free, or lower-sugar options, you can modify these cookies without sacrificing their signature taste and texture. They work for afternoon snacks, dessert tables, or even homemade gifts.
- Distinctive flavor: What sets these cookies apart is the incredible combination of textures and flavors. The browned butter adds a nutty richness, while the cornflakes provide satisfying crunch. The powdered milk creates a unique milky undertone that pairs perfectly with chocolate and marshmallows. Each bite offers crispy edges, chewy centers, and bursts of sweetness that make these cookies truly addictive.
Jump to:
- Why You’ll Love This Milk Bar Cornflake Cookies
- Essential Ingredients for Milk Bar Cornflake Cookies
- Main Ingredients
- Special Dietary Options
- How to Prepare the Perfect Milk Bar Cornflake Cookies: Step-by-Step Guide
- Preparing Your Kitchen Space
- Creating the Flavor Foundation
- Building the Dough Structure
- Incorporating Signature Mix-ins
- Shaping and Baking to Perfection
- Protein and Main Component Alternatives
- Flour Alternatives
- Butter Substitutions
- Powdered Milk Alternatives
- Vegetable, Sauce, and Seasoning Modifications
- Cereal Alternatives
- Chocolate Variations
- Fruit and Flavor Additions
- Mastering Milk Bar Cornflake Cookies: Advanced Tips and Variations
- Pro Cooking Techniques
- Flavor Variations
- Presentation Tips
- Make-Ahead Options
- How to Store Milk Bar Cornflake Cookies: Best Practices
- Refrigeration
- Freezing
- Reheating
- Meal Prep Considerations
- FAQs: Frequently Asked Questions About Milk Bar Cornflake Cookies
- What are Milk Bar cornflake cookies?
- What ingredients do I need for Milk Bar cornflake cookies?
- How do you make Milk Bar cornflake cookies step by step?
- Can I substitute ingredients in Milk Bar cornflake cookies?
- How should I store Milk Bar cornflake cookies?
- Milk Bar Cornflake Cookies
- Ingredients
- Instructions
- Last Step:
- Notes
- Nutrition
- Did you make this recipe?
Essential Ingredients for Milk Bar Cornflake Cookies
The magic of these cookies comes from the perfect combination of ingredients. Each component plays a crucial role in creating the distinctive texture and flavor profile that makes Milk Bar Cornflake Cookies so popular.
Main Ingredients
8 oz butter – The foundation of flavor in these cookies. Browning it adds a rich, nutty dimension that elevates the entire recipe.
1¼ cups granulated sugar – Provides the classic sweetness and helps create the perfect crisp edges on your cookies.
⅔ cup light brown sugar – Adds moisture and creates a chewy texture with its molasses content.
1 egg – Binds the ingredients together and contributes to the cookie structure and richness.
1 tsp vanilla extract – Enhances all the other flavors and adds a classic bakery aroma.
1¾ cups all-purpose flour – Forms the base of the cookie dough, providing structure and substance.
½ tsp baking powder – Helps the cookies rise slightly for a lighter texture.
½ tsp baking soda – Works with the baking powder to create the perfect lift and spread.
½ tsp salt – Balances the sweetness and enhances all the flavors.
⅓ cup powdered milk – The secret ingredient that gives these cookies their distinctive milky taste and unique texture.
7 cups cornflakes – The star ingredient that provides the signature crunch. Crushing them slightly helps them bind better in the dough.
¾ cup mini chocolate chips – Adds pockets of rich chocolate throughout each cookie.
½ cup mini marshmallows – Creates gooey pockets of sweetness that contribute to the textural variety.
½ cup shredded coconut – Adds a subtle tropical note and additional texture contrast.
½ cup raisins – Provides natural sweetness and chewiness that complements the crunch.
Special Dietary Options
Vegan: Replace butter with plant-based butter sticks (not tub margarine), use a flax egg (1 tablespoon ground flaxseed mixed with 3 tablespoons water), opt for dairy-free chocolate chips and vegan marshmallows, and choose coconut milk powder instead of dairy-based powdered milk.
Gluten-free: Use a high-quality gluten-free 1-to-1 flour blend that includes xanthan gum, and ensure your cornflakes are certified gluten-free (many brands contain barley malt flavoring).
Low-calorie: Reduce sugar by 25-30% and replace half the butter with unsweetened applesauce or Greek yogurt. Use sugar-free chocolate chips and increase the cornflake ratio slightly while reducing the coconut.
How to Prepare the Perfect Milk Bar Cornflake Cookies: Step-by-Step Guide
Creating these delicious cornflake marshmallow chocolate chip cookies requires following a few key steps to achieve the perfect texture and flavor. The process involves browning butter for depth, creaming it properly for structure, and folding in mix-ins carefully to maintain those coveted crispy pieces.
Preparing Your Kitchen Space
Before you begin, clear your workspace and gather all your ingredients. Preheat your oven to 350°F (175°C) and line two baking sheets with parchment paper. This preparation step, often called mise en place, will make the process smoother and more enjoyable. Have your measuring cups, mixing bowls, and utensils ready. For the best results, use room-temperature egg for easier incorporation into the dough.
Creating the Flavor Foundation
First Step: Brown the butter to create a rich, nutty flavor base. Place 8 oz of butter in a light-colored saucepan over medium heat. Melt completely, then continue cooking, swirling occasionally. Watch as the milk solids separate and turn golden brown, creating a toffee-like aroma. This typically takes about 8-10 minutes. Pour the browned butter into a heat-proof bowl and let it cool slightly while still liquid.
Second Step: In a large mixing bowl, combine the cooled browned butter, 1¼ cups granulated sugar, and ⅔ cup light brown sugar. Using an electric mixer on medium speed, beat these together for about 3-4 minutes until light and fluffy. This creaming process creates air pockets that help give the cookies structure and a pleasing texture. Scrape down the sides of the bowl as needed to ensure even mixing.
Third Step: Add the egg and 1 teaspoon vanilla extract to the creamed butter and sugar mixture. Beat on medium-high speed for about 1 minute until the mixture is smooth and glossy. The mixture should appear slightly pale and increased in volume. This step ensures proper emulsification, which contributes to the cookie’s final texture.
Building the Dough Structure
Fourth Step: In a separate medium bowl, whisk together the dry ingredients: 1¾ cups flour, ½ teaspoon baking powder, ½ teaspoon baking soda, ½ teaspoon salt, and ⅓ cup powdered milk. Whisking these together before adding ensures they’re evenly distributed throughout the cookie dough. This prevents any pockets of baking soda or salt that could affect the flavor.
Fifth Step: Add the dry ingredient mixture to the wet ingredients in three additions, mixing on low speed just until combined after each addition. Be careful not to overmix at this stage, as developing too much gluten can make the cookies tough. The dough will be thick and slightly sticky.
Incorporating Signature Mix-ins
Sixth Step: Now it’s time to add the signature ingredients that make these chocolate chip cornflake cookies special. Add 7 cups cornflakes, ¾ cup mini chocolate chips, ½ cup mini marshmallows, ½ cup shredded coconut, and ½ cup raisins to the dough. Using a spatula or wooden spoon, fold these in gently just until distributed throughout the dough. For the best texture, slightly crush about half the cornflakes before adding them to help them bind better in the cookies while keeping some whole for maximum crunch.
Shaping and Baking to Perfection
Seventh Step: Using a ¼-cup measure or cookie scoop, portion the dough into mounds and place them on the prepared baking sheets, spacing them about 2 inches apart. Gently flatten each mound slightly with your hand to create discs rather than perfect balls. This helps them bake evenly with the characteristic irregular edges.
Eighth Step: Bake the cookies in the preheated oven at 350°F (175°C) for about 12 minutes. You’re looking for golden brown edges with centers that still appear slightly soft and underbaked. They will continue to cook on the baking sheet after removal, so removing them while still slightly soft ensures the perfect texture.
Ninth Step: Remove the cookies from the oven and let them cool on the baking sheets for about 5 minutes. This resting period allows them to set and firm up slightly without becoming too hard. Then transfer them to wire racks to cool completely. If you can resist eating them warm, they’ll develop even more complex flavors as they cool.
Protein and Main Component Alternatives
While the traditional recipe for these marshmallow cookies is hard to beat, there are several alternatives you can try depending on your dietary preferences, ingredient availability, or simply to add variety to your baking repertoire.
Flour Alternatives
For those looking to experiment with different types of flour, whole wheat flour can replace up to half of the all-purpose flour to add fiber and nutrients. This will create a slightly heartier cookie with a more robust flavor that some may prefer. If you need gluten-free options, a high-quality 1-to-1 gluten-free flour blend that includes xanthan gum will provide the best results. Almond flour can also be used to replace up to one-third of the all-purpose flour for a boost of protein and healthy fats, though it will create a more tender, cakier cookie.
Butter Substitutions
While browned butter is crucial to the signature flavor, you can substitute regular butter if you’re pressed for time. For a different flavor profile, coconut oil can replace the butter 1:1, though this will impart a subtle coconut taste and create a slightly different texture. For those with dairy restrictions, high-quality plant-based butter sticks (not tub margarine) work well in this recipe. Keep in mind that some butter alternatives contain more water content, which may require chilling the dough before baking to prevent excessive spreading.
Powdered Milk Alternatives
The powdered milk in this recipe contributes a unique milky flavor and affects the texture. If you don’t have powdered milk, you can substitute with buttermilk powder, which provides similar results. For a dairy-free version, coconut milk powder works well. Some bakers have had success omitting it entirely and adding 1 teaspoon of liquid milk to the dough, though this slightly changes the texture. Soy milk powder or rice milk powder are other alternatives depending on your dietary needs.
Vegetable, Sauce, and Seasoning Modifications
Customizing your milk bar cookies with different mix-ins and flavor additions allows you to create variations that suit your taste preferences or use ingredients you have on hand. These modifications can transform the basic recipe into something entirely new while maintaining the cookie’s beloved texture foundation.
Cereal Alternatives
While cornflakes are the traditional choice for this recipe, other cereals can create interesting variations. Rice Krispies provide a similar crunch with a milder flavor. Crushed pretzels can add a salty dimension that pairs beautifully with the chocolate. Some adventurous bakers have even used crushed Honey Bunches of Oats or Cinnamon Toast Crunch for different flavor profiles. Keep the quantity around 7 cups to maintain the proper ratio of cereal to dough. For the best results, slightly crush your cereal before adding it to help it incorporate better into the dough.
Chocolate Variations
The chocolate component of these cookies offers endless customization. While mini chocolate chips are traditional, chopped chocolate bars create beautiful puddles of chocolate throughout. Dark chocolate lovers might prefer using 60-70% dark chocolate chunks for a more sophisticated flavor profile. White chocolate chips or chunks create a sweeter cookie that contrasts nicely with the browned butter. For a colorful twist, use a mix of milk, dark, and white chocolates, or try peanut butter chips for a chocolate-peanut butter combination that many find irresistible.
Fruit and Flavor Additions
While raisins are traditional in this recipe, dried cranberries offer a tart alternative that pairs beautifully with white chocolate. Chopped dried apricots or cherries can add sophistication to the flavor profile. For those who prefer no fruit, simply omit them or replace with additional chocolate chips or nuts. Some variations include adding ½ teaspoon of cinnamon or nutmeg to the dry ingredients for a spiced version. A tablespoon of espresso powder can enhance the chocolate flavor without making the cookies taste distinctly like coffee. Lemon or orange zest adds a bright, fresh dimension that cuts through the richness of the butter and chocolate.
Mastering Milk Bar Cornflake Cookies: Advanced Tips and Variations
Once you’ve mastered the basic recipe, these expert techniques and creative variations will help you take your Milk Bar Cornflake Cookies to the next level. These tips from experienced bakers can help you troubleshoot common issues and create cookies that rival professional bakeries.
Pro Cooking Techniques
For extra depth of flavor, try toasting your coconut and cornflakes separately before adding them to the dough. This enhances their natural flavors and adds another layer of complexity to the cookies. Spread coconut on a baking sheet and toast at 350°F for 5-7 minutes until golden. For cornflakes, spread them in a single layer and toast for 3-5 minutes, watching carefully to prevent burning.
Chilling your dough for at least 30 minutes (up to 24 hours) before baking allows the flour to hydrate fully and the flavors to meld. This also prevents excessive spreading during baking, resulting in thicker cookies with chewier centers. For consistently sized cookies, use a kitchen scale to weigh portions (about 2.5-3 ounces each) rather than relying solely on volume measurements.
When browning your butter, strain it through a fine-mesh sieve to remove the milk solids if you prefer a clearer, smoother dough. However, many bakers prefer to keep the browned bits as they add additional flavor and texture to the final cookies.
Flavor Variations
Transform your cookies into a s’mores experience by increasing the marshmallows to 1 cup and adding graham cracker crumbs along with the cornflakes. For a peanut butter chocolate version, replace ¼ cup of the butter with creamy peanut butter and use peanut butter chips instead of some of the chocolate chips. A Mexican chocolate variation includes adding 1 teaspoon of cinnamon and a pinch of cayenne pepper to the dry ingredients, creating a warm, subtly spicy cookie.
For those who enjoy nuts, adding ½ cup of chopped pecans, walnuts, or macadamia nuts provides additional crunch and richness. Salted caramel lovers can stir ½ cup of caramel bits into the dough, creating pockets of gooey sweetness throughout the cookies.
Presentation Tips
For bakery-perfect appearance, press additional chocolate chips and cornflakes onto the tops of the dough balls before baking. This ensures an attractive distribution of these ingredients on the surface of each cookie. Sprinkling a pinch of flaky sea salt on top immediately after baking creates a sophisticated finish that enhances the sweet-salty combination.
To create consistently shaped cookies, use the bottom of a glass to gently press the dough balls into uniform thickness. For gift-giving, wrap individual cookies in clear cellophane bags tied with baker’s twine, or arrange them in decorative tins layered between sheets of parchment paper.
Make-Ahead Options
These cookies are excellent for advance preparation. The dough can be made and refrigerated for up to 3 days before baking, with the flavor improving each day. For even longer storage, scoop the dough balls and freeze them on a baking sheet before transferring to a freezer bag. Frozen dough balls can be baked directly from the freezer, adding just 2-3 minutes to the baking time.
Fully baked cookies maintain their quality well and can be prepared days ahead for events. Store them in an airtight container at room temperature for up to 5 days. For longer storage, freeze the baked cookies in freezer bags for up to 1 month.
Remember that Milk Bar cornflake cookies actually improve in flavor after a day as the ingredients meld together. If you’re serving them for a special occasion, consider making them 24 hours in advance for the best possible taste experience.
How to Store Milk Bar Cornflake Cookies: Best Practices
Proper storage ensures your copycat milk bar cornflake cookies maintain their signature texture and flavor. These cookies are known for their perfect balance of crispy and chewy, and the right storage methods help preserve this appealing quality.
Refrigeration
While you can store these cookies in the refrigerator, it’s not typically recommended unless your kitchen is exceptionally warm. The cool, humid environment of the refrigerator can make the cornflakes soggy and soften the cookies more quickly. If you must refrigerate them, place the cookies in an airtight container with a piece of bread or a paper towel to absorb excess moisture. They should maintain their quality for up to a week when refrigerated this way.
Freezing
For long-term storage, freezing is your best option. Allow the cookies to cool completely before freezing to prevent ice crystals from forming. Place the cooled cookies in a single layer on a baking sheet and freeze until firm, about 1-2 hours. Then transfer them to a freezer-safe bag or container, separating layers with parchment paper. Properly frozen cookies will maintain their quality for up to 1 month.
To freeze the dough, portion it into balls using your preferred scoop size. Arrange the dough balls on a baking sheet and freeze until solid. Transfer to a freezer bag and store for up to 2 months. When you’re ready to bake, place the frozen dough balls on a prepared baking sheet and add 2-3 minutes to the regular baking time. There’s no need to thaw them first.
Reheating
To refresh cookies that have lost their crispness, place them on a baking sheet in a 300°F oven for 3-5 minutes. Watch them closely to prevent overbrowning. This method helps restore some of the crisp texture to the cornflakes and slightly melts the chocolate chips, recreating the fresh-baked experience.
Microwaving is not recommended for these cookies as it tends to make the cornflakes soggy and creates uneven heating. If you must use a microwave, heat for just 5-10 seconds to avoid ruining the texture.
Meal Prep Considerations
These cookies are excellent for batch cooking and meal prep. Consider preparing a double batch of dough, portioning it into balls, and freezing half for future use. This gives you the convenience of fresh-baked cookies without the mess each time. Label your freezer bags with the baking temperature and time for easy reference.
For school lunches or office snacks, package individual cookies in small bags or containers to maintain freshness. The sturdy texture of these cookies makes them travel well, unlike more delicate cookies that might crumble during transport.

FAQs: Frequently Asked Questions About Milk Bar Cornflake Cookies
What are Milk Bar cornflake cookies?
What ingredients do I need for Milk Bar cornflake cookies?
How do you make Milk Bar cornflake cookies step by step?
Can I substitute ingredients in Milk Bar cornflake cookies?
How should I store Milk Bar cornflake cookies?
Milk Bar Cornflake Cookies
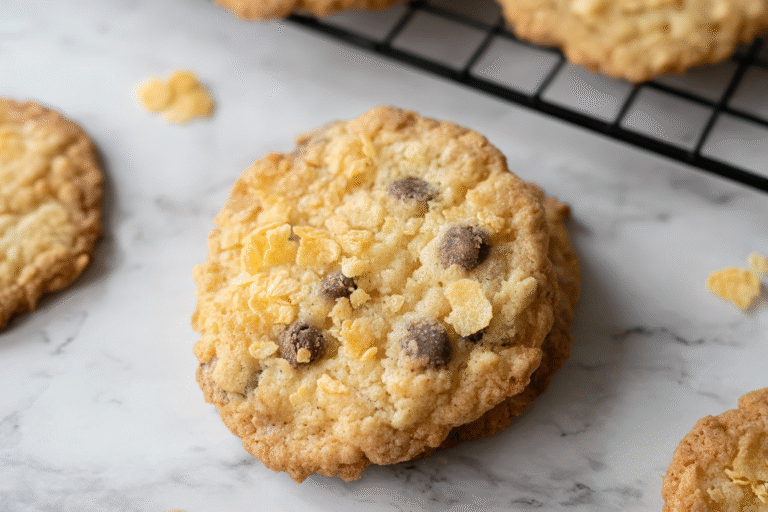
🍪🌽 Discover the perfect crunch from cornflakes paired with gooey marshmallows and melty chocolate chips in these addictive cookies – ultimate texture contrast!
🥛🍫 Quick bake using simple ingredients, great for potlucks or after-school snacks – a fun, crowd-pleasing twist on classic chocolate chip cookies!
- Total Time: 1 hour
- Yield: 36 cookies
Ingredients
– 8 oz butter
– 1¼ cups granulated sugar
– ⅔ cup light brown sugar
– 1 egg
– 1 tsp vanilla extract
– 1¾ cups all-purpose flour
– ½ tsp baking powder
– ½ tsp baking soda
– ½ tsp salt
– ⅓ cup powdered milk
– 7 cups cornflakes
– ¾ cup mini chocolate chips
– ½ cup mini marshmallows
– ½ cup shredded coconut
– ½ cup raisins
Instructions
1-First Step: Brown the butter to create a rich, nutty flavor base. Place 8 oz of butter in a light-colored saucepan over medium heat. Melt completely, then continue cooking, swirling occasionally. Watch as the milk solids separate and turn golden brown, creating a toffee-like aroma. This typically takes about 8-10 minutes. Pour the browned butter into a heat-proof bowl and let it cool slightly while still liquid.
2-Second Step: In a large mixing bowl, combine the cooled browned butter, 1¼ cups granulated sugar, and ⅔ cup light brown sugar. Using an electric mixer on medium speed, beat these together for about 3-4 minutes until light and fluffy. This creaming process creates air pockets that help give the cookies structure and a pleasing texture. Scrape down the sides of the bowl as needed to ensure even mixing.
3-Third Step: Add the egg and 1 teaspoon vanilla extract to the creamed butter and sugar mixture. Beat on medium-high speed for about 1 minute until the mixture is smooth and glossy. The mixture should appear slightly pale and increased in volume. This step ensures proper emulsification, which contributes to the cookie’s final texture.
4-Fourth Step: In a separate medium bowl, whisk together the dry ingredients: 1¾ cups flour, ½ teaspoon baking powder, ½ teaspoon baking soda, ½ teaspoon salt, and ⅓ cup powdered milk. Whisking these together before adding ensures they’re evenly distributed throughout the cookie dough. This prevents any pockets of baking soda or salt that could affect the flavor.
5-Fifth Step: Add the dry ingredient mixture to the wet ingredients in three additions, mixing on low speed just until combined after each addition. Be careful not to overmix at this stage, as developing too much gluten can make the cookies tough. The dough will be thick and slightly sticky.
6-Sixth Step: Now it’s time to add the signature ingredients that make these chocolate chip cornflake cookies special. Add 7 cups cornflakes, ¾ cup mini chocolate chips, ½ cup mini marshmallows, ½ cup shredded coconut, and ½ cup raisins to the dough. Using a spatula or wooden spoon, fold these in gently just until distributed throughout the dough. For the best texture, slightly crush about half the cornflakes before adding them to help them bind better in the cookies while keeping some whole for maximum crunch.
7-Seventh Step: Using a ¼-cup measure or cookie scoop, portion the dough into mounds and place them on the prepared baking sheets, spacing them about 2 inches apart. Gently flatten each mound slightly with your hand to create discs rather than perfect balls. This helps them bake evenly with the characteristic irregular edges.
8-Eighth Step: Bake the cookies in the preheated oven at 350°F (175°C) for about 12 minutes. You’re looking for golden brown edges with centers that still appear slightly soft and underbaked. They will continue to cook on the baking sheet after removal, so removing them while still slightly soft ensures the perfect texture.
9-Ninth Step: Remove the cookies from the oven and let them cool on the baking sheets for about 5 minutes. This resting period allows them to set and firm up slightly without becoming too hard. Then transfer them to wire racks to cool completely. If you can resist eating them warm, they’ll develop even more complex flavors as they cool.
Last Step:
Please leave a rating and comment letting us know how you liked this recipe! This helps our business to thrive and continue providing free, high-quality recipes for you.Notes
❄️ Chill dough for 30 minutes before baking to prevent spreading and enhance flavor.
🌽 Crush cornflakes coarsely by hand for maximum crunch without turning to dust.
🍪 Press a few extra marshmallows on top before baking for gooey, pretty centers.
- Prep Time: 15 minutes
- Chilling: 30 minutes
- Cook Time: 12 minutes
- Category: Desserts
- Method: Baked
- Cuisine: American
- Diet: Vegetarian
Nutrition
- Serving Size: 1 cookie
- Calories: 160 kcal
- Sugar: 14g
- Sodium: 140mg
- Fat: 8g
- Saturated Fat: 5g
- Unsaturated Fat: 2.5g
- Trans Fat: 0g
- Carbohydrates: 22g
- Fiber: 1g
- Protein: 2g
- Cholesterol: 25mg


