
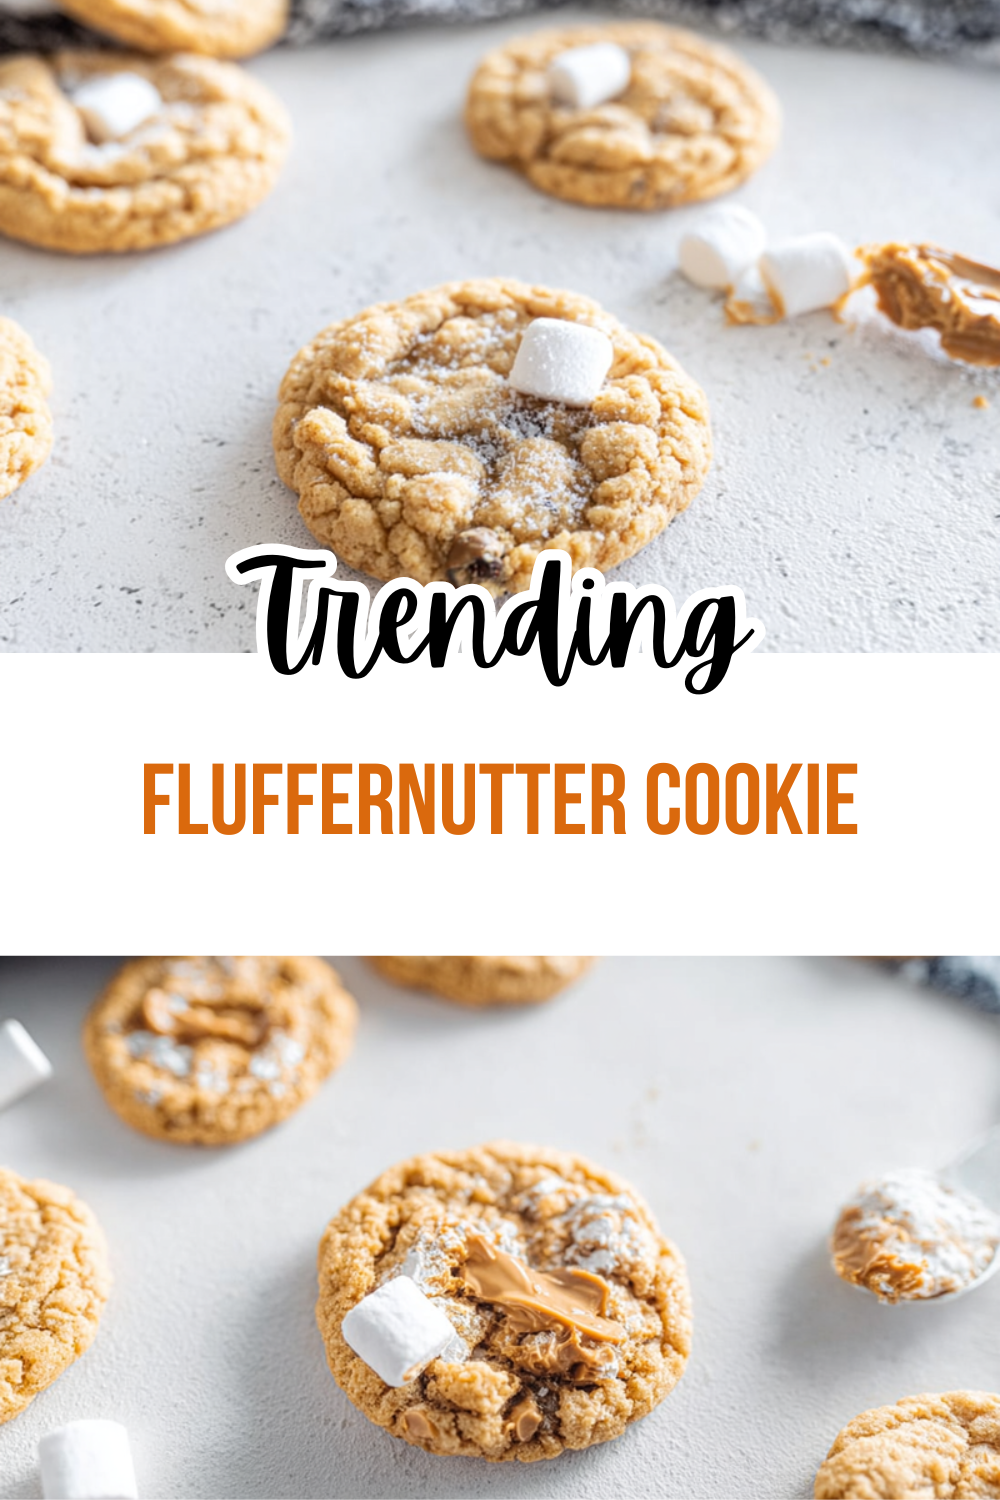
Why You’ll Love This Fluffernutter Cookie
When it comes to cookie recipes that bring joy to your kitchen, few can match the delightful combination found in a fluffernutter cookie. This sweet treat captures the essence of the classic childhood sandwich in a portable, cookie form that appeals to both kids and adults alike. Let’s explore why this recipe deserves a special place in your baking repertoire.
Ease of Preparation
Making fluffernutter cookies is surprisingly simple, requiring minimal ingredients and basic baking skills. With just a handful of pantry staples and marshmallow fluff, you can create these delicious treats in under an hour. The straightforward process makes them perfect for busy weeknights, last-minute gatherings, or when you’re craving something sweet without the fuss of complicated recipes. Even novice bakers can achieve impressive results with these peanut butter marshmallow cookies, as the dough comes together quickly and bakes evenly. Other cookie recipes on our site also follow this simple approach, making baking accessible to everyone.
Health Benefits
While certainly a treat, these cookies do offer some nutritional benefits thanks to the peanut butter content. Peanut butter provides protein, healthy fats, and essential minerals like magnesium and potassium. When you use natural peanut butter without added sugars, you’re getting even more nutritional value. The marshmallow fluff cookies also satisfy cravings with smaller portions, as their rich flavor means you likely won’t need to eat as many to feel satisfied. Making them at home allows you to control the ingredients and potentially reduce preservatives and artificial additives compared to store-bought versions.
Versatility
One of the greatest strengths of this recipe is its adaptability to various dietary needs and preferences. Whether you need to accommodate allergies or simply want to experiment with flavors, chewy peanut butter cookies can be customized to suit your requirements. From gluten-free flour alternatives to different nut or seed butters, these cookies maintain their delicious character while meeting diverse needs. They work well for bake sales, holiday gatherings, lunchbox treats, or simply as a comforting snack with a glass of milk.
Distinctive Flavor
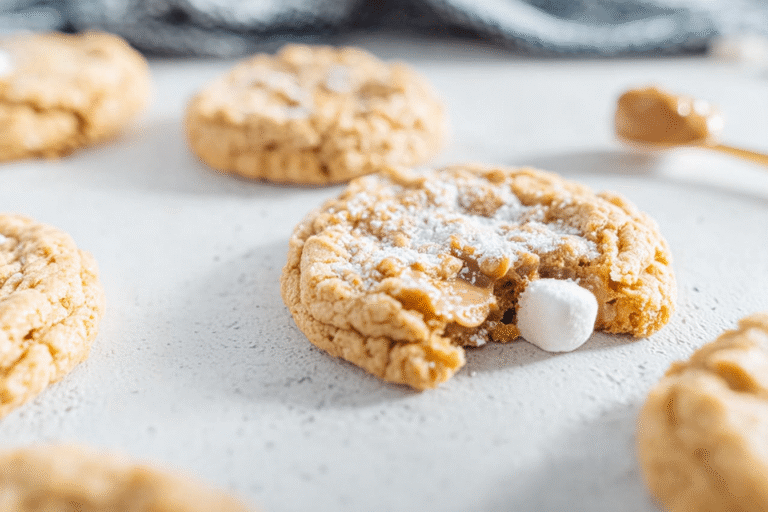
The magic of fluffernutter cookies lies in their perfect balance of salty and sweet, soft and crunchy, rich and light. The nutty, earthy notes of peanut butter contrast beautifully with the pure sweetness of marshmallow fluff, creating a flavor profile that feels both nostalgic and exciting. When baked to perfection, the cookies develop slightly crisp edges while maintaining a soft, tender center that holds the marshmallow filling in place. This textural interplay makes each bite a delightful experience that keeps you coming back for more.
Jump to:
- Why You’ll Love This Fluffernutter Cookie
- Ease of Preparation
- Health Benefits
- Versatility
- Distinctive Flavor
- Essential Ingredients for Fluffernutter Cookie
- Main Ingredients
- Special Dietary Options
- Vegan
- Gluten-Free
- Low-Calorie
- How to Prepare the Perfect Fluffernutter Cookie: Step-by-Step Guide
- First Step: Preparation
- Second Step: Creaming the Base
- Third Step: Adding Liquids
- Fourth Step: Incorporating Dry Ingredients
- Fifth Step: Shaping and Baking
- Final Step: Assembly
- Dietary Substitutions to Customize Your Fluffernutter Cookie
- Protein and Main Component Alternatives
- Vegetable, Sauce, and Seasoning Modifications
- Mastering Fluffernutter Cookie: Advanced Tips and Variations
- Pro Cooking Techniques
- Flavor Variations
- Presentation Tips
- Make-Ahead Options
- How to Store Fluffernutter Cookie: Best Practices
- Refrigeration
- Freezing
- Reheating
- Meal Prep Considerations
- FAQs: Frequently Asked Questions About Fluffernutter Cookie
- What is a fluffernutter cookie?
- How do you make fluffernutter cookies from scratch?
- What’s an easy fluffernutter cookie recipe for beginners?
- How do you store fluffernutter cookies to keep them fresh?
- Can you make fluffernutter cookies without peanut butter?
- Fluffernutter Cookie
- Ingredients
- Instructions
- Last Step:
- Notes
- Nutrition
- Did you make this recipe?
Essential Ingredients for Fluffernutter Cookie
Creating the perfect fluffernutter cookie recipe starts with having the right ingredients on hand. Each component plays a crucial role in achieving the desired texture and flavor. Below is a comprehensive list of everything you’ll need to make these delightful treats.
Main Ingredients
- 1/2 cup butter – Provides richness and helps create a tender cookie texture
- 1/2 cup peanut butter – The star ingredient offering nutty flavor and structure
- 1/2 cup white sugar – Sweetens the dough and aids in browning
- 1/2 cup brown sugar – Adds moisture and depth of flavor with its molasses content
- 1 egg – Binds ingredients together and contributes to the cookie structure
- 1 teaspoon vanilla extract – Enhances overall flavor and adds aromatic sweetness
- 1 1/4 cups all-purpose flour – Forms the base structure of the cookie
- 1/2 teaspoon baking soda – Helps the cookies rise and spread appropriately
- 1/4 teaspoon salt – Balances sweetness and enhances all other flavors
- 1 cup marshmallow fluff – The essential filling that gives these cookies their signature name
Special Dietary Options
Vegan
To make vegan fluffernutter cookies, substitute the egg with a flax egg (1 tablespoon ground flaxseed mixed with 3 tablespoons water), use vegan butter instead of dairy butter, and ensure your marshmallow fluff is gelatin-free and vegan-certified. Many traditional marshmallow products contain gelatin, which isn’t vegan, so look for alternatives specifically labeled vegan.
Gluten-Free
For those avoiding gluten, replace the all-purpose flour with a high-quality gluten-free flour blend that includes xanthan gum. You can also use almond flour for a slightly different texture and added protein. Always check that your baking soda and other ingredients are certified gluten-free if cross-contamination is a concern.
Low-Calorie
To reduce calories in your fluffernutter cookies, consider using a natural peanut butter with no added sugars, replacing half the butter with unsweetened applesauce or Greek yogurt, and using a reduced-sugar marshmallow fluff alternative. You can also make smaller cookies to naturally reduce calories per serving while still satisfying your craving.
How to Prepare the Perfect Fluffernutter Cookie: Step-by-Step Guide
Following these detailed instructions will help you create the perfect batch of soft chewy fluffernutter cookies that look and taste bakery-quality. Take your time with each step to ensure the best possible results. You might also enjoy checking out another fluffernutter cookie recipe for comparison and additional tips.
First Step: Preparation
Before you begin mixing your dough, gather all your ingredients and ensure they are at room temperature. This allows for proper emulsification and even mixing. Preheat your oven to 350°F (175°C) and line two baking sheets with parchment paper or silicone baking mats. Prepare your workspace by clearing enough counter space for mixing and assembly. If you’re making the sandwich-style cookies, have a small offset spatula or butter knife ready for spreading the marshmallow fluff later. Proper preparation makes the baking process smoother and more enjoyable, especially when working with sticky ingredients like marshmallow fluff.
Second Step: Creaming the Base
In a large mixing bowl, combine the butter and peanut butter. Using a hand mixer or stand mixer fitted with the paddle attachment, beat these together on medium speed until completely smooth and well combined. This process creates a stable base for your cookie dough. Add both the white sugar and brown sugar to the butter mixture and continue beating until the mixture is light and fluffy, typically 2-3 minutes. This step is crucial for texture as it incorporates air into the dough, resulting in lighter cookies. The sugar granules also create pockets in the dough that contribute to the desired chewy texture.
Third Step: Adding Liquids
With the mixer on low speed, add the egg and vanilla extract to your creamed mixture. Beat just until combined, being careful not to overmix at this stage. Overmixing once the egg is added can lead to cookies that spread too much or have a tough texture. Scrape down the sides and bottom of the bowl to ensure all ingredients are incorporated evenly. The mixture should appear smooth and slightly glossy at this point. If you’re making a variation with different extracts or flavorings, add them now as well to ensure even distribution throughout the dough.
Fourth Step: Incorporating Dry Ingredients
In a separate medium bowl, whisk together the flour, baking soda, and salt. This ensures the leavening agent is evenly distributed throughout the flour. With the mixer on low speed, gradually add the dry ingredients to the wet mixture. Mix just until the flour is barely visible a few streaks are okay. Avoid overmixing at this stage, as this develops gluten and can make your cookies tough rather than tender. The dough should be soft but not sticky. If it seems too wet to handle, you can refrigerate it for 30 minutes before scooping, which also helps prevent excessive spreading during baking.
Fifth Step: Shaping and Baking
Scoop tablespoon-sized portions of dough and roll them into balls using your hands. Place them on the prepared baking sheets, leaving about 2 inches of space between each cookie to allow for spreading. Gently flatten each ball with the palm of your hand or the bottom of a glass to create discs about ½ inch thick. Bake in the preheated oven for 10-12 minutes, or until the edges are lightly golden but the centers still appear slightly soft. This is the secret to achieving that perfect chewy texture. The cookies will continue to set as they cool on the baking sheet.
Final Step: Assembly
Allow the cookies to cool completely on the baking sheet before moving them. This is important because fresh-baked cookies are too fragile to handle and will fall apart if you try to fill them while warm. Once cooled, spread approximately 1-2 tablespoons of marshmallow fluff on the flat side of half the cookies. Top with the remaining cookies to create sandwiches. For a decorative touch, you can roll the edges of the sandwiches in sprinkles, mini chocolate chips, or crushed peanuts. Serve immediately or store according to the guidelines below. These homemade fluffernutter cookies are best enjoyed within a few days of baking.
| Cookie Size | Temperature | Baking Time |
|---|---|---|
| Small (1 inch balls) | 350°F | 8-10 minutes |
| Medium (2 inch balls) | 350°F | 10-12 minutes |
| Large (3 inch balls) | 350°F | 12-15 minutes |

Dietary Substitutions to Customize Your Fluffernutter Cookie
One of the beautiful aspects of baking is the ability to adapt recipes to meet various dietary needs and preferences. These peanut butter marshmallow fluff cookies are particularly forgiving and can be modified in numerous ways while still maintaining their delicious character.
Protein and Main Component Alternatives
For those with peanut allergies or simply seeking variety, several alternatives work wonderfully in this recipe. Sunflower seed butter provides a similar texture with a slightly more earthy flavor profile, making it an excellent 1:1 replacement for peanut butter. Almond butter offers a richer, slightly sweeter alternative that pairs beautifully with marshmallow fluff. Cashew butter creates a creamier, more delicate cookie that feels luxurious despite being simple to make. For a completely nut-free option that mimics the cookie-butter flavor, Biscoff spread or other cookie butters work surprisingly well, adding a spiced, caramel-like note to the finished cookies.
If you need to avoid nuts completely but still want protein, consider using tahini (sesame paste) for its mild, nutty flavor and creamy consistency. Soy butter is another viable option that provides protein without the allergens found in tree nuts or peanuts. When making substitutions, remember that natural nut and seed butters may contain more oil, so you might need to slightly reduce the butter in the recipe or add a tablespoon of flour to achieve the right dough consistency.
Vegetable, Sauce, and Seasoning Modifications
While the classic fluffernutter recipe is beloved for its simplicity, incorporating additional elements can create exciting variations. For a chocolatey twist, add ½ cup of chocolate chips to the dough or mix cocoa powder into the flour for double chocolate fluffernutter cookies. Cinnamon, nutmeg, or pumpkin pie spice can be added to the dry ingredients for a spiced version that feels perfect for autumn gatherings.
Consider adding texture with ingredients like chopped peanuts, pretzels, or even bacon for a sweet and salty combination. For a fruitier variation, swirl in some strawberry or raspberry jam before baking to create a PB&J-inspired treat. Adult versions might include a splash of bourbon or rum in the dough, or you could add espresso powder to enhance the chocolate notes if using chocolate peanut butter.
Sauces like salted caramel or chocolate ganache can be drizzled over the finished cookies for an impressive presentation. You can also experiment with different marshmallow flavors strawberry, vanilla, or even colored marshmallow fluff can create visually stunning variations that are perfect for themed parties or holidays.
Mastering Fluffernutter Cookie: Advanced Tips and Variations
Once you’ve mastered the basic easy fluffernutter cookies recipe, you might want to refine your technique or try more adventurous variations. These expert tips will help you take your cookies to the next level and impress everyone who tastes them. If you’re looking for peanut butter desserts, this is just one of many delicious options on our site.
Pro Cooking Techniques
For perfectly uniform cookies, use a cookie scoop rather than spooning the dough by hand. This ensures each cookie is the same size, which means they will bake evenly and look professional. If you want cookies with slightly crispier edges but still soft centers, try chilling the dough for at least 30 minutes before baking. This allows the flour to fully hydrate and prevents excessive spreading in the oven.
Another pro technique is to weigh your ingredients rather than using volume measurements. This precision is especially important with flour, as scooping can lead to packing more flour into the measuring cup, resulting in dry cookies. For the softest texture, slightly underbake the cookies and let them finish setting on the hot baking sheet. This method preserves moisture and creates that irresistible chewiness.
When working with marshmallow fluff, warming the jar slightly in the microwave for 10-15 seconds makes it easier to spread. You can also transfer the fluff to a piping bag fitted with a large tip for more precise application and less mess. For a torch-kissed effect, use a kitchen torch to lightly toast the exposed marshmallow fluff after assembling the sandwiches, mimicking the flavor of toasted marshmallows.
Flavor Variations
Beyond the classic combination, countless flavor variations can transform this basic recipe. Try adding ½ teaspoon of instant coffee or espresso powder to the dough for a mocha-flavored cookie that balances the sweetness of the marshmallow. Incorporate citrus zest orange or lemon works particularly well for brightness that cuts through the richness. Spicy food lovers might enjoy adding a pinch of cayenne pepper or cinnamon to create a surprising depth of flavor.
For a richer chocolate experience, use chocolate peanut butter or add 2 tablespoons of cocoa powder to the flour mixture. Salt lovers can increase the salt in the recipe to ½ teaspoon and finish the cookies with flaky sea salt for a sophisticated sweet and salty contrast. Feeling adventurous? Try adding chopped bacon or pretzels to the dough for an unexpected crunch that plays beautifully with the smooth marshmallow filling.
Presentation Tips
Turn these humble cookies into an elegant dessert with thoughtful presentation. For a finished look, roll the edges of the assembled sandwiches in sprinkles, mini chocolate chips, chopped nuts, or even cookie crumbs. Use a small offset spatula to create a decorative swirl pattern in the marshmallow fluff before topping with the second cookie.
For special occasions, consider making smaller, bite-sized versions that can be served as finger foods at parties. You can also package them in clear bags with ribbons for charming homemade gifts. When serving, arrange them on a decorative plate or tiered stand, perhaps alongside a glass of cold milk or a cup of hot coffee for a complete dessert experience.
Make-Ahead Options
For busy bakers, these cookies offer excellent make-ahead potential. The dough can be prepared and refrigerated for up to 3 days or frozen for up to 3 months. Simply scoop the dough into balls and freeze on a baking sheet before transferring to an airtight container. When ready to bake, add 1-2 minutes to the baking time for frozen dough balls.
You can also bake the cookies in advance and store them without the marshmallow filling. The cookie bases will keep for up to a week in an airtight container. Assemble with fresh marshmallow fluff just before serving for the best texture. This approach is particularly useful for events where you want to minimize day-of preparation.
The secret to bakery-quality fluffernutter cookies lies in slightly underbaking them and allowing them to finish setting on the hot baking sheet. This technique preserves moisture and creates that perfect chewy texture that makes them irresistible.
How to Store Fluffernutter Cookie: Best Practices
Proper storage ensures your fluffernutter cookies remain delicious and safe to eat. Following these guidelines will help you maintain freshness and texture whether you’re storing them for a few days or several months. For a different approach to traditional fluffernutter cookies, check out the link for additional inspiration.
Refrigeration
For short-term storage, keep your assembled cookies in an airtight container at room temperature rather than in the refrigerator. Cold temperatures can cause the marshmallow fluff to harden and the cookies to become stale more quickly. If you must refrigerate them due to warm weather or other circumstances, allow them to come to room temperature before serving for the best texture and flavor. When stored properly in an airtight container at room temperature, assembled fluffernutter cookies will stay fresh for up to 5 days.
If you’re storing the cookies without the marshmallow filling, you have more flexibility. Unfilled cookies can be kept at room temperature for up to a week in an airtight container. Place a piece of parchment paper between layers to prevent sticking and maintain the cookies’ appearance. This approach is ideal if you’re planning to fill them fresh before serving or if you’re preparing components ahead of time.
Freezing
For long-term storage, freezing is an excellent option that preserves quality for several months. The best approach is to freeze the cookie bases unfilled. Place cooled cookies in a single layer on a baking sheet and freeze until firm, about 1-2 hours. Then transfer them to a freezer-safe airtight container or zip-top bag with parchment paper between layers. They can be frozen for up to 3 months. When ready to enjoy, thaw the cookies at room temperature before assembling with fresh marshmallow fluff.
If you’ve already assembled the cookies, you can still freeze them, though the texture of the marshmallow may change slightly. Wrap each sandwich individually in plastic wrap before placing in a freezer-safe container. Thaw overnight in the refrigerator for best results, then bring to room temperature before serving. This method is particularly useful for advance meal prep or making large batches for holidays and special occasions.
Reheating
If your cookies have lost some of their freshness, a brief reheating can help restore their appeal. For room temperature cookies, a few seconds in the microwave can soften the marshmallow fluff and slightly warm the cookie base. Be careful not to overheat, as the marshmallow can become extremely hot and the cookie might become too soft.
For a different approach, place cookies in a 300°F (150°C) oven for 2-3 minutes. This method refreshes the cookie texture without overheating the marshmallow filling. It’s particularly effective for restoring a slight crispness to the edges while keeping the centers soft and chewy. After reheating, allow the cookies to cool for a minute or two before serving to avoid burning your mouth on the hot marshmallow.
Meal Prep Considerations
Fluffernutter cookies are excellent for meal prep due to their versatility and storage options. Consider setting aside time on weekends to prepare large batches of dough or bake multiple sheets of cookie bases. This approach saves time during busy weekdays and ensures you always have homemade treats on hand.
For school lunches or office snacks, individually wrap portions to make grab-and-go options that stay fresh. You can also pre-assemble a few cookies while keeping the rest unfilled for later use. This strategy gives you the flexibility to enjoy freshly assembled treats throughout the week without additional preparation time.
FAQs: Frequently Asked Questions About Fluffernutter Cookie
What is a fluffernutter cookie?
How do you make fluffernutter cookies from scratch?
What’s an easy fluffernutter cookie recipe for beginners?
How do you store fluffernutter cookies to keep them fresh?
Can you make fluffernutter cookies without peanut butter?
Fluffernutter Cookie
🥜🍬 Indulge in soft, chewy fluffernutter cookies marrying creamy peanut butter with gooey marshmallow centers for ultimate nostalgic bliss!
🍪🔥 Simple stuffed cookie recipe that’s a crowd-pleaser for bake sales, parties, or everyday treats – pure peanut butter marshmallow heaven!
- Total Time: 1 hour 32 minutes
- Yield: 30 cookies
Ingredients
– 1/2 cup butter – Provides richness and helps create a tender cookie texture
– 1/2 cup peanut butter – The star ingredient offering nutty flavor and structure
– 1/2 cup white sugar – Sweetens the dough and aids in browning
– 1/2 cup brown sugar – Adds moisture and depth of flavor with its molasses content
– 1 egg – Binds ingredients together and contributes to the cookie structure
– 1 teaspoon vanilla extract – Enhances overall flavor and adds aromatic sweetness
– 1 1/4 cups all-purpose flour – Forms the base structure of the cookie
– 1/2 teaspoon baking soda – Helps the cookies rise and spread appropriately
– 1/4 teaspoon salt – Balances sweetness and enhances all other flavors
– 1 cup marshmallow fluff – The essential filling that gives these cookies their signature name
Instructions
1-First Step: Preparation Before you begin mixing your dough, gather all your ingredients and ensure they are at room temperature. This allows for proper emulsification and even mixing. Preheat your oven to 350°F (175°C) and line two baking sheets with parchment paper or silicone baking mats. Prepare your workspace by clearing enough counter space for mixing and assembly. If you’re making the sandwich-style cookies, have a small offset spatula or butter knife ready for spreading the marshmallow fluff later. Proper preparation makes the baking process smoother and more enjoyable, especially when working with sticky ingredients like marshmallow fluff.
2-Second Step: Creaming the Base In a large mixing bowl, combine the butter and peanut butter. Using a hand mixer or stand mixer fitted with the paddle attachment, beat these together on medium speed until completely smooth and well combined. This process creates a stable base for your cookie dough. Add both the white sugar and brown sugar to the butter mixture and continue beating until the mixture is light and fluffy, typically 2-3 minutes. This step is crucial for texture as it incorporates air into the dough, resulting in lighter cookies. The sugar granules also create pockets in the dough that contribute to the desired chewy texture.
3-Third Step: Adding Liquids With the mixer on low speed, add the egg and vanilla extract to your creamed mixture. Beat just until combined, being careful not to overmix at this stage. Overmixing once the egg is added can lead to cookies that spread too much or have a tough texture. Scrape down the sides and bottom of the bowl to ensure all ingredients are incorporated evenly. The mixture should appear smooth and slightly glossy at this point. If you’re making a variation with different extracts or flavorings, add them now as well to ensure even distribution throughout the dough.
4-Fourth Step: Incorporating Dry Ingredients In a separate medium bowl, whisk together the flour, baking soda, and salt. This ensures the leavening agent is evenly distributed throughout the flour. With the mixer on low speed, gradually add the dry ingredients to the wet mixture. Mix just until the flour is barely visible a few streaks are okay. Avoid overmixing at this stage, as this develops gluten and can make your cookies tough rather than tender. The dough should be soft but not sticky. If it seems too wet to handle, you can refrigerate it for 30 minutes before scooping, which also helps prevent excessive spreading during baking.
5-Fifth Step: Shaping and Baking Scoop tablespoon-sized portions of dough and roll them into balls using your hands. Place them on the prepared baking sheets, leaving about 2 inches of space between each cookie to allow for spreading. Gently flatten each ball with the palm of your hand or the bottom of a glass to create discs about ½ inch thick. Bake in the preheated oven for 10-12 minutes, or until the edges are lightly golden but the centers still appear slightly soft. This is the secret to achieving that perfect chewy texture. The cookies will continue to set as they cool on the baking sheet.
6-Final Step: Assembly Allow the cookies to cool completely on the baking sheet before moving them. This is important because fresh-baked cookies are too fragile to handle and will fall apart if you try to fill them while warm. Once cooled, spread approximately 1-2 tablespoons of marshmallow fluff on the flat side of half the cookies. Top with the remaining cookies to create sandwiches. For a decorative touch, you can roll the edges of the sandwiches in sprinkles, mini chocolate chips, or crushed peanuts. Serve immediately or store according to the guidelines below. These homemade fluffernutter cookies are best enjoyed within a few days of baking.
Last Step:
Please leave a rating and comment letting us know how you liked this recipe! This helps our business to thrive and continue providing free, high-quality recipes for you.Notes
❄️ Chill dough at least 1 hour to prevent spreading and keep fluff contained.
💨 Use a piping bag or ziplock with corner cut for easy, neat fluff filling.
🔥 Bake until just set – underbaked centers stay soft and chewy.
- Prep Time: 20 minutes
- Chilling: 1 hour
- Cook Time: 12 minutes
- Category: Desserts
- Method: Baked
- Cuisine: American
- Diet: Vegetarian
Nutrition
- Serving Size: 1 cookie
- Calories: 210 kcal
- Sugar: 20g
- Sodium: 150mg
- Fat: 11g
- Saturated Fat: 5g
- Unsaturated Fat: 5g
- Trans Fat: 0g
- Carbohydrates: 25g
- Fiber: 1g
- Protein: 4g
- Cholesterol: 30mg


