Why You’ll Love This Cookie Scoop Set
There is nothing quite like the smell of fresh cookies baking in the oven. However, getting them to look and taste professional can sometimes be a challenge. That is where the right tools come into play. Using a high-quality cookie scoop set changes the entire baking experience, making it easier, faster, and much more enjoyable. Whether you are a seasoned baker or just starting out, having the right portion scoop in your kitchen drawer is a game changer.
Ease of Preparation
Baking should be fun, not a chore. One of the biggest benefits of using cookie scoops for baking is the incredible speed they offer. Instead of struggling with two spoons to shape sticky dough, you simply scoop and release. This efficient method cuts down prep time significantly. Home bakers often report that using a disher scoop makes the process 20-30% faster. You can move dough from the bowl to the baking sheet in seconds, keeping your hands clean and your kitchen tidy. This is especially helpful during the holidays when you have dozens of cookies to make.
Uniformity and Consistency
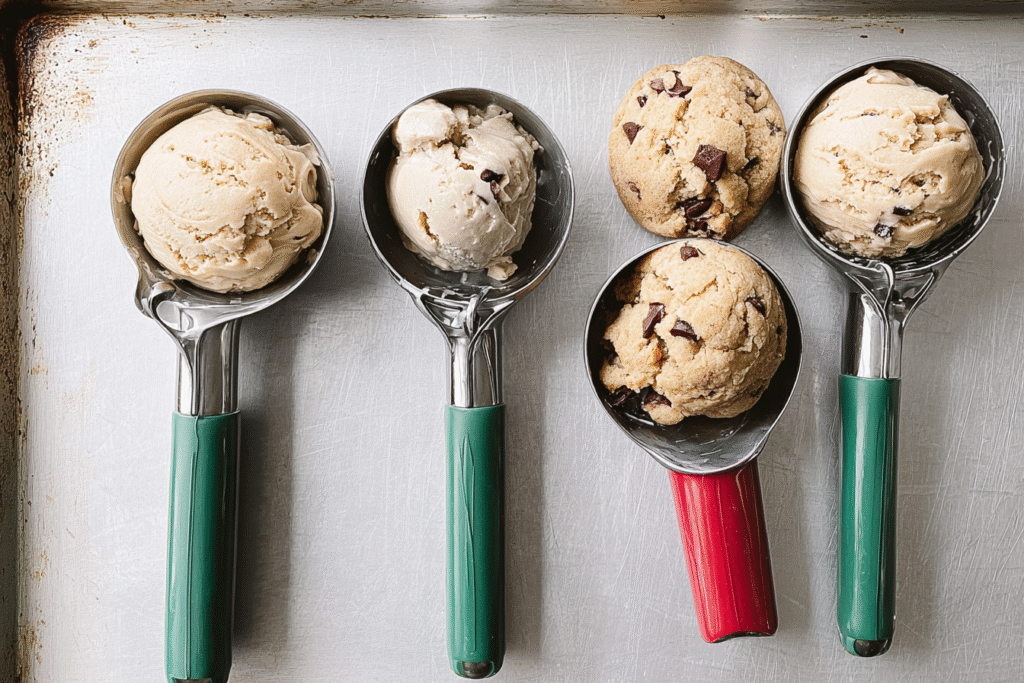
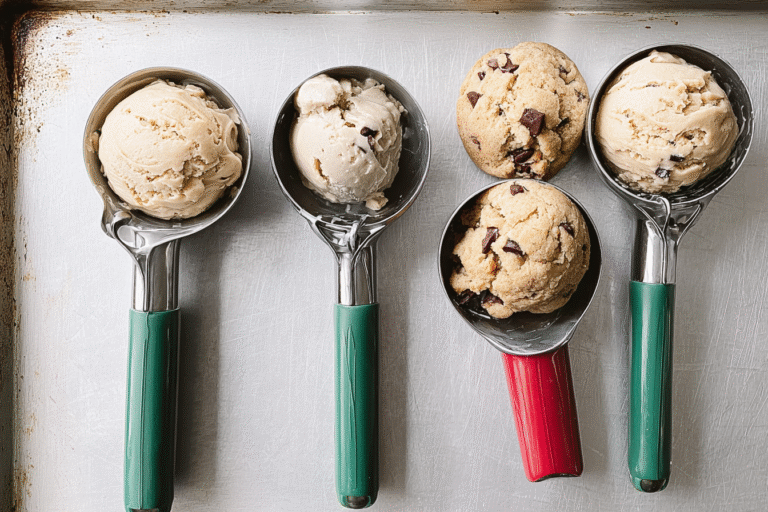
We have all experienced a batch of cookies where some are burnt while others are raw in the middle. This usually happens because the dough balls are not the same size. A 1 tbsp cookie scoop or 2 tbsp cookie scoop ensures every single cookie is identical. When the cookies are uniform, they bake evenly. You get a perfect golden brown color across the entire tray, and everyone gets a fair share. This consistency is key for presentation, making your homemade treats look like they came from a bakery.
Versatility in the Kitchen
While the name suggests they are just for cookies, these tools are surprisingly versatile. A set that includes a tablespoon scoop and a larger size can be used for so much more. Use them to portion muffin batter, scoop meatballs for spaghetti, or create perfectly round melon balls for fruit salad. You can even use them to dish up consistent servings of mashed potatoes or ice cream. This multitasking ability makes a baking scoop one of the most used tools in your arsenal.
Distinctive Professional Results
There is a certain satisfaction that comes from serving food that looks beautiful. Using a stainless steel cookie scoop gives your dough a smooth, round shape that you just cannot get with a spoon. The smooth surface helps the cookies hold their shape better in the oven, resulting in a pleasing texture. They rise evenly and look delicious on the plate. If you are giving cookies as gifts or bringing them to a party, this professional touch makes a big difference. People will wonder how you got them so perfect without trying.
Jump to:
- Why You’ll Love This Cookie Scoop Set
- Ease of Preparation
- Uniformity and Consistency
- Versatility in the Kitchen
- Distinctive Professional Results
- Essential Ingredients for Perfect Cookies
- Main Ingredients
- Special Dietary Options
- Vegan
- Gluten-Free
- Low-Calorie
- How to Prepare the Perfect Cookies: Step-by-Step Guide
- First Step: Preparation and Mise en Place
- Second Step: Creaming the Butter and Sugars
- Third Step: Adding Wet Ingredients
- Fourth Step: Incorporating the Chocolate Chips
- Fifth Step: Scooping and Shaping
- Final Step: Baking and Cooling
- Dietary Substitutions to Customize Your Cookies
- Protein and Main Component Alternatives
- Vegetable, Sauce, and Seasoning Modifications
- Mastering Cookie Scoops: Advanced Tips and Variations
- Pro Cooking Techniques
- Flavor Variations
- Presentation Tips
- Make-Ahead Options
- How to Store Cookie Dough and Baked Cookies: Best Practices
- Refrigeration
- Freezing
- Reheating
- Meal Prep Considerations
- FAQs: Frequently Asked Questions About Cookie Scoops
- What is a cookie scoop and why use one for baking?
- What size cookie scoop do I need for chocolate chip cookies?
- How do you use a cookie scoop for perfect cookies?
- Can you put a cookie scoop in the dishwasher?
- What is the best material for a cookie scoop?
- Cookie Scoops
- Ingredients
- Instructions
- Last Step:
- Notes
- Nutrition
- Did you make this recipe?
Essential Ingredients for Perfect Cookies
Using a great scoop is the first step, but you also need a fantastic recipe to fill it. Below is a list of ingredients for a classic, versatile cookie dough that works perfectly with your cookie scoops. These measurements are designed to work well with both the small and large scoops in your set.
Main Ingredients
- 2 1/4 cups All-purpose flour – The structure of the cookie, providing the necessary gluten.
- 1 tsp Baking soda – Helps the cookies rise and spread properly.
- 1 tsp Salt – Enhances the flavor and balances the sweetness.
- 1 cup Unsalted butter, softened – Creates a rich, tender texture.
- 3/4 cup Granulated white sugar – Sweetens and helps with crisp edges.
- 3/4 cup Brown sugar, packed – Adds moisture and a deep, caramel flavor.
- 1 large Egg – Binds the ingredients together.
- 1 tsp Vanilla extract – Provides a warm, aromatic flavor.
- 2 cups Semisweet chocolate chips – The classic mix-in for texture and taste.
Special Dietary Options
One of the best things about baking is adapting recipes to fit your needs. Here are a few substitutions if you are looking to change things up.
Vegan
- Plant-based butter sticks can replace dairy butter 1:1.
- Flax eggs (1 tbsp ground flaxseed + 3 tbsp water) replace the chicken egg.
- Use vegan-certified chocolate chips to ensure no dairy is included.
Gluten-Free
- Use a 1-to-1 Gluten-Free Baking Flour blend instead of all-purpose flour.
- Ensure your baking soda and chocolate chips are certified gluten-free.
Low-Calorie
- Swap the butter for unsweetened applesauce or mashed banana for half the amount.
- Use a natural sugar substitute like stevia or monk fruit sweetener.
- Reduce the chocolate chips to 1 cup or use cacao nibs for less sugar.
How to Prepare the Perfect Cookies: Step-by-Step Guide
Now that you have your tools and ingredients ready, it is time to start baking. Follow these detailed steps to create beautiful, uniform cookies using your cookie scoop set. This guide focuses on technique to ensure your cookie dough scoops turn out perfectly every time.
First Step: Preparation and Mise en Place
Before you touch any ingredients, prepare your workspace. Preheat your oven to 375°F (190°C) and line two large baking sheets with parchment paper or silicone baking mats. This prevents sticking and makes cleanup easy. In a medium bowl, whisk together the flour, baking soda, and salt. This step aerates the dry ingredients and ensures the leavening is evenly distributed. Set this mixture aside. It is crucial to have your oven fully preheated before the dough goes in, so the cookies start baking immediately and set their structure.
Second Step: Creaming the Butter and Sugars
In a large bowl, use an electric mixer to beat the softened butter, granulated sugar, and brown sugar together. You want to beat this mixture on medium speed for about 2 to 3 minutes until it is pale yellow and fluffy. This process incorporates air into the dough, which helps make the cookies light. If the butter is too cold, it will not cream well; if it is too hot, the cookies will spread too much. Room temperature butter is the key to success here. Scrape down the sides of the bowl with a spatula to make sure everything is mixed evenly.
Third Step: Adding Wet Ingredients
Add the egg and vanilla extract to the butter mixture. Beat on medium speed for another minute until the egg is fully incorporated. The mixture should look glossy and smooth. Take care not to overbeat at this stage, as too much air can cause the cookies to puff up and then collapse in the oven. Once the wet ingredients are combined, turn the mixer to low speed. Gradually add the dry flour mixture. Mix only until you no longer see streaks of white flour. Overmixing develops too much gluten, which can make your cookies tough instead of tender.
Fourth Step: Incorporating the Chocolate Chips
Remove the bowl from the mixer. Using a sturdy spatula or wooden spoon, fold in the chocolate chips by hand. This ensures you do not break the chips or overwork the dough. The dough will be thick and slightly sticky. Now is the perfect time to choose your cookie scoops. If you like smaller, bite-sized cookies, grab the 1 tbsp cookie scoop. For a more traditional size, use the 2 tbsp cookie scoop. Both sizes will bake beautifully.
Fifth Step: Scooping and Shaping
This is where your tools shine. Load the baking scoop by pressing it firmly into the dough. Do not be afraid to heap it slightly over the top. Scrape the excess against the side of the bowl to level it off. Hold the scoop over your prepared baking sheet and squeeze the trigger. A perfect ball of dough will drop onto the paper. Repeat this process, spacing the balls about 2 inches apart to allow room for spreading. If you are making the smaller size, you can fit more cookies on the tray.
Pro Tip: If your dough is very sticky and sticking to the scoop, dip the metal portion into a small cup of cold water or flour between scoops. This ensures a clean release every time.
Final Step: Baking and Cooling
Place the baking sheets in the preheated oven. If you cannot fit both trays on one rack, bake them one at a time. Bake for 9 to 11 minutes for the smaller scoops, or 11 to 13 minutes for the larger ones. You know they are done when the edges are golden brown but the centers still look slightly soft. They will continue to cook on the hot pan. Let them cool on the baking sheet for 2 minutes, then transfer them to a wire rack to cool completely. This step is vital for achieving a chewy texture.
For a classic chocolate chip cookie recipe that everyone loves, this technique creates the best texture. Remember, using a portion scoop is the secret to making sure they all bake at the same rate.
Dietary Substitutions to Customize Your Cookies
Baking is all about making recipes work for you and your family. Whether you have allergies or just want to try something new, there are plenty of ways to customize your dough while still using your trusty cookie scoops.
Protein and Main Component Alternatives
Flour is the main structure of the cookie, but you can swap it out for different nutritional profiles. For a protein boost, try replacing half of the all-purpose flour with almond flour or coconut flour. Be aware that coconut flour absorbs more liquid, so you may need to add a splash of milk. If you are looking for whole grains, white whole wheat flour is a great option that keeps the color light but adds fiber. You can also use oat flour for a heartier, nuttier flavor that pairs wonderfully with raisins instead of chocolate chips. These changes affect how the dough handles, but your disher scoop will still cut through it cleanly.
Vegetable, Sauce, and Seasoning Modifications
While you might not typically put vegetables in cookies, purees can add moisture and nutrients. Pumpkin puree or mashed sweet potato works surprisingly well in spice cookies, replacing some of the butter for a lower-fat version. You can also get creative with mix-ins. Instead of chocolate chips, try adding dried cranberries and white chocolate chunks. For a savory twist, pretzels and sea salt can be added to chocolate dough for a sweet and salty combo. Spices are another easy way to modify the flavor. A teaspoon of cinnamon, nutmeg, or a pinch of cayenne pepper can completely transform a standard recipe into something unique without changing the baking time. For more ideas on healthy variations, check out scoopable cookies that offer different nutritional benefits.
Mastering Cookie Scoops: Advanced Tips and Variations
Once you have mastered the basic method, you can start experimenting with professional techniques to make your cookies even better. Your stainless steel cookie scoop is capable of more than just portioning dough.
Pro Cooking Techniques
One advanced technique involves chilling the dough balls. After scooping the entire batch onto a baking sheet, place the sheet in the refrigerator for 30 minutes before baking. This solidifies the fat in the dough, which results in thicker cookies that do not spread as much. Another trick is to stack a small piece of chocolate on top of each scooped ball before baking. This creates a puddle of chocolate on the surface for a gourmet look. If you want extra crispy edges, try rolling the scooped balls in granulated sugar before putting them on the tray. This creates a crackly, shiny crust.
Flavor Variations
Do not limit yourself to chocolate chips. Use your cookie scoop set to make peanut butter cookies, snickerdoodles, or shortbread. You can fill the scoops with jam to make thumbprint cookies, or use a smaller tablespoon scoop to create fillings for whoopie pies. Another great idea is to use the scoop to drop fudge or truffle mixture onto a tray for uniform candies. The precision of the tool helps with these delicate sweets where size matters for presentation.
Presentation Tips
Uniformity is the key to presentation, but you can go one step further. After baking, while the cookies are still soft, press a few extra chocolate chips or sea salt flakes into the tops. This makes them look picture-perfect. If you are giving them as a gift, use the scoop to measure out the dough, freeze the balls, and pack them in a nice box with instructions to bake. This “ready-to-bake” gift is always appreciated and shows off your preparation skills.
Make-Ahead Options
For busy schedules, you can scoop an entire batch of dough, freeze the balls on a tray, and then transfer them to a freezer bag. When you want fresh cookies, simply take out the desired number of balls and bake them. You may need to add a minute or two to the baking time since they are frozen. This is perfect for having fresh-baked treats after school or work without the mess of mixing dough every time.
How to Store Cookie Dough and Baked Cookies: Best Practices
Whether you have baked a huge batch or have leftover dough, proper storage ensures your cookies stay fresh and delicious. Your cookie scoops make portioning for storage incredibly easy.
Refrigeration
If you plan to bake the cookies within a few days, you can store the scooped dough balls in the refrigerator. Place them in an airtight container with layers of parchment paper in between so they do not stick together. The dough will stay fresh for up to 3 days. In fact, chilling the dough can improve the flavor, as the flour hydrates and the flavors meld together.
Freezing
Freezing is the best long-term option for both dough and baked cookies. For dough, scoop it onto a baking sheet and freeze until solid. Then, transfer the frozen balls to a freezer bag. They can last for up to 3 months. For baked cookies, wait until they are completely cool. Store them in a freezer-safe container with wax paper between the layers. They will keep for about 3 months as well. To thaw, let them sit at room temperature or warm them slightly in the oven.
Reheating
There is nothing like a warm cookie. To refresh stored cookies, place them in a 300°F (150°C) oven for 5 to 10 minutes. This brings back the crisp edges and soft center. Microwaving works for a softer texture but can make them chewy rather than crispy. Avoid reheating in the microwave if you prefer that fresh-baked crunch.
Meal Prep Considerations
Using your cookie scoops for meal prep is a smart strategy. You can portion out individual servings of dough for school lunches or snacks. This controls portion sizes and makes it easy to grab exactly what you need. It also helps when you are baking for large events, as you can prep days in advance and simply bake when it is time to serve. For those watching their intake, knowing the exact size of each cookie helps with tracking calories and nutrients. You can learn more about weight loss and cookies by controlling your portions.

FAQs: Frequently Asked Questions About Cookie Scoops
What is a cookie scoop and why use one for baking?
What size cookie scoop do I need for chocolate chip cookies?
How do you use a cookie scoop for perfect cookies?
Can you put a cookie scoop in the dishwasher?
What is the best material for a cookie scoop?
Cookie Scoops
🥄🍪 Achieve perfectly portioned, uniform cookies every time with this 1 Tbsp and 2 Tbsp scoop set – effortless baking for professional results at home!
🍪🔥 Save time scooping dough, ensure even baking and consistent sizes for bite-sized treats or jumbo delights – a baker’s essential!
- Total Time: 1 hour
- Yield: 48 small or 24 large cookies
Ingredients
– 2 1/4 cups all-purpose flour for structure
– 1 tsp baking soda for rising and spreading
– 1 tsp salt for enhancing flavor and balancing sweetness
– 1 cup unsalted butter, softened for rich, tender texture
– 3/4 cup granulated white sugar for sweetening and crisp edges
– 3/4 cup brown sugar, packed for moisture and caramel flavor
– 1 large egg for binding ingredients
– 1 tsp vanilla extract for warm, aromatic flavor
– 2 cups semisweet chocolate chips for texture and taste
Instructions
1-First Step: Preparation and Mise en Place Before you touch any ingredients, prepare your workspace. Preheat your oven to 375°F (190°C) and line two large baking sheets with parchment paper or silicone baking mats. This prevents sticking and makes cleanup easy. In a medium bowl, whisk together the flour, baking soda, and salt. This step aerates the dry ingredients and ensures the leavening is evenly distributed. Set this mixture aside. It is crucial to have your oven fully preheated before the dough goes in, so the cookies start baking immediately and set their structure.
2-Second Step: Creaming the Butter and Sugars In a large bowl, use an electric mixer to beat the softened butter, granulated sugar, and brown sugar together. You want to beat this mixture on medium speed for about 2 to 3 minutes until it is pale yellow and fluffy. This process incorporates air into the dough, which helps make the cookies light. If the butter is too cold, it will not cream well; if it is too hot, the cookies will spread too much. Room temperature butter is the key to success here. Scrape down the sides of the bowl with a spatula to make sure everything is mixed evenly.
3-Third Step: Adding Wet Ingredients Add the egg and vanilla extract to the butter mixture. Beat on medium speed for another minute until the egg is fully incorporated. The mixture should look glossy and smooth. Take care not to overbeat at this stage, as too much air can cause the cookies to puff up and then collapse in the oven. Once the wet ingredients are combined, turn the mixer to low speed. Gradually add the dry flour mixture. Mix only until you no longer see streaks of white flour. Overmixing develops too much gluten, which can make your cookies tough instead of tender.
4-Fourth Step: Incorporating the Chocolate Chips Remove the bowl from the mixer. Using a sturdy spatula or wooden spoon, fold in the chocolate chips by hand. This ensures you do not break the chips or overwork the dough. The dough will be thick and slightly sticky. Now is the perfect time to choose your cookie scoops. If you like smaller, bite-sized cookies, grab the 1 tbsp cookie scoop. For a more traditional size, use the 2 tbsp cookie scoop. Both sizes will bake beautifully.
5-Fifth Step: Scooping and Shaping This is where your tools shine. Load the baking scoop by pressing it firmly into the dough. Do not be afraid to heap it slightly over the top. Scrape the excess against the side of the bowl to level it off. Hold the scoop over your prepared baking sheet and squeeze the trigger. A perfect ball of dough will drop onto the paper. Repeat this process, spacing the balls about 2 inches apart to allow room for spreading. If you are making the smaller size, you can fit more cookies on the tray.
6-Final Step: Baking and Cooling Place the baking sheets in the preheated oven. If you cannot fit both trays on one rack, bake them one at a time. Bake for 9 to 11 minutes for the smaller scoops, or 11 to 13 minutes for the larger ones. You know they are done when the edges are golden brown but the centers still look slightly soft. They will continue to cook on the hot pan. Let them cool on the baking sheet for 2 minutes, then transfer them to a wire rack to cool completely. This step is vital for achieving a chewy texture.
Last Step:
Please leave a rating and comment letting us know how you liked this recipe! This helps our business to thrive and continue providing free, high-quality recipes for you.Notes
💧 Dip scoops in hot water between uses for smooth release and perfect shapes.
🧊 Chill dough 30 minutes before scooping to prevent spreading.
✨ Store scoops properly to maintain spring mechanism for reliable use.
- Prep Time: 15 minutes
- Chilling: 30 minutes
- Cook Time: 12 minutes
- Category: Desserts
- Method: Baked
- Cuisine: American
- Diet: Vegetarian
Nutrition
- Serving Size: 1 cookie
- Calories: 120 kcal
- Sugar: 12g
- Sodium: 100mg
- Fat: 6g
- Saturated Fat: 4g
- Unsaturated Fat: 1.5g
- Trans Fat: 0g
- Carbohydrates: 16g
- Fiber: 1g
- Protein: 2g
- Cholesterol: 20mg


