Why You’ll Love This Cookie Baking
If you’re looking for the ultimate treat that brings joy to your kitchen, this cookie baking experience is perfect for you. There’s nothing quite like the aroma of freshly baked cookies filling your home. Here are the main benefits that make this cookie recipe stand out from the rest:- Ease of preparation: This cookie baking process is designed with simplicity in mind. With just 15 minutes of prep time and minimal equipment required, you’ll have delicious homemade chocolate chip cookies ready for the oven in no time. Perfect for busy parents, students, or anyone craving a sweet treat without spending hours in the kitchen. The straightforward instructions make cookie dough preparation accessible even for baking novices.
- Health benefits: While cookies are certainly an indulgence, this recipe incorporates quality ingredients that provide some nutritional advantages. Using high-quality butter offers fat-soluble vitamins, while dark chocolate chips contain antioxidants that support heart health. Whole grain flour options increase fiber content, and nuts can add protein and healthy fats. By controlling ingredients in your homemade cookies, you avoid preservatives and artificial additives often found in store-bought versions.
- Versatility: This cookie baking recipe adapts beautifully to various dietary preferences and needs without sacrificing flavor. Whether you’re vegan, gluten-free, or reducing sugar intake, simple substitutions create cookies that everyone can enjoy. Add mix-ins like dried fruits, different nuts, or alternative chocolate varieties to customize flavor profiles. The base cookie dough serves as a canvas for creative expression in the kitchen.
- Distinctive flavor: What sets these chewy cookies apart is the perfect balance of textures and tastes. The combination of crispy edges, soft centers, and bursts of chocolate creates an irresistible experience. The recipe has been fine-tuned to achieve that ideal chewiness while maintaining structural integrity. Deep, rich vanilla notes complement the sweetness without overwhelming the palate, resulting in sophisticated flavor that appeals to all ages.
Jump to:
- Why You’ll Love This Cookie Baking
- Essential Ingredients for Cookie Baking
- Main Ingredients:
- Special Dietary Options:
- How to Prepare the Perfect Cookie Baking: Step-by-Step Guide
- Preparation Phase
- Mixing the Cookie Dough
- Baking Process
- Dietary Substitutions to Customize Your Cookie Baking
- Protein and Main Component Alternatives
- Vegetable, Sauce, and Seasoning Modifications
- Mastering Cookie Baking: Advanced Tips and Variations
- Pro Cooking Techniques
- Flavor Variations
- Presentation Tips
- Make-Ahead Options
- How to Store Cookie Baking: Best Practices
- Refrigeration
- Freezing
- Reheating
- Meal Prep Considerations
- FAQs: Frequently Asked Questions About Cookie Baking
- What temperature do you bake cookies at?
- How long does it take to bake cookies?
- Why are my cookies flat and spread out?
- How do I make soft chewy cookies?
- Can you freeze cookie dough and baked cookies?
- Cookie Baking
- Ingredients
- Instructions
- Last Step:
- Notes
- Nutrition
- Did you make this recipe?
Essential Ingredients for Cookie Baking
Creating the perfect chocolate chip cookies starts with high-quality ingredients measured precisely. Here’s everything you’ll need for successful cookie baking:Main Ingredients:
2 1/4 cups all-purpose flour – Forms the structure and body of your cookies, providing the necessary gluten development for proper texture
1 cup unsalted butter, softened – Creates richness, tenderness, and influences how much your cookie dough spreads during baking
3/4 cup granulated white sugar – Provides sweetness and contributes to crispy edges
3/4 cup packed brown sugar – Adds moisture for chewy cookies and creates a deeper, caramel-like flavor
2 large eggs – Bind ingredients together and contribute structure while adding richness
2 teaspoons vanilla extract – Provides essential flavor depth and aromatic quality
1 teaspoon baking soda – Acts as the leavening agent to help cookies rise slightly
1/2 teaspoon salt – Balances sweetness and enhances overall flavor profile
2 cups chocolate chips – The star ingredient providing rich chocolate bursts throughout each cookie
Special Dietary Options:
Vegan: Replace eggs with flax eggs (1 tablespoon ground flaxseed + 3 tablespoons water per egg) and use plant-based butter or coconut oil
Gluten-free: Substitute all-purpose flour with a 1-to-1 gluten-free flour blend containing xanthan gum for best texture
Low-calorie: Reduce butter to 3/4 cup, swap half the sugar for a natural sweetener like erythritol, and incorporate applesauce for moisture
The secret to exceptional cookie baking lies not just in following measurements, but in understanding how each ingredient contributes to the final texture and flavor of your homemade cookies.
How to Prepare the Perfect Cookie Baking: Step-by-Step Guide
Following these detailed steps will ensure your cookie baking journey results in consistently delicious treats. Pay attention to timing and technique for the best outcome with your cookie dough.Preparation Phase
First Step: Begin your cookie baking adventure by properly preparing your workspace and ingredients. Measure all ingredients accurately using kitchen scales when possible, as precise measurements are crucial for consistent results. Soften your butter to room temperature press it gently with your finger; it should yield without being greasy. Crack eggs into a separate bowl to check for freshness and avoid shell fragments. Line two baking sheets with parchment paper for easy cleanup and to prevent sticking. This preparation phase, often called mise en place, makes the actual cookie baking process smooth and enjoyable.
Second Step: Position your oven rack in the center position and preheat to 350°F (175°C). If your oven runs hot or cool, adjust accordingly by using an oven thermometer for accuracy. Proper preheating ensures that your cookies begin baking immediately upon entering the oven, which is essential for proper spread and texture. While the oven heats, ensure your mixing bowls are clean and dry. This step might seem simple, but proper temperature management is a cornerstone of successful cookie baking.
Mixing the Cookie Dough
Third Step: In a medium bowl, whisk together the flour, baking soda, and salt until thoroughly combined. This step ensures even distribution of the leavening agent throughout your cookie dough. Set this dry mixture aside while you prepare the wet ingredients. This separation of wet and dry ingredients prevents overmixing when combined, which could lead to tough cookies instead of soft, tender treats.
Fourth Step: In a large mixing bowl, beat the softened butter, granulated sugar, and brown sugar together using a hand mixer or stand mixer on medium speed. Cream these ingredients for approximately 3-4 minutes until the mixture is light and fluffy. This process incorporates air into the cookie dough, contributing to a lighter texture. Scrape down the sides of the bowl as needed to ensure all ingredients are fully incorporated. For vegan options, use softened coconut oil or vegan butter substitutes following the same creaming technique.
Fifth Step: Add the eggs one at a time to the butter-sugar mixture, beating well after each addition. Then mix in the vanilla extract until fully combined. This gradual addition of eggs helps emulsify the cookie dough, creating a cohesive mixture. The eggs provide structure and richness that are essential for the classic cookie texture we all love. Make sure to scrape the bowl between additions to prevent pockets of unmixed egg.
Sixth Step: With the mixer on low speed, gradually add the flour mixture to the wet ingredients. Mix only until just combined overmixing develops too much gluten, resulting in tough cookies. Stop mixing as soon as you no longer see streaks of dry flour. A few small flour patches are preferable to overmixed dough. This technique creates the tender crumb structure that distinguishes excellent homemade cookies from mediocre ones.
Seventh Step: Add the chocolate chips to the cookie dough, folding them in gently with a spatula or wooden spoon. This ensures even distribution without breaking the chips. For variations, consider adding chopped nuts, dried fruits, or different types of chocolate at this stage. The folding technique incorporates these additions without overworking the dough.
Baking Process
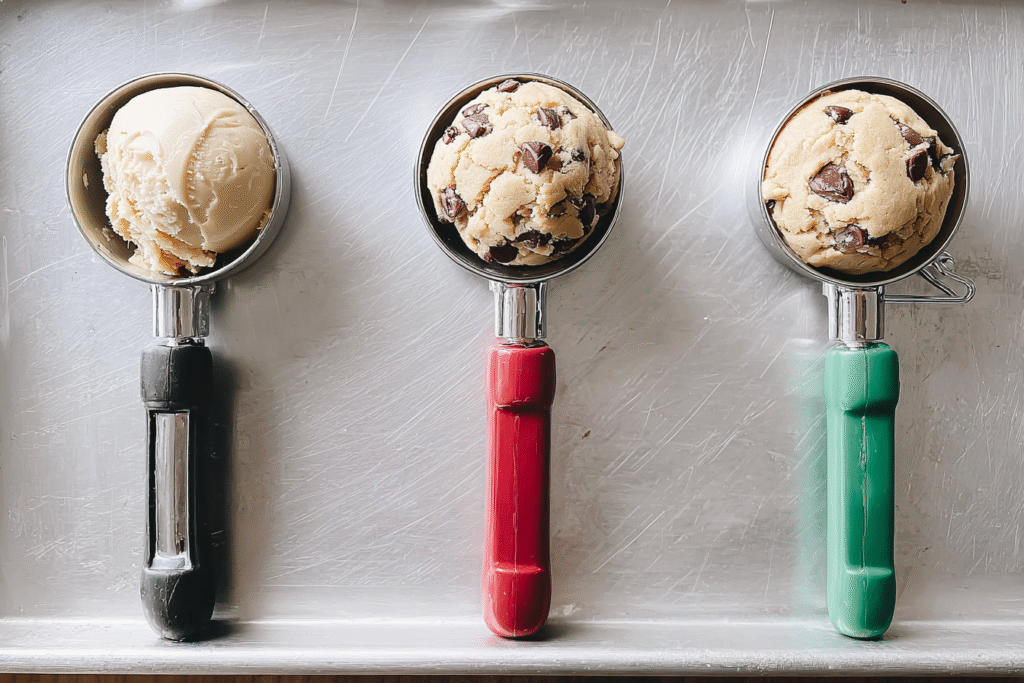
Eighth Step: Using a cookie scoop or tablespoon, drop rounded portions of cookie dough onto your prepared baking sheets, leaving approximately 2 inches of space between each cookie to allow for spreading. For uniform cookies that bake evenly, aim for consistent sizing approximately 2 tablespoons of dough per cookie. If you prefer thicker cookies, chill the dough balls for 30 minutes before baking to reduce spread.
Ninth Step: Place one baking sheet at a time in the preheated oven. Bake for 9-11 minutes, or until edges are lightly golden brown but centers still appear slightly soft and underbaked. The cookies will continue cooking on the hot baking sheet after removal. For softer cookies, lean toward the shorter baking time; for crispier edges, extend slightly. Avoid the temptation to overbake soft centers will firm up during cooling.
Final Step: Remove the baking sheet from the oven and let the cookies rest for 5 minutes on the pan. This resting period allows them to set and finish baking without falling apart. Afterward, carefully transfer the cookies to a wire cooling rack using a spatula. Cool completely before storing. For warm cookies, simply let them cool for just 2-3 minutes before serving. This final step completes your cookie baking adventure, resulting in perfectly textured treats ready to enjoy!

Dietary Substitutions to Customize Your Cookie Baking
Protein and Main Component Alternatives
Adapting your cookie recipe to accommodate different dietary needs doesn’t mean sacrificing flavor or texture. For egg alternatives in cookie dough, flax eggs (1 tablespoon ground flaxseed mixed with 3 tablespoons water per egg) work exceptionally well in binding ingredients while adding fiber and omega-3 fatty acids. Chia seeds prepared similarly provide another excellent plant-based option that adds a subtle nutty flavor. For those avoiding butter, coconut oil offers a delightful alternative that can add a tropical note to your cookies. If you prefer a neutral flavor, use high-quality vegan butter sticks rather than tub margarine, which contains excess water that affects cookie texture.
For protein enthusiasts, consider adding a scoop of unflavored or vanilla protein powder to the flour mixture, though this may slightly alter the texture of your cookie dough. Collagen peptides are another excellent option that dissolves easily and adds protein without changing the flavor profile. These modifications make cookie baking more accessible to various dietary preferences while maintaining the integrity of the final product.
Vegetable, Sauce, and Seasoning Modifications
Cookie creativity extends beyond traditional ingredients. For reduced sugar content, unsweetened applesauce can replace half the butter in a recipe, lowering calories while adding moisture and fruit sweetness. Pumpkin puree works similarly and adds a seasonal twist with extra nutrients. These swaps result in softer, cakier cookies with a distinct character that many find delightful.
For flavor variations, consider adding extracts beyond vanilla almond, peppermint, or coconut extracts transform simple cookies into gourmet treats. Spices like cinnamon, nutmeg, or cardamom add warmth and complexity without extra calories. A pinch of sea salt sprinkled on top before baking elevates the chocolate flavor and creates a sophisticated contrast. For those seeking savory notes, finely chopped rosemary pairs surprisingly well with dark chocolate chips, creating an unexpected but delicious combination.
Gluten-free bakers can successfully use oat flour as an alternative, adding a subtle nutty flavor and additional fiber. Almond flour offers another gluten-free option that produces tender, slightly golden cookies with protein benefits. These modifications showcase the versatility of cookie baking, allowing home cooks to adapt recipes to seasonal ingredients, dietary restrictions, or personal flavor preferences without sacrificing the joy of creating homemade treats.
Mastering Cookie Baking: Advanced Tips and Variations
Once you’ve mastered the basic cookie recipe, these professional techniques and creative variations will elevate your cookie baking to new heights. Small adjustments can make significant differences in texture and flavor, turning good cookies into exceptional ones.
Pro Cooking Techniques
The temperature of your ingredients significantly impacts cookie texture. Using room temperature butter and eggs ensures proper emulsification, resulting in cookies with consistent structure. However, for thicker cookies with more pronounced ridges, try refrigerating your cookie dough for 24-72 hours before baking. This aging process allows flour to fully hydrate and flavors to meld, creating a complex, caramel-like taste with improved texture. This technique is used by many professional bakers and is easily replicated at home with just a bit of planning ahead.
Another professional technique involves brown butter cooking butter until the milk solids brown and develop a nutty aroma. Use this cooled brown butter in place of regular butter for cookies with a sophisticated, toffee-like depth of flavor. This simple addition transforms a standard chocolate chip cookie recipe into something extraordinary with minimal effort.
Flavor Variations
Expand your cookie repertoire by experimenting with different chocolate combinations. A mix of semi-sweet, milk, and dark chocolate chips creates layers of flavor complexity. For adults, adding chopped chocolate bars with higher cocoa percentages (60-70%) provides a sophisticated bitterness that balances sweetness. Sea salt flakes sprinkled on top before baking create a delightful sweet-salty contrast that enhances chocolate flavor.
Beyond chocolate, consider incorporating crushed pretzels for crunch and saltiness, or toffee pieces for buttery sweetness. Dried cherries or cranberries add tart contrast to rich chocolate. Spices like cinnamon, cardamom, or espresso powder intensify chocolate flavor and add warmth. These variations demonstrate how versatile cookie baking can be, limited only by your imagination and taste preferences.
Presentation Tips
The visual appeal of your cookies enhances the eating experience. For bakery-style appearance, press additional chocolate chips into the tops of cookie dough balls before baking this ensures visible chocolate morsels on each cookie. Alternatively, reserve a portion of the chocolate chips to press into the hot cookies immediately after removing from the oven, creating a beautifully glossy finish.
For gift-giving, create uniform cookies by using a spring-loaded scoop, then roll dough balls between your palms to smooth surfaces. This professional touch shows care and attention to detail. Arrange cookies in clear bags or boxes with ribbon for an attractive presentation that makes them perfect for sharing during holidays or special occasions.
Make-Ahead Options
Busy schedules shouldn’t prevent you from enjoying fresh cookies. Cookie dough freezes exceptionally well portion into balls, freeze on a baking sheet until firm, then transfer to a freezer bag. These frozen dough balls can go directly from freezer to oven, adding just 1-2 minutes to the baking time. This approach allows you to enjoy freshly baked cookies anytime without daily preparation.
For holiday preparation, prepare and freeze multiple batches of cookie dough balls in advance. This strategy spreads out the work while ensuring fresh cookies throughout the season. Label freezer bags with baking instructions for convenience. Frozen dough balls also make excellent gifts for friends who enjoy baking but may not have time for preparation.
How to Store Cookie Baking: Best Practices
Proper storage techniques preserve the quality and freshness of your homemade cookies, allowing you to enjoy them longer. Different storage methods suit various needs, from short-term enjoyment to long-term preservation.
Refrigeration
For short-term storage (up to one week), keep cookies in an airtight container at room temperature. Layer cookies between parchment paper to prevent sticking. If your kitchen is particularly warm or humid, refrigeration can extend freshness by a few days, though this may slightly alter texture. For refrigerated storage, bring cookies to room temperature before serving for the best flavor and texture experience.
Pro tip: Place a slice of white bread in the container with your cookies. The bread absorbs excess moisture and transfers it back to the cookies, keeping them soft and chewy for days longer than usual. Replace the bread slice if it becomes hard or stale.
Freezing
For long-term storage (up to three months), freezing is your best option. Freeze baked cookies in airtight containers or freezer bags, separated by layers of wax paper or parchment paper. Thaw frozen cookies at room temperature for 1-2 hours, or warm them in a 300°F oven for 5-7 minutes to refresh their texture. This method preserves quality remarkably well and allows you to keep a stash of homemade treats ready for unexpected guests or sudden cravings.
Cookie dough freezes even better than baked cookies. Portion dough into individual balls, freeze on a baking sheet until solid, then transfer to freezer bags. This approach allows you to bake fresh cookies whenever desired without starting from scratch. Label bags with the baking date and temperature instructions for convenience.
Reheating
To refresh stored cookies, a brief time in the oven works wonders. Preheat to 300°F (150°C) and place cookies on a baking sheet for 3-5 minutes. This gentle reheating crisps edges and warms the interior without further cooking. Avoid microwaving, which creates uneven heating and rubbery textures. For that just-baked experience, reheat cookies just before serving for maximum enjoyment.
Meal Prep Considerations
For efficient batch cooking, dedicate time to prepare multiple cookie dough varieties. Store pre-portioned dough balls in the freezer, clearly labeled by type. This system allows you to bake a variety of fresh cookies throughout the week with minimal daily effort. Consider creating a cookie baking schedule bake one type on Monday, another on Wednesday, and so on to maintain a rotating supply of fresh treats.
FAQs: Frequently Asked Questions About Cookie Baking
What temperature do you bake cookies at?
How long does it take to bake cookies?
Why are my cookies flat and spread out?
How do I make soft chewy cookies?
Can you freeze cookie dough and baked cookies?
Cookie Baking
🍪 Ultimate chewy chocolate chip cookies with crispy edges and gooey centers – crowd-pleasing perfection!
🥛 Timeless family favorite ready in 20 minutes; brown butter option for next-level flavor depth.
- Total Time: 50 minutes
- Yield: 60 cookies
Ingredients
– 2 1/4 cups all-purpose flour for structure and texture
– 1 cup unsalted butter, softened for richness and tenderness
– 3/4 cup granulated white sugar for sweetness and crispy edges
– 3/4 cup packed brown sugar for moisture and chewy cookies
– 2 large eggs for binding and richness
– 2 teaspoons vanilla extract for flavor
– 1 teaspoon baking soda for leavening
– 1/2 teaspoon salt for balancing sweetness
– 2 cups chocolate chips for chocolate bursts
Instructions
1-First Step: Begin your cookie baking adventure by properly preparing your workspace and ingredients. Measure all ingredients accurately using kitchen scales when possible, as precise measurements are crucial for consistent results. Soften your butter to room temperature press it gently with your finger; it should yield without being greasy. Crack eggs into a separate bowl to check for freshness and avoid shell fragments. Line two baking sheets with parchment paper for easy cleanup and to prevent sticking. This preparation phase, often called mise en place, makes the actual cookie baking process smooth and enjoyable.
2-Second Step: Position your oven rack in the center position and preheat to 350°F (175°C). If your oven runs hot or cool, adjust accordingly by using an oven thermometer for accuracy. Proper preheating ensures that your cookies begin baking immediately upon entering the oven, which is essential for proper spread and texture. While the oven heats, ensure your mixing bowls are clean and dry. This step might seem simple, but proper temperature management is a cornerstone of successful cookie baking.
3-Third Step: In a medium bowl, whisk together the flour, baking soda, and salt until thoroughly combined. This step ensures even distribution of the leavening agent throughout your cookie dough. Set this dry mixture aside while you prepare the wet ingredients. This separation of wet and dry ingredients prevents overmixing when combined, which could lead to tough cookies instead of soft, tender treats.
4-Fourth Step: In a large mixing bowl, beat the softened butter, granulated sugar, and brown sugar together using a hand mixer or stand mixer on medium speed. Cream these ingredients for approximately 3-4 minutes until the mixture is light and fluffy. This process incorporates air into the cookie dough, contributing to a lighter texture. Scrape down the sides of the bowl as needed to ensure all ingredients are fully incorporated. For vegan options, use softened coconut oil or vegan butter substitutes following the same creaming technique.
5-Fifth Step: Add the eggs one at a time to the butter-sugar mixture, beating well after each addition. Then mix in the vanilla extract until fully combined. This gradual addition of eggs helps emulsify the cookie dough, creating a cohesive mixture. The eggs provide structure and richness that are essential for the classic cookie texture we all love. Make sure to scrape the bowl between additions to prevent pockets of unmixed egg.
6-Sixth Step: With the mixer on low speed, gradually add the flour mixture to the wet ingredients. Mix only until just combined overmixing develops too much gluten, resulting in tough cookies. Stop mixing as soon as you no longer see streaks of dry flour. A few small flour patches are preferable to overmixed dough. This technique creates the tender crumb structure that distinguishes excellent homemade cookies from mediocre ones.
7-Seventh Step: Add the chocolate chips to the cookie dough, folding them in gently with a spatula or wooden spoon. This ensures even distribution without breaking the chips. For variations, consider adding chopped nuts, dried fruits, or different types of chocolate at this stage. The folding technique incorporates these additions without overworking the dough.
8-Eighth Step: Using a cookie scoop or tablespoon, drop rounded portions of cookie dough onto your prepared baking sheets, leaving approximately 2 inches of space between each cookie to allow for spreading. For uniform cookies that bake evenly, aim for consistent sizing approximately 2 tablespoons of dough per cookie. If you prefer thicker cookies, chill the dough balls for 30 minutes before baking to reduce spread.
9-Ninth Step: Place one baking sheet at a time in the preheated oven. Bake for 9-11 minutes, or until edges are lightly golden brown but centers still appear slightly soft and underbaked. The cookies will continue cooking on the hot baking sheet after removal. For softer cookies, lean toward the shorter baking time; for crispier edges, extend slightly. Avoid the temptation to overbake soft centers will firm up during cooling.
10-Final Step: Remove the baking sheet from the oven and let the cookies rest for 5 minutes on the pan. This resting period allows them to set and finish baking without falling apart. Afterward, carefully transfer the cookies to a wire cooling rack using a spatula. Cool completely before storing. For warm cookies, simply let them cool for just 2-3 minutes before serving. This final step completes your cookie baking adventure, resulting in perfectly textured treats ready to enjoy!
Last Step:
Please leave a rating and comment letting us know how you liked this recipe! This helps our business to thrive and continue providing free, high-quality recipes for you.Notes
❄️ Chill dough 30 minutes for thicker cookies that don’t spread too much.
🍫 Use a mix of chocolate chip sizes for varied melty pockets.
🌡️ Cool cookies completely before storing to maintain chewiness.
- Prep Time: 10 minutes
- Chill: 30 minutes
- Cook Time: 10 minutes
- Category: Dessert
- Method: Baking
- Cuisine: American
- Diet: Vegetarian
Nutrition
- Serving Size: 1 cookie
- Calories: 110 calories
- Sugar: 10g
- Sodium: 90mg
- Fat: 6g
- Saturated Fat: 3g
- Unsaturated Fat: 2g
- Trans Fat: 0g
- Carbohydrates: 14g
- Fiber: 1g
- Protein: 1g
- Cholesterol: 15mg


