
Why You’ll Love This Chocolate Glazed Donut
If you’ve been searching for the perfect treat that satisfies your chocolate cravings without requiring hours in the kitchen, this chocolate glazed donut recipe is your answer. Whether you’re an experienced baker or just starting out, these homemade delights offer something special for everyone.
Ease of Preparation
This chocolate glazed donut recipe comes together in about 30 minutes from start to finish, making it perfect for busy mornings or last-minute dessert cravings. Unlike traditional yeast donuts that require hours of rising time, these baked donuts use simple ingredients and a straightforward mixing process. You don’t need any special equipment beyond a donut pan, and even that can be substituted with a muffin tin in a pinch. The quick baking method means you can enjoy warm, fresh donuts without the mess of frying in oil.
Health Benefits
By baking instead of frying, these chocolate glazed donuts significantly reduce the fat content while still delivering that crave-worthy texture and flavor. Baking cuts calories by up to 50% compared to traditional fried versions, making them a smarter choice for those watching their intake. The use of dark chocolate in the glaze provides antioxidants, and you can easily adjust the sugar content to suit your preferences. Plus, making them at home allows you to control exactly what goes into your treats, avoiding artificial preservatives and additives found in store-bought options.
Versatility
This chocolate glazed donut recipe adapts beautifully to various dietary needs and preferences. You can easily substitute gluten-free flour for those with sensitivities, or use plant-based milk and egg replacers for a vegan version. The basic recipe serves as a canvas for endless flavor variations, from adding espresso powder for a mocha twist to incorporating seasonal spices like cinnamon or pumpkin pie spice. The glaze can be customized with different extracts, colored sprinkles, or even a pinch of sea salt for a sophisticated finish.
Distinctive Flavor
What sets this chocolate glazed donut apart is the deep, rich chocolate flavor that comes from using quality cocoa powder both in the donut and the glaze. The texture is moist and tender, similar to a cupcake but with that classic donut shape we all love. The chocolate glaze creates a perfect balance of sweetness that complements without overpowering the chocolate base. Unlike store-bought versions that often taste artificial, these homemade donuts have a pure, intense chocolate taste that satisfies the most serious chocolate cravings.
Jump to:
- Why You’ll Love This Chocolate Glazed Donut
- Ease of Preparation
- Health Benefits
- Versatility
- Distinctive Flavor
- Essential Ingredients for Chocolate Glazed Donut
- For the Donuts
- For the Chocolate Glaze
- For the Topping
- Special Dietary Options
- How to Prepare the Perfect Chocolate Glazed Donut: Step-by-Step Guide
- First Step: Preparation and Preheating
- Second Step: Creating the Wet Ingredients
- Third Step: Mixing the Batter
- Fourth Step: Filling the Donut Pan
- Fifth Step: Baking to Perfection
- Sixth Step: Preparing the Chocolate Glaze
- Seventh Step: Glazing and Decorating
- Final Step: Serving and Enjoying
- Dietary Substitutions to Customize Your Chocolate Glazed Donut
- Protein and Main Component Alternatives
- Vegetable, Sauce, and Seasoning Modifications
- Mastering Chocolate Glazed Donut: Advanced Tips and Variations
- Pro Cooking Techniques
- Flavor Variations
- Presentation Tips
- Make-Ahead Options
- How to Store Chocolate Glazed Donut: Best Practices
- Refrigeration
- Freezing
- Reheating
- Meal Prep Considerations
- FAQs: Frequently Asked Questions About Chocolate Glazed Donut
- What is a chocolate glazed donut?
- How many calories are in a chocolate glazed donut?
- How do you make chocolate glazed donuts at home?
- Can you freeze chocolate glazed donuts?
- What’s the difference between chocolate glazed and chocolate frosted donuts?
- Chocolate Glazed Donut
- Ingredients
- Instructions
- Last Step:
- Notes
- Nutrition
- Did you make this recipe?
Essential Ingredients for Chocolate Glazed Donut
The secret to creating the perfect chocolate glazed donut lies in using quality ingredients and precise measurements. Here’s everything you’ll need to make these delicious treats:
For the Donuts
- 2 cups all-purpose flour – The foundation of your donuts, providing structure and texture.
- 3/4 cup granulated sugar – Adds sweetness and helps create a tender crumb.
- 1 1/2 teaspoons baking powder – The leavening agent that helps donuts rise and become fluffy.
- 1/4 teaspoon salt – Enhances and balances the flavors.
- 1/2 cup unsweetened cocoa powder – Provides the rich chocolate flavor in the donut base.
- 1 egg – Adds structure and richness to the batter.
- 3/4 cup milk – Provides moisture and helps create the right consistency.
- 1/4 cup unsalted butter, melted – Contributes to flavor and a moist texture.
- 1 teaspoon vanilla extract – Enhances the overall flavor profile.
For the Chocolate Glaze
- 4 oz dark chocolate – The base for the glossy chocolate glaze.
- 1/4 cup butter – Adds richness and helps the glaze set properly.
- 1 cup powdered sugar – Sweetens the glaze and creates the perfect consistency.
- 1/4 cup corn syrup – Essential for achieving that shiny, professional-looking glaze.
- 1/4 cup hot water – Helps achieve the right consistency for the glaze.
- 1/2 teaspoon vanilla extract – Adds depth to the chocolate flavor.
For the Topping
- 1/2 cup rainbow sprinkles – The colorful finishing touch that makes these donuts fun and festive.
Special Dietary Options
Vegan: Replace the egg with a flax egg (1 tablespoon ground flaxseed mixed with 3 tablespoons water), use plant-based milk such as almond or oat milk, and substitute coconut oil or vegan butter for the dairy butter.
Gluten-free: Use a high-quality gluten-free flour blend that includes xanthan gum for the best texture and results. Check out our gluten-free baking guide for more tips on achieving perfect results with alternative flours.
Low-calorie: Substitute half of the sugar with a natural sweetener like stevia or erythritol, and use unsweetened almond milk instead of regular milk.
How to Prepare the Perfect Chocolate Glazed Donut: Step-by-Step Guide
“Baking donuts at home is easier than you might think, and the results are far superior to anything you can buy at the store. The smell of freshly baked chocolate donuts filling your kitchen is absolutely worth the minimal effort required.”
First Step: Preparation and Preheating
Begin by preheating your oven to 350°F (175°C). Lightly grease your donut pan with cooking spray or a small amount of melted butter, ensuring all the ridges are coated to prevent sticking. In a medium bowl, whisk together the flour, sugar, baking powder, salt, and cocoa powder until well combined. This dry mixture forms the base of your chocolate glazed donut batter, so make sure there are no lumps of cocoa powder remaining. Proper preparation at this stage ensures smooth execution later in the process.
Second Step: Creating the Wet Ingredients
In a separate bowl, whisk the egg, milk, melted butter, and vanilla extract until smooth. The melted butter should be slightly cooled before adding to the egg to prevent scrambling. This wet ingredient mixture will bind with the dry ingredients to create your donut batter. For those adapting this recipe, note that plant-based milks work equally well here, though the sweetness level may vary slightly depending on the type used. The key is to achieve a smooth, homogeneous mixture that will incorporate evenly with the dry ingredients.
Third Step: Mixing the Batter
Pour the wet ingredients into the dry ingredients and stir until just combined. Be careful not to overmix, as this can result in tough donuts. The batter should be thick but still pourable. If it seems too thick, add a tablespoon of milk at a time until you reach the right consistency. For best results, let the batter rest for about 5 minutes, which allows the flour to fully hydrate and ensures even baking. This resting period is a crucial step that many home bakers skip, but it makes a noticeable difference in the final texture.
Fourth Step: Filling the Donut Pan
Transfer the batter to a piping bag or a large zip-top bag with one corner snipped off. Pipe the batter into the prepared donut pan, filling each cavity about 2/3 to 3/4 full. Using a piping bag gives you more control and helps create evenly shaped donuts. If you don’t have a piping bag, you can carefully spoon the batter into the pan, though this method requires a bit more precision to get clean edges. Remember not to overfill the cavities, as the batter will expand during baking and could overflow, creating messy edges.
Fifth Step: Baking to Perfection
Bake the donuts for 10-12 minutes, or until a toothpick inserted into the thickest part comes out clean. The donuts should spring back when lightly touched. Be careful not to overbake, as this can result in dry donuts. While baking, you can start preparing your chocolate glaze. The aroma of baking chocolate will fill your kitchen, creating anticipation for the delicious treats to come. If you’re unsure if they’re done, it’s better to underbake slightly than to overbake, as residual heat will continue cooking them for a minute or two after they leave the oven.
Sixth Step: Preparing the Chocolate Glaze
While the donuts are cooling slightly, prepare the glaze by melting the dark chocolate and butter together in a microwave-safe bowl or over a double boiler. Stir until smooth, then add the powdered sugar, corn syrup, hot water, and vanilla extract. Whisk until completely smooth and glossy. If the glaze is too thick, add additional hot water one teaspoon at a time until it reaches a pourable consistency. If it’s too thin, add more powdered sugar until thickened. The perfect glaze should be thick enough to coat the donut without dripping off immediately but thin enough to create a smooth surface.
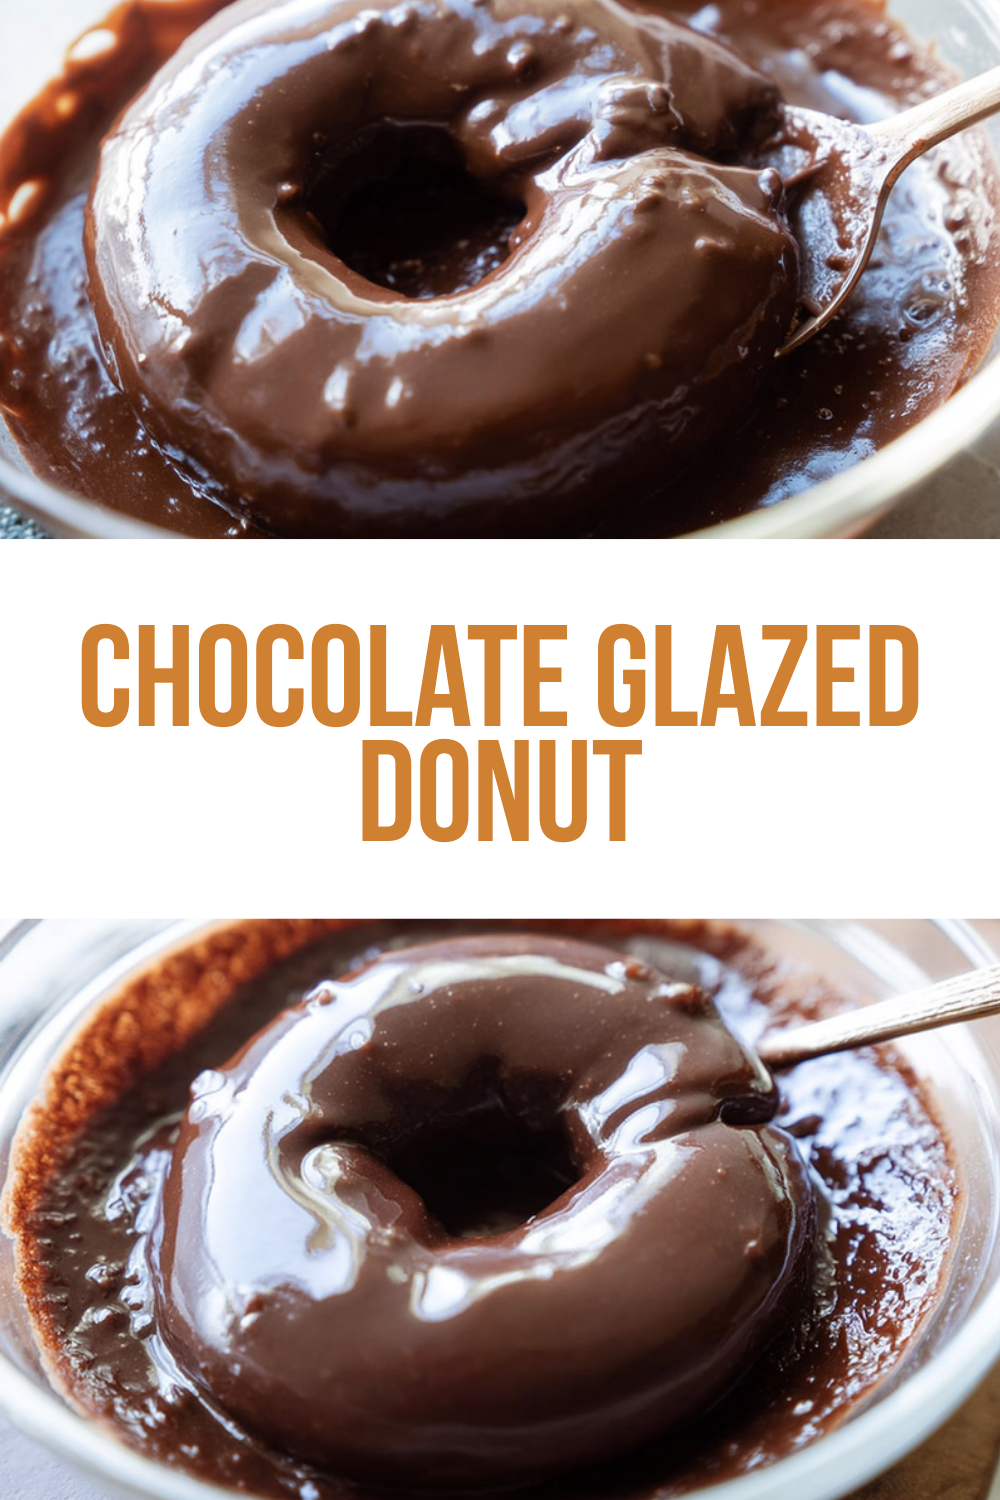
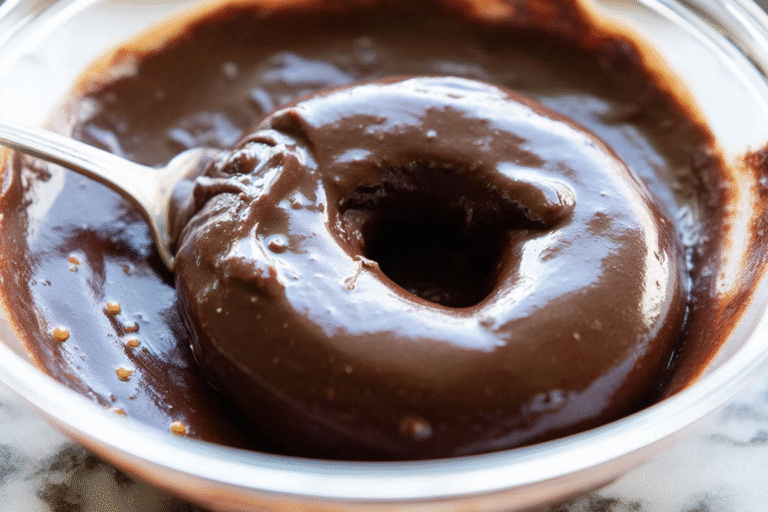
Seventh Step: Glazing and Decorating
Once the donuts have cooled for about 5-10 minutes, dip the top of each donut into the chocolate glaze. Lift and let the excess drip off, then immediately sprinkle with rainbow sprinkles before the glaze sets. Place the glazed donuts on a wire rack with parchment paper underneath to catch any drips. The glaze will set as it cools, creating that perfect shiny finish. For best results, glaze the donuts while they’re still slightly warm, as this helps the glaze adhere properly. Work quickly when adding sprinkles, as once the glaze begins to set, they won’t stick as well.
Final Step: Serving and Enjoying
Allow the glaze to set completely for about 15-20 minutes before serving. These chocolate glazed donuts are best enjoyed fresh on the day they’re made, though they can be stored for later enjoyment. Serve them alongside a cup of coffee or a cold glass of milk for the perfect treat. The contrast between the moist chocolate donut and the crisp chocolate glaze creates an irresistible combination that will have everyone coming back for seconds. For a special presentation, arrange them on a decorative platter or cake stand, perhaps with a dusting of powdered sugar for extra elegance.

Dietary Substitutions to Customize Your Chocolate Glazed Donut
Protein and Main Component Alternatives
For those looking to increase the protein content of their chocolate glazed donut, consider adding a scoop of your favorite protein powder to the dry ingredients. This works particularly well with vanilla or chocolate-flavored protein powders. You can also substitute some of the all-purpose flour with almond flour, which adds protein and a nutty flavor that complements the chocolate. For egg-free options, besides the flax egg mentioned earlier, you can use a commercial egg replacer, mashed banana (about 1/4 cup per egg), or applesauce, though these will slightly alter the flavor and texture.
For those with dairy sensitivities, coconut milk or almond milk work beautifully as substitutes for regular milk. When replacing butter, coconut oil provides a subtle sweetness that enhances the chocolate flavor, while vegan butter offers a more neutral taste. If you’re using coconut oil, make sure your other ingredients are at room temperature, as the oil can solidify if it comes into contact with cold ingredients. Experiment with different plant-based milks to find your favorite combination of flavor and texture.
Vegetable, Sauce, and Seasoning Modifications
While the classic chocolate glazed donut is hard to beat, there are many ways to customize the flavor profile. For a mocha version, dissolve 1-2 teaspoons of instant espresso powder in the milk before adding it to the wet ingredients. This adds a sophisticated coffee undertone that pairs perfectly with chocolate. For those who enjoy a bit of spice, add 1/4 teaspoon of cayenne pepper or cinnamon to the dry mixture for a Mexican chocolate twist.
For fruit variations, consider adding 1/4 cup of pureed raspberries or cherries to the batter. This adds moisture and creates a chocolate-fruit combination that’s both elegant and delicious. You can also fold in chocolate chips, chopped nuts, or dried fruit to the batter just before baking for added texture and flavor. The glaze itself offers numerous customization opportunities. Try adding a teaspoon of mint extract for a chocolate-mint variation, or replace the vanilla with almond extract for a nuttier flavor.
| Original Ingredient | Vegan Substitute | Gluten-Free Substitute | Low-Calorie Substitute |
|---|---|---|---|
| Egg | Flax egg (1 tbsp ground flaxseed + 3 tbsp water) | Same as original | Same as original or egg whites |
| Milk | Almond milk, oat milk, or soy milk | Same as original | Unsweetened almond milk |
| Butter | Coconut oil or vegan butter | Same as original | Light butter or applesauce |
| All-purpose flour | Same as original | Gluten-free flour blend | Almond flour or oat flour |
Mastering Chocolate Glazed Donut: Advanced Tips and Variations
Pro Cooking Techniques
To achieve the perfect texture in your chocolate glazed donut, start by measuring your flour correctly. Too much flour results in dry donuts, so either weigh your ingredients or use the spoon-and-level method rather than scooping directly from the bag. Room temperature ingredients mix more evenly, so try to have your egg and milk at room temperature before starting. When greasing your donut pan, pay special attention to the center post, as donuts tend to stick there most often.
For an exceptionally smooth glaze, sift your powdered sugar before adding it to the melted chocolate. This prevents lumps and ensures a professional-looking finish. The temperature of your glaze also affects its consistency and appearance. If the glaze is too warm, it will be too thin and run right off the donut. If it’s too cool, it won’t coat evenly. The ideal temperature is slightly warm to the touch but not hot. Learn more about working with chocolate in our baking guide.
Flavor Variations
Once you’ve mastered the basic chocolate glazed donut, try these exciting variations. For a chocolate-peanut butter version, replace some of the butter in the glaze with creamy peanut butter and top with chopped peanuts. For a chocolate-orange twist, add the zest of one orange to the batter and a teaspoon of orange extract to the glaze. Coconut lovers can add 1/2 cup of shredded coconut to the batter and top with toasted coconut after glazing.
For a more sophisticated flavor profile, try adding 1/2 teaspoon of espresso powder to both the batter and glaze. This enhances the chocolate flavor without making the donuts taste like coffee. You can also experiment with different types of chocolate in the glaze milk chocolate for a sweeter result, white chocolate for a beautiful contrast, or semi-sweet for a classic taste. Each type of chocolate will create a slightly different flavor profile and consistency, allowing you to customize the final result to your preferences.
Presentation Tips
For bakery-worthy presentation, use a piping bag with a large round tip to fill your donut pan. This creates smooth, professional-looking donuts with clean edges. When glazing, dip the donuts at a slight angle rather than straight down, then twist slightly as you lift to create an attractive swirl pattern. Arrange sprinkles in a deliberate pattern or create a gradient effect with different colors.
For special occasions, consider drizzling a contrasting glaze over the chocolate one. A white chocolate zigzag or a colorful cream cheese frosting adds visual interest and additional flavor. You can also fill cooled donuts with jam, custard, or Nutella using a piping bag with a small tip inserted into the side of the donut. This surprise filling adds an extra element of luxury that elevates your homemade donuts to gourmet status.
Make-Ahead Options
You can prepare the donut batter the night before and store it in the refrigerator. In the morning, simply give it a quick stir and pipe into your donut pan. The batter may need to sit at room temperature for about 15 minutes before baking if it’s too thick. Baked donuts can also be frozen for up to 3 months. Freeze them unglazed on a baking sheet until solid, then transfer to an airtight container or freezer bag.
For a quick breakfast treat, make a double batch on the weekend and freeze half. To refresh frozen donuts, warm them in the microwave for about 10-15 seconds, then prepare fresh glaze. This gives you the convenience of a store-bought treat with the homemade quality you crave. Preparing the dry ingredients in advance and storing them in a sealed container can also save time on busy mornings, allowing you to have fresh donuts in under 30 minutes.
How to Store Chocolate Glazed Donut: Best Practices
Refrigeration
If you plan to enjoy your chocolate glazed donuts within 2-3 days, storing them at room temperature in an airtight container is perfectly fine. In fact, refrigeration can sometimes cause the glaze to become cloudy and the donut to dry out more quickly. Keep the container away from direct sunlight and heat sources to maintain freshness. If your kitchen is particularly warm or humid, you might prefer to refrigerate them, but bring them to room temperature before serving for the best texture and flavor.
Freezing
For longer storage, freezing is an excellent option. The best approach is to freeze the donuts unglazed. Wrap each donut individually in plastic wrap, then place them in a freezer-safe bag or container. They’ll maintain their quality for up to 3 months this way. When you’re ready to enjoy them, thaw the donuts at room temperature for about an hour, then prepare fresh glaze. This method ensures the glaze stays perfectly shiny and the donuts remain moist.
If you’ve already glazed the donuts, you can still freeze them, though the texture of the glaze may change slightly. Place glazed donuts on a baking sheet in the freezer until firm, then transfer to a freezer-safe container with parchment paper between layers to prevent sticking. Thaw at room temperature, avoiding the microwave as it can make the glaze runny. For the best results, consume frozen glazed donuts within 1-2 months.
Reheating
To restore that fresh-baked texture, reheat room temperature donuts in the microwave for about 8-10 seconds. This warms them through and softens the crumb without affecting the glaze. For frozen unglazed donuts, you can bake them at 350°F (175°C) for about 5-7 minutes to refresh them. If you’ve glazed your donuts and stored them in the refrigerator, bringing them to room temperature for about 30 minutes before serving will significantly improve their texture.
Meal Prep Considerations
If you’re meal prepping for the week, consider baking a batch of unglazed donuts on Sunday and storing them in an airtight container. Prepare the glaze fresh when you’re ready to serve, which takes only about 5 minutes. This approach ensures the donuts stay moist and the glaze maintains its perfect consistency. For weekday breakfasts, you can even prepare the dry and wet ingredients separately the night before and quickly combine them in the morning for freshly baked donuts with minimal effort. This strategy allows you to enjoy homemade treats even on the busiest mornings.
FAQs: Frequently Asked Questions About Chocolate Glazed Donut
What is a chocolate glazed donut?
How many calories are in a chocolate glazed donut?
How do you make chocolate glazed donuts at home?
Can you freeze chocolate glazed donuts?
What’s the difference between chocolate glazed and chocolate frosted donuts?
Chocolate Glazed Donut
🍩 Fluffy baked chocolate glazed doughnuts topped with vibrant sprinkles – lighter, oil-free alternative to fried!
✨ Quick 20-minute bake yields bakery-fresh treats perfect for brunches, snacks, or kid-approved delights.
- Total Time: 33 minutes
- Yield: 12 doughnuts
Ingredients
– 2 cups all-purpose flour
– 3/4 cup granulated sugar
– 1 1/2 teaspoons baking powder
– 1/4 teaspoon salt
– 1/2 cup unsweetened cocoa powder
– 1 egg
– 3/4 cup milk
– 1/4 cup unsalted butter, melted
– 1 teaspoon vanilla extract
– 4 oz dark chocolate
– 1/4 cup butter
– 1 cup powdered sugar
– 1/4 cup corn syrup
– 1/4 cup hot water
– 1/2 teaspoon vanilla extract
– 1/2 cup rainbow sprinkles
Instructions
1-First Step: Preparation and Preheating Begin by preheating your oven to 350°F (175°C). Lightly grease your donut pan with cooking spray or a small amount of melted butter, ensuring all the ridges are coated to prevent sticking. In a medium bowl, whisk together the flour, sugar, baking powder, salt, and cocoa powder until well combined. This dry mixture forms the base of your chocolate glazed donut batter, so make sure there are no lumps of cocoa powder remaining. Proper preparation at this stage ensures smooth execution later in the process.
2-Second Step: Creating the Wet Ingredients In a separate bowl, whisk the egg, milk, melted butter, and vanilla extract until smooth. The melted butter should be slightly cooled before adding to the egg to prevent scrambling. This wet ingredient mixture will bind with the dry ingredients to create your donut batter. For those adapting this recipe, note that plant-based milks work equally well here, though the sweetness level may vary slightly depending on the type used. The key is to achieve a smooth, homogeneous mixture that will incorporate evenly with the dry ingredients.
3-Third Step: Mixing the Batter Pour the wet ingredients into the dry ingredients and stir until just combined. Be careful not to overmix, as this can result in tough donuts. The batter should be thick but still pourable. If it seems too thick, add a tablespoon of milk at a time until you reach the right consistency. For best results, let the batter rest for about 5 minutes, which allows the flour to fully hydrate and ensures even baking. This resting period is a crucial step that many home bakers skip, but it makes a noticeable difference in the final texture.
4-Fourth Step: Filling the Donut Pan Transfer the batter to a piping bag or a large zip-top bag with one corner snipped off. Pipe the batter into the prepared donut pan, filling each cavity about 2/3 to 3/4 full. Using a piping bag gives you more control and helps create evenly shaped donuts. If you don’t have a piping bag, you can carefully spoon the batter into the pan, though this method requires a bit more precision to get clean edges. Remember not to overfill the cavities, as the batter will expand during baking and could overflow, creating messy edges.
5-Fifth Step: Baking to Perfection Bake the donuts for 10-12 minutes, or until a toothpick inserted into the thickest part comes out clean. The donuts should spring back when lightly touched. Be careful not to overbake, as this can result in dry donuts. While baking, you can start preparing your chocolate glaze. The aroma of baking chocolate will fill your kitchen, creating anticipation for the delicious treats to come. If you’re unsure if they’re done, it’s better to underbake slightly than to overbake, as residual heat will continue cooking them for a minute or two after they leave the oven.
6-Sixth Step: Preparing the Chocolate Glaze While the donuts are cooling slightly, prepare the glaze by melting the dark chocolate and butter together in a microwave-safe bowl or over a double boiler. Stir until smooth, then add the powdered sugar, corn syrup, hot water, and vanilla extract. Whisk until completely smooth and glossy. If the glaze is too thick, add additional hot water one teaspoon at a time until it reaches a pourable consistency. If it’s too thin, add more powdered sugar until thickened. The perfect glaze should be thick enough to coat the donut without dripping off immediately but thin enough to create a smooth surface.
7-Seventh Step: Glazing and Decorating Once the donuts have cooled for about 5-10 minutes, dip the top of each donut into the chocolate glaze. Lift and let the excess drip off, then immediately sprinkle with rainbow sprinkles before the glaze sets. Place the glazed donuts on a wire rack with parchment paper underneath to catch any drips. The glaze will set as it cools, creating that perfect shiny finish. For best results, glaze the donuts while they’re still slightly warm, as this helps the glaze adhere properly. Work quickly when adding sprinkles, as once the glaze begins to set, they won’t stick as well.
8-Final Step: Serving and Enjoying Allow the glaze to set completely for about 15-20 minutes before serving. These chocolate glazed donuts are best enjoyed fresh on the day they’re made, though they can be stored for later enjoyment. Serve them alongside a cup of coffee or a cold glass of milk for the perfect treat. The contrast between the moist chocolate donut and the crisp chocolate glaze creates an irresistible combination that will have everyone coming back for seconds. For a special presentation, arrange them on a decorative platter or cake stand, perhaps with a dusting of powdered sugar for extra elegance.
Last Step:
Please leave a rating and comment letting us know how you liked this recipe! This helps our business to thrive and continue providing free, high-quality recipes for you.Notes
🍩 Fill pan generously but not full to avoid overflow during baking.
❄️ Cool doughnuts fully before glazing for best adhesion.
💦 Thin glaze with extra milk drop by drop for perfect dipping consistency.
- Prep Time: 15 minutes
- Cool: 10 minutes
- Cook Time: 8 minutes
- Category: Dessert
- Method: Baking
- Cuisine: American
- Diet: Vegetarian
Nutrition
- Serving Size: 1 doughnut
- Calories: 220 calories
- Sugar: 24g
- Sodium: 200mg
- Fat: 6g
- Saturated Fat: 3g
- Unsaturated Fat: 2g
- Trans Fat: 0g
- Carbohydrates: 38g
- Fiber: 1g
- Protein: 4g
- Cholesterol: 45mg


