
Ingredients
- 12 ounces pretzel rods or twists
- 12 ounces milk or dark chocolate chips
- 1 teaspoon coconut oil
- Sprinkles or crushed nuts (to taste)
Jump to:
- Ingredients
- Why You’ll Love This Chocolate Covered Pretzels
- The Irresistible Appeal of Salty-Sweet Combinations
- How to Prepare the Perfect Chocolate Covered Pretzels: Step-by-Step Guide
- Essential Preparation and Setup
- Melting Chocolate to Perfection
- Dipping Techniques for Different Pretzel Shapes
- Applying Toppings for Maximum Appeal
- The Setting Process
- Final Touches and Presentation
- Dietary Substitutions to Customize Your Chocolate Covered Pretzels
- Protein and Main Component Alternatives
- Vegetable, Sauce, and Seasoning Modifications
- Mastering Chocolate Covered Pretzels: Advanced Tips and Variations
- Pro Cooking Techniques
- Flavor Variations
- Presentation Tips
- Make-Ahead Options
- How to Store Chocolate Covered Pretzels: Best Practices
- Refrigeration Guidelines
- Freezing for Long-Term Storage
- Reheating and Refreshing
- Meal Prep Considerations
- FAQs: Frequently Asked Questions About Chocolate Covered Pretzels
- How do you make chocolate covered pretzels at home?
- What kind of chocolate works best for dipping pretzels?
- How long do chocolate covered pretzels last?
- Do chocolate covered pretzels need refrigeration?
- Can you freeze chocolate covered pretzels?
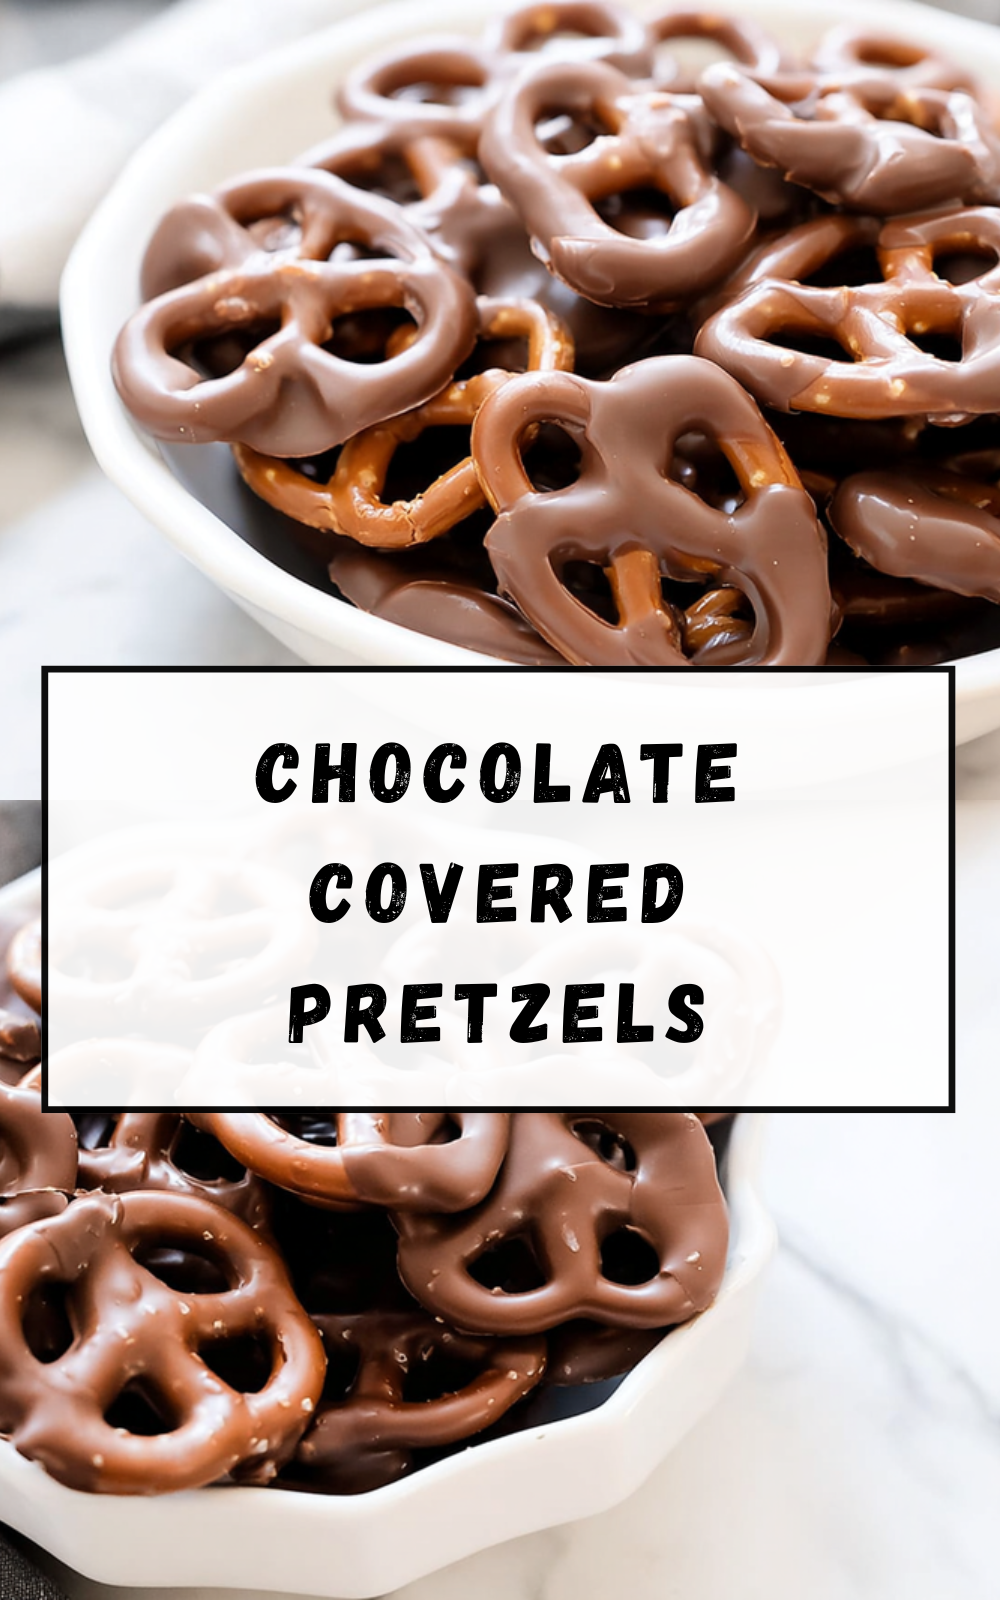
- Chocolate Covered Pretzels
- Ingredients
- Instructions
- Last Step:
- Notes
- Nutrition
- Did you make this recipe?
Why You’ll Love This Chocolate Covered Pretzels
Creating homemade chocolate covered pretzels is one of the most rewarding kitchen projects you can undertake. The perfect balance of salty and sweet makes these treats universally appealing, while their simplicity means anyone can master them quickly. Easy dessert recipes like this one have become staples in my kitchen because they deliver impressive results with minimal effort.
The Irresistible Appeal of Salty-Sweet Combinations
There’s something magical about the contrast between the salty crunch of a pretzel and the smooth sweetness of chocolate. This dynamic duo triggers pleasure receptors in our brains in a way that few other flavor combinations can match. Whether you’re serving these at a party, giving them as gifts, or simply enjoying them as an afternoon treat, chocolate covered pretzels never fail to satisfy.
Here are the main reasons why this recipe deserves a permanent spot in your repertoire:
- Ease of preparation: This no-bake recipe comes together in under 30 minutes with minimal equipment required. You don’t need any special baking skills or expensive tools just a microwave-safe bowl, parchment paper, and your favorite toppings. Even children can participate in the dipping and decorating process, making it a perfect family activity.
- Health benefits: When made with dark chocolate, these treats offer antioxidants and potential heart-health benefits. The portion control aspect helps satisfy cravings without overindulging. Dark chocolate contains flavonoids that may improve blood flow and lower blood pressure. The pretzels provide a satisfying crunch that helps you feel content with just a few pieces.
- Versatility: This recipe adapts effortlessly to different holidays, celebrations, and dietary needs. Change up the sprinkles for seasonal themes, use white chocolate for a different look, or incorporate nuts and dried fruits for added nutrition. The basic technique remains the same regardless of the variations you choose.
- Distinctive flavor: The combination of salty pretzels and sweet chocolate creates a complex taste profile that appeals to both children and adults. You can customize the sweetness level by choosing different chocolate varieties or adjusting how much of the pretzel gets coated.
How to Prepare the Perfect Chocolate Covered Pretzels: Step-by-Step Guide
Creating beautiful, professional-looking chocolate covered pretzels is easier than you might think. With attention to a few key details, you’ll achieve consistent results every time. This method works equally well for pretzel rods, twists, or even small pretzel nuggets.
Essential Preparation and Setup
Before you begin melting your chocolate, proper setup is crucial. This preparation phase ensures a smooth dipping process without interruptions. Clear off a large workspace and protect your counters with wax paper or silicone mats. Have all your ingredients and tools measured and ready.
Organize your workspace in assembly-line fashion: melted chocolate on one side, pretzels in the middle, and toppings ready for application. This layout prevents the chocolate from hardening before you’ve finished dipping all your pretzels.
Melting Chocolate to Perfection
The quality of your melted chocolate makes all the difference in the final product. Place your chocolate chips in a microwave-safe bowl and heat in 30-second intervals, stirring thoroughly between each session. This gentle heating process prevents scorching and ensures a smooth consistency.
Alternative method: Use a double boiler by placing heat-safe bowl over a pot of simmering water. Stir continuously until the chocolate is completely melted. This method gives you more control over the temperature and prevents overheating.
Pro tip: Adding a teaspoon of coconut oil or shortening to your melted chocolate creates a smoother consistency and helps it harden with a beautiful shine. This small addition also makes the chocolate easier to work with when dipping.
Dipping Techniques for Different Pretzel Shapes
For pretzel rods, hold the rod by one end and dip about three-quarters into the melted chocolate. Gently twist the rod as you remove it from the chocolate to catch any drips. Tap the rod lightly against the side of the bowl to remove excess coating.
For pretzel twists, use a fork to carefully lift the pretzel from your bowl and lower it into the chocolate. Let it sit for just a second to coat thoroughly, then lift and shake gently to remove excess. Work carefully to prevent the pretzel from breaking apart.
Applying Toppings for Maximum Appeal
The timing for adding toppings is crucial sprinkle or roll your coated pretzels immediately while the chocolate is still wet. If the chocolate begins to harden, the toppings won’t adhere properly.
Create a varied selection by using different toppings on different pretzels. Consider crushed nuts, colorful sprinkles, mini chocolate chips, crushed candies, sea salt flakes, or even edible glitter for special occasions. Place each completed pretzel on your prepared baking sheet, leaving space between them to prevent sticking.
The Setting Process
Allow your chocolate covered pretzels to set completely at room temperature for 15-20 minutes. If you’re in a hurry or the room is particularly warm, refrigerate for 10 minutes to speed up the process. The chocolate should be firm to the touch before handling further.
Final Touches and Presentation
Once set, your chocolate covered pretzels are ready to serve or store. For a professional finishing touch, consider drizzling with a contrasting chocolate color. You can also dust lightly with edible powder or luster spray for an elegant appearance.
Packaging transforms these simple treats into impressive gifts. Place three to five pretzels in clear bags tied with ribbon, or arrange them in decorative boxes lined with parchment paper. For parties, display them in glass jars or on pretty platters for an inviting presentation.
| Chocolate Type | Flavor Profile | Best For | Melting Tips |
|---|---|---|---|
| Milk Chocolate | Creamy, sweet, mild | Classic taste, kids’ parties | Melts easily; don’t overheat |
| Dark Chocolate | Rich, slightly bitter | Adults, elegant occasions | Handle gently; may seize |
| White Chocolate | Sweet, vanilla-like | Colorful themes, contrasts | Can scorch easily; watch closely |
| Candy Melts | Various artificial flavors | Beginners, bright colors | Very forgiving; smooth melting |

Dietary Substitutions to Customize Your Chocolate Covered Pretzels
Protein and Main Component Alternatives
One of the beauties of chocolate covered pretzels is their adaptability to various dietary requirements. For those following a dairy-free lifestyle, vegan chocolate chips made from rice milk, almond milk, or coconut milk work beautifully as substitutes. These options provide the same creamy texture without any animal products.
For gluten-sensitive individuals, certified gluten-free pretzels are essential. While traditional pretzels contain wheat, many brands now offer gluten-free alternatives made from rice flour, potato flour, or corn flour. Always check labels carefully to ensure the pretzels meet your specific dietary needs.
Keto enthusiasts might consider alternative crunchy bases instead of pretzels. Coating pork rinds, pecan halves, or macadamia nuts with dark chocolate creates a low-carb version that satisfies the craving for something salty and sweet. These alternatives provide healthy fats alongside the moderate amount of carbohydrates from the chocolate.
Vegetable, Sauce, and Seasoning Modifications
The customization options for chocolate covered pretzels are virtually limitless. Instead of traditional sweet toppings, consider incorporating savory elements for a more sophisticated flavor profile. A light dusting of smoked paprika, garlic powder, or even dried herbs like rosemary can create unexpected and delicious flavor combinations.
For those who enjoy some heat, sprinkle the chocolate-coated pretzels with cayenne pepper, Tajín seasoning, or crushed red pepper flakes. The subtle warmth complements the sweetness of the chocolate and highlights the saltiness of the pretzel.
Fruit-based additions bring natural sweetness and vibrant colors to your treats. Try rolling the wet chocolate in crushed freeze-dried strawberries, blueberries, or raspberries for a tart contrast. Chopped dried fruits like cranberries, cherries, or apricots add both flavor and texture.
For an elegant touch, consider finishing your pretzels with sea salt flakes, especially when using dark chocolate. The salt crystals provide a pleasing crunch and enhance the complex flavors. Other sophisticated options include crushed espresso beans, matcha powder, or edible gold leaf for special occasions.
Mastering Chocolate Covered Pretzels: Advanced Tips and Variations
Pro Cooking Techniques
Tempering chocolate takes your pretzels from homemade to professional quality. This precise process of heating and cooling chocolate encourages the formation of stable crystals, resulting in a glossy finish and satisfying snap. While tempering requires some practice, the dramatic improvement in appearance and texture makes it worth the effort for special occasions.
Maintaining the proper working temperature while dipping is crucial for consistent results. If your chocolate becomes too cool, it will thicken and become difficult to work with. If it becomes too hot, it may seize or lose its temper. A kitchen thermometer can help you monitor the temperature, aiming for around 88-90°F for dark chocolate and slightly lower for milk and white varieties.
Keep your dipping tools and hands dry at all times. Even a single drop of water can cause chocolate to seize, turning it into a grainy, clumpy mess. If your chocolate does seize, you can sometimes save it by whisking in a teaspoon of oil, though the texture may not return to its original smoothness.
Flavor Variations
Infusing your chocolate with additional flavors creates unique gourmet treats. Stir in a teaspoon of extract such as peppermint, orange, raspberry, or almond oil after melting the chocolate. These concentrated flavors distribute evenly throughout the chocolate, imparting a subtle but noticeable taste to your finished pretzels.
For adult gatherings, consider adding a splash of liqueur to the melted chocolate. Coffee liqueur, orange liqueur, or even a flavored schnapps can add depth and sophistication. Use only a small amount to avoid thinning the chocolate too much, and note that the alcohol will not completely cook off.
Create marbled effects by swirling two colors of chocolate together before dipping. Alternatively, dip your pretzels in one color of chocolate, let it set completely, then drizzle with a contrasting color. This technique is particularly effective during holidays dark chocolate drizzled over white chocolate creates an elegant black and white effect, while red and white chocolate designs are perfect for Valentine’s Day.
Presentation Tips
Elevate your chocolate covered pretzels with thoughtful presentation ideas. For parties, arrange them in clear glass jars sorted by topping or chocolate color. This creates visual interest and allows guests to easily identify their preferred variety.
Transform your pretzels into an impressive centerpiece by creating a pretzel bouquet. Use floral foam in a decorative container and insert the pretzel rods at varying heights to create a full, flower-like arrangement. This works beautifully for birthdays, holidays, or as a unique gift.
For gift-giving, consider creating themed collections. Holiday pretzels with seasonal colors, graduation pretzels with school colors, or baby shower pretzels in pink or blue all add a personal touch. Package them in clear boxes with customized tags for a professional look.
Make-Ahead Options
Chocolate covered pretzels are ideal for advance preparation. When stored properly, they maintain their quality for up to two weeks at room temperature, making them perfect for preparing ahead of parties or events.
For holiday planning, consider making large batches in the weeks leading up to celebrations. Freeze prepared pretzels in single layers separated by parchment paper, then thaw and package closer to your event. This approach spreads out the work and ensures you have plenty of treats on hand.
Setting up a pretzel dipping station creates an interactive activity for parties and family gatherings. Prepare the melted chocolate and provide various toppings, allowing guests to customize their own creations. This engaging element becomes a memorable part of the celebration.
How to Store Chocolate Covered Pretzels: Best Practices
Refrigeration Guidelines
While chocolate covered pretzels don’t require refrigeration, chilling them can extend their shelf life significantly. Store the pretzels in an airtight container in the refrigerator for up to one month. Layer the pretzels between sheets of parchment paper to prevent them from sticking together.
To minimize condensation, allow refrigerated pretzels to come to room temperature before opening the container. This simple step prevents moisture from forming on the chocolate surface, which can cause sugar bloom or make the pretzels soggy.
Freezing for Long-Term Storage
Freezing provides an excellent option for long-term storage, allowing you to keep chocolate covered pretzels for up to three months. First, arrange the pretzels on a baking sheet and place them in the freezer until firm. This flash-freezing step prevents them from sticking together during storage.
Transfer the frozen pretzels to freezer-safe bags or containers, separating layers with parchment paper. Label each container with the date and type of pretzels for easy identification. When you’re ready to enjoy them, thaw the pretzels at room temperature for 1-2 hours or in the refrigerator overnight.
Reheating and Refreshing
Chocolate covered pretzels typically don’t require reheating, but if they’ve lost some crispness during storage, a brief warming can help restore texture. Place the pretzels in a 200°F oven for just 2-3 minutes, watching carefully to prevent melting. The gentle warmth helps crisp the pretzel without compromising the chocolate coating.
Avoid microwaving chocolate covered pretzels, as this causes uneven heating and can create hot spots that melt the chocolate while leaving other areas cold. The uneven heating may also cause the chocolate to seize or develop a grainy texture.
Meal Prep Considerations
Batch preparing chocolate covered pretzels is an efficient approach for meal prep. Set aside time to make a large quantity, then portion into smaller containers for daily treats, school snacks, or upcoming events. This method saves time and ensures you always have homemade snacks on hand.
Consider creating a variety of flavors in one session to provide options throughout the weeks ahead. Keep a simple log recording the types you’ve made, storage dates, and any notes about particular variations that were especially successful.
FAQs: Frequently Asked Questions About Chocolate Covered Pretzels
How do you make chocolate covered pretzels at home?
What kind of chocolate works best for dipping pretzels?
How long do chocolate covered pretzels last?
Do chocolate covered pretzels need refrigeration?
Can you freeze chocolate covered pretzels?

Chocolate Covered Pretzels
🍫🥨 Crunchy pretzels enrobed in smooth melted chocolate – sweet-salty perfection ready in minutes!
🎁 Easy homemade treat ideal for gifts, parties, or snacking; customize with toppings endlessly.
- Total Time: 25 minutes
- Yield: 4 dozen pretzels
Ingredients
Instructions
1-Essential Preparation and Setup: Before you begin melting your chocolate, proper setup is crucial. This preparation phase ensures a smooth dipping process without interruptions. Clear off a large workspace and protect your counters with wax paper or silicone mats. Have all your ingredients and tools measured and ready. Organize your workspace in assembly-line fashion: melted chocolate on one side, pretzels in the middle, and toppings ready for application. This layout prevents the chocolate from hardening before you’ve finished dipping all your pretzels.
2-Melting Chocolate to Perfection: The quality of your melted chocolate makes all the difference in the final product. Place your chocolate chips in a microwave-safe bowl and heat in 30-second intervals, stirring thoroughly between each session. This gentle heating process prevents scorching and ensures a smooth consistency. Alternative method: Use a double boiler by placing heat-safe bowl over a pot of simmering water. Stir continuously until the chocolate is completely melted. This method gives you more control over the temperature and prevents overheating.
3-Dipping Techniques for Different Pretzel Shapes: For pretzel rods, hold the rod by one end and dip about three-quarters into the melted chocolate. Gently twist the rod as you remove it from the chocolate to catch any drips. Tap the rod lightly against the side of the bowl to remove excess coating. For pretzel twists, use a fork to carefully lift the pretzel from your bowl and lower it into the chocolate. Let it sit for just a second to coat thoroughly, then lift and shake gently to remove excess. Work carefully to prevent the pretzel from breaking apart.
4-Applying Toppings for Maximum Appeal: The timing for adding toppings is crucial sprinkle or roll your coated pretzels immediately while the chocolate is still wet. If the chocolate begins to harden, the toppings won’t adhere properly. Create a varied selection by using different toppings on different pretzels. Consider crushed nuts, colorful sprinkles, mini chocolate chips, crushed candies, sea salt flakes, or even edible glitter for special occasions. Place each completed pretzel on your prepared baking sheet, leaving space between them to prevent sticking.
5-The Setting Process: Allow your chocolate covered pretzels to set completely at room temperature for 15-20 minutes. If you’re in a hurry or the room is particularly warm, refrigerate for 10 minutes to speed up the process. The chocolate should be firm to the touch before handling further.
6-Final Touches and Presentation: Once set, your chocolate covered pretzels are ready to serve or store. For a professional finishing touch, consider drizzling with a contrasting chocolate color. You can also dust lightly with edible powder or luster spray for an elegant appearance. Packaging transforms these simple treats into impressive gifts. Place three to five pretzels in clear bags tied with ribbon, or arrange them in decorative boxes lined with parchment paper. For parties, display them in glass jars or on pretty platters for an inviting presentation.
Last Step:
Please leave a rating and comment letting us know how you liked this recipe! This helps our business to thrive and continue providing free, high-quality recipes for you.Notes
🍫 Stir chocolate frequently to avoid scorching during melting.
❄️ Use room-temp pretzels to prevent condensation on chocolate.
✨ Double-dip in white then dark chocolate for festive bark effect.
- Prep Time: 10 minutes
- Chill: 15 minutes
- Category: Dessert
- Method: No-Bake
- Cuisine: American
- Diet: Vegetarian
Nutrition
- Serving Size: 1 pretzel
- Calories: 60 calories
- Sugar: 4g
- Sodium: 120mg
- Fat: 3g
- Saturated Fat: 2g
- Unsaturated Fat: 1g
- Trans Fat: 0g
- Carbohydrates: 8g
- Fiber: 0g
- Protein: 1g
- Cholesterol: 0mg


