
Why You’ll Love This Caramel
If you’ve ever tasted homemade caramel, you know there’s nothing quite like it. This simple salted caramel recipe brings rich, buttery flavor to your favorite desserts and treats. Unlike store-bought versions, this homemade caramel sauce allows you to control the ingredients and customize the taste to your preferences.
Ease of Preparation
Despite its reputation, making caramel at home is surprisingly simple. This recipe requires just a few basic ingredients and less than 20 minutes of active cooking time. Even beginners can master the technique with our straightforward instructions. No special equipment needed beyond a good saucepan and some patience as the sugar transforms into golden goodness.
Health Benefits
While caramel isn’t typically considered a health food, this homemade version avoids the preservatives and artificial ingredients found in commercial products. By using quality butter and cream, you’re incorporating some beneficial nutrients like calcium and vitamin D. The moderate portion sizes typical for caramel also make it a reasonable treat when enjoyed as part of a balanced diet.
Versatility
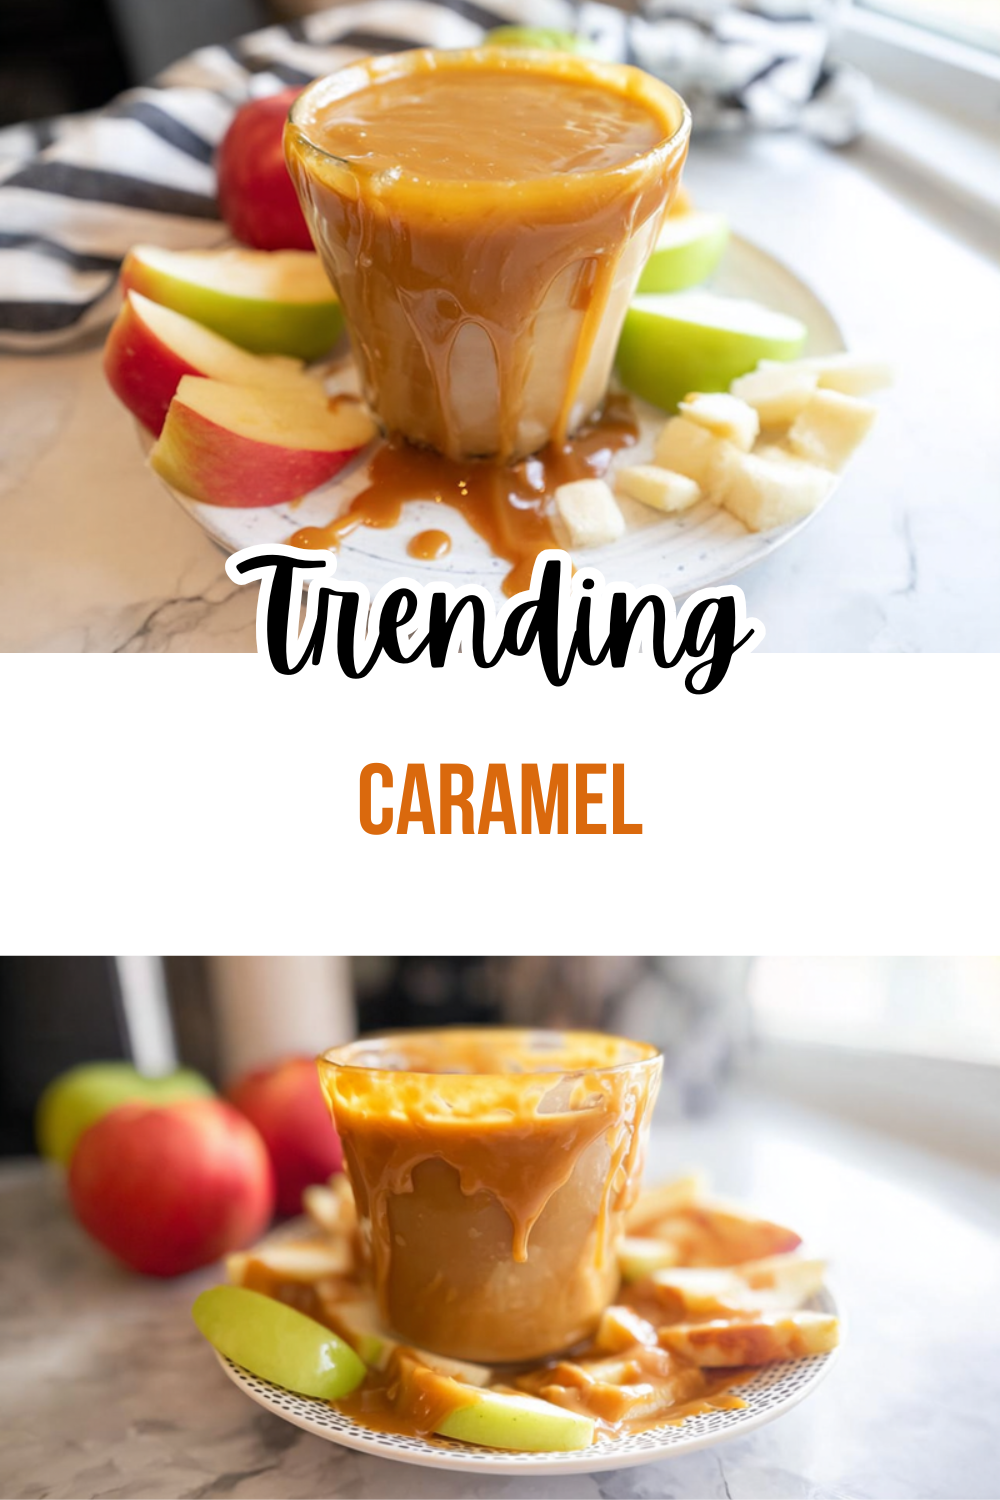
This salted caramel recipe works wonderfully in countless applications. Drizzle it over ice cream, apples, or brownies. Use it as a filling for cakes and cookies. Stir it into your morning coffee or hot chocolate. It even works as a dipping sauce for fruits or pretzels. The possibilities are nearly endless, making this recipe a valuable addition to your culinary repertoire.
Distinctive Flavor
The combination of bitter-sweet caramel with just the right amount of sea salt creates a complex flavor profile that keeps you coming back for more. This recipe achieves that perfect balance between sweet and salty, with a buttery richness that enhances both the texture and taste. Once you try this homemade version, store-bought caramel simply won’t compare.
Jump to:
- Why You’ll Love This Caramel
- Ease of Preparation
- Health Benefits
- Versatility
- Distinctive Flavor
- Essential Ingredients for Caramel
- Main Ingredients
- Special Dietary Options
- How to Prepare the Perfect Caramel: Step-by-Step Guide
- First Step: Preparation and Mise en Place
- Second Step: Melting the Sugar
- Third Step: Achieving the Perfect Color
- Fourth Step: Adding Butter and Cream
- Final Step: Finishing Touches and Serving
- Dietary Substitutions to Customize Your Caramel
- Protein and Main Component Alternatives
- Vegetable, Sauce, and Seasoning Modifications
- Mastering Caramel: Advanced Tips and Variations
- Pro Cooking Techniques
- Flavor Variations
- Presentation Tips
- Make-Ahead Options
- How to Store Caramel: Best Practices
- Refrigeration
- Freezing
- Reheating
- Meal Prep Considerations
- FAQs: Frequently Asked Questions About Caramel
- What is caramel and how is it made?
- How do you make caramel sauce at home?
- What’s the difference between caramel, butterscotch, and toffee?
- How can you fix grainy or burnt caramel?
- How long does homemade caramel last and how should you store it?
- Caramel
- Ingredients
- Instructions
- Last Step:
- Notes
- Nutrition
- Did you make this recipe?
Essential Ingredients for Caramel
Main Ingredients
- 1 cup granulated sugar – The foundation of caramel, which melts and browns to create the signature flavor and color
- 1 cup heavy cream – Adds richness and creaminess to balance the sweetness of the caramelized sugar
- 4 tablespoons unsalted butter – Provides a luxurious mouthfeel and enhances the overall flavor profile
- 1 teaspoon vanilla extract – Adds depth and aromatic qualities to complement the caramel notes
- ½ teaspoon sea salt – Creates the signature salted caramel taste by balancing the sweetness
- 2 tablespoons water (optional) – Used in the wet method to help dissolve sugar more evenly
- ½ teaspoon corn syrup (optional) – Helps prevent crystallization during the cooking process
- ¼ teaspoon baking soda (for fixing graininess) – Can be added to break down sugar crystals if caramel becomes grainy
Special Dietary Options
Vegan: Substitute coconut cream for heavy cream and vegan butter for regular butter to create a plant-based version of this caramel recipe.
Gluten-free: This recipe is naturally gluten-free, but always ensure your specific ingredients are certified gluten-free if you have severe sensitivities.
Low-calorie: Replace half of the sugar with a zero-calorie sweetener suitable for high-heat cooking, and use a lower-fat milk alternative like almond milk for a lighter version.
How to Prepare the Perfect Caramel: Step-by-Step Guide
Creating the perfect homemade caramel might seem intimidating, but with this comprehensive guide, you’ll master the process in no time. Follow these simple steps to achieve smooth, rich caramel sauce every time.
First Step: Preparation and Mise en Place
Before you begin cooking, measure out all your ingredients and have them ready beside the stove. Caramelizing sugar happens quickly, so you won’t have time to measure once the process starts. Use a light-colored heavy-bottomed saucepan so you can clearly see the color change as the sugar browns. Have your cream slightly warmed (not boiling) and your butter cut into pieces. This preparation ensures a smooth cooking process without last-minute scrambling.
Second Step: Melting the Sugar
Place the granulated sugar in your prepared saucepan over medium heat. Stir constantly with a heat-proof spatula or wooden spoon as the sugar begins to melt. It will clump initially before melting completely into a clear liquid. Continue stirring until all sugar has dissolved. This stage typically takes 3-5 minutes. Watch closely as the sugar begins to color. The timing will vary based on your stove, but this is when the magic of caramelization begins.
Third Step: Achieving the Perfect Color
Once the sugar has completely melted, stop stirring. Instead, gently swirl the pan occasionally to distribute heat evenly. The sugar will gradually turn from clear to light golden, then to a rich amber color. This process usually takes another 2-4 minutes but can vary. The color development happens quickly toward the end, so stay vigilant. Remove from heat immediately when the caramel reaches a deep amber color, as it will continue cooking briefly even after removing from the heat source.
Fourth Step: Adding Butter and Cream
Carefully add the butter to the hot caramel, stirring constantly. The mixture will bubble vigorously, so be cautious of steam. Once the butter has melted completely, slowly pour in the warm heavy cream while continuing to stir. The mixture will bubble up again this is normal. Keep stirring until everything is well combined. For a smooth texture, ensure both your butter and cream are at room temperature or slightly warm before adding them to prevent the caramel from seizing.
Final Step: Finishing Touches and Serving
Stir in the vanilla extract and sea salt until fully incorporated. If you prefer a thicker consistency, return the caramel to low heat and simmer for 1-2 minutes, stirring constantly. For a thinner sauce ideal for drizzling, add a tablespoon of additional cream. Allow the caramel to cool in the pan for 10-15 minutes before transferring to a heat-proof container. The sauce will continue to thicken as it cools. Store in an airtight container once completely cooled.

Dietary Substitutions to Customize Your Caramel
Protein and Main Component Alternatives
For those with dairy restrictions, you can easily adapt this caramel recipe to meet your needs. Replace heavy cream with full-fat coconut milk for a vegan-friendly version that maintains the creamy texture. The subtle coconut flavor actually complements the caramel notes beautifully. For those avoiding butter, coconut oil or high-quality vegan butter alternatives work well. If you prefer a lower-fat option, try evaporated milk or almond milk, though these may result in a slightly thinner consistency that might require additional cooking time to achieve the desired thickness.
Vegetable, Sauce, and Seasoning Modifications
While traditional caramel relies on sugar and dairy, you can introduce creative variations to customize the flavor profile. For a spiced version, add a cinnamon stick or a pinch of cayenne pepper during the cooking process. Coffee lovers can add a tablespoon of strong espresso or coffee to enhance the caramel notes. For a fruity twist, stir in a tablespoon of fruit puree after cooking, such as raspberry or mango. Those seeking a savory element might experiment with adding herbs like thyme or rosemary, which create an intriguing contrast with the sweetness. The key is to add these flavorings after the caramel has finished cooking to prevent scorching.
Mastering Caramel: Advanced Tips and Variations
Pro Cooking Techniques
For consistently perfect results, invest in a candy thermometer to monitor the temperature precisely. The ideal temperature for caramel is between 320-350°F. Using a light-colored pan helps you accurately gauge the color development of the sugar. If you encounter crystallization issues, try the “wet method” by adding 2 tablespoons of water to the sugar at the beginning, which helps dissolve the sugar more evenly. For the smoothest texture, always add room temperature or slightly warmed liquids to hot caramel to prevent seizing.
| Stage | Temperature Range | Characteristics | Best Uses |
|---|---|---|---|
| Light Caramel | 320-335°F | Golden yellow, mild flavor | Subtle sweetness for glazes |
| Medium Caramel | 335-345°F | Amber color, balanced flavor | Sauces, fillings, toppings |
| Dark Caramel | 345-355°F | Deep amber, complex flavor | Intense flavoring, brittle |
| Burnt | 355°F+ | Very dark, bitter | Generally avoid |
Flavor Variations
Once you’ve mastered the basic salted caramel recipe, experiment with different flavor combinations. Add bourbon, rum, or whiskey for an adult version perfect for special occasions. Create a chocolate caramel by whisking in 2-3 tablespoons of cocoa powder or melted chocolate at the end. For a festive variation, add peppermint extract during the holidays. Those who enjoy nuts can fold in toasted pecans, walnuts, or almonds just before cooling. Each variation transforms the basic recipe into something uniquely delicious while maintaining that beloved caramel essence.
Presentation Tips
Transfer your cooled caramel into attractive glass jars with tight-fitting lids for storing and gifting. Consider adding a decorative label or tying the jar with ribbon for a personalized touch. When serving, drizzle caramel in attractive patterns over desserts using a spoon or piping bag. For a professional presentation, create caramel designs on parchment paper, let them harden, and use them as elegant garnishes. These presentation techniques make even simple desserts feel special and showcase your homemade caramel beautifully.
Make-Ahead Options
Caramel sauce can be prepared up to two weeks in advance, making it perfect for holiday baking and entertaining. Prepare a double batch and portion it into smaller containers for easy use throughout the season. For longer storage, freeze extra caramel for up to three months. Consider preparing different flavor variations simultaneously to have options ready for various recipes. This advance preparation saves valuable time during busy periods and ensures you always have homemade caramel on hand for spontaneous baking projects.
How to Store Caramel: Best Practices
Refrigeration
For short-term storage, keep your homemade caramel in an airtight glass container in the refrigerator. Glass jars work best as metal containers can sometimes react with the acidic components in caramel. Properly stored, your caramel will maintain its quality for 2-3 weeks in the refrigerator. Before serving refrigerated caramel, allow it to come to room temperature or gently reheat to restore its smooth consistency. The cooler temperatures of refrigeration will cause the caramel to thicken significantly, so plan for this when using it in recipes.
Freezing
For longer storage, caramel freezes exceptionally well. Transfer cooled sauce to freezer-safe bags or containers, leaving some space at the top as caramel expands when frozen. Properly frozen caramel will maintain its quality for up to three months. To thaw, place the container in the refrigerator overnight, then reheat gently before using. Label your containers with the date so you can track freshness. Freezing smaller portions rather than one large container allows you to thaw only what you need for a specific recipe.
Reheating
To restore refrigerated or frozen caramel to its perfect consistency, reheat gently using either a microwave or stovetop method. For the microwave, heat in 10-15 second intervals, stirring between each heating until smooth. On the stovetop, use a double boiler or place the caramel container in a saucepan of simmering water, stirring occasionally. Avoid direct high heat which can scorch the caramel or cause separation. Reheated caramel should have the same smooth texture as when first made, though you may need to add a splash of cream if it has thickened excessively.
Meal Prep Considerations
When incorporating caramel into your meal prep routine, consider how it will be used in various recipes throughout the week. Prepare a basic unsalted version that can be customized for different applications, adding salt or other flavorings as needed for specific recipes. Portion caramel into smaller containers for convenient use in breakfast items, desserts, or snacks. Document the quantity needed for your favorite recipes to streamline preparation for future meal prep sessions. This systematic approach makes incorporating homemade caramel into your regular cooking rotation efficient and enjoyable.
FAQs: Frequently Asked Questions About Caramel
What is caramel and how is it made?
How do you make caramel sauce at home?
What’s the difference between caramel, butterscotch, and toffee?
How can you fix grainy or burnt caramel?
How long does homemade caramel last and how should you store it?

Caramel
🍮🧂 Master easy homemade salted caramel in minutes – rich, buttery perfection that’s infinitely better than store-bought for drizzling on desserts!
🔥🍦 Versatile sauce elevates ice cream, apples, or baked goods with sweet-salty bliss; simple steps yield professional results every time!
- Total Time: 45 minutes
- Yield: 1 cup
Ingredients
– 1 cup granulated sugar
– 1 cup heavy cream
– 4 tablespoons unsalted butter
– 1 teaspoon vanilla extract
– ½ teaspoon sea salt
– 2 tablespoons water (optional)
– ½ teaspoon corn syrup (optional)
– ¼ teaspoon baking soda (for fixing graininess)
Instructions
1-First Step: Preparation and Mise en Place Before you begin cooking, measure out all your ingredients and have them ready beside the stove. Caramelizing sugar happens quickly, so you won’t have time to measure once the process starts. Use a light-colored heavy-bottomed saucepan so you can clearly see the color change as the sugar browns. Have your cream slightly warmed (not boiling) and your butter cut into pieces. This preparation ensures a smooth cooking process without last-minute scrambling.
2-Second Step: Melting the Sugar Place the granulated sugar in your prepared saucepan over medium heat. Stir constantly with a heat-proof spatula or wooden spoon as the sugar begins to melt. It will clump initially before melting completely into a clear liquid. Continue stirring until all sugar has dissolved. This stage typically takes 3-5 minutes. Watch closely as the sugar begins to color. The timing will vary based on your stove, but this is when the magic of caramelization begins.
3-Third Step: Achieving the Perfect Color Once the sugar has completely melted, stop stirring. Instead, gently swirl the pan occasionally to distribute heat evenly. The sugar will gradually turn from clear to light golden, then to a rich amber color. This process usually takes another 2-4 minutes but can vary. The color development happens quickly toward the end, so stay vigilant. Remove from heat immediately when the caramel reaches a deep amber color, as it will continue cooking briefly even after removing from the heat source.
4-Fourth Step: Adding Butter and Cream Carefully add the butter to the hot caramel, stirring constantly. The mixture will bubble vigorously, so be cautious of steam. Once the butter has melted completely, slowly pour in the warm heavy cream while continuing to stir. The mixture will bubble up again this is normal. Keep stirring until everything is well combined. For a smooth texture, ensure both your butter and cream are at room temperature or slightly warm before adding them to prevent the caramel from seizing.
5-Final Step: Finishing Touches and Serving Stir in the vanilla extract and sea salt until fully incorporated. If you prefer a thicker consistency, return the caramel to low heat and simmer for 1-2 minutes, stirring constantly. For a thinner sauce ideal for drizzling, add a tablespoon of additional cream. Allow the caramel to cool in the pan for 10-15 minutes before transferring to a heat-proof container. The sauce will continue to thicken as it cools. Store in an airtight container once completely cooled.
Last Step:
Please leave a rating and comment letting us know how you liked this recipe! This helps our business to thrive and continue providing free, high-quality recipes for you.Notes
🔥 Use a light-colored pan to monitor sugar color and avoid burning for perfect caramel.
🧂 Taste and adjust salt after cooling slightly – it mellows as it sets.
❄️ Store in airtight jar up to 2 weeks in fridge; reheat in microwave 10-second bursts.
- Prep Time: 5 minutes
- Cooling: 30 minutes
- Cook Time: 10 minutes
- Category: Desserts
- Method: Stovetop
- Cuisine: American
- Diet: Vegetarian
Nutrition
- Serving Size: 1 tablespoon
- Calories: 100 kcal
- Sugar: 14g
- Sodium: 120mg
- Fat: 5g
- Saturated Fat: 3g
- Unsaturated Fat: 1.5g
- Trans Fat: 0g
- Carbohydrates: 14g
- Fiber: 0g
- Protein: 0g
- Cholesterol: 15mg


