
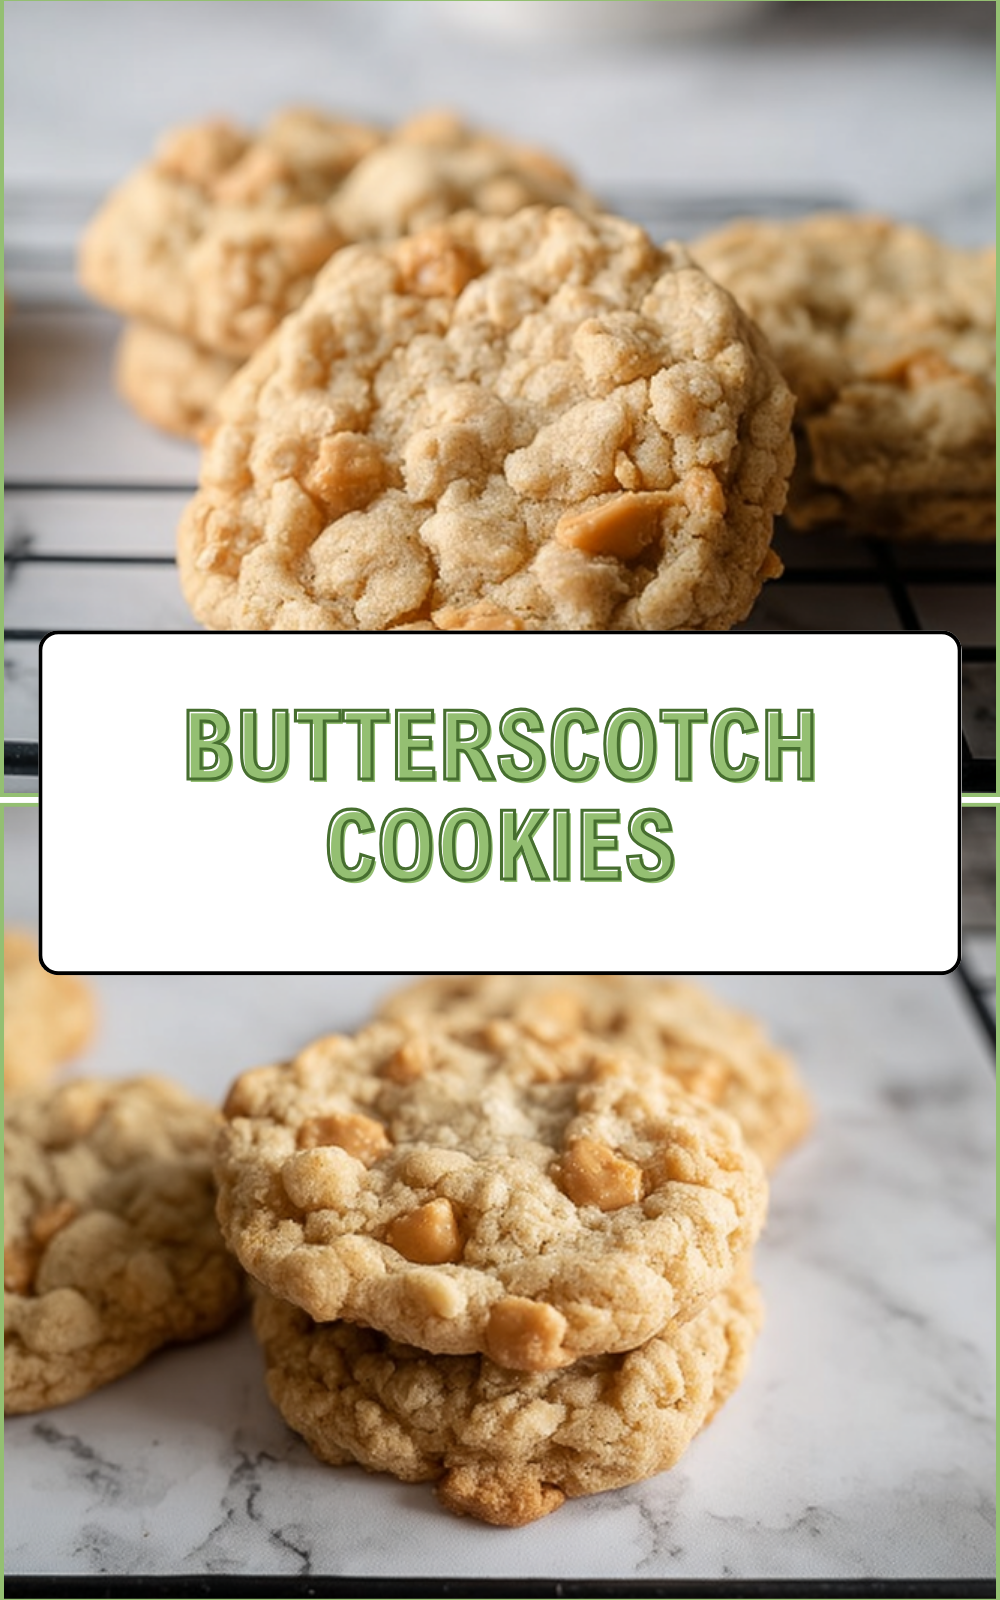
Why You’ll Love This Butterscotch Cookies
If you have been searching for the ultimate treat to satisfy your sweet tooth, look no further. These butterscotch cookies are a game changer for home bakers of all skill levels. Whether you are a busy parent looking for a quick snack or a student craving something homemade, this recipe fits perfectly into your schedule. The combination of rich, buttery flavor and a chewy texture makes these cookies stand out from the usual chocolate chip varieties.
- Ease of Preparation: You do not need to be a professional pastry chef to master these easy butterscotch chip cookies. The recipe comes together quickly with simple steps and standard pantry staples, making it perfect for impromptu baking sessions or when you need a last-minute dessert for a gathering.
- Health and Wellness: While cookies are certainly an indulgence, this recipe allows for some flexibility. By using high-quality ingredients like oats, you introduce a source of fiber that makes these chewy cookies slightly more wholesome. The balance of sweetness means you can enjoy a treat without feeling overly heavy, fitting well into a balanced lifestyle when enjoyed in moderation.
- Versatility: One of the best things about this cookie recipe is how adaptable it is. It serves as a fantastic base for various dietary needs. Whether you need to make them gluten-free, vegan, or simply want to add your favorite mix-ins like nuts or dried fruit, the dough handles modifications beautifully while keeping that signature butterscotch chips flavor intact.
- Distinctive Flavor: The taste profile is simply irresistible. The deep, caramel notes from the brown sugar and butter blend perfectly with the creamy butterscotch chips. Unlike standard sugary cookies, these offer a complex, buttery richness that feels sophisticated yet comforting. It is a nostalgic flavor that brings warmth to any table.
Jump to:
- Why You’ll Love This Butterscotch Cookies
- Essential Ingredients for Butterscotch Cookies
- Main Ingredients
- Special Dietary Options
- Vegan
- Gluten-Free
- Low-Calorie
- How to Prepare the Perfect Butterscotch Cookies: Step-by-Step Guide
- First Step: Preparation and Mise en Place
- Second Step: Creaming the Butter and Sugars
- Third Step: Adding Wet Ingredients
- Fourth Step: Mixing Dry Ingredients
- Fifth Step: Incorporating Oats and Chips
- Final Step: Baking and Cooling
- Dietary Substitutions to Customize Your Butterscotch Cookies
- Protein and Main Component Alternatives
- Vegetable, Sauce, and Seasoning Modifications
- Mastering Butterscotch Cookies: Advanced Tips and Variations
- Pro Cooking Techniques
- Flavor Variations
- Presentation Tips
- Make-Ahead Options
- How to Store Butterscotch Cookies: Best Practices
- Refrigeration
- Freezing
- Reheating
- Meal Prep Considerations
- FAQs: Frequently Asked Questions About Butterscotch Cookies
- What are butterscotch cookies?
- How do I make easy butterscotch cookies at home?
- Can I substitute ingredients in butterscotch cookies?
- How long do homemade butterscotch cookies stay fresh?
- What’s the best way to store butterscotch cookies?
- Butterscotch Cookies
- Ingredients
- Instructions
- Last Step:
- Notes
- Nutrition
- Did you make this recipe?
Essential Ingredients for Butterscotch Cookies
Creating the perfect batch requires the right components. Each ingredient plays a specific role in building the structure and flavor of your soft cookies. Below is a detailed breakdown of what you need, along with precise measurements to ensure your baking success.
Main Ingredients
- 1 cup softened butter – Creates the rich base and helps spread the dough.
- 1 cup brown sugar – Provides moisture and a deep, caramel-like flavor.
- 1/2 cup white sugar – Sweetens the dough and helps crisp the edges.
- 2 large eggs – Bind the ingredients together and add structure.
- 1 tsp vanilla extract – Enhances the overall sweetness and aroma.
- 1.5 cups all-purpose flour – Forms the main structure of the cookie.
- 1 tsp baking soda – Allows the cookies to rise and spread properly.
- 1 tsp cinnamon – Adds a warm spice note that complements the butterscotch.
- 3 cups oats – Adds texture and a hearty, chewy consistency.
- 11 oz butterscotch chips – The star ingredient for that signature flavor.
Special Dietary Options
Vegan
- Use plant-based butter sticks instead of dairy butter.
- Replace eggs with flax eggs (1 tablespoon ground flaxseed mixed with 3 tablespoons water per egg).
- Ensure your butterscotch chips are dairy-free.
Gluten-Free
- Substitute the all-purpose flour with a 1-to-1 gluten-free baking blend.
- Verify that your oats are certified gluten-free to avoid cross-contamination.
- Adding 1/2 teaspoon of xanthan gum can help improve the texture.
Low-Calorie
- Use a sugar substitute that measures 1:1 with sugar.
- Reduce the amount of chips slightly or use a sugar-free version.
- Swap half of the butter for unsweetened applesauce to cut fat.
How to Prepare the Perfect Butterscotch Cookies: Step-by-Step Guide
Making homemade butterscotch cookies is a rewarding process. Follow these detailed instructions to achieve the best results every time. This method ensures your cookies turn out soft, chewy, and full of flavor.
First Step: Preparation and Mise en Place
Start by preheating your oven to 350°F (175°C). This temperature is ideal for baking chewy butterscotch chip cookies without burning them. Line your baking sheets with parchment paper to prevent sticking and make cleanup easier. If you do not have parchment, a light coating of cooking spray works too. Gather all your ingredients so they are at room temperature, specifically the butter and eggs. This helps them mix together more smoothly, creating a consistent texture throughout the dough.
Second Step: Creaming the Butter and Sugars
In a large mixing bowl, combine the softened butter, brown sugar, and white sugar. Using a hand mixer or a stand mixer fitted with the paddle attachment, beat these ingredients on medium speed until the mixture is fluffy and pale. This step usually takes about 2 to 3 minutes. Creaming the butter and sugar incorporates air into the dough, which contributes to a lighter texture. The brown sugar is essential here because its molasses content keeps the cookies moist and chewy. Scrape down the sides of the bowl to ensure everything is well combined.
Third Step: Adding Wet Ingredients
Add the eggs and vanilla extract to the creamed butter mixture. Beat on medium speed until the eggs are fully incorporated. This step adds necessary liquid and richness to the dough. The vanilla extract enhances the buttery notes of the butterscotch chips. If you are making a vegan version, this is when you would add your prepared flax eggs instead of regular eggs. Mix just until combined to avoid overworking the dough, which can lead to tough cookies.
Fourth Step: Mixing Dry Ingredients
In a separate medium bowl, whisk together the flour, baking soda, and cinnamon. Whisking ensures the baking soda is evenly distributed, so every cookie rises perfectly. Gradually add this dry mixture to the wet ingredients while the mixer runs on low speed. Mix until just a few streaks of flour remain. Overmixing at this stage develops gluten, which can make the cookies tough instead of tender. The cinnamon adds a lovely warmth that pairs beautifully with the caramel flavors of the butterscotch.
Fifth Step: Incorporating Oats and Chips
With the mixer on low speed or using a spatula, fold in the oats and butterscotch chips. The oats add a hearty chew and nutritional value, while the chips provide pockets of intense flavor. Ensure they are evenly distributed throughout the dough so every bite is delicious. The dough will be thick and slightly sticky. If you find the dough too soft to scoop, you can refrigerate it for 30 minutes. Chilling the dough helps prevent excessive spreading in the oven, resulting in thicker cookies.
Final Step: Baking and Cooling
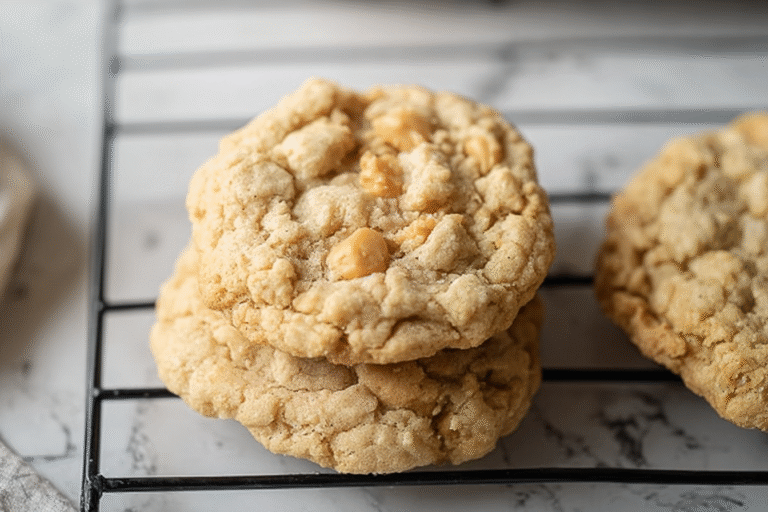
Scoop tablespoon-sized balls of dough onto your prepared baking sheets, placing them about 2 inches apart. The cookies will spread as they bake, so giving them space is crucial. Bake in the preheated oven for 10 to 12 minutes. You know they are done when the edges are golden brown, but the centers still look slightly soft and underbaked. They will continue to cook on the baking sheet. Let them cool on the sheet for 5 minutes before transferring them to a wire rack to cool completely. This resting period sets the structure, ensuring you get that perfect soft cookies texture.
Pro Tip: For extra soft cookies, slightly underbake them. Remove them from the oven when the edges are set but the center looks wet. The residual heat will finish the cooking process without drying them out.

Dietary Substitutions to Customize Your Butterscotch Cookies
Everyone has unique dietary needs and preferences. Fortunately, this simple chewy butterscotch cookies recipe is highly adaptable. You can easily modify it to suit vegan, gluten-free, or other specific diets without sacrificing taste.
Protein and Main Component Alternatives
If you wish to increase the protein content or avoid eggs, there are several effective swaps. As mentioned, flax eggs are a fantastic vegan binder that adds a subtle nutty flavor. For those who eat eggs but want more protein, you can add a scoop of vanilla or unflavored protein powder to the dry ingredients. You may need to add a splash of milk to maintain the correct dough consistency. Another option is to use chopped walnuts or pecans, which replace some of the oats with healthy fats and protein, adding a nice crunch to the best butterscotch cookies recipe.
Vegetable, Sauce, and Seasoning Modifications
While oats are the standard texture booster, you can experiment with other mix-ins. Shredded coconut makes a wonderful substitute for half of the oats, offering a tropical twist and extra chewiness. Raisins or dried cranberries can replace some of the butterscotch chips for a fruitier version. If you prefer a deeper flavor, consider swapping the white sugar for dark brown sugar entirely. This intensifies the molasses taste, making the cookies darker and richer. For seasonings, a pinch of sea salt on top of the cookies before baking can really make the butterscotch flavor pop, creating a sweet and savory profile that is hard to resist.
Mastering Butterscotch Cookies: Advanced Tips and Variations
Once you have mastered the basic recipe, you might want to experiment with more advanced techniques to elevate your baking. These tips will help you achieve bakery-quality results in your own kitchen.
Pro Cooking Techniques
One secret to incredibly chewy cookies is browning the butter before creaming it with the sugars. This technique, known as beurre noisette, adds a nutty, toasted flavor that pairs perfectly with butterscotch. Simply melt the butter in a saucepan over medium heat until it foams and turns golden brown, then chill it until it solidifies back to a softened state before using it in the recipe. Another technique is to sprinkle a tiny bit of sea salt flakes on top of the cookies immediately after taking them out of the oven. This contrasts the sweetness and highlights the caramel notes of the butterscotch chips.
Flavor Variations
Do not be afraid to get creative with your mix-ins. While butterscotch chip cookies are delicious on their own, adding different elements can create new experiences. Try mixing in white chocolate chips for a “blondie” flavor profile. Chopped toffee pieces add a delightful crunch and buttery taste. For a fall twist, add 1/2 teaspoon of nutmeg or ginger along with the cinnamon. Spices like cardamom can also add a unique, aromatic layer that surprises the palate. If you are a fan of nuts, toasted pecans or almonds add a sophisticated crunch that complements the soft dough.
Presentation Tips
Presentation matters, especially if you are serving these at a party or gifting them. For a uniform look, use a cookie scoop to ensure every ball of dough is the same size. This guarantees they all bake evenly. You can also press a few extra butterscotch chips onto the tops of the dough balls before baking. This ensures a pretty, chip-studded appearance once they come out of the oven. Drizzling cooled cookies with a simple white chocolate glaze makes them look like they came from a professional bakery.
Make-Ahead Options
Planning ahead can save you a lot of time. You can prepare the dough and scoop it into balls, then freeze the balls on a baking sheet. Once frozen solid, transfer them to a freezer bag. This way, you can bake fresh butterscotch cookies whenever the craving strikes, adding just 1 to 2 extra minutes to the baking time. Alternatively, you can bake the cookies fully and freeze them in layers separated by parchment paper. They thaw quickly at room temperature, making them perfect for unexpected guests or lunchbox treats.
How to Store Butterscotch Cookies: Best Practices
To keep your easy butterscotch chip cookies recipe tasting fresh, proper storage is key. No one wants a stale cookie, so follow these guidelines to maintain that just-baked texture and flavor.
Refrigeration
While room temperature is usually best for soft cookies, refrigeration can be necessary in hot or humid climates. If you choose to refrigerate, place the cookies in an airtight container or a heavy-duty freezer bag. They will last for up to 5 days in the fridge. However, be aware that refrigeration can sometimes cause cookies to dry out or harden slightly. To counteract this, let them come to room temperature before eating, or warm them slightly in the microwave for a few seconds.
Freezing
For long-term storage, freezing is your best option. You can freeze both the dough and the baked cookies. To freeze baked cookies, ensure they are completely cool first. Layer them in a freezer-safe container with parchment paper between the layers to prevent them from sticking together. They can be frozen for up to 3 months. To thaw, simply leave them at room temperature for about an hour. If you froze dough balls, you can bake them straight from the freezer; just add a couple of minutes to the baking time.
Reheating
If your cookies have lost their warmth or become slightly firm, reheating can bring them back to life. A microwave is the quickest method. Place a cookie on a microwave-safe plate and heat it for 5 to 10 seconds. This melts the chips slightly and softens the dough. For a crispier exterior, you can warm them in a preheated oven at 300°F (150°C) for 5 minutes. This method revitalizes the texture, making them taste almost as good as when they were first baked.
Meal Prep Considerations
Batch cooking is a smart strategy for busy individuals. You can double or triple the cookie recipe on a weekend and spend an hour baking. Once cooled, separate the batch into daily portions or freeze them for future weeks. This ensures you always have a homemade snack ready without the daily mess. Portioning them out also helps with managing serving sizes, which is great for those keeping an eye on their intake.
FAQs: Frequently Asked Questions About Butterscotch Cookies
What are butterscotch cookies?
How do I make easy butterscotch cookies at home?
Can I substitute ingredients in butterscotch cookies?
How long do homemade butterscotch cookies stay fresh?
What’s the best way to store butterscotch cookies?
Butterscotch Cookies
🍪 Discover ultra-chewy butterscotch chip cookies with rich caramel notes and perfect soft centers for irresistible snacking!
🍯 This foolproof recipe yields dozens in just 25 minutes – bake now, share joy, or freeze for later cravings.
- Total Time: 25 minutes
- Yield: 48 cookies
Ingredients
– 1 cup softened butter
– 1 cup brown sugar
– 1/2 cup white sugar
– 2 large eggs
– 1 tsp vanilla extract
– 1.5 cups all-purpose flour
– 1 tsp baking soda
– 1 tsp cinnamon
– 3 cups oats
– 11 oz butterscotch chips
Instructions
1-First Step: Preparation and Mise en Place Start by preheating your oven to 350°F (175°C). This temperature is ideal for baking chewy butterscotch chip cookies without burning them. Line your baking sheets with parchment paper to prevent sticking and make cleanup easier. If you do not have parchment, a light coating of cooking spray works too. Gather all your ingredients so they are at room temperature, specifically the butter and eggs. This helps them mix together more smoothly, creating a consistent texture throughout the dough.
2-Second Step: Creaming the Butter and Sugars In a large mixing bowl, combine the softened butter, brown sugar, and white sugar. Using a hand mixer or a stand mixer fitted with the paddle attachment, beat these ingredients on medium speed until the mixture is fluffy and pale. This step usually takes about 2 to 3 minutes. Creaming the butter and sugar incorporates air into the dough, which contributes to a lighter texture. The brown sugar is essential here because its molasses content keeps the cookies moist and chewy. Scrape down the sides of the bowl to ensure everything is well combined.
3-Third Step: Adding Wet Ingredients Add the eggs and vanilla extract to the creamed butter mixture. Beat on medium speed until the eggs are fully incorporated. This step adds necessary liquid and richness to the dough. The vanilla extract enhances the buttery notes of the butterscotch chips. If you are making a vegan version, this is when you would add your prepared flax eggs instead of regular eggs. Mix just until combined to avoid overworking the dough, which can lead to tough cookies.
4-Fourth Step: Mixing Dry Ingredients In a separate medium bowl, whisk together the flour, baking soda, and cinnamon. Whisking ensures the baking soda is evenly distributed, so every cookie rises perfectly. Gradually add this dry mixture to the wet ingredients while the mixer runs on low speed. Mix until just a few streaks of flour remain. Overmixing at this stage develops gluten, which can make the cookies tough instead of tender. The cinnamon adds a lovely warmth that pairs beautifully with the caramel flavors of the butterscotch.
5-Fifth Step: Incorporating Oats and Chips With the mixer on low speed or using a spatula, fold in the oats and butterscotch chips. The oats add a hearty chew and nutritional value, while the chips provide pockets of intense flavor. Ensure they are evenly distributed throughout the dough so every bite is delicious. The dough will be thick and slightly sticky. If you find the dough too soft to scoop, you can refrigerate it for 30 minutes. Chilling the dough helps prevent excessive spreading in the oven, resulting in thicker cookies.
6-Final Step: Baking and Cooling Scoop tablespoon-sized balls of dough onto your prepared baking sheets, placing them about 2 inches apart. The cookies will spread as they bake, so giving them space is crucial. Bake in the preheated oven for 10 to 12 minutes. You know they are done when the edges are golden brown, but the centers still look slightly soft and underbaked. They will continue to cook on the baking sheet. Let them cool on the sheet for 5 minutes before transferring them to a wire rack to cool completely. This resting period sets the structure, ensuring you get that perfect soft cookies texture.
Last Step:
Please leave a rating and comment letting us know how you liked this recipe! This helps our business to thrive and continue providing free, high-quality recipes for you.Notes
🍪 Chill dough for 30 minutes before baking for extra thick, chewy cookies.
🔥 Don’t overbake – soft centers firm up as they cool for perfect chewiness.
❄️ Freeze baked cookies or dough balls for up to 3 months; bake from frozen adding 1 min.
- Prep Time: 15 minutes
- Cook Time: 10 minutes
- Category: Dessert
- Method: Baking
- Cuisine: American
- Diet: Vegetarian
Nutrition
- Serving Size: 1 cookie
- Calories: 140 calories
- Sugar: 12g
- Sodium: 130mg
- Fat: 7g
- Saturated Fat: 4g
- Unsaturated Fat: 2g
- Trans Fat: 0g
- Carbohydrates: 18g
- Fiber: 0g
- Protein: 2g
- Cholesterol: 20mg


