Why You’ll Love This Buckeye Cookies
If you’re looking for a delightful treat that combines the rich flavors of peanut butter and chocolate, these classic Buckeye Cookies are the perfect choice. Here are several reasons why this recipe will become a favorite in your household:
- Ease of preparation: These no-bake treats require just minutes of prep time and no oven, making them perfect for busy schedules or when you need a quick dessert solution. The simple ingredients come together effortlessly, and even beginner bakers can achieve impressive results.
- Health benefits: While these are certainly treats, peanut butter provides protein and healthy fats that make these bites more satisfying than empty calorie sweets. Using high-quality dark chocolate can also add antioxidants, and you can adjust the recipe to include less sugar or alternative sweeteners to suit dietary preferences.
- Versatility: This recipe adapts beautifully to different dietary needs. It’s naturally gluten-free, and with simple substitutions, you can create vegan, dairy-free, or lower-sugar versions. The base recipe is also a canvas for various flavor additions and textures, from crunchy cereals to different nut butters.
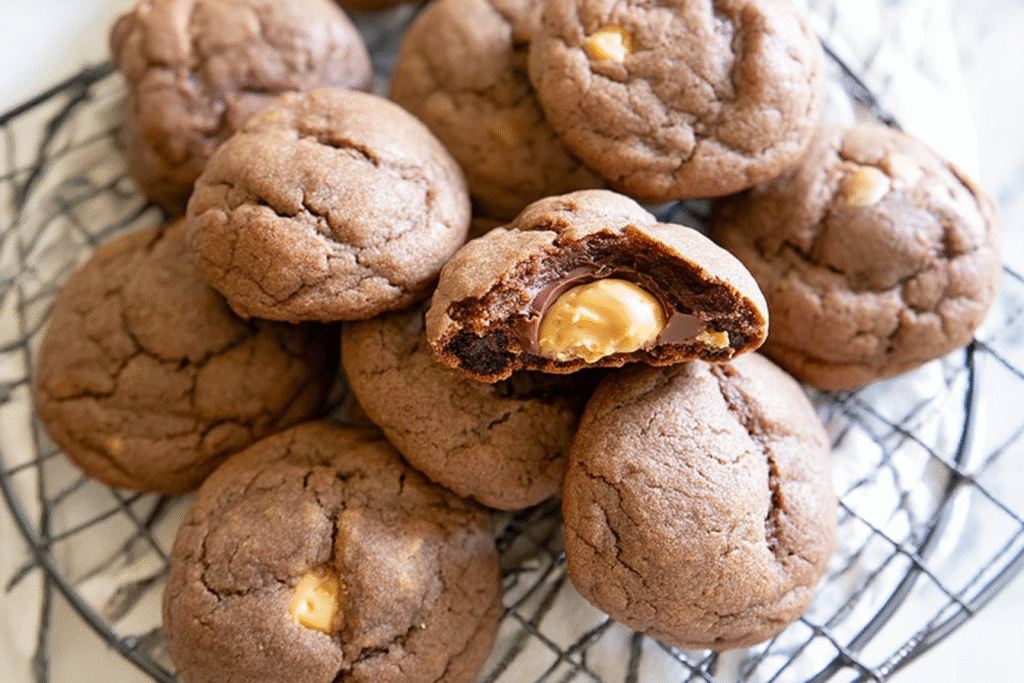
- Distinctive flavor: The combination of creamy peanut butter fudge center and crisp chocolate coating creates an irresistible sweet and salty profile. Each bite delivers the perfect balance of textures the soft peanut butter inside contrasts beautifully with the hard chocolate shell, while the partially dipped appearance gives them an elegant presentation.
These Buckeye Cookies capture the spirit of Ohio’s beloved treat, bringing together the classic pairing of peanut butter and chocolate in a delightful bite-sized format that’s perfect for sharing.
Jump to:
- Why You’ll Love This Buckeye Cookies
- Essential Ingredients for Buckeye Cookies
- Main Ingredients:
- Additional Items:
- Special Dietary Options:
- Vegan:
- Gluten-free:
- Low-calorie:
- How to Prepare the Perfect Buckeye Cookies: Step-by-Step Guide
- First Step: Preparation
- Second Step: Create the Peanut Butter Mixture
- Third Step: Test the Consistency
- Fourth Step: Roll the Balls
- Fifth Step: Prepare the Chocolate Coating
- Sixth Step: Dip the Buckeyes
- Final Step: Set and Serve
- Dietary Substitutions to Customize Your Buckeye Cookies
- Protein and Main Component Alternatives
- Vegetable, Sauce, and Seasoning Modifications
- Mastering Buckeye Cookies: Advanced Tips and Variations
- Pro Cooking Techniques
- Flavor Variations
- Presentation Tips
- Make-Ahead Options
- How to Store Buckeye Cookies: Best Practices
- Refrigeration
- Freezing
- Reheating
- Meal Prep Considerations
- FAQs: Frequently Asked Questions About Buckeye Cookies
- What are buckeye cookies?
- What ingredients do I need for buckeye cookies?
- How do you make buckeye cookies step by step?
- How long do buckeye cookies last and how should I store them?
- Can you freeze buckeye cookies and what are some variations?
- Buckeye Cookies
- Ingredients
- Instructions
- Last Step:
- Notes
- Nutrition
- Did you make this recipe?
Essential Ingredients for Buckeye Cookies
Creating the perfect Buckeye Cookies requires just a handful of pantry staples. Here’s what you’ll need to make about 40 delicious peanut butter chocolate bites:
Main Ingredients:
- 1 ½ cups creamy peanut butter – Provides the rich, nutty base of these treats; high-quality peanut butter without added oils works best to prevent separation
- ½ cup unsalted butter (softened) – Creates a smooth, creamy texture and helps bind the ingredients together
- 1 teaspoon vanilla extract – Adds depth of flavor that complements the peanut butter
- 3-4 cups powdered sugar – Sweetens the mixture and helps create a firm dough that holds its shape; adjust amount based on desired firmness
- 12 ounces chocolate chips or bark – Forms the delicious coating; semisweet or milk chocolate both work wonderfully
- 1 tablespoon shortening (optional) – Helps the chocolate melt smoothly for easier dipping
- Pinch of salt (optional) – Enhances the flavor balance, especially if using unsalted butter
Additional Items:
- 2 cups crushed Rice Krispies (optional) – Adds a delightful crunch to the peanut butter mixture
- Toothpicks – Essential for the dipping process to create the signature buckeye appearance
- Wax paper or parchment paper – Needed for cooling and setting the dipped cookies
Special Dietary Options:
Vegan:
- Replace butter with coconut oil or vegan butter alternative
- Use dairy-free chocolate chips or baking chocolate
- Ensure your powdered sugar is vegan (some brands use bone char in processing)
Gluten-free:
- This recipe is naturally gluten-free as written
- If adding Rice Krispies, ensure they are gluten-free (some contain malt)
- Verify that all ingredients, especially chocolate, are certified gluten-free if needed
Low-calorie:
- Use natural peanut butter with no added sugar or oil
- Reduce the amount of powdered sugar slightly
- Opt for dark chocolate with higher cocoa content for more flavor with less sugar
- Make smaller balls to reduce portion size while still enjoying the treat
Using high-quality ingredients makes a noticeable difference in this simple recipe, especially when it comes to the peanut butter and chocolate which are the stars of the show.
How to Prepare the Perfect Buckeye Cookies: Step-by-Step Guide
Follow these detailed instructions to create Buckeye Cookies that look beautiful and taste amazing. This no-bake treat comes together in about 20 minutes of active prep time, plus chilling time.
First Step: Preparation
Before you begin, clear some counter space and gather all your ingredients and tools. Line a large baking sheet or tray with wax paper or parchment paper. This will prevent the buckeyes from sticking and make cleanup much easier. Ensure your butter is softened to room temperature for smooth mixing. If you plan to use the optional Rice Krispies for texture, measure and crush them slightly before starting.
Second Step: Create the Peanut Butter Mixture
In a large mixing bowl, combine the creamy peanut butter, softened butter, and vanilla extract. Mix these ingredients until they’re thoroughly combined and smooth. You can use a hand mixer on low speed or mix by hand with a sturdy spoon. Once these are well blended, gradually add the powdered sugar, starting with 3 cups. Mix well after each addition. The mixture will become thick and stiff as you add the sugar. If you’re including the pinch of salt, add it now. If you’re adding Rice Krispies for crunch, fold them in gently.
Third Step: Test the Consistency
After adding 3 cups of powdered sugar, check the consistency of your dough. It should be stiff enough to hold its shape when rolled into a ball without cracking or falling apart. If it’s too soft or sticky, add more powdered sugar, ¼ cup at a time, mixing well after each addition. Most recipes require between 3 and 4 cups total, but the exact amount can vary based on the moisture content of your peanut butter and butter. When you reach the right consistency, the dough should feel like playdough and hold a clean shape.
Fourth Step: Roll the Balls
Once your dough is ready, use a small cookie scoop or tablespoon to measure even portions of the mixture. Roll each portion between your palms to create smooth, round balls approximately 1 inch in diameter. This size is ideal for a satisfying two-bite treat. Place each ball on your prepared baking sheet, leaving a little space between them. Once all the balls are rolled, place the tray in the refrigerator for at least 30 minutes. Chilling the balls makes them firm and easier to dip without losing their shape or melting in the warm chocolate.
Fifth Step: Prepare the Chocolate Coating
While the peanut butter balls are chilling, prepare your chocolate coating. Place the chocolate chips in a microwave-safe bowl. If using shortening (which helps create a smoother, shinier coating), add it to the bowl now. Microwave in 30-second intervals, stirring well after each heating. This prevents the chocolate from burning and ensures even melting. Continue until the chocolate is completely smooth and glossy. Alternatively, you can melt the chocolate using a double boiler on the stovetop if you prefer that method.
Sixth Step: Dip the Buckeyes
Remove the chilled peanut butter balls from the refrigerator. Working with one ball at a time, insert a toothpick into the top center of the ball. Dip the ball into the melted chocolate, covering about three-quarters of it while leaving a small circle of peanut butter visible at the top. This creates the signature buckeye appearance that resembles the nut from the buckeye tree. Gently tap the toothpick against the side of the bowl to remove excess chocolate. Place the dipped ball back onto the wax paper, using another toothpick to help slide it off the dipping toothpick if needed. Use a small knife or your finger to gently smooth over the hole left by the toothpick.
Final Step: Set and Serve
After all the balls are dipped, return the tray to the refrigerator for about 20 minutes to allow the chocolate to completely harden. Once set, these Buckeye Cookies are ready to enjoy! They can be stored in the refrigerator in an airtight container for up to two weeks. For longer storage, they can be frozen for up to three months. Serve them chilled or let them sit at room temperature for a few minutes before serving for a slightly softer texture. These treats make perfect additions to holiday cookie plates, party desserts, or as gifts for friends and family.
The key to perfect-looking buckeyes is working in small batches and keeping the balls chilled throughout the dipping process. If the peanut butter balls become too warm, they may lose their shape when dipped.

Dietary Substitutions to Customize Your Buckeye Cookies
Protein and Main Component Alternatives
While traditional Buckeye Cookies use creamy peanut butter as the star ingredient, there are several alternatives you can try to accommodate different tastes and dietary needs. Almond butter makes an excellent substitute, offering a slightly different nutty profile that pairs beautifully with chocolate. Cashew butter is another smooth, creamy option with a naturally sweeter flavor that might reduce the amount of powdered sugar needed. For those with tree nut allergies, sunflower seed butter provides a similar texture and consistency, creating what some call “sunbutter balls” that taste remarkably similar to the original.
If you’re looking to increase the protein content, consider using a powdered peanut butter mixed with a little oil and water to recreate the creamy consistency. This reduces the fat content while maintaining that classic peanut butter flavor. Some adventurous bakers even experiment with using cream cheese as part of the filling mixture for an extra tangy, creamy variation on the traditional recipe.
Vegetable, Sauce, and Seasoning Modifications
While vegetables might not seem like an obvious addition to sweet treats, there are creative ways to incorporate nutritious elements into your Buckeye Cookies. Finely shredded coconut can be added to the peanut butter mixture for texture and a tropical twist. Some health-conscious bakers incorporate pureed white beans or chickpeas into the mixture for added fiber and protein the neutral flavor of these legumes blends surprisingly well with peanut butter and chocolate.
For sauce alternatives, consider adding a teaspoon of honey or maple syrup to enhance the natural sweetness of the filling. A splash of espresso or strong coffee can deepen the chocolate flavor when added to the coating chocolate. Spices like cinnamon, nutmeg, or even a pinch of cayenne pepper can create intriguing flavor variations that make your buckeyes stand out.
For seasonal variations, try adding pumpkin pie spice to the mixture for a fall treat, or incorporate peppermint extract during the winter holidays. The beauty of this simple recipe lies in its adaptability to different flavor preferences and dietary requirements while maintaining the beloved peanut butter and chocolate combination.
Mastering Buckeye Cookies: Advanced Tips and Variations
Pro Cooking Techniques
Achieving the perfect Buckeye Cookies requires attention to a few key details. For the smoothest chocolate coating, temper your chocolate by melting it carefully and allowing it to cool slightly before dipping. This creates a glossy finish that snaps when bitten. If you struggle with the toothpick method, try using a dipping fork or a slotted spoon instead these tools allow you to lower the balls into the chocolate and lift them out without leaving visible marks.
When working with chocolate, moisture is your enemy. Ensure all your utensils and bowls are completely dry before melting chocolate. Even a drop of water can cause chocolate to seize, becoming grainy and unworkable. If your chocolate does seize, try adding a teaspoon of vegetable oil and stirring vigorously to save it.
For perfectly round buckeyes, roll the balls between your palms with a gentle, circular motion. If you find the dough sticking to your hands, lightly grease your palms with a small amount of butter or oil. When dipping, work in small batches to keep the remaining peanut butter balls chilled while you work with a few at a time.
Flavor Variations
The classic peanut butter and chocolate combination is hard to beat, but there are many delicious variations you can try. Incorporate 1-2 cups of crushed graham crackers or Rice Krispies into the peanut butter mixture for added texture and a nostalgic flavor profile. For a sophisticated twist, add 2 tablespoons of bourbon or rum to the peanut butter mixture for an adult version perfect for holiday parties.
Experiment with different types of chocolate coatings white chocolate creates a striking visual contrast, while dark chocolate offers a richer, less sweet option. You can even color white chocolate with food coloring for seasonal or team-themed buckeyes. Try adding extracts like almond, coconut, or orange to the peanut butter mixture for unique flavor profiles.
Presentation Tips
Make your Buckeye Cookies stand out with elegant presentation ideas. Arrange them in paper candy cups for a professional look. Top each buckeye with a small pinch of flaky sea salt immediately after dipping the salt contrasts beautifully with the sweet chocolate and creamy peanut butter. For holidays, sprinkle with crushed peppermint candies, colored sprinkles, or edible glitter while the chocolate is still wet.
If gifting, package buckeyes in clear cellophane bags tied with festive ribbon, or layer them in decorative tins between sheets of parchment paper. They make excellent homemade gifts during the holiday season and are always well-received at cookie exchanges.
Make-Ahead Options
Buckeye Cookies are excellent candidates for advance preparation, making them perfect for busy holiday seasons. You can prepare the peanut butter balls and freeze them undipped for up to a month. When ready to serve, simply thaw them in the refrigerator overnight and dip in melted chocolate.
For even more convenience, prepare and dip the buckeyes completely, then freeze them in a single layer on a baking sheet before transferring to freezer bags. They’ll keep for up to three months and can be thawed in the refrigerator as needed. This makes them ideal for holiday prep dedicate one day to making several batches, then you’ll have homemade treats ready to serve or gift throughout the season.
How to Store Buckeye Cookies: Best Practices
Refrigeration
For short-term storage, Buckeye Cookies keep best in the refrigerator. Place them in an airtight container, separating layers with wax paper or parchment paper to prevent them from sticking together. When properly stored, they will maintain their quality for up to two weeks in the refrigerator. The cool temperature keeps the chocolate firm and the peanut butter center at the perfect consistency. Before serving, you can let them sit at room temperature for about 10 minutes for a slightly softer texture.
Freezing
For long-term storage, freezing is an excellent option. Flash-freeze the completed buckeyes by placing them in a single layer on a baking sheet and putting them in the freezer for about 2 hours. Once firm, transfer them to freezer-safe bags or containers. They will maintain their quality for up to three months in the freezer. To thaw, simply transfer the desired amount to the refrigerator overnight. Avoid thawing at room temperature, as condensation may form on the chocolate surface and affect its appearance. Properly frozen and thawed buckeyes taste nearly identical to freshly made ones.
Reheating
Generally, Buckeye Cookies are enjoyed chilled or at room temperature rather than reheated. However, if they become too firm from extended refrigeration, letting them sit at room temperature for 15-20 minutes before serving will bring them to the perfect eating consistency. Avoid using microwave or oven to warm them, as this will melt the chocolate coating and alter the texture of the peanut butter center.
Meal Prep Considerations
Buckeye Cookies are excellent for batch cooking and meal prep. You can prepare a large quantity in advance, then portion them out for snacks, desserts, or gifts throughout the month. When making multiple batches, consider freezing some without chocolate coating so you can have freshly dipped buckeyes later. This approach gives you the convenience of having homemade treats ready with minimal effort. Always label your storage containers with the date so you can keep track of freshness. The recipe scales easily, making it simple to prepare larger batches for events or gifts.

FAQs: Frequently Asked Questions About Buckeye Cookies
What are buckeye cookies?
What ingredients do I need for buckeye cookies?
How do you make buckeye cookies step by step?
How long do buckeye cookies last and how should I store them?
Can you freeze buckeye cookies and what are some variations?

Buckeye Cookies
🥜🍫 Classic creamy peanut butter balls half-dipped in smooth chocolate – iconic buckeye bliss minus the oven!
🎁 Quick no-bake bites ideal for holidays, parties, or sweet tooth fixes; endlessly shareable delight.
- Total Time: 1 hour 5 minutes
- Yield: 40 bites
Ingredients
– 1 ½ cups creamy peanut butter for rich, nutty base
– ½ cup unsalted butter (softened) for smooth, creamy texture
– 1 teaspoon vanilla extract for depth of flavor
– 3-4 cups powdered sugar for sweetening and firm dough
– 12 ounces chocolate chips or bark for coating
– 1 tablespoon shortening (optional) for smooth melting
– Pinch of salt (optional) for flavor balance
– 2 cups crushed Rice Krispies (optional) for crunch
Instructions
1-First Step: Preparation Before you begin, clear some counter space and gather all your ingredients and tools. Line a large baking sheet or tray with wax paper or parchment paper. This will prevent the buckeyes from sticking and make cleanup much easier. Ensure your butter is softened to room temperature for smooth mixing. If you plan to use the optional Rice Krispies for texture, measure and crush them slightly before starting.
2-Second Step: Create the Peanut Butter Mixture In a large mixing bowl, combine the creamy peanut butter, softened butter, and vanilla extract. Mix these ingredients until they’re thoroughly combined and smooth. You can use a hand mixer on low speed or mix by hand with a sturdy spoon. Once these are well blended, gradually add the powdered sugar, starting with 3 cups. Mix well after each addition. The mixture will become thick and stiff as you add the sugar. If you’re including the pinch of salt, add it now. If you’re adding Rice Krispies for crunch, fold them in gently.
3-Third Step: Test the Consistency After adding 3 cups of powdered sugar, check the consistency of your dough. It should be stiff enough to hold its shape when rolled into a ball without cracking or falling apart. If it’s too soft or sticky, add more powdered sugar, ¼ cup at a time, mixing well after each addition. Most recipes require between 3 and 4 cups total, but the exact amount can vary based on the moisture content of your peanut butter and butter. When you reach the right consistency, the dough should feel like playdough and hold a clean shape.
4-Fourth Step: Roll the Balls Once your dough is ready, use a small cookie scoop or tablespoon to measure even portions of the mixture. Roll each portion between your palms to create smooth, round balls approximately 1 inch in diameter. This size is ideal for a satisfying two-bite treat. Place each ball on your prepared baking sheet, leaving a little space between them. Once all the balls are rolled, place the tray in the refrigerator for at least 30 minutes. Chilling the balls makes them firm and easier to dip without losing their shape or melting in the warm chocolate.
5-Fifth Step: Prepare the Chocolate Coating While the peanut butter balls are chilling, prepare your chocolate coating. Place the chocolate chips in a microwave-safe bowl. If using shortening (which helps create a smoother, shinier coating), add it to the bowl now. Microwave in 30-second intervals, stirring well after each heating. This prevents the chocolate from burning and ensures even melting. Continue until the chocolate is completely smooth and glossy. Alternatively, you can melt the chocolate using a double boiler on the stovetop if you prefer that method.
6-Sixth Step: Dip the Buckeyes Remove the chilled peanut butter balls from the refrigerator. Working with one ball at a time, insert a toothpick into the top center of the ball. Dip the ball into the melted chocolate, covering about three-quarters of it while leaving a small circle of peanut butter visible at the top. This creates the signature buckeye appearance that resembles the nut from the buckeye tree. Gently tap the toothpick against the side of the bowl to remove excess chocolate. Place the dipped ball back onto the wax paper, using another toothpick to help slide it off the dipping toothpick if needed. Use a small knife or your finger to gently smooth over the hole left by the toothpick.
7-Final Step: Set and Serve After all the balls are dipped, return the tray to the refrigerator for about 20 minutes to allow the chocolate to completely harden. Once set, these Buckeye Cookies are ready to enjoy! They can be stored in the refrigerator in an airtight container for up to two weeks. For longer storage, they can be frozen for up to three months. Serve them chilled or let them sit at room temperature for a few minutes before serving for a slightly softer texture. These treats make perfect additions to holiday cookie plates, party desserts, or as gifts for friends and family.
Last Step:
Please leave a rating and comment letting us know how you liked this recipe! This helps our business to thrive and continue providing free, high-quality recipes for you.Notes
🥜 Start with less powdered sugar and add as needed for non-sticky dough.
❄️ Freeze balls solid before dipping to prevent falling apart.
🍫 Melt chocolate slowly to avoid seizing; stir constantly.
- Prep Time: 20 minutes
- Chill/Freeze: 45 minutes
- Category: Dessert
- Method: No-Bake
- Cuisine: American
- Diet: Vegetarian
Nutrition
- Serving Size: 1 bite
- Calories: 140 calories
- Sugar: 15g
- Sodium: 60mg
- Fat: 9g
- Saturated Fat: 4g
- Unsaturated Fat: 4g
- Trans Fat: 0g
- Carbohydrates: 15g
- Fiber: 1g
- Protein: 3g
- Cholesterol: 5mg


