Why You’ll Love This Korean Bbq Chicken
Korean Bbq Chicken brings big flavor, crispy texture, and a fun mix of sweet, salty, and spicy notes to the table. If you want a dish that feels special but still fits busy weeknights, this one delivers fast. It is also a great choice for readers who like bold comfort food with simple steps and pantry-friendly ingredients.
- Easy to make at home: This Korean BBQ Chicken recipe uses a simple soy sauce marinade, a flour batter, and a straightforward frying method. The hands-on prep is easy to follow, and the chicken cooks in about 10 to 12 minutes per batch at 160°C/320°F, making it a practical pick for home cooks, students, and busy parents.
- Rich flavor with familiar ingredients: Garlic, onion, chili flakes, cinnamon, and black pepper create a bold flavor base without needing a long ingredient list. The soy-based sauce adds savory depth, while mozzarella cheese can bring a creamy finish for a fun cheese medley version.
- Flexible for different tastes: You can keep the spice level lower by adding more onion and garlic, or you can add extra chili flakes for more heat. This makes Korean Bbq Chicken a good fit for families, newlyweds, working professionals, and anyone who likes to adjust a recipe to match the crowd.
- Great for sharing: Fried chicken always brings people together, and this version is perfect for dinner plates, weekend snacks, or game-day servings. If you want more family-friendly meal ideas, you might also like this sweet and savory pineapple casserole recipe from the site.
With its crispy coating, savory marinade, and sauce-friendly finish, Korean Bbq Chicken is the kind of recipe that feels restaurant-style without being hard to make.
The flavor is also supported by a smart cooking method. Frying at a lower temperature helps the chicken cook through while keeping the coating crisp. That simple step makes a big difference in texture, especially if you plan to toss the chicken in a soy-based glaze or a cheese mix at the end. For readers who enjoy learning about poultry nutrition and cooking basics, the National Chicken Council nutrition and health guide is a helpful external resource.
Jump to:
- Why You’ll Love This Korean Bbq Chicken
- Ingredients for Korean Bbq Chicken
- How to Prepare the Perfect Korean Bbq Chicken: Step-by-Step Guide
- First Step: Gather and prep everything
- Second Step: Mix the marinade and season the chicken
- Third Step: Coat the chicken in flour
- Fourth Step: Heat the oil to the right temperature
- Fifth Step: Fry in batches for 10 to 12 minutes
- Sixth Step: Toss with sauce or cheese medley
- Final Step: Serve hot and enjoy
- Dietary Substitutions to Customize Your Korean Bbq Chicken
- Protein and Main Component Alternatives
- Vegetable, Sauce, and Seasoning Modifications
- Mastering Korean Bbq Chicken: Advanced Tips and Variations
- Pro cooking techniques
- Flavor variations
- Presentation tips
- Make-ahead options
- How to Store Korean Bbq Chicken: Best Practices
- FAQs: Frequently Asked Questions About Korean Bbq Chicken
- Korean Bbq Chicken
- Ingredients
- Instructions
- Last Step:
- Notes
- Nutrition
- Did you make this recipe?
Ingredients for Korean Bbq Chicken
Below is the full ingredient list for this Korean BBQ Chicken recipe. Each item is measured clearly so you can gather everything before you start cooking.
- 1 kg chicken pieces, thighs or wings
- 1/2 cup soy sauce
- 6 cloves garlic, minced
- 1 large onion, sliced
- 100g mozzarella cheese, shredded
- 2 tbsp chili flakes
- 1 tsp ground cinnamon
- 1 tsp black pepper
- 1 cup flour, for batter
- About 2 liters vegetable oil, for frying
| Ingredient | Purpose | Notes |
|---|---|---|
| Chicken pieces | Main protein | Thighs or wings work best for juicy results |
| Soy sauce | Salty base | Gives the Korean BBQ flavor |
| Garlic and onion | Aromatics | Helps balance heat and boosts savoriness |
| Chili flakes, cinnamon, black pepper | Seasoning | Creates warmth and depth |
| Flour | Batter coating | Helps build the crispy crust |
| Mozzarella cheese | Finishing option | Great for a cheesy sauce version |
| Vegetable oil | Frying medium | Use enough for safe deep frying |
How to Prepare the Perfect Korean Bbq Chicken: Step-by-Step Guide
First Step: Gather and prep everything
Start by setting out the chicken pieces, soy sauce, garlic, onion, chili flakes, cinnamon, black pepper, flour, mozzarella cheese, and vegetable oil. Slice the onion, mince the garlic, and measure the seasonings so the cooking process stays smooth. This recipe is especially helpful for busy cooks because the prep stays simple and the ingredient list is short.
If you are cooking for a smaller household, you can cut the recipe in half without changing the method. For larger gatherings, the same process works well in batches. Before you begin frying, clear space for a plate or tray lined with paper towels so the cooked chicken has a place to rest.
Second Step: Mix the marinade and season the chicken
In a bowl, combine the soy sauce, minced garlic, sliced onion, chili flakes, ground cinnamon, and black pepper. Add the chicken pieces and brush them by hand with the marinade so every piece gets coated well. Hand brushing helps the seasoning cling to the surface and gives the chicken more flavor before battering.
Let the chicken sit for a short time while you heat the oil. Even a brief rest can help the flavor settle in. If you want a less spicy version, add a little more onion and garlic, then reduce the chili flakes slightly. That keeps the dish bold without overpowering the plate.
Third Step: Coat the chicken in flour
Pour the flour into a shallow bowl or dish. Take each marinated chicken piece and hand batter it in the flour mixture until it is fully coated. Press lightly so the coating sticks well. This step is what helps form that crisp outer layer once the chicken hits the oil.
For a lighter crust, shake off extra flour before frying. For a thicker crust, press the coating on a little more firmly. Home cooks who like extra crunch can even double coat the chicken by dipping it back into the marinade and then into the flour again, though the original recipe works well with a single coating.
Fourth Step: Heat the oil to the right temperature
Pour about 2 liters of vegetable oil into a deep pan or fryer. Heat it to around 160°C or 320°F. This lower frying temperature is one of the most important parts of the recipe because it helps the chicken cook through more evenly while still turning crisp on the outside.
Use a thermometer if you have one. If the oil is too hot, the outside may brown too quickly before the inside is fully cooked. If the oil is too cool, the chicken can turn greasy. Keeping the oil steady is the best way to get that crunchy finish people want from Korean BBQ Chicken.
Fifth Step: Fry in batches for 10 to 12 minutes
Carefully place the coated chicken into the hot oil in small batches. Do not overcrowd the pan, because that can drop the oil temperature and soften the crust. Fry each batch for about 10 to 12 minutes, turning as needed so the pieces cook evenly and get a nice golden color.
When the chicken is done, move it to a plate lined with paper towels. Let the excess oil drain off for a moment before saucing. If you are making this for a group, keep the finished batches warm in a low oven while the rest of the chicken fries.
Sixth Step: Toss with sauce or cheese medley
Once all the chicken is fried, toss it in your signature sauce. A soy-based glaze gives you a classic savory finish, while a cheese medley can add a rich, creamy touch. The mozzarella cheese in this recipe works beautifully when melted into a warm sauce or sprinkled over the hot chicken so it softens on contact.
This is also where you can adjust the dish to match your mood. Want a stronger salty finish? Go heavier on the soy-based coating. Want a fun comfort-food version? Add the cheese and let it melt into the crispy chicken. Both versions work well with the same fried base.
Final Step: Serve hot and enjoy
Serve the Korean Bbq Chicken while it is hot and crisp. Add a side of rice, salad, or roasted vegetables if you want a full meal. It also works well as a shareable snack plate for parties, movie nights, or casual weekends at home.
The best Korean Bbq Chicken is fried low, cooked in batches, and served right away so the coating stays crisp and the sauce stays lively.
Preparation time is estimated at 30 to 45 minutes, depending on how fast you work and how many batches you fry. That makes it a solid choice for a weeknight dinner that still feels special.

Dietary Substitutions to Customize Your Korean Bbq Chicken
Protein and Main Component Alternatives
If you do not want to use thighs or wings, try boneless chicken pieces for faster cooking and easier serving. Chicken breast can work too, though it may cook more quickly and needs close attention so it stays juicy. For readers who prefer a different protein, the same flavor idea can be used with firm tofu or cauliflower florets, but the frying time will be shorter.
For those avoiding deep frying, you can oven-bake the coated chicken pieces or air-fry them in batches. The texture will be different, but the soy, garlic, onion, and spice mix still gives you a tasty Korean BBQ style result. If you need a lighter meal, pair the chicken with more vegetables and less sauce.
Vegetable, Sauce, and Seasoning Modifications
You can swap or add vegetables based on what you have on hand. Sliced bell peppers, scallions, or mushrooms pair well with the savory base. For a milder flavor, reduce the chili flakes and add a little extra onion to keep the dish balanced.
If you want a different sauce, try a sweet soy glaze, a garlicky butter sauce, or a mild cheese sauce. The recipe also works well with a touch of honey or brown sugar if you like a sweeter finish. For a garlic-focused flavor note, this Healthline guide to garlic benefits is a useful read.
Mastering Korean Bbq Chicken: Advanced Tips and Variations
Pro cooking techniques
Keep the oil at a steady 160°C or 320°F for the best texture. Frying too hot can make the coating burn before the meat cooks, while frying too cool can leave the crust soft. A thermometer makes the process much easier, especially if you are cooking multiple batches.
Another smart move is to let the fried chicken rest for a minute before saucing it. That short pause helps keep the coating from breaking apart too soon. If you want extra crunch, serve the sauce on the side instead of tossing the chicken right away.
Flavor variations
You can make the dish sweeter, saltier, or richer depending on the sauce you choose. A soy-based glaze gives a classic Korean-inspired bite, while a cheese medley turns it into a creamy comfort meal. For a stronger savory note, add more garlic and onion. For a spicier kick, add more chili flakes.
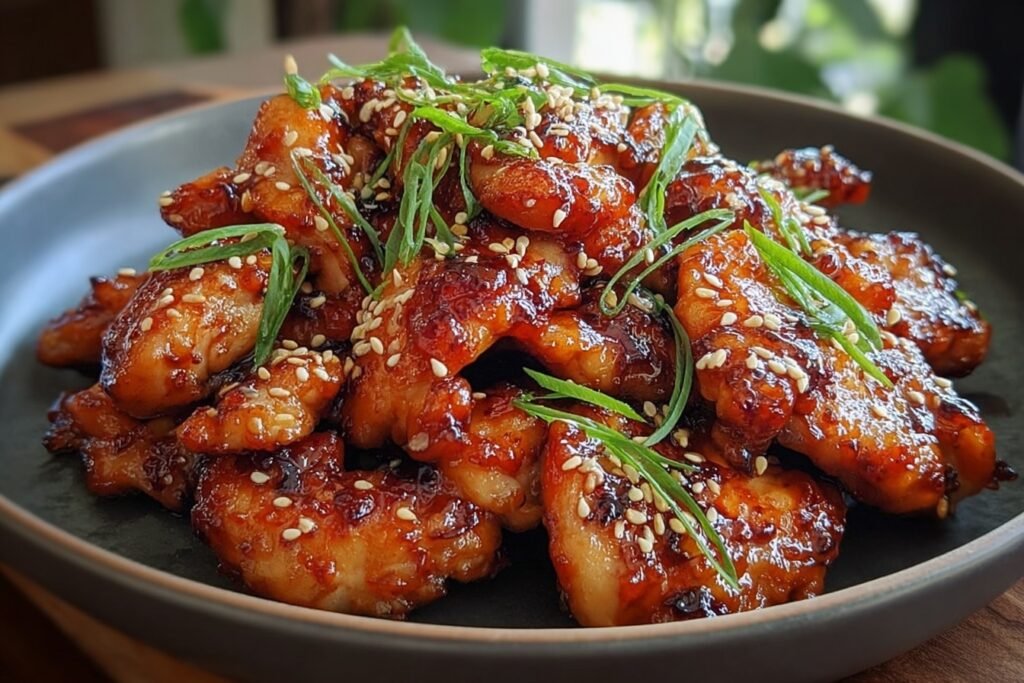
Some home cooks also like to finish Korean Bbq Chicken with sesame seeds or chopped scallions. Those toppings add color and a little fresh bite. If you are serving guests, offer two sauce bowls so people can choose their favorite version.
Presentation tips
Serve the chicken on a wide platter so the crispy pieces stay visible. A sprinkle of sliced onion, a few scallions, or a light drizzle of sauce makes the plate look fresh and inviting. If you are adding mozzarella cheese, let it melt just enough so the chicken still looks crisp around the edges.
Make-ahead options
You can mix the marinade ahead of time and refrigerate it for a day. You can also slice the onion and mince the garlic in advance to save time. If you are cooking for a busy week, fry the chicken, cool it, and store it for later reheating. That keeps dinner planning easier for working professionals and parents alike.
How to Store Korean Bbq Chicken: Best Practices
Leftover Korean Bbq Chicken can stay tasty when stored the right way. Let the chicken cool fully before packing it away. Store it in an airtight container in the refrigerator for up to 3 days.
For longer storage, freeze the fried chicken in a freezer-safe bag or container. Place parchment between layers if you want to keep the pieces from sticking together. When you are ready to eat, thaw it in the refrigerator before reheating.
To reheat, use an oven or air fryer instead of the microwave if you want to keep the coating crisp. Heat until the chicken is hot all the way through. If you added sauce or cheese earlier, expect the texture to be a little softer after storage, so a fresh sauce drizzle right before serving can help.
For meal prep, keep the fried chicken and sauce separate until serving time. That makes the coating last longer and gives you more control over texture. It is a practical option for batch cooking on weekends.

FAQs: Frequently Asked Questions About Korean Bbq Chicken
Print
Korean Bbq Chicken
🍗🔥 Crispy Korean BBQ chicken bursts with soy-garlic-chili flavor and melty mozzarella – juicy thighs/wings double-crisp fried perfection!
🌶️ Low-temp frying yields unbeatable crunch, quick marinade for bold taste – must-try for parties, game days, or weeknight wow!
- Total Time: 1 hour 20 minutes
- Yield: 4 servings
Ingredients
Instructions
1-First Step: Gather and prep everything Start by setting out the chicken pieces, soy sauce, garlic, onion, chili flakes, cinnamon, black pepper, flour, mozzarella cheese, and vegetable oil. Slice the onion, mince the garlic, and measure the seasonings so the cooking process stays smooth. This recipe is especially helpful for busy cooks because the prep stays simple and the ingredient list is short. If you are cooking for a smaller household, you can cut the recipe in half without changing the method. For larger gatherings, the same process works well in batches. Before you begin frying, clear space for a plate or tray lined with paper towels so the cooked chicken has a place to rest.
2-Second Step: Mix the marinade and season the chicken In a bowl, combine the soy sauce, minced garlic, sliced onion, chili flakes, ground cinnamon, and black pepper. Add the chicken pieces and brush them by hand with the marinade so every piece gets coated well. Hand brushing helps the seasoning cling to the surface and gives the chicken more flavor before battering. Let the chicken sit for a short time while you heat the oil. Even a brief rest can help the flavor settle in. If you want a less spicy version, add a little more onion and garlic, then reduce the chili flakes slightly. That keeps the dish bold without overpowering the plate.
3-Third Step: Coat the chicken in flour Pour the flour into a shallow bowl or dish. Take each marinated chicken piece and hand batter it in the flour mixture until it is fully coated. Press lightly so the coating sticks well. This step is what helps form that crisp outer layer once the chicken hits the oil. For a lighter crust, shake off extra flour before frying. For a thicker crust, press the coating on a little more firmly. Home cooks who like extra crunch can even double coat the chicken by dipping it back into the marinade and then into the flour again, though the original recipe works well with a single coating.
4-Fourth Step: Heat the oil to the right temperature Pour about 2 liters of vegetable oil into a deep pan or fryer. Heat it to around 160°C or 320°F. This lower frying temperature is one of the most important parts of the recipe because it helps the chicken cook through more evenly while still turning crisp on the outside. Use a thermometer if you have one. If the oil is too hot, the outside may brown too quickly before the inside is fully cooked. If the oil is too cool, the chicken can turn greasy. Keeping the oil steady is the best way to get that crunchy finish people want from Korean BBQ Chicken.
5-Fifth Step: Fry in batches for 10 to 12 minutes Carefully place the coated chicken into the hot oil in small batches. Do not overcrowd the pan, because that can drop the oil temperature and soften the crust. Fry each batch for about 10 to 12 minutes, turning as needed so the pieces cook evenly and get a nice golden color. When the chicken is done, move it to a plate lined with paper towels. Let the excess oil drain off for a moment before saucing. If you are making this for a group, keep the finished batches warm in a low oven while the rest of the chicken fries.
6-Sixth Step: Toss with sauce or cheese medley Once all the chicken is fried, toss it in your signature sauce. A soy-based glaze gives you a classic savory finish, while a cheese medley can add a rich, creamy touch. The mozzarella cheese in this recipe works beautifully when melted into a warm sauce or sprinkled over the hot chicken so it softens on contact. This is also where you can adjust the dish to match your mood. Want a stronger salty finish? Go heavier on the soy-based coating. Want a fun comfort-food version? Add the cheese and let it melt into the crispy chicken. Both versions work well with the same fried base.
7-Final Step: Serve hot and enjoy Serve the Korean Bbq Chicken while it is hot and crisp. Add a side of rice, salad, or roasted vegetables if you want a full meal. It also works well as a shareable snack plate for parties, movie nights, or casual weekends at home.
Last Step:
Please leave a rating and comment letting us know how you liked this recipe! This helps our business to thrive and continue providing free, high-quality recipes for you.Notes
🔥 Fry at 160°C low temp longer for extra-crispy skin without burning.
🧄 Balance bold chili heat with plenty of garlic and onions.
🧪 Experiment with sauce add-ins like honey or gochujang for variety.
- Prep Time: 20 minutes
- Marinate: 30 minutes
- Cook Time: 30 minutes
- Category: Main Course
- Method: Deep Frying
- Cuisine: Korean
Nutrition
- Serving Size: 250g
- Calories: 550 calories
- Sugar: 5g
- Sodium: 1200mg
- Fat: 35g
- Saturated Fat: 8g
- Unsaturated Fat: 25g
- Trans Fat: 0g
- Carbohydrates: 20g
- Fiber: 2g
- Protein: 40g
- Cholesterol: 150mg


