Why You’ll Love This Quick Hawaiian Guava Cake Recipe
This Quick Hawaiian Guava Cake Recipe brings sunny island flavor to your table with very little fuss. It is the kind of dessert that fits busy school nights, weekend get-togethers, and last-minute parties, which is why so many home cooks keep it close.
- Easy to make: This cake starts with a boxed strawberry cake mix, so the prep moves fast. You only need a large bowl, a 9×13-inch baking dish, and a few simple steps before it goes into the oven. That makes it a great pick for busy parents, students, and working professionals.
- Bright tropical flavor: Guava nectar or guava juice gives the cake a sweet, fruity taste that feels special without being complicated. The creamy filling and shiny guava topping turn each slice into a soft, rich treat with lots of island charm.
- Good for sharing: This recipe serves 12, so it works well for potlucks, birthdays, brunches, and family dinners. It also pairs nicely with other easy desserts like simple chocolate muffins for a sweet spread.
- Flexible for different needs: You can swap coconut oil for canola or vegetable oil, and use white or yellow cake mix if strawberry is not available. That makes this quick Hawaiian guava cake recipe easier to fit into your pantry and your routine.
Taste, texture, and speed all come together here, so you get a dessert that feels homemade without taking over your day.
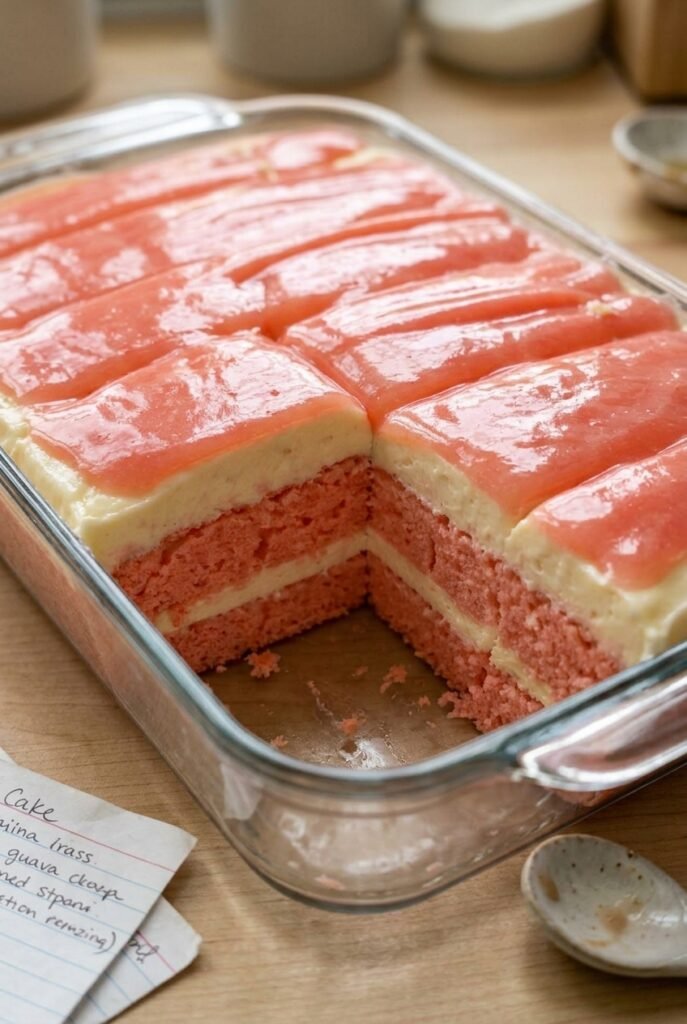
If you enjoy recipes that are simple, cheerful, and full of flavor, this one is a strong choice. The guava gel, cream cheese layer, and soft cake base make every bite taste like a mini tropical getaway.
For more on the fruit itself, you can also read about the health benefits of guava.
Jump to:
- Why You’ll Love This Quick Hawaiian Guava Cake Recipe
- Essential Ingredients for Quick Hawaiian Guava Cake Recipe
- Structured ingredient list
- What each ingredient does
- Special dietary options
- Quick ingredient notes
- How to Prepare the Perfect Quick Hawaiian Guava Cake Recipe: Step-by-Step Guide
- First step: Mix the cake batter
- Second step: Bake the cake
- Third step: Make the cream cheese layer
- Fourth step: Cook the guava gel topping
- Fifth step: Assemble the layers
- Final step: Slice and serve
- Dietary Substitutions to Customize Your Quick Hawaiian Guava Cake Recipe
- Protein and main component alternatives
- Vegetable, sauce, and seasoning modifications
- Mastering Quick Hawaiian Guava Cake Recipe: Advanced Tips and Variations
- Pro cooking techniques
- Flavor variations
- Presentation tips
- Make-ahead options
- How to Store Quick Hawaiian Guava Cake Recipe: Best Practices
- Refrigeration
- Freezing
- Reheating
- Meal prep considerations
- FAQs: Frequently Asked Questions About Quick Hawaiian Guava Cake Recipe
- What if my guava glaze isn’t setting up on Hawaiian guava cake?
- Can I freeze Hawaiian guava cake from a quick recipe?
- What’s a good substitute for coconut oil in quick Hawaiian guava cake?
- How do I store quick Hawaiian guava cake to keep it fresh?
- Can I make quick Hawaiian guava cake ahead for a party?
- Quick Hawaiian Guava Cake Recipe
- Ingredients
- Instructions
- Last Step:
- Notes
- Nutrition
- Did you make this recipe?
Essential Ingredients for Quick Hawaiian Guava Cake Recipe
Here is everything you need for this Quick Hawaiian Guava Cake Recipe, listed clearly so you can gather your ingredients before you begin. The measurements below match the recipe exactly, including the cake, cream cheese layer, and guava gel topping.
Structured ingredient list
- 1 box (15.25 ounces) strawberry cake mix
- 1 1/3 cups guava nectar or guava juice, divided
- 3 large eggs
- 1/3 cup coconut oil, at room temperature or liquid
- 8 ounces cream cheese, softened
- 1/3 cup sugar
- 1 teaspoon vanilla
- 8 ounces whipped topping, thawed
- 2 cups guava nectar or guava juice
- 1/2 cup sugar
- 1/4 cup cornstarch
- 3 tablespoons water
What each ingredient does
- Strawberry cake mix: Gives the cake a quick head start and adds a light berry note that works beautifully with guava.
- Guava nectar or juice: Adds the tropical flavor that makes this dessert stand out. Choose a brand you like to drink since taste matters here.
- Eggs: Help bind the batter and give the cake a soft, fluffy texture.
- Coconut oil: Brings gentle richness and a mild tropical feel. If you want, use canola oil or vegetable oil instead.
- Cream cheese: Makes the middle layer smooth, tangy, and creamy.
- Sugar: Balances the tartness in the cream cheese and helps sweeten the guava gel.
- Vanilla: Adds warmth and rounds out the flavor.
- Whipped topping: Lightens the cream cheese layer so it spreads easily and stays airy.
- Cornstarch and water: Work together to thicken the guava topping into a glossy gel.
Special dietary options
- Vegan: Use a vegan strawberry cake mix, egg replacer, plant-based cream cheese, and dairy-free whipped topping.
- Gluten-free: Use a gluten-free cake mix that bakes in a similar way to the original.
- Low-calorie: Choose a lighter whipped topping, reduced-sugar cake mix, and a sugar substitute that measures like sugar if desired.
Quick ingredient notes
| Part | Main ingredients | Purpose |
|---|---|---|
| Cake | Strawberry cake mix, guava juice, eggs, coconut oil | Forms the soft base |
| Cream layer | Cream cheese, sugar, vanilla, whipped topping | Adds creamy sweetness |
| Guava gel | Guava juice, sugar, cornstarch, water | Creates the shiny topping |
How to Prepare the Perfect Quick Hawaiian Guava Cake Recipe: Step-by-Step Guide
This Quick Hawaiian Guava Cake Recipe comes together in a few easy stages. The key is to keep the cake, cream layer, and guava topping separate until each part is cooled and ready. That gives you clean layers and the best texture.
First step: Mix the cake batter
Start by preheating your oven according to the cake mix package directions. Lightly grease a 9×13-inch baking dish so the cake releases easily after baking. In a large bowl, combine the strawberry cake mix, 1 1/3 cups guava nectar or guava juice, 3 large eggs, and 1/3 cup coconut oil.
Stir until the batter looks smooth and well blended. If your coconut oil is solid, let it sit at room temperature until soft or liquid before mixing. This helps the batter come together more evenly and keeps the cake tender.
Second step: Bake the cake
Pour the batter into the prepared baking dish and spread it into an even layer. Bake it using the time listed on the cake mix box, usually around 25 minutes for this recipe. Since ovens can vary, start checking a little early if needed.
To test for doneness, insert a toothpick into the center of the cake. If it comes out clean or with just a few moist crumbs, the cake is ready. Let the cake cool completely in the pan before adding any topping. This matters because a warm cake can melt the cream layer and make the dessert runny.
Third step: Make the cream cheese layer
While the cake cools, beat 8 ounces softened cream cheese in a mixing bowl until it looks light and fluffy. Add 1/3 cup sugar and 1 teaspoon vanilla, then mix until smooth. Fold in 8 ounces thawed whipped topping with a spatula so the mixture stays airy.
If the cream cheese is too cold, the filling may look lumpy. Room-temperature ingredients give you a much smoother finish. Once mixed, refrigerate the cream layer while you prepare the guava topping. This helps it firm up a bit and makes spreading easier later.
Fourth step: Cook the guava gel topping
Pour 2 cups guava nectar or guava juice and 1/2 cup sugar into a saucepan. Bring the mixture to a boil over medium heat, stirring now and then so the sugar dissolves.
In a small bowl, whisk 1/4 cup cornstarch with 3 tablespoons water until smooth. This makes a slurry that thickens the topping without lumps. Stir the slurry into the boiling guava mixture and cook for about 1 minute, or until it starts to thicken. If it still seems a little thin, let it cook 1 to 2 minutes longer while stirring constantly. Then remove it from the heat and let it cool completely.
Fifth step: Assemble the layers
Once the cake is fully cool, spread the cream cheese mixture over the top in an even layer. Take your time here so every slice gets a nice creamy middle. Next, spoon or pour the cooled guava gel over the cream layer and gently spread it to the edges.
After assembly, place the cake in the refrigerator until it sets. Chilling helps the layers hold their shape and makes slicing much easier. For the best flavor and texture, refrigerate it overnight if you can.
Final step: Slice and serve
Cut the cake into 12 squares and serve it chilled. If you want a little extra flair, top each piece with fresh guava slices or a sprinkle of shredded coconut. This is a pretty dessert for birthdays, potlucks, brunches, or any day that needs a tropical treat.
The biggest secret is patience between layers. A fully cooled cake, a chilled cream layer, and a cooled guava topping give you the cleanest, prettiest slices.

Dietary Substitutions to Customize Your Quick Hawaiian Guava Cake Recipe
One of the best things about this Quick Hawaiian Guava Cake Recipe is how easy it is to adapt. A few simple swaps can help you work with what you have in the kitchen or match certain food preferences.
Protein and main component alternatives
For the cake base, the recipe already gives you a few handy options. If coconut oil is not your thing, use canola oil or vegetable oil in the same amount. Both give a mild flavor and keep the cake moist. If you prefer a richer taste, melted unsalted butter can also work well, though it will add a slightly different finish.
If strawberry cake mix is hard to find, white or yellow cake mix will still give you a lovely result. The guava flavor will still come through strongly, and the cake will stay soft and sweet. For a lighter version, some home cooks also like using a reduced-sugar cake mix, though the texture may be a little different.
Vegetable, sauce, and seasoning modifications
For the cream layer, you can swap in dairy-free cream cheese and dairy-free whipped topping if you need a lactose-friendly dessert. If you want a lighter filling, use a whipped topping labeled reduced fat. The vanilla can stay the same, since it adds flavor without changing the texture.
For the guava gel, the main flavor comes from guava nectar or juice, so choose one with a taste you enjoy. If your juice is very sweet, lower the sugar a little. If it tastes tart, keep the full amount. That small adjustment can make a big difference in the final flavor balance.
People who enjoy flexible baking recipes may also like trying other easy breakfast and brunch bakes such as this quinoa spinach egg bake for a savory change of pace.
These swaps keep the dessert friendly for more households without changing the heart of the recipe. The cake still tastes tropical, creamy, and fun.
Mastering Quick Hawaiian Guava Cake Recipe: Advanced Tips and Variations
Once you have made this dessert once or twice, a few small tricks can help you get even better results. These tips are simple, but they can make the cake look prettier, slice cleaner, and taste even fresher.
Pro cooking techniques
Always check the cake with a toothpick near the end of baking so you do not overbake it. An overbaked cake can turn dry, while a just-right cake stays soft and tender. Also, be sure the guava gel cooks long enough to thicken properly. If it seems loose, let it simmer a little more before cooling.
Using room-temperature cream cheese and coconut oil helps the layers mix more smoothly. Cold ingredients can leave lumps, and that can make the finished cake harder to spread. A little extra time for cooling also pays off when you are building the layers.
Flavor variations
If you want to change the flavor a bit, try adding shredded coconut on top for more island style. You can also use a mix of guava juice and pineapple juice for a brighter fruit note. Some bakers like to add a little lime zest to the cream layer for a fresh citrus touch.
For a more festive look, top the cake with sliced strawberries or tiny pieces of fresh guava. The pink and green colors make the dessert look cheerful on a party table. This is a simple way to dress it up without adding much work.
Presentation tips
For cleaner slices, chill the cake overnight and wipe your knife between cuts. A sharp knife works best when the guava gel is fully set. If you are serving it for guests, place each square on a small dessert plate and add a coconut flake garnish.
A dessert like this also pairs well with other sweet bakes at a gathering, especially if you like a mix of fruity and rich flavors. It makes a nice match with coffee, tea, or a cold glass of milk.
Make-ahead options
This cake works well for planning ahead. You can bake the cake layer a day early, make the cream layer in advance, and cook the guava gel ahead of time too. Keep each part chilled, then assemble the dessert before serving or the night before if you want the flavors to blend.
For the best party dessert, make the layers ahead, then assemble when the cake is fully cool and the topping is fully set.
How to Store Quick Hawaiian Guava Cake Recipe: Best Practices
Because this dessert has cream cheese and whipped topping, it should be kept cold. Good storage helps the cake stay fresh, creamy, and safe to eat for a few days.
Refrigeration
Store the finished cake in an airtight container in the refrigerator for 4 to 5 days. If you need to stack slices, place a small piece of plastic wrap between layers so they do not stick together. For the best texture, let each slice sit at room temperature for just a few minutes before serving.
Freezing
If you want to freeze it, freeze only the cake layer for the best results. Wrap it tightly in plastic wrap, then add a layer of foil or place it in a freezer-safe bag. It can keep for up to 3 months. Thaw overnight in the fridge, then add the cream cheese layer and guava topping fresh.
Reheating
This cake is best served chilled, so there is no true reheating step. If a slice feels a little firm from the fridge, let it sit out for 5 to 10 minutes. That softens the cake without hurting the topping. A very short microwave burst can work in a pinch, but only for a few seconds.
Meal prep considerations
If you are making dessert for a busy week, bake the cake and mix the cream layer a day ahead. The guava topping can also be cooked early and cooled in the fridge. Assemble the cake the day you plan to serve it, or the night before if you want easy slicing and less work on party day.

FAQs: Frequently Asked Questions About Quick Hawaiian Guava Cake Recipe
What if my guava glaze isn’t setting up on Hawaiian guava cake?
Can I freeze Hawaiian guava cake from a quick recipe?
What’s a good substitute for coconut oil in quick Hawaiian guava cake?
How do I store quick Hawaiian guava cake to keep it fresh?
Can I make quick Hawaiian guava cake ahead for a party?

Quick Hawaiian Guava Cake Recipe
🥥🍍 Hawaiian guava cake layers tropical chiffon moistness, creamy frosting, glossy gel—party-worthy island escape.
🍰 35-min bake + chill: box mix easy, guava nectar zing, sets overnight perfection!
- Total Time: 35 minutes + overnight
- Yield: 12 servings
Ingredients
– 1 box (15.25 ounces) strawberry cake mix
– 1 1/3 cups guava nectar or guava juice, divided
– 3 large eggs
– 1/3 cup coconut oil, at room temperature or liquid
– 8 ounces cream cheese, softened
– 1/3 cup sugar
– 1 teaspoon vanilla
– 8 ounces whipped topping, thawed
– 2 cups guava nectar or guava juice
– 1/2 cup sugar
– 1/4 cup cornstarch
– 3 tablespoons water
Instructions
1-First step: Mix the cake batter Start by preheating your oven according to the cake mix package directions. Lightly grease a 9×13-inch baking dish so the cake releases easily after baking. In a large bowl, combine the strawberry cake mix, 1 1/3 cups guava nectar or guava juice, 3 large eggs, and 1/3 cup coconut oil. Stir until the batter looks smooth and well blended. If your coconut oil is solid, let it sit at room temperature until soft or liquid before mixing. This helps the batter come together more evenly and keeps the cake tender.
2-Second step: Bake the cake Pour the batter into the prepared baking dish and spread it into an even layer. Bake it using the time listed on the cake mix box, usually around 25 minutes for this recipe. Since ovens can vary, start checking a little early if needed. To test for doneness, insert a toothpick into the center of the cake. If it comes out clean or with just a few moist crumbs, the cake is ready. Let the cake cool completely in the pan before adding any topping. This matters because a warm cake can melt the cream layer and make the dessert runny.
3-Third step: Make the cream cheese layer While the cake cools, beat 8 ounces softened cream cheese in a mixing bowl until it looks light and fluffy. Add 1/3 cup sugar and 1 teaspoon vanilla, then mix until smooth. Fold in 8 ounces thawed whipped topping with a spatula so the mixture stays airy. If the cream cheese is too cold, the filling may look lumpy. Room-temperature ingredients give you a much smoother finish. Once mixed, refrigerate the cream layer while you prepare the guava topping. This helps it firm up a bit and makes spreading easier later.
4-Fourth step: Cook the guava gel topping Pour 2 cups guava nectar or guava juice and 1/2 cup sugar into a saucepan. Bring the mixture to a boil over medium heat, stirring now and then so the sugar dissolves. In a small bowl, whisk 1/4 cup cornstarch with 3 tablespoons water until smooth. This makes a slurry that thickens the topping without lumps. Stir the slurry into the boiling guava mixture and cook for about 1 minute, or until it starts to thicken. If it still seems a little thin, let it cook 1 to 2 minutes longer while stirring constantly. Then remove it from the heat and let it cool completely.
5-Fifth step: Assemble the layers Once the cake is fully cool, spread the cream cheese mixture over the top in an even layer. Take your time here so every slice gets a nice creamy middle. Next, spoon or pour the cooled guava gel over the cream layer and gently spread it to the edges. After assembly, place the cake in the refrigerator until it sets. Chilling helps the layers hold their shape and makes slicing much easier. For the best flavor and texture, refrigerate it overnight if you can.
6-Final step: Slice and serve Cut the cake into 12 squares and serve it chilled. If you want a little extra flair, top each piece with fresh guava slices or a sprinkle of shredded coconut. This is a pretty dessert for birthdays, potlucks, brunches, or any day that needs a tropical treat.
Last Step:
Please leave a rating and comment letting us know how you liked this recipe! This helps our business to thrive and continue providing free, high-quality recipes for you.Notes
🥄 Room-temp ingredients blend smoothest layers.
🔥 Toothpick test cake doneness—avoids gumminess.
❄️ Overnight chill = sliceable perfect texture.
- Prep Time: 10 minutes
- Chilling Time: Overnight
- Cook Time: 25 minutes
- Category: Desserts
- Method: Bake
- Cuisine: Hawaiian
- Diet: Vegetarian
Nutrition
- Serving Size: 1 slice
- Calories: 416 kcal
- Sugar: 44g
- Sodium: 338mg
- Fat: 17g
- Saturated Fat: 11g
- Unsaturated Fat: 6g
- Trans Fat: 0g
- Carbohydrates: 62g
- Fiber: 1g
- Protein: 4g
- Cholesterol: 65mg


