Ninja Creami Key Lime Pie Protein Ice Cream You Will Want on Repeat
If you love bright citrus flavor, creamy texture, and a dessert that feels fun but still gives you a protein boost, this Ninja Creami Key Lime Pie recipe is going to hit the spot. It is sweet, tangy, smooth, and so easy to make ahead for a treat later in the day. Best of all, it uses simple ingredients and works well for busy families, students, and anyone who wants a dessert that fits into real life.
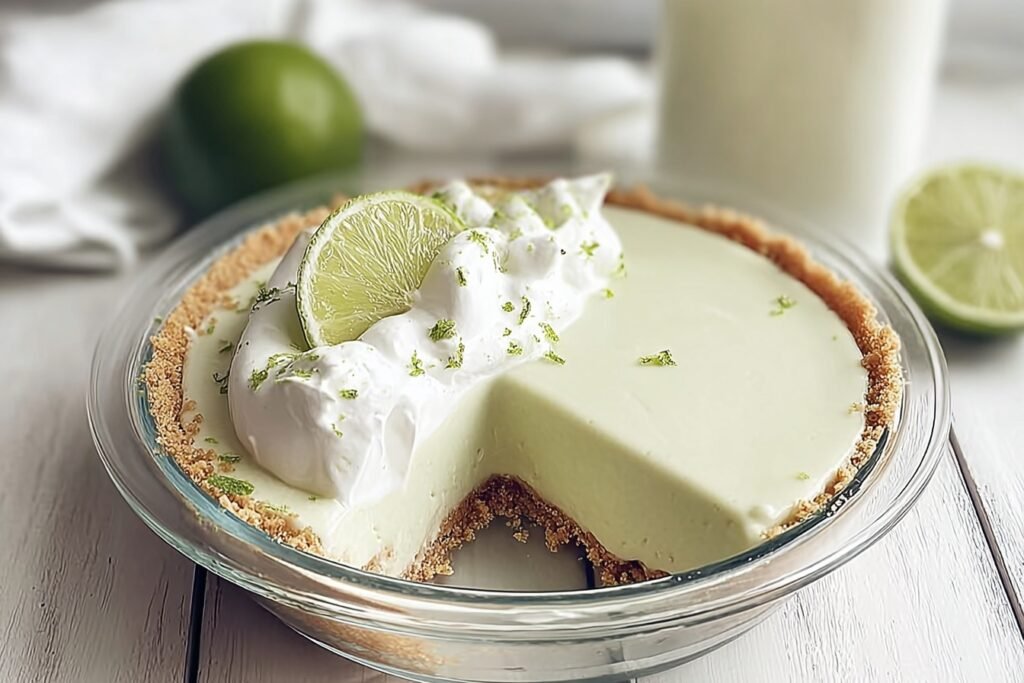
This Ninja Creami Key Lime Pie protein ice cream brings together the flavor of classic key lime pie and the creamy finish people love from a frozen treat. It is made with key lime pie Greek yogurt, milk, vanilla protein powder, and lime juice, then processed until dreamy and scoopable. If you are looking for a frozen dessert with more staying power than regular ice cream, this one is a strong pick.
Bright, creamy, and full of tangy lime flavor, this recipe feels special without asking for much effort.
Author: Josie Baker
Blog: recipesvalentina.com
For a quick refresher on the flavor behind this dessert, the health benefits of lime make a nice bonus read before you start. If you are new to frozen desserts, the Ninja Creami guide is also helpful for learning how the machine works.
Jump to:
- Ninja Creami Key Lime Pie Protein Ice Cream You Will Want on Repeat
- Why You Will Love This Ninja Creami Key Lime Pie
- Essential Ingredients for Ninja Creami Key Lime Pie
- Main Ingredients
- Why each ingredient matters
- Special dietary options
- How to Prepare the Perfect Ninja Creami Key Lime Pie: Step-by-Step Guide
- First Step: Gather and measure everything
- Second Step: Mix until creamy and lump-free
- Third Step: Freeze the pint
- Fourth Step: Process in the ice cream maker
- Fifth Step: Add mix-ins if you want more pie flavor
- Final Step: Serve and enjoy
- Dietary Substitutions to Customize Your Ninja Creami Key Lime Pie
- Protein and main component alternatives
- Vegetable, sauce, and seasoning modifications
- Mastering Ninja Creami Key Lime Pie: Advanced Tips and Variations
- Pro cooking techniques
- Flavor variations
- Presentation tips
- Make-ahead options
- How to Store Ninja Creami Key Lime Pie: Best Practices
- Refrigeration
- Freezing
- Reprocessing
- Meal prep considerations
- Nutrition Snapshot for Ninja Creami Key Lime Pie
- FAQs: Frequently Asked Questions About Ninja Creami Key Lime Pie
- Can I make Ninja Creami Key Lime Pie dairy-free?
- Can I use different yogurt for Ninja Creami Key Lime Pie?
- How do you store leftover Ninja Creami Key Lime Pie?
- How do I get creamy texture in Ninja Creami Key Lime Pie?
- What’s the easiest Ninja Creami Key Lime Pie recipe variation?
- Ninja Creami Key Lime Pie
- Ingredients
- Instructions
- Last Step:
- Notes
- Nutrition
- Did you make this recipe?
Why You Will Love This Ninja Creami Key Lime Pie
- Easy prep: You only need about 10 minutes to mix the base. After that, the freezer and the machine do most of the work, which makes this recipe great for busy weeknights or weekend meal prep.
- Good protein boost: With vanilla protein powder and Greek yogurt, each serving offers a satisfying amount of protein. That makes it a smarter dessert choice for active adults, teens, and anyone who wants something sweet with a little more staying power.
- Fresh, distinct flavor: The tangy lime taste gives this frozen treat that classic key lime pie feel. It is creamy, bright, and just different enough to keep things interesting.
- Flexible for different routines: You can serve it plain, top it with whipped cream, or add graham cracker crumbs for a pie-style finish. It also fits well into a variety of eating styles with simple swaps.
This recipe also works well for home cooks who want a dessert that can be made ahead. Because it freezes overnight, you can prep it when you have time and enjoy it later with very little effort. It is the kind of recipe that feels like a small win at the end of a long day.
Essential Ingredients for Ninja Creami Key Lime Pie
Main Ingredients
- 2 cartons of 5.3 ounce key lime pie Greek yogurt – This gives the base its signature flavor and creamy body.
- 1/2 cup milk – Whole milk is recommended for the creamiest texture and best spin in the machine.
- 1 scoop vanilla protein powder – Adds protein and helps the mixture turn thicker and more dessert-like.
- 2 teaspoons lime juice – Brings extra tartness and helps brighten the key lime pie flavor.
- Optional whipped cream – Perfect for serving and adds a soft, sweet finish.
- Optional graham cracker crumbs – Gives the ice cream a classic pie crust touch.
Why each ingredient matters
| Ingredient | Role in the recipe |
|---|---|
| Key lime pie Greek yogurt | Creates the base flavor and gives the dessert its creamy texture. |
| Milk | Helps everything blend smoothly and supports a softer final texture. |
| Vanilla protein powder | Adds protein and helps balance the tart lime flavor with a gentle sweetness. |
| Lime juice | Sharpens the citrus flavor so the dessert tastes more like key lime pie. |
| Whipped cream | Adds a light, bakery-style finish on top. |
| Graham cracker crumbs | Bring in that classic pie crust flavor and crunch. |
Special dietary options
- Vegan: This recipe has not been tested dairy-free, but you can try a plant-based yogurt and dairy-free protein powder if you want to test a vegan version at home.
- Gluten-free: The base is naturally gluten-free as written, but check your protein powder and toppings to be sure they are certified gluten-free.
- Low-calorie: Use a lighter yogurt and a lower-sugar protein powder if you want to keep the calories lower while still enjoying the citrus flavor.
How to Prepare the Perfect Ninja Creami Key Lime Pie: Step-by-Step Guide
First Step: Gather and measure everything
Start by pulling out all of your ingredients so the process feels smooth from the beginning. You will need 2 cartons of 5.3 ounce key lime pie Greek yogurt, 1/2 cup milk, 1 scoop vanilla protein powder, and 2 teaspoons lime juice. If you plan to serve it with toppings, keep the whipped cream and graham cracker crumbs nearby too.
Use a freezer-safe pint container for mixing and freezing. This matters because the base needs to freeze in the same container it will be processed in later. A level top also helps the machine work better and gives you a more even spin.
Second Step: Mix until creamy and lump-free
Add the Greek yogurt, milk, protein powder, and lime juice to the pint container. Then use a frother, immersion blender, or whisk to mix everything together until it looks smooth. Keep blending until you do not see any protein powder clumps.
If you want the creamiest result, take a little extra time here. A smooth base makes a big difference once the pint goes into the machine. If the mixture looks too thick, add a small splash of milk and mix again. If it seems too thin, whisk for another moment until it starts to look more unified.
Third Step: Freeze the pint
Once the mixture is smooth, place the lid on the pint container and freeze it overnight or for at least 10 hours. The longer freeze time helps the base set firmly so it spins properly. Try to keep the container flat in the freezer so the top stays level.
This recipe works best when the base is fully frozen all the way through. If you are in a hurry, do not cut the time short too much, because a soft center can lead to a soupy texture in the machine. A firm freeze is the key to that classic Creami texture.
Fourth Step: Process in the ice cream maker
When the base is fully frozen, remove the lid and place the pint into your ice cream maker. Use the lite ice cream setting for the best result. This setting helps turn the frozen base into a creamy dessert without overworking it.
If the texture comes out crumbly after the first spin, do not worry. That is very common with protein ice cream. Add a splash of milk or a spoonful of yogurt, then re-spin. This usually brings the texture back together and makes it much smoother.
Fifth Step: Add mix-ins if you want more pie flavor
For a more dessert-like finish, you can add graham cracker pieces or frozen cream cheese after the first spin. Then process it again so the mix-ins spread through the base. These extras add a pie crust vibe and a richer flavor that really suits the key lime theme.
Use a light hand with mix-ins so the texture still stays creamy. A few pieces are usually enough to give you that key lime pie feel without making the ice cream too heavy. If you want to keep it simple, you can skip this part and still have a delicious bowl.
Final Step: Serve and enjoy
Spoon the ice cream into bowls or dessert cups and top with whipped cream and graham cracker crumbs if desired. The whipped cream adds a soft finish, while the crumbs bring a little crunch. Serve right away for the best texture.
If the pint has been sitting in the freezer for a while after spinning, let it sit out for a few minutes before serving. That short rest can make scooping easier and help the texture feel softer. This dessert is best enjoyed soon after processing, when it is at its creamiest.
For the best spin, freeze the pint flat and give it a few minutes on the counter before processing if it has become very firm.

Dietary Substitutions to Customize Your Ninja Creami Key Lime Pie
Protein and main component alternatives
If you want to change the base of this Ninja Creami Key Lime Pie recipe, start with the yogurt. Lemon Greek yogurt works beautifully when paired with lemon juice instead of lime juice. It gives you a brighter citrus taste while still keeping the same creamy style.
Vanilla yogurt is another easy swap if you want a milder flavor. In that case, you may want to keep a little more lime juice so the dessert still tastes like key lime pie. For a richer version, some home cooks like to mix in frozen cream cheese, which gives the final spin a richer, pie-like finish.
Vegetable, sauce, and seasoning modifications
This recipe does not use vegetables, but you can still play with flavor additions in a few simple ways. Graham cracker pieces are the most classic mix-in, but you could also try a small amount of crushed vanilla cookie crumbs if that is what you have on hand. A tiny pinch of salt can also help the lime flavor pop.
If you want a lighter feel, use less topping and keep the base simple. If you want more sweetness, add a bit of whipped cream on top instead of mixing in extra sugar. Since the recipe already has a good balance of tangy and sweet, small changes are usually enough.
Mastering Ninja Creami Key Lime Pie: Advanced Tips and Variations
Pro cooking techniques
One of the best tips for this recipe is to use whole milk. It gives the base a creamier texture and helps it spin into a richer dessert. Another smart move is to remove the pint from the freezer 5 to 10 minutes before processing. That short rest can reduce crumbliness and make the spin smoother.
If your first spin looks dry or powdery, add just a splash of milk or yogurt and re-spin. It usually takes only a little liquid to bring the texture back together. Also, make sure the pint is not overfilled, since too much base can make processing less even.
Flavor variations
If you like to mix things up, try swapping the yogurt flavor and matching the juice. Lemon yogurt with lemon juice gives a bright twist. You could also try another citrus-forward version if you enjoy tart desserts.
For more texture, add graham cracker pieces or frozen cream cheese after the first spin. These mix-ins give the dessert a more pie-like feel and make it fun for serving guests. You can also drizzle a little whipped cream on top for a bakery-style look.
Presentation tips
Serve the ice cream in chilled bowls if you want to slow melting. A light sprinkle of graham cracker crumbs on top makes it look like mini key lime pie in a bowl. You can also add a thin lime slice on the rim for a fresh look.
For a family dessert night, put out a small topping bar. Let everyone add their own whipped cream, crumbs, or extra lime zest. That small touch makes dessert feel special without adding much work.
Make-ahead options
This recipe is ideal for planning ahead. Since the base needs to freeze overnight or at least 10 hours, you can mix it the day before you need it. That works well for busy parents, students, and working professionals who want a sweet treat ready to go.
Leftovers can be stored in an airtight container in the freezer and re-processed as needed. If the texture firms up too much, let it sit out for a few minutes before spinning again. This makes it easy to enjoy later without wasting any of the batch.
How to Store Ninja Creami Key Lime Pie: Best Practices
Refrigeration
This dessert is best enjoyed fresh after processing, so refrigeration is not the main storage method. If you need to hold it briefly after spinning, keep it cold and covered. For longer freshness, move it back into the freezer instead of leaving it in the fridge.
Freezing
Store leftovers in an airtight container in the freezer. Smooth the top flat before freezing to help reduce ice crystals. When you are ready to eat it again, let it sit out for a few minutes and re-spin if needed.
Reprocessing
If the texture gets a little icy after storage, add a small splash of milk or yogurt and run it through the machine again. That usually brings back the creamy finish. This is especially helpful if the dessert has been stored for a few days.
Meal prep considerations
Because the base needs time to freeze, this recipe is a smart meal prep dessert. You can make a batch at the start of the week and enjoy it later in smaller servings. It fits nicely into a routine where you want something sweet ready without extra cooking.
Nutrition Snapshot for Ninja Creami Key Lime Pie
Here is the nutrition breakdown per serving, based on the recipe information provided:
| Nutrient | Amount per serving |
|---|---|
| Calories | 373 |
| Carbohydrates | 48 grams |
| Protein | 26 grams |
| Fat | 10 grams |
| Saturated fat | 4 grams |
| Polyunsaturated fat | 6 grams |
| Cholesterol | 12 milligrams |
| Sodium | 282 milligrams |
| Fiber | 4 grams |
| Sugar | 21 grams |
This makes it a dessert that feels a little more balanced than many store-bought frozen treats. The protein content is especially helpful if you want a sweet option that still fits into a more mindful eating routine.

FAQs: Frequently Asked Questions About Ninja Creami Key Lime Pie
Can I make Ninja Creami Key Lime Pie dairy-free?
Can I use different yogurt for Ninja Creami Key Lime Pie?
How do you store leftover Ninja Creami Key Lime Pie?
How do I get creamy texture in Ninja Creami Key Lime Pie?
What’s the easiest Ninja Creami Key Lime Pie recipe variation?

Ninja Creami Key Lime Pie
🍨 Indulge in creamy, tangy key lime pie flavor with a protein boost – a healthy frozen treat that satisfies sweet cravings!
🍋 High-protein, low-effort ice cream perfect for workouts, desserts, or hot summer days without the guilt.
- Total Time: 10 hours 10 minutes
- Yield: 2 servings
Ingredients
– 2 cartons of 5.3 ounce key lime pie Greek yogurt for base flavor and creamy texture
– 1/2 cup milk for smooth blending and soft texture
– 1 scoop vanilla protein powder for protein and flavor balance
– 2 teaspoons lime juice for sharpening citrus flavor
– optional whipped cream for light bakery-style finish
– optional graham cracker crumbs for classic pie crust crunch
Instructions
1-First Step: Gather and measure everything Start by pulling out all of your ingredients so the process feels smooth from the beginning. You will need 2 cartons of 5.3 ounce key lime pie Greek yogurt, 1/2 cup milk, 1 scoop vanilla protein powder, and 2 teaspoons lime juice. If you plan to serve it with toppings, keep the whipped cream and graham cracker crumbs nearby too. Use a freezer-safe pint container for mixing and freezing. This matters because the base needs to freeze in the same container it will be processed in later. A level top also helps the machine work better and gives you a more even spin.
2-Second Step: Mix until creamy and lump-free Add the Greek yogurt, milk, protein powder, and lime juice to the pint container. Then use a frother, immersion blender, or whisk to mix everything together until it looks smooth. Keep blending until you do not see any protein powder clumps. If you want the creamiest result, take a little extra time here. A smooth base makes a big difference once the pint goes into the machine. If the mixture looks too thick, add a small splash of milk and mix again. If it seems too thin, whisk for another moment until it starts to look more unified.
3-Third Step: Freeze the pint Once the mixture is smooth, place the lid on the pint container and freeze it overnight or for at least 10 hours. The longer freeze time helps the base set firmly so it spins properly. Try to keep the container flat in the freezer so the top stays level. This recipe works best when the base is fully frozen all the way through. If you are in a hurry, do not cut the time short too much, because a soft center can lead to a soupy texture in the machine. A firm freeze is the key to that classic Creami texture.
4-Fourth Step: Process in the ice cream maker When the base is fully frozen, remove the lid and place the pint into your ice cream maker. Use the lite ice cream setting for the best result. This setting helps turn the frozen base into a creamy dessert without overworking it. If the texture comes out crumbly after the first spin, do not worry. That is very common with protein ice cream. Add a splash of milk or a spoonful of yogurt, then re-spin. This usually brings the texture back together and makes it much smoother.
5-Fifth Step: Add mix-ins if you want more pie flavor For a more dessert-like finish, you can add graham cracker pieces or frozen cream cheese after the first spin. Then process it again so the mix-ins spread through the base. These extras add a pie crust vibe and a richer flavor that really suits the key lime theme. Use a light hand with mix-ins so the texture still stays creamy. A few pieces are usually enough to give you that key lime pie feel without making the ice cream too heavy. If you want to keep it simple, you can skip this part and still have a delicious bowl.
6-Final Step: Serve and enjoy Spoon the ice cream into bowls or dessert cups and top with whipped cream and graham cracker crumbs if desired. The whipped cream adds a soft finish, while the crumbs bring a little crunch. Serve right away for the best texture. If the pint has been sitting in the freezer for a while after spinning, let it sit out for a few minutes before serving. That short rest can make scooping easier and help the texture feel softer. This dessert is best enjoyed soon after processing, when it is at its creamiest.
Last Step:
Please leave a rating and comment letting us know how you liked this recipe! This helps our business to thrive and continue providing free, high-quality recipes for you.Notes
🥛 Use whole milk for the creamiest, richest texture.
❄️ Let the frozen pint sit at room temperature for 5-10 minutes before processing to reduce crumbliness.
🍪 Add graham cracker crumbs or frozen cream cheese as mix-ins for authentic key lime pie taste.
- Prep Time: 10 minutes
- Freezing Time: 10 hours
- Category: Desserts
- Method: No-Churn Ice Cream
- Cuisine: American
- Diet: High Protein
Nutrition
- Serving Size: 1 serving
- Calories: 373
- Sugar: 21g
- Sodium: 282mg
- Fat: 10g
- Saturated Fat: 4g
- Unsaturated Fat: 6g
- Trans Fat: 0g
- Carbohydrates: 48g
- Fiber: 4g
- Protein: 26g
- Cholesterol: 12mg


