Why You’ll Love This Chocolate Eclair
If you’re looking for a dessert that combines simplicity with elegance, this chocolate eclair cake recipe is exactly what you need. Here’s why this no-bake dessert should be at the top of your must-try list:
Ease of Preparation
This chocolate eclair cake requires minimal effort and time, making it perfect for busy weeknights or unexpected gatherings. Unlike traditional eclairs that involve making choux pastry, this version uses readily available ingredients that most home cooks have on hand. The no-bake approach means you can have this delicious dessert ready in under 30 minutes, with most of that time being chilling time rather than active preparation.
Health Benefits
While this chocolate eclair cake is certainly a treat, you can make smarter ingredient choices to boost its nutritional value. By using lower-fat milk substitutes and adjusting sugar content, you can create a dessert that fits into a balanced diet. The calcium from dairy products and potential antioxidants from dark chocolate make this dessert a relatively better choice compared to many other sugar-loaded treats. For those watching their calorie intake, portion control is easy with this cake as it can be cut into precise servings.
Versatility
This recipe adapts beautifully to various dietary needs without compromising on taste or texture. Whether you need gluten-free options, vegan alternatives, or lower-calorie versions, this chocolate eclair cake can be customized to meet different requirements. The basic structure remains stable across variations, making it a reliable go-to recipe for households with multiple dietary preferences or restrictions.
Distinctive Flavor
The combination of creamy vanilla pudding, smooth chocolate topping, and crunchy graham crackers creates a perfect harmony of textures and flavors that sets this dessert apart. As the chills, the graham crackers soften slightly to mimic the texture of traditional eclairs while maintaining just enough structure for a satisfying bite. The chocolate eclair experience is complete with the rich chocolate glaze that adds both visual appeal and an extra layer of decadence.
This no-bake chocolate eclair cake delivers the classic flavors you love with a fraction of the effort, making it perfect for both novice and experienced bakers alike.
Jump to:
- Why You’ll Love This <a href="https://recipesvalentina.com">Chocolate Eclair</a>
- Ease of Preparation
- Health Benefits
- Versatility
- Distinctive Flavor
- Essential Ingredients for <a href="https://recipesvalentina.com">Chocolate Eclair</a>
- Main Ingredients
- Special Dietary Options
- Vegan Substitutes
- Gluten-Free Alternatives
- Low-Calorie Options
- How to Prepare the Perfect <a href="https://recipesvalentina.com">Chocolate Eclair</a>: Step-by-Step Guide
- First Step: Preparation and Mise en Place
- Second Step: Creating the Pastry Base (Optional Traditional Method)
- Third Step: Preparing the Creamy Filling
- Fourth Step: Assembling the Layers
- Fifth Step: Creating the Chocolate Glaze
- Final Step: Chilling and Serving
- Dietary Substitutions to Customize Your <a href="https://recipesvalentine.com">Chocolate Eclair</a>
- Protein and Main Component Alternatives
- Vegetable, Sauce, and Seasoning Modifications
- Mastering <a href="https://recipesvalentina.com">Chocolate Eclair</a>: Advanced Tips and Variations
- Pro Cooking Techniques
- Flavor Variations
- Presentation Tips
- Make-Ahead Options
- How to Store <a href="https://recipesvalentina.com">Chocolate Eclair</a>: Best Practices
- Refrigeration
- Freezing
- Reheating
- Meal Prep Considerations
- FAQs: Frequently Asked Questions About <a href="https://recipesvalentina.com">Chocolate Eclair</a>
- What is a chocolate eclair?
- How do you make chocolate eclairs at home?
- How many calories are in a chocolate eclair?
- How long do chocolate eclairs stay fresh?
- What are some chocolate eclair variations?
- Chocolate Eclair
- Ingredients
- Instructions
- Last Step:
- Notes
- Nutrition
- Did you make this recipe?
Essential Ingredients for Chocolate Eclair
Before diving into creating your delicious dessert, gather all the necessary ingredients. This chocolate eclair cake relies on simple components that work together to create something extraordinary.
Main Ingredients
- 1/2 cup water – Essential for the choux pastry base
- 1/4 cup butter – Provides richness and helps create the pastry structure
- 1 pinch salt – Enhances overall flavor
- 1/2 cup flour – Forms the base of the pastry dough
- 2 eggs – Adds structure and helps the pastry puff up
- 2 cups milk – Creates the smooth, creamy filling
- 4 egg yolks – Thickens the pastry cream and provides richness
- 1/2 cup sugar – Sweetens both the pastry cream and balances flavors
- 3 tablespoons cornstarch – Essential thickening agent for the filling
- 1 teaspoon vanilla extract – Provides classic flavor profile
- 4 oz dark chocolate – Creates the rich glaze topping
- 1/4 cup cream – Adds silkiness to the chocolate glaze
- 1 box graham crackers (approx. 14 sheets) – Forms the layers in this no-bake variation
- 2 packages instant vanilla pudding mix – Creates the creamy filling layers
- 3 cups cold milk – Required for preparing the instant pudding
- 8 ounces whipped topping – Adds lightness to the filling
Special Dietary Options
Vegan Substitutes
- Replace eggs with 6 tablespoons aquafaba (chickpea liquid)
- Use plant-based butter or coconut oil instead of dairy butter
- Substitute dairy milk with oat, almond, or soy milk
- Choose plant-based whipped topping alternatives
- Select dairy-free chocolate for the glaze
Gluten-Free Alternatives
- Use gluten-free graham crackers or cookie alternatives
- Replace all-purpose flour with a 1:1 gluten-free flour blend
- Ensure all other ingredients are certified gluten-free
Low-Calorie Options
- Use sugar-free instant pudding mix
- Opt for light whipped topping or fat-free Greek yogurt
- Replace some of the milk with unsweetened almond milk
- Use sugar substitute in place of regular sugar
How to Prepare the Perfect Chocolate Eclair: Step-by-Step Guide
Creating this delicious no-bake chocolate eclair cake is simpler than you might think. Follow these detailed steps to achieve a dessert that looks impressive and tastes absolutely divine. For traditional éclairs, consider following this classic French éclair recipe to master the authentic technique.
First Step: Preparation and Mise en Place
Begin by gathering all your ingredients and ensuring you have the necessary equipment. You’ll need a 9×13 inch baking dish, mixing bowls, a whisk, and a spatula. For the traditional eclair pastry method, prepare a baking sheet by lining it with parchment paper. Having everything organized before you start will make the process smoother and more enjoyable. Clear some space in your refrigerator as the cake will need to chill for several hours to set properly.
Second Step: Creating the Pastry Base (Optional Traditional Method)
If you’re making traditional eclairs rather than the no-bake cake version, start by preparing the choux pastry. In a medium saucepan, combine 1/2 cup water, 1/4 cup butter, and a pinch of salt. Bring this mixture to a rolling boil. Remove from heat immediately and add 1/2 cup flour all at once. Stir vigorously with a wooden spoon until the mixture forms a ball and pulls away from the sides of the pan. Let this cool for about 5 minutes.
Next, add your eggs one at a time, beating well after each addition until fully incorporated. The dough should be smooth and glossy but not too thin. Transfer the dough to a piping bag fitted with a large round tip. Pipe 4-inch long strips onto your prepared baking sheet, leaving space between them as they will expand. For best results, bake at 400°F for 20-25 minutes until golden brown and puffed. Let them cool completely on a wire rack before filling.
For the no-bake cake version, skip this step entirely and proceed directly to preparing the filling.
Third Step: Preparing the Creamy Filling
For the easiest no-bake version, whisk together 2 packages of instant vanilla pudding mix with 3 cups of cold milk until smooth and slightly thickened. Gently fold in 8 ounces of whipped topping until well combined. This creates a light and creamy filling that perfectly mimics traditional pastry cream.
If you prefer making your own pastry cream from scratch for a more authentic taste, follow this method: Heat 2 cups of milk in a saucepan until just boiling. Meanwhile, whisk together 4 egg yolks, 1/2 cup sugar, and 3 tablespoons cornstarch until pale yellow and smooth. Slowly pour about 1/2 cup of the hot milk into the egg mixture while whisking constantly, then return this mixture to the saucepan with the remaining milk.
Cook over medium heat, stirring constantly until the mixture thickens and bubbles for about 1-2 minutes. Remove from heat and stir in 1 teaspoon vanilla extract. Transfer to a bowl, cover with plastic wrap directly touching the surface to prevent a skin from forming, and refrigerate until completely cooled.
Fourth Step: Assembling the Layers
For the no-bake cake version, begin by placing a single layer of graham crackers at the bottom of your 9×13 inch baking dish. You may need to break some crackers to fit the spaces perfectly. Spread half of your prepared filling evenly over the graham crackers. Add another layer of graham crackers, followed by the remaining filling. Finish with a final layer of graham crackers on top.
If you’re making traditional eclairs, use a piping bag fitted with a small round tip to fill the cooled pastry shells. Insert the tip into one end of each eclair and gently squeeze to fill with your prepared pastry cream. You’ll know they’re full when you feel a slight resistance or see the cream start to emerge.
Fifth Step: Creating the Chocolate Glaze
In a microwave-safe bowl, combine 4 ounces of dark chocolate with 1/4 cup of cream. Microwave in 30-second intervals, stirring between each, until completely smooth and glossy. Alternatively, you can use a double boiler method to melt the chocolate gently.
For the cake version, pour this warm glaze evenly over the top layer of graham crackers, spreading with an offset spatula to create an even surface. For traditional eclairs, dip the top of each filled eclair into the glaze, allowing excess to drip off before placing on a wire rack to set.
Final Step: Chilling and Serving
Refrigerate your no-bake chocolate eclair cake for at least 4-6 hours, or ideally overnight. This chilling period allows the graham crackers to soften to a cake-like texture and all the flavors to meld together beautifully. Traditional eclairs should be chilled for about 30 minutes to allow the glaze to set completely.
When ready to serve, cut the cake into squares and garnish with a light dusting of cocoa powder or chocolate shavings if desired. Traditional eclairs can be served as-is or with a dollop of whipped cream on the side. Both versions are best enjoyed chilled but can sit at room temperature for up to 30 minutes before serving without compromising texture.
The secret to the perfect chocolate eclair experience is patience allowing enough chilling time ensures the layers set properly and the flavors develop fully.
Dietary Substitutions to Customize Your Chocolate Eclair
One of the wonderful aspects of this chocolate eclair recipe is its adaptability. Whether you have specific dietary requirements or simply want to experiment with different ingredients, these substitutions will help you create a personalized version that meets your needs.
Protein and Main Component Alternatives
For those looking to modify the protein content or main components of this dessert, several excellent alternatives exist. If you prefer to avoid dairy products, coconut cream makes an excellent substitute for both the filling and whipped topping. Its natural sweetness pairs wonderfully with chocolate, though it will impart a subtle coconut flavor to the final dish. Cashew cream is another dairy-free alternative that provides a rich, creamy texture similar to traditional dairy products.
For a higher-protein version, consider using Greek yogurt in place of some or all of the whipped topping. This substitution not only increases the protein content but also adds a pleasant tang that balances the sweetness of the chocolate and vanilla. Silken tofu blended with a sweetener and vanilla can also create a surprisingly smooth and creamy filling suitable for vegan diets.
If you need to avoid eggs in the traditional pastry cream, you can create a custard-like consistency using cornstarch as the primary thickener. Increase the cornstarch to 4-5 tablespoons and cook the mixture until it reaches the desired thickness. This egg-free version sets well when chilled and maintains the classic vanilla flavor profile.
Vegetable, Sauce, and Seasoning Modifications
While this chocolate eclair recipe traditionally follows a specific flavor profile, creative modifications can yield delicious results. For seasonal variations, consider adding fruit layers between the graham crackers. Fresh berries, sliced bananas, or even poached pears can add moisture and natural sweetness while reducing the need for excessive sugar.
Nut butters can be swirled into the filling for added protein and flavor depth. Peanut butter creates a classic combination with chocolate, while almond butter adds a more subtle nuttiness. For those with nut allergies, sunflower seed butter provides a similar texture with a different flavor profile.
The chocolate glaze itself can be modified with various additions. A pinch of cinnamon or cayenne pepper adds warmth and complexity to the chocolate flavor. For a mocha variation, dissolve instant espresso powder in the cream before melting the chocolate. Mint extract can transform this into a refreshing peppermint chocolate eclair cake, perfect for holidays or summer gatherings.
For a more sophisticated flavor profile, consider infusing the milk used in the filling with herbs or spices before combining with other ingredients. Lavender, cardamom, or even a vanilla bean split and steeped in warm milk can elevate this simple dessert to something truly special.
| Dietary Need | Original Ingredient | Substitute Option | Notes |
|---|---|---|---|
| Vegan | Dairy milk | Oat, almond, or soy milk | Use unsweetened varieties for best results |
| Gluten-free | Graham crackers | Gluten-free graham-style crackers | May have slightly different texture |
| Lower sugar | Instant pudding | Sugar-free pudding mix | Check for artificial aftertaste |
| Higher protein | Whipped topping | Greek yogurt | Will add tangy flavor |
Mastering Chocolate Eclair: Advanced Tips and Variations
Once you’ve mastered the basic chocolate eclair cake recipe, these advanced techniques and creative variations will help you elevate your dessert-making skills and impress your family and friends.
Pro Cooking Techniques
The key to a professional-looking chocolate eclair cake lies in achieving perfectly smooth layers. When spreading the filling between graham cracker layers, use an offset spatula held at a slight angle to create even layers without disturbing the crackers underneath. For the chocolate glaze, pour it from one end of the pan to the other while moving steadily back and forth, then immediately tap the pan gently on the counter to eliminate air bubbles and create a perfectly smooth surface.
Temperature control significantly impacts the final texture of your dessert. All ingredients should be properly chilled before assembly, especially the filling and whipped topping. This prevents the layers from mixing together and ensures distinct layers when sliced. The chocolate glaze should be warm but not hot when applied too hot and it may melt the filling underneath; too cool and it won’t spread smoothly.
For the cleanest cuts, use a sharp knife dipped in hot water and wiped dry between each slice. This technique prevents the knife from dragging through the chocolate glaze and filling, creating clean, professional-looking portions. For extra precision, you can mark your cutting lines lightly with a toothpick before slicing.
Flavor Variations
While the classic chocolate eclair flavor combination is timeless, experimenting with different variations can yield delightful results. For a salted caramel version, drizzle caramel sauce between the layers and finish with a chocolate glaze sprinkled with sea salt. Coffee lovers can substitute half of the milk in the filling with strong brewed coffee for a mocha-inspired chocolate eclair cake.
Seasonal variations keep this recipe exciting year-round. In summer, incorporate fresh berries between layers or top with lightly sweetened whipped cream and fruit. Fall versions might include pumpkin spice mixed into the filling, while winter variations could feature peppermint extract in both the filling and glaze. Spring calls for lighter flavors consider lemon zest in the filling and a white chocolate glaze instead of traditional chocolate.
Nut additions provide both texture and flavor contrast. Chopped toasted pecans, walnuts, or hazelnuts can be sprinkled between layers or incorporated into the filling. For those with nut allergies, toasted coconut flakes or crushed cocoa nibs offer similar textural contrast without the allergen concerns.
Presentation Tips
Elevate the visual appeal of your chocolate eclair cake with simple presentation techniques. A dusting of cocoa powder, cinnamon, or powdered sugar over the chocolate glaze adds visual interest and an extra layer of flavor. Fresh mint leaves or edible flowers create a beautiful contrast to the dark chocolate glaze.
Individual servings make an impressive presentation for dinner parties. Instead of assembling one large cake, create mini versions in mason jars or clear glasses. Layer the ingredients in small containers for elegant individual portions that show off the beautiful layers. These mini versions require less chilling time and can be prepared the day before your event.
For holiday occasions, themed garnishes add a festive touch. Crushed peppermint candies work beautifully for winter holidays, while pastel sprinkles or edible flowers suit spring celebrations. Halloween calls for candy eyes or spiderweb designs made with white chocolate on top of the glaze.
Make-Ahead Options
This chocolate eclair cake is ideal for advance preparation, making it perfect for busy hosts. The assembled cake actually improves with time as the flavors meld together and the texture becomes more uniform. You can prepare the entire cake up to 24 hours before serving, covering it tightly and refrigerating until ready to serve.
For even more convenience, the components can be prepared separately and assembled later. The filling can be made up to 3 days in advance and stored in an airtight container in the refrigerator. The chocolate glaze can be made ahead and gently reheated before applying. This flexibility allows you to spread the preparation over several days, reducing the stress of last-minute dessert preparation.
Freezing assembled portions is another excellent make-ahead strategy. Cut the fully assembled cake into individual portions, wrap each tightly in plastic wrap, and freeze for up to 1 month. Thaw individual portions in the refrigerator overnight for a quick dessert solution that tastes freshly made.
The most impressive desserts often come from the simplest recipes executed with attention to detail and quality ingredients.
How to Store Chocolate Eclair: Best Practices
Proper storage of your chocolate eclair cake ensures it maintains its delicious taste and appealing texture. Follow these guidelines to keep your dessert fresh for as long as possible. For detailed nutritional information about chocolate éclairs, you can check this comprehensive nutrition guide.
Refrigeration
This chocolate eclair cake must be stored in the refrigerator due to its dairy components. Cover the baking dish tightly with plastic wrap or aluminum foil, or transfer any leftover portions to an airtight container. Properly stored, the cake will remain fresh for up to 4-5 days in the refrigerator. For optimal texture, consume within the first 2-3 days when the graham crackers still maintain some structure without becoming overly soft.
If you’ve cut individual portions from the cake, store them in separate airtight containers to prevent the exposed edges from drying out. This also makes grabbing a quick portion easier without exposing the entire dessert to air each time.
Freezing
Freezing extends the life of your chocolate eclair cake significantly. For best results, freeze the entire cake before cutting it. Wrap the baking dish tightly with plastic wrap, followed by a layer of aluminum foil for extra protection against freezer burn. Label with the date and contents. The frozen cake will maintain its quality for up to 1 month.
To freeze individual portions, cut the cake into squares and wrap each piece tightly in plastic wrap, then place all wrapped portions in a freezer-safe bag or container. This method allows you to thaw only what you need, reducing waste. Individual portions thaw more quickly than a whole cake, typically requiring just 2-3 hours at room temperature or overnight in the refrigerator.
Reheating
Unlike many desserts, this chocolate eclair cake is best served chilled directly from the refrigerator. The contrast between the cold creamy filling and the slightly firmer texture of the graham crackers creates the most enjoyable eating experience. If you prefer a softer texture, let the portions sit at room temperature for 15-20 minutes before serving.
Avoid microwaving portions as this will cause the chocolate glaze to melt unevenly and may create hot spots in the filling that compromise the texture. If you absolutely must serve the cake warm, place individual portions in a 300°F oven for just 5-7 minutes, watching carefully to prevent melting the glaze.
Meal Prep Considerations
This chocolate eclair cake is an excellent candidate for meal prep, especially for entertaining. The entire dessert can be assembled 24 hours in advance, allowing you to focus on other preparations the day of your event. In fact, the flavors develop and the texture improves with chilling time, making advance preparation beneficial rather than detrimental to the final result.
For weekly meal prep, consider making individual portions in small containers for grab-and-go desserts throughout the week. These maintain freshness well and provide portion control. Prepare on Sunday and enjoy throughout the week without additional preparation time.
If you’re preparing multiple components ahead of time, remember that the graham crackers will soften once they come into contact with the moist filling. For the best texture, assemble the layers no more than 24 hours before serving. The filling and glaze can be prepared several days in advance, but wait to assemble until the day before or the day of serving.
FAQs: Frequently Asked Questions About Chocolate Eclair
Here are answers to some of the most common questions about making and enjoying chocolate eclairs in their various forms.
What is a chocolate eclair?
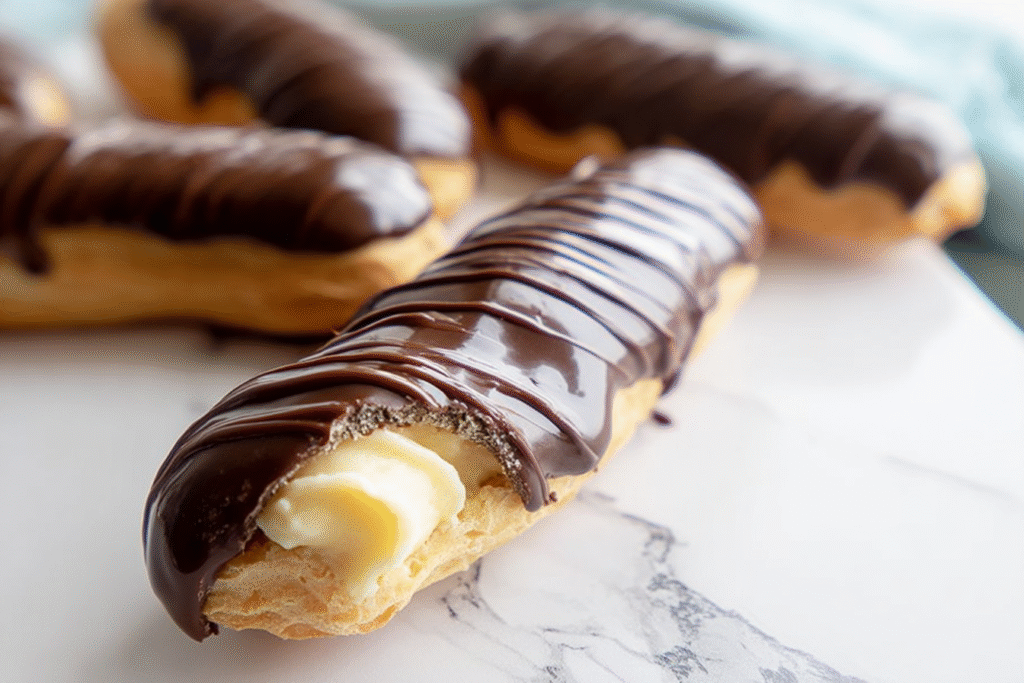
A chocolate eclair is a classic French pastry made from light choux dough piped into an oblong shape, baked until crisp and hollow, then filled with smooth vanilla or chocolate pastry cream, and topped with a glossy chocolate glaze. Typically 5-6 inches long, it offers a satisfying crunch followed by creamy sweetness. Originating in the 19th century, éclairs remain popular worldwide for their elegant simplicity. To enjoy one fresh, slice lengthwise to reveal the filling pair with coffee or tea for the best experience. Store uneaten ones in the fridge for up to 2 days, but they’re best within hours of filling to avoid sogginess.
The no-bake version featured in this recipe captures the essence of traditional eclairs in a much simpler format, using graham crackers to mimic the choux pastry texture and instant pudding to recreate the creamy filling.
How do you make chocolate eclairs at home?
For traditional eclairs, start with choux pastry: boil 1/2 cup water, 1/4 cup butter, and a pinch of salt, then add 1/2 cup flour off heat, stirring until a ball forms. Cool slightly, beat in 2 eggs one at a time for smooth dough. Pipe 4-inch lines on a parchment-lined baking sheet, bake at 400°F for 20-25 minutes until golden, then cool. Fill with pastry cream (made from milk, egg yolks, sugar, cornstarch, and vanilla) using a piping bag. For glaze, melt 4 oz dark chocolate with 1/4 cup cream. Dip tops and chill 30 minutes to set. Yields 10-12; perfect for beginners with practice.
Our no-bake version simplifies this process significantly by layering graham crackers, vanilla pudding filling, and chocolate glaze, requiring no baking and much less active preparation time while still delivering those beloved chocolate eclair flavors.
How many calories are in a chocolate eclair?
A standard 5-inch chocolate eclair contains about 250-350 calories, depending on size and filling. Breakdown: choux shell (100 cal), pastry cream (120 cal), chocolate glaze (80 cal). Homemade versions can be lighter use low-fat milk in cream to drop to 200 cal each, or opt for Greek yogurt filling for under 180 cal. Store-bought ones from bakeries average 300 cal due to richer cream and icing. Track via apps like MyFitnessPal. For guilt-free indulgence, halve lengthwise and share, or make mini éclairs at 100 cal apiece. Always check labels for exact nutrition.
The no-bake cake version can be customized to reduce calories further by using sugar-free pudding mix, lighter whipped topping alternatives, and controlling portion sizes.
How long do chocolate eclairs stay fresh?
Freshly baked unfilled choux shells last 1-2 days at room temp in an airtight container. Once filled and glazed, refrigerate for up to 2 days cover loosely to prevent condensation softening the shell. Freeze assembled éclairs up to 1 month: wrap individually, thaw overnight in fridge, and refresh in a 350°F oven for 5 minutes. Avoid microwaving to keep crispness. Signs of spoilage: soggy texture, off odors, or mold. For events, assemble day-of. Pro tip: dust with powdered sugar before serving to mask minor dryness.
The no-bake cake version typically maintains its quality for 4-5 days in the refrigerator when properly stored, making it an excellent option for preparing ahead of time.
What are some chocolate eclair variations?
Try coffee éclairs with espresso pastry cream and mocha glaze for a caffeine kick. Fruit versions use fresh berries or lemon curd inside. Vegan options swap eggs/butter for aquafaba and plant-based cream, topped with dairy-free chocolate. Mini éclairs (2 inches) suit parties bake 15 minutes. Savory twists like cheese-filled for appetizers. For holidays, add peppermint extract to cream and crush candy topping. Experiment by infusing cream with matcha or peanut butter. Link to our choux dough recipe for bases and pastry cream guide for fillings easy swaps keep classics exciting.
For the no-bake cake version, similar variations work beautifully try different pudding flavors, add fruit layers between the graham crackers, or experiment with various glaze flavors to create your own signature dessert.
Whether you’re a seasoned baker or just starting out, chocolate eclairs offer endless possibilities for creativity while maintaining that classic appeal that has made them beloved for generations.Print

Chocolate Eclair
🍫🍰 Indulge in creamy, dreamy no-bake chocolate eclair cake – layers of graham crackers, vanilla pudding, and fudgy chocolate frosting for effortless elegance!
❄️✨ Refrigerator set magic mimics bakery eclairs; perfect make-ahead dessert for parties, holidays, or weeknight cravings – slices like a dream!
- Total Time: 8 hours 20 minutes
- Yield: 12 servings
Ingredients
– 1/2 cup water Essential for the choux pastry base
– 1/4 cup butter Provides richness and helps create the pastry structure
– 1 pinch salt Enhances overall flavor
– 1/2 cup flour Forms the base of the pastry dough
– 2 eggs Adds structure and helps the pastry puff up
– 2 cups milk Creates the smooth, creamy filling
– 4 egg yolks Thickens the pastry cream and provides richness
– 1/2 cup sugar Sweetens both the pastry cream and balances flavors
– 3 tablespoons cornstarch Essential thickening agent for the filling
– 1 teaspoon vanilla extract Provides classic flavor profile
– 4 oz dark chocolate Creates the rich glaze topping
– 1/4 cup cream Adds silkiness to the chocolate glaze
– 1 box graham crackers (approx. 14 sheets) Forms the layers in this no-bake variation
– 2 packages instant vanilla pudding mix Creates the creamy filling layers
– 3 cups cold milk Required for preparing the instant pudding
– 8 ounces whipped topping Adds lightness to the filling
Instructions
1-First Step: Preparation and Mise en Place Begin by gathering all your ingredients and ensuring you have the necessary equipment. You’ll need a 9×13 inch baking dish, mixing bowls, a whisk, and a spatula. For the traditional eclair pastry method, prepare a baking sheet by lining it with parchment paper. Having everything organized before you start will make the process smoother and more enjoyable. Clear some space in your refrigerator as the cake will need to chill for several hours to set properly.
2-Second Step: Creating the Pastry Base (Optional Traditional Method) If you’re making traditional eclairs rather than the no-bake cake version, start by preparing the choux pastry. In a medium saucepan, combine 1/2 cup water, 1/4 cup butter, and a pinch of salt. Bring this mixture to a rolling boil. Remove from heat immediately and add 1/2 cup flour all at once. Stir vigorously with a wooden spoon until the mixture forms a ball and pulls away from the sides of the pan. Let this cool for about 5 minutes. Next, add your eggs one at a time, beating well after each addition until fully incorporated. The dough should be smooth and glossy but not too thin. Transfer the dough to a piping bag fitted with a large round tip. Pipe 4-inch long strips onto your prepared baking sheet, leaving space between them as they will expand. For best results, bake at 400°F for 20-25 minutes until golden brown and puffed. Let them cool completely on a wire rack before filling. For the no-bake cake version, skip this step entirely and proceed directly to preparing the filling.
3-Third Step: Preparing the Creamy Filling For the easiest no-bake version, whisk together 2 packages of instant vanilla pudding mix with 3 cups of cold milk until smooth and slightly thickened. Gently fold in 8 ounces of whipped topping until well combined. This creates a light and creamy filling that perfectly mimics traditional pastry cream. If you prefer making your own pastry cream from scratch for a more authentic taste, follow this method: Heat 2 cups of milk in a saucepan until just boiling. Meanwhile, whisk together 4 egg yolks, 1/2 cup sugar, and 3 tablespoons cornstarch until pale yellow and smooth. Slowly pour about 1/2 cup of the hot milk into the egg mixture while whisking constantly, then return this mixture to the saucepan with the remaining milk. Cook over medium heat, stirring constantly until the mixture thickens and bubbles for about 1-2 minutes. Remove from heat and stir in 1 teaspoon vanilla extract. Transfer to a bowl, cover with plastic wrap directly touching the surface to prevent a skin from forming, and refrigerate until completely cooled.
4-Fourth Step: Assembling the Layers For the no-bake cake version, begin by placing a single layer of graham crackers at the bottom of your 9×13 inch baking dish. You may need to break some crackers to fit the spaces perfectly. Spread half of your prepared filling evenly over the graham crackers. Add another layer of graham crackers, followed by the remaining filling. Finish with a final layer of graham crackers on top. If you’re making traditional eclairs, use a piping bag fitted with a small round tip to fill the cooled pastry shells. Insert the tip into one end of each eclair and gently squeeze to fill with your prepared pastry cream. You’ll know they’re full when you feel a slight resistance or see the cream start to emerge.
5-Fifth Step: Creating the Chocolate Glaze In a microwave-safe bowl, combine 4 ounces of dark chocolate with 1/4 cup of cream. Microwave in 30-second intervals, stirring between each, until completely smooth and glossy. Alternatively, you can use a double boiler method to melt the chocolate gently. For the cake version, pour this warm glaze evenly over the top layer of graham crackers, spreading with an offset spatula to create an even surface. For traditional eclairs, dip the top of each filled eclair into the glaze, allowing excess to drip off before placing on a wire rack to set.
6-Final Step: Chilling and Serving Refrigerate your no-bake chocolate eclair cake for at least 4-6 hours, or ideally overnight. This chilling period allows the graham crackers to soften to a cake-like texture and all the flavors to meld together beautifully. Traditional eclairs should be chilled for about 30 minutes to allow the glaze to set completely. When ready to serve, cut the cake into squares and garnish with a light dusting of cocoa powder or chocolate shavings if desired. Traditional eclairs can be served as-is or with a dollop of whipped cream on the side. Both versions are best enjoyed chilled but can sit at room temperature for up to 30 minutes before serving without compromising texture. The secret to the perfect chocolate eclair experience is patience allowing enough chilling time ensures the layers set properly and the flavors develop fully.
Last Step:
Please leave a rating and comment letting us know how you liked this recipe! This helps our business to thrive and continue providing free, high-quality recipes for you.Notes
❄️ Chill overnight for best texture – graham crackers soften perfectly into ‘pastry’ layers.
🥄 Soften frosting slightly for easy spreading without tearing crackers.
🍫 Use high-quality cocoa for richer homemade frosting if skipping store-bought.
- Prep Time: 20 minutes
- Chilling: 8 hours
- Category: Desserts
- Method: No-Bake
- Cuisine: American
- Diet: Vegetarian
Nutrition
- Serving Size: 1 slice
- Calories: 380 kcal
- Sugar: 45g
- Sodium: 450mg
- Fat: 16g
- Saturated Fat: 7g
- Unsaturated Fat: 8g
- Trans Fat: 0g
- Carbohydrates: 58g
- Fiber: 2g
- Protein: 5g
- Cholesterol: 20mg


