Why You’ll Love This Chocolate Oatmeal Cookies
These Chocolate Oatmeal Cookies are more than just a sweet treat, they’re a delightful baking experience that brings joy to any kitchen. Here’s why this recipe will become a favorite in your household:
- Ease of preparation: This recipe requires minimal prep time and no complex techniques. You can have these cookies ready in under 30 minutes, making them perfect for busy weeknights or unexpected guests. The simple method means even baking beginners can achieve bakery-quality results without any stress or special equipment.
- Health benefits: Unlike many traditional cookies, these oatmeal cookies contain whole grains that provide fiber and sustained energy. The oats offer essential nutrients including manganese, phosphorus, and magnesium. Plus, you can easily adjust the sugar content to suit your dietary preferences without compromising taste or texture. For those tracking their nutritional intake, detailed calorie information can help you enjoy these treats as part of a balanced diet.
- Versatility: This recipe adapts beautifully to various dietary needs. Whether you need gluten-free, dairy-free, or vegan options, simple substitutions make this cookie recipe accessible to everyone. You can also add nuts, dried fruits, or different chocolate varieties to customize based on what you have in your pantry.
- Distinctive flavor: The combination of nutty oats and rich chocolate creates a depth of flavor that sets these cookies apart. The slight chewiness from the oats perfectly complements the melty chocolate chips, resulting in a texture that keeps people coming back for more. The subtle vanilla enhances the overall flavor profile without overpowering the main ingredients.
These dessert recipes strike the perfect balance between convenience and homemade goodness, proving that delicious treats don’t need to be complicated to taste amazing.
Jump to:
- Why You’ll Love This Chocolate Oatmeal Cookies
- Essential Ingredients for Chocolate Oatmeal Cookies
- Main Ingredients:
- Special Dietary Options:
- How to Prepare the Perfect Chocolate Oatmeal Cookies: Step-by-Step Guide
- First Step: Preparation and Mise en Place
- Oven Preparation
- Ingredient Preparation
- Second Step: Creaming the Butter and Sugars
- Third Step: Adding Wet Ingredients
- Fourth Step: Incorporating Dry Ingredients and Oats
- Fifth Step: Shaping and Baking
- Final Step: Cooling and Serving
- Dietary Substitutions to Customize Your Chocolate Oatmeal Cookies
- Protein and Main Component Alternatives
- Vegetable, Sauce, and Seasoning Modifications
- Mastering Chocolate Oatmeal Cookies: Advanced Tips and Variations
- Pro Cooking Techniques
- Flavor Variations
- Presentation Tips
- Make-Ahead Options
- How to Store Chocolate Oatmeal Cookies: Best Practices
- Refrigeration
- Freezing
- Reheating
- Meal Prep Considerations
- FAQs: Frequently Asked Questions About Chocolate Oatmeal Cookies
- Chocolate Oatmeal Cookies
- Ingredients
- Instructions
- Last Step:
- Notes
- Nutrition
- Did you make this recipe?
Essential Ingredients for Chocolate Oatmeal Cookies
The key to creating perfect oatmeal chocolate chip cookies lies in using quality ingredients in the right proportions. Here’s what you’ll need to make these delicious treats:
Main Ingredients:
- 1/2 cup unsalted butter (softened) – Provides richness and helps create a tender texture. Using softened butter ensures proper creaming with sugars for the right cookie structure.
- 1/2 cup granulated sugar – Adds sweetness and helps create a slightly crisp exterior. It also aids in spreading during baking for that perfect cookie shape.
- 1/2 cup brown sugar (packed) – Contributes moisture and a subtle caramel flavor that complements the oats. The molasses content keeps cookies chewy and soft.
- 1 large egg – Binds the ingredients together and provides structure. It also contributes to the richness and helps create a pleasing texture.
- 1 teaspoon vanilla extract – Enhances the overall flavor profile, adding depth without overpowering the other ingredients. Pure vanilla extract makes a noticeable difference.
- 1 cup all-purpose flour – Forms the base structure of the cookie. It provides the necessary gluten for binding while keeping the texture light.
- 1 teaspoon baking soda – Acts as the leavening agent, helping the cookies rise slightly and spread appropriately during baking for the right thickness.
- 1/2 teaspoon salt – Balances the sweetness and enhances all the flavors. Don’t skip this ingredient as it makes a significant difference in taste.
- 1 1/2 cups old-fashioned rolled oats – The star ingredient that gives these cookies their characteristic texture and nutty flavor. Old-fashioned oats provide better texture than quick-cooking varieties.
- 1 cup semi-sweet chocolate chips – Adds chocolate goodness throughout each bite. Semi-sweet provides the perfect balance without being overly sweet.
Special Dietary Options:
| Vegan | Gluten-free | Low-calorie | Replace butter with vegan butter or coconut oil | Use certified gluten-free oats and 1:1 gluten-free flour blend | Reduce sugar by 25% and use natural sweeteners like stevia | Use flax egg (1 tbsp ground flaxseed + 3 tbsp water) | Ensure chocolate chips are certified gluten-free | Replace some butter with unsweetened applesauce | Choose dairy-free chocolate chips | Reduce chocolate chips to 1/2 cup and add dried fruit |
|---|
Using room temperature ingredients is crucial for this recipe to work properly. Take your butter and egg out of the refrigerator about 30 minutes before baking to ensure they incorporate well with other ingredients.
How to Prepare the Perfect Chocolate Oatmeal Cookies: Step-by-Step Guide
Follow these detailed instructions to create the best oatmeal chocolate chip cookies with perfect texture and flavor every time. This recipe yields approximately 24 delicious cookies.
First Step: Preparation and Mise en Place
Oven Preparation
Start by preheating your oven to 350°F (175°C) and lining two baking sheets with parchment paper or silicone baking mats. This preparation prevents sticking and makes cleanup easier. The parchment paper creates a non-stick surface and helps achieve even browning on the bottom of the cookies.
Ingredient Preparation
Measure all your ingredients accurately before beginning to ensure the recipe comes together smoothly. Softened butter should be pliable but not melted or greasy. If you forgot to take your butter out of the refrigerator, you can microwave it for just 5-10 seconds to soften it slightly, but be careful not to melt it. In a small bowl, combine the flour, baking soda, and salt. This dry mixture will be added later to prevent overmixing, which can lead to tough cookies. Having everything measured and ready before you start mixing is the secret to stress-free baking.
Second Step: Creaming the Butter and Sugars
In a large mixing bowl, combine the softened butter, granulated sugar, and brown sugar. Using an electric mixer on medium speed or a sturdy wooden spoon, beat these ingredients together until light and fluffy. This process usually takes 2-3 minutes with an electric mixer or 4-5 minutes by hand. Proper creaming incorporates air into the dough, helping create a lighter texture. The mixture should appear pale in color and have a creamy consistency. Scrape down the sides of the bowl periodically to ensure all ingredients are well incorporated. This step is crucial for achieving the right cookie texture, so don’t rush it. The aeration created during creaming helps the cookies rise properly and gives them a pleasant texture.
Third Step: Adding Wet Ingredients
Add the egg and vanilla extract to the creamed butter and sugar mixture. Beat on medium speed until well combined, about 1 minute. The mixture should be smooth and creamy. If you’re making vegan versions, add your prepared flax egg or other egg substitute at this stage. Scrape the bowl again to make sure everything is evenly incorporated. The egg provides structure to the cookies while the vanilla adds flavor depth. Don’t overmix at this stage, just combine until smooth. Overmixing can develop too much gluten in the flour that will be added later, resulting in tough cookies. For additional baking tips on perfect cookie texture, proper mixing technique is essential.
Fourth Step: Incorporating Dry Ingredients and Oats
Gradually add the flour mixture to the wet ingredients, mixing on low speed or by hand just until combined. The dough should start to come together but may still appear slightly crumbly. Then add the rolled oats and continue mixing just until they’re evenly distributed throughout the dough. The dough should hold together when pressed but still have some visible oat texture. Finally, fold in the chocolate chips by hand using a rubber spatula, being careful not to overmix. The dough should be thick and slightly sticky but not wet. If it seems too dry, add a teaspoon of water; if too wet, add a tablespoon of flour. This stage determines the final texture of your cookies, so paying attention to the dough consistency is important.
Fifth Step: Shaping and Baking
Using a cookie scoop or tablespoon, drop rounded portions of dough onto the prepared baking sheets, spacing them about 2 inches apart. These cookies do spread, so giving them room prevents them from merging together. For consistently sized cookies, use a 1.5 tablespoon cookie scoop. If you prefer thicker cookies, chill the dough for 15-30 minutes before baking to prevent excessive spreading. Bake in the preheated oven for 10-12 minutes, or until the edges are lightly golden but the centers still appear slightly underbaked. This technique guarantees soft, chewy cookies as they continue cooking on the hot baking sheet after removal. For extra crispy edges and soft centers, press down gently on the hot cookies with the back of a spoon immediately after taking them out of the oven.
Final Step: Cooling and Serving
Allow the cookies to cool on the baking sheets for 5 minutes before transferring them to a wire rack to cool completely. This resting period is essential as it allows the cookies to set without becoming too hard. The residual heat continues cooking them slightly while they cool on the pan, helping achieve that perfect texture balance between crispy edges and soft centers. Once cooled completely, store them in an airtight container to maintain freshness. These oatmeal chocolate chip cookies are delicious served with a glass of milk, a cup of coffee, or on their own as a satisfying snack. They’re perfect for lunchboxes, after-school treats, or sharing at gatherings.

Dietary Substitutions to Customize Your Chocolate Oatmeal Cookies
Protein and Main Component Alternatives
For those looking to increase the protein content or accommodate different dietary preferences, several substitutions work beautifully in this cookie recipe. Replacing up to 1/4 cup of all-purpose flour with protein powder creates a higher protein version, though this may slightly alter the texture. Plant-based protein powders tend to work better than whey-based options for baking. If you prefer natural protein sources, adding 2 tablespoons of chia seeds or ground flaxseed not only boosts nutritional value but adds a pleasant nutty flavor and extra fiber.
For those with egg allergies or following a vegan diet, several egg alternatives work well. A flax egg (1 tablespoon ground flaxseed mixed with 3 tablespoons water and allowed to sit for 5 minutes) provides binding power similar to eggs. Alternatively, 1/4 cup of unsweetened applesauce or mashed banana can replace one egg, though these will slightly change the flavor profile. Commercial egg replacers specifically formulated for baking also work excellently in this recipe without compromising texture or taste.
Vegetable, Sauce, and Seasoning Modifications
While this recipe focuses on the classic oatmeal chocolate combination, creative bakers can experiment with various additions and modifications. Grated zucchini or carrots can be added in small amounts (1/4 to 1/2 cup) to increase moisture and nutrition without dramatically changing the flavor. These additions work particularly well with darker chocolate or adding warming spices like cinnamon or nutmeg.
Nut butters such as peanut, almond, or cashew can replace up to 1/4 cup of butter for added richness and different flavor profiles. When using nut butters, you may need to reduce the sugar slightly as they often contain added sugars. For those with nut allergies, seed butters like sunflower or pumpkin seed butter offer similar nutritional benefits with different flavors.
Extract variations like almond, coconut, or maple can replace or complement the vanilla for unique flavor combinations. Adding spices such as cinnamon (1/2 teaspoon), nutmeg (1/4 teaspoon), or even a pinch of cayenne pepper for a subtle kick can transform these familiar cookies into something new and exciting. Dried fruits like cranberries, cherries, or chopped dates can replace or supplement the chocolate chips for a different twist on the classic recipe.
Mastering Chocolate Oatmeal Cookies: Advanced Tips and Variations
Pro Cooking Techniques
For consistently excellent results, consider these professional techniques when making your Chocolate Oatmeal Cookies. First, always weigh your ingredients when possible, especially flour, as different measuring methods can yield significantly different amounts. If measuring by volume, use the spoon-and-level method rather than scooping directly from the container, which compacts the flour.
The temperature of your ingredients matters significantly. For thicker cookies with soft centers, use room temperature ingredients and avoid chilling the dough. For cookies with crispier edges and more spread, use slightly warmer butter and consider chilling the shaped dough for 30 minutes before baking. The baking surface also affects results, with lighter-colored baking sheets producing more evenly baked cookies compared to dark sheets, which can cause excessive browning on the bottom.
Rotating your baking sheets halfway through the baking time promotes even cooking, especially if your oven has hot spots. Watch the cookies closely during the last 2 minutes of baking, as they can go from perfect to overbaked quickly. Remember that cookies continue cooking on the hot baking sheet after removal from the oven, so removing them when they appear slightly underbaked is the secret to perfectly soft centers.
Flavor Variations
While the classic combination of oats and chocolate is beloved for good reason, these cookies adapt well to countless flavor variations. Try adding 1/2 cup of chopped nuts such as pecans, walnuts, or macadamias for extra crunch and richness. For a salted caramel experience, sprinkle sea salt over the cookies immediately after baking and press a caramel candy into the center of each while they’re still warm.
Experiment with different chocolate varieties beyond semi-sweet chips. Dark chocolate chunks provide a more intense flavor that pairs beautifully with the nutty oats. White chocolate chips create a sweet contrast that many find irresistible. Mixing different chocolate types, such as half dark and half white, creates an exciting flavor and visual contrast.
For a sophisticated twist, add 1 teaspoon of instant espresso powder to intensify the chocolate flavor without adding coffee taste. Citrus zest from orange or lemon (1-2 teaspoons) brightens the overall flavor profile. Spiced versions with cinnamon, ginger, and a pinch of cloves create a comforting variation perfect for cooler months.
Presentation Tips
Turn these simple cookies into stunning treats with thoughtful presentation. For special occasions, press a whole chocolate truffle into the center of each cookie immediately after removing from the oven for a molten chocolate surprise. Drizzle melted chocolate across the cooled cookies for a bakery-style finish.
Serve the cookies alongside a bowl of vanilla ice cream for an impressive dessert, or crumble them over Greek yogurt with fresh berries for an elevated breakfast parfait. For gift-giving, arrange cookies in a clear cellophane bag tied with ribbon or stack them in a decorative tin with parchment paper between layers. Adding a handwritten note with serving suggestions or the recipe makes the gift even more special.
Make-Ahead Options
These Chocolate Oatmeal Cookies lend themselves perfectly to advance preparation, making them ideal for busy schedules. The cookie dough can be prepared up to 3 days in advance and stored in the refrigerator, tightly covered. In fact, many bakers believe chilled dough produces superior cookies with better flavor development and texture.
For even longer storage, scoop the dough into balls and freeze on a baking sheet before transferring to a freezer-safe bag. Frozen dough balls can be baked directly from the freezer, adding just 1-2 minutes to the baking time. This approach allows you to have fresh-baked cookies anytime without the full preparation process.
Already baked cookies freeze exceptionally well for up to 3 months. Thaw at room temperature for 1-2 hours or warm in a 300°F oven for 5-7 minutes to refresh. Layer frozen cookies between wax paper in an airtight container to prevent sticking. Having a stash of homemade cookies in the freezer means you’re always prepared for unexpected guests or sudden sweet cravings. If you’re looking for an even simpler option that doesn’t require baking, try these delicious no-bake cookies for those hot summer days when turning on the oven isn’t appealing.
How to Store Chocolate Oatmeal Cookies: Best Practices
Proper storage ensures your Chocolate Oatmeal Cookies maintain their delicious texture and flavor for as long as possible. Following these guidelines will help you enjoy these treats at their best, whether you’re keeping them for a few days or several months.
Refrigeration
For short-term storage up to one week, keep your cookies at room temperature in an airtight container. Placing a slice of white bread in the container with the cookies helps maintain moisture and prevents them from becoming stale. Avoid storing different types of cookies together, as the moisture from softer cookies can make crisp ones soggy. If your kitchen is particularly warm or humid, refrigeration can extend freshness to 10-14 days, though bring the cookies to room temperature before serving for the best flavor and texture.
Freezing
For long-term storage, freezing is an excellent option. Allow baked cookies to cool completely before freezing to prevent ice crystals from forming. Wrap individual cookies tightly in plastic wrap, then place them in a freezer-safe container or bag. Alternatively, layer cookies between sheets of parchment paper in a rigid container to prevent breakage. Properly stored, these cookies will maintain their quality for up to 3 months in the freezer. Label containers with the date so you can keep track of freshness.
For freezing unbaked cookie dough, form it into balls as if ready to bake, then freeze on a tray before transferring to a freezer bag. This prevents the balls from sticking together. Frozen dough can be baked directly from the freezer, adding just 1-2 minutes to the baking time. This method allows you to enjoy fresh-baked cookies anytime without the full preparation process.
Reheating
When you’re ready to enjoy your stored cookies, proper reheating can restore that just-baked quality. For frozen or refrigerated cookies, let them thaw at room temperature for 30 minutes to 1 hour. To refresh their texture, warm them in a 300°F oven for 3-5 minutes. This technique is particularly effective for cookies that have lost some of their freshness.
Microwaving works in a pinch, but be careful as it can make cookies tough if overheated. Place a cookie on a microwave-safe plate and heat for just 10-15 seconds. This method creates a warm, soft texture that’s perfect with a cold glass of milk or hot coffee. Never reheat cookies in their storage container, as this can cause them to steam and become soggy.
Meal Prep Considerations
Incorporating these cookies into your meal prep routine can save time while ensuring homemade treats are always available. Consider baking a double batch and freezing half for later use. This approach maximizes your oven usage and provides a convenient stash for snacks or unexpected occasions.
When preparing cookies for meal prep, portion the dough uniformly for consistent baking. Use a cookie scoop to ensure each cookie is the same size, which helps with even baking and portion control. Label all storage containers with contents and dates to maintain organization and track freshness.

FAQs: Frequently Asked Questions About Chocolate Oatmeal Cookies
Print
Chocolate Oatmeal Cookies
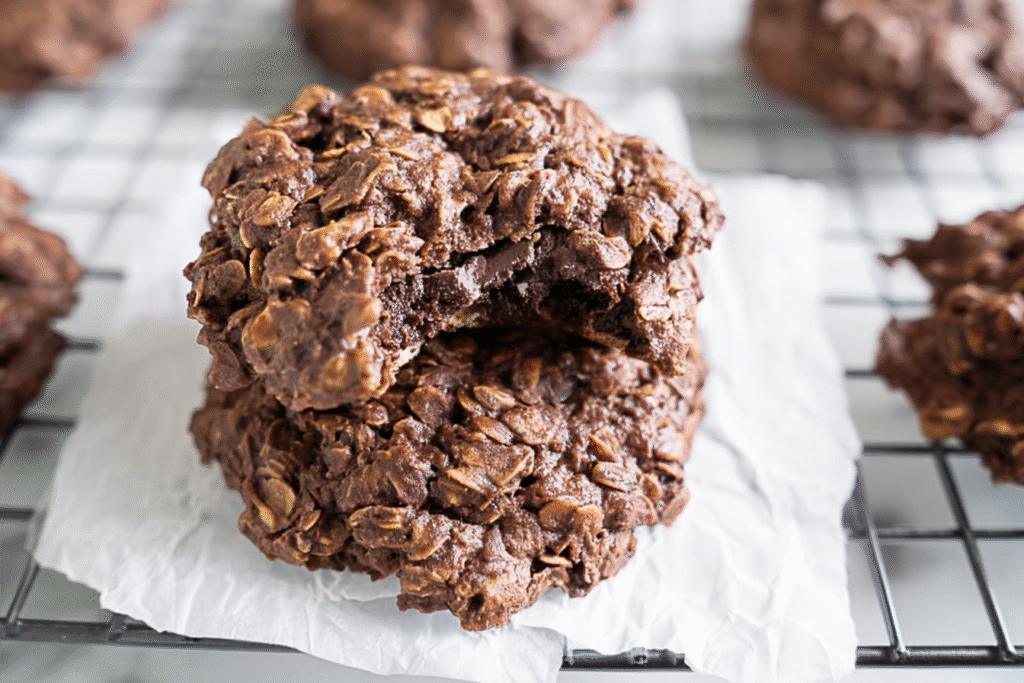
🍪🌾 Soft chewy oatmeal chocolate chip cookies blending hearty oats with melty chips – wholesome sweet satisfaction!
✨ Nutrient-packed treat stays moist days; customizable with raisins or nuts for all tastes.
- Total Time: 56 minutes
- Yield: 36 cookies
Ingredients
– 1/2 cup unsalted butter (softened)
– 1/2 cup granulated sugar
– 1/2 cup brown sugar (packed)
– 1 large egg
– 1 teaspoon vanilla extract
– 1 cup all-purpose flour
– 1 teaspoon baking soda
– 1/2 teaspoon salt
– 1 1/2 cups old-fashioned rolled oats
– 1 cup semi-sweet chocolate chips
Instructions
1-First Step: Preparation and Mise en Place
Oven Preparation
Start by preheating your oven to 350°F (175°C) and lining two baking sheets with parchment paper or silicone baking mats. This preparation prevents sticking and makes cleanup easier. The parchment paper creates a non-stick surface and helps achieve even browning on the bottom of the cookies.
Ingredient Preparation
Measure all your ingredients accurately before beginning to ensure the recipe comes together smoothly. Softened butter should be pliable but not melted or greasy. If you forgot to take your butter out of the refrigerator, you can microwave it for just 5-10 seconds to soften it slightly, but be careful not to melt it. In a small bowl, combine the flour, baking soda, and salt. This dry mixture will be added later to prevent overmixing, which can lead to tough cookies. Having everything measured and ready before you start mixing is the secret to stress-free baking.
2-Second Step: Creaming the Butter and Sugars
In a large mixing bowl, combine the softened butter, granulated sugar, and brown sugar. Using an electric mixer on medium speed or a sturdy wooden spoon, beat these ingredients together until light and fluffy. This process usually takes 2-3 minutes with an electric mixer or 4-5 minutes by hand. Proper creaming incorporates air into the dough, helping create a lighter texture. The mixture should appear pale in color and have a creamy consistency. Scrape down the sides of the bowl periodically to ensure all ingredients are well incorporated. This step is crucial for achieving the right cookie texture, so don’t rush it. The aeration created during creaming helps the cookies rise properly and gives them a pleasant texture.
3-Third Step: Adding Wet Ingredients
Add the egg and vanilla extract to the creamed butter and sugar mixture. Beat on medium speed until well combined, about 1 minute. The mixture should be smooth and creamy. If you’re making vegan versions, add your prepared flax egg or other egg substitute at this stage. Scrape the bowl again to make sure everything is evenly incorporated. The egg provides structure to the cookies while the vanilla adds flavor depth. Don’t overmix at this stage, just combine until smooth. Overmixing can develop too much gluten in the flour that will be added later, resulting in tough cookies. For additional baking tips on perfect cookie texture, proper mixing technique is essential.
4-Fourth Step: Incorporating Dry Ingredients and Oats
Gradually add the flour mixture to the wet ingredients, mixing on low speed or by hand just until combined. The dough should start to come together but may still appear slightly crumbly. Then add the rolled oats and continue mixing just until they’re evenly distributed throughout the dough. The dough should hold together when pressed but still have some visible oat texture. Finally, fold in the chocolate chips by hand using a rubber spatula, being careful not to overmix. The dough should be thick and slightly sticky but not wet. If it seems too dry, add a teaspoon of water; if too wet, add a tablespoon of flour. This stage determines the final texture of your cookies, so paying attention to the dough consistency is important.
5-Fifth Step: Shaping and Baking
Using a cookie scoop or tablespoon, drop rounded portions of dough onto the prepared baking sheets, spacing them about 2 inches apart. These cookies do spread, so giving them room prevents them from merging together. For consistently sized cookies, use a 1.5 tablespoon cookie scoop. If you prefer thicker cookies, chill the dough for 15-30 minutes before baking to prevent excessive spreading. Bake in the preheated oven for 10-12 minutes, or until the edges are lightly golden but the centers still appear slightly underbaked. This technique guarantees soft, chewy cookies as they continue cooking on the hot baking sheet after removal. For extra crispy edges and soft centers, press down gently on the hot cookies with the back of a spoon immediately after taking them out of the oven.
6-Final Step: Cooling and Serving
Allow the cookies to cool on the baking sheets for 5 minutes before transferring them to a wire rack to cool completely. This resting period is essential as it allows the cookies to set without becoming too hard. The residual heat continues cooking them slightly while they cool on the pan, helping achieve that perfect texture balance between crispy edges and soft centers. Once cooled completely, store them in an airtight container to maintain freshness. These oatmeal chocolate chip cookies are delicious served with a glass of milk, a cup of coffee, or on their own as a satisfying snack. They’re perfect for lunchboxes, after-school treats, or sharing at gatherings.
Last Step:
Please leave a rating and comment letting us know how you liked this recipe! This helps our business to thrive and continue providing free, high-quality recipes for you.Notes
❄️ Chilling dough prevents spreading for thicker, chewier results.
🍫 Underbake slightly for ultimate soft centers that firm as they cool.
🥄 Measure oats loosely for lighter texture; pulse in blender if too coarse.
- Prep Time: 15 minutes
- Chill: 30 minutes
- Cook Time: 11 minutes
- Category: Dessert
- Method: Baking
- Cuisine: American
- Diet: Vegetarian
Nutrition
- Serving Size: 1 cookie
- Calories: 180 calories
- Sugar: 16g
- Sodium: 130mg
- Fat: 9g
- Saturated Fat: 5g
- Unsaturated Fat: 3g
- Trans Fat: 0g
- Carbohydrates: 24g
- Fiber: 2g
- Protein: 3g
- Cholesterol: 25mg


