Why You’ll Love This Maple Donuts Recipe
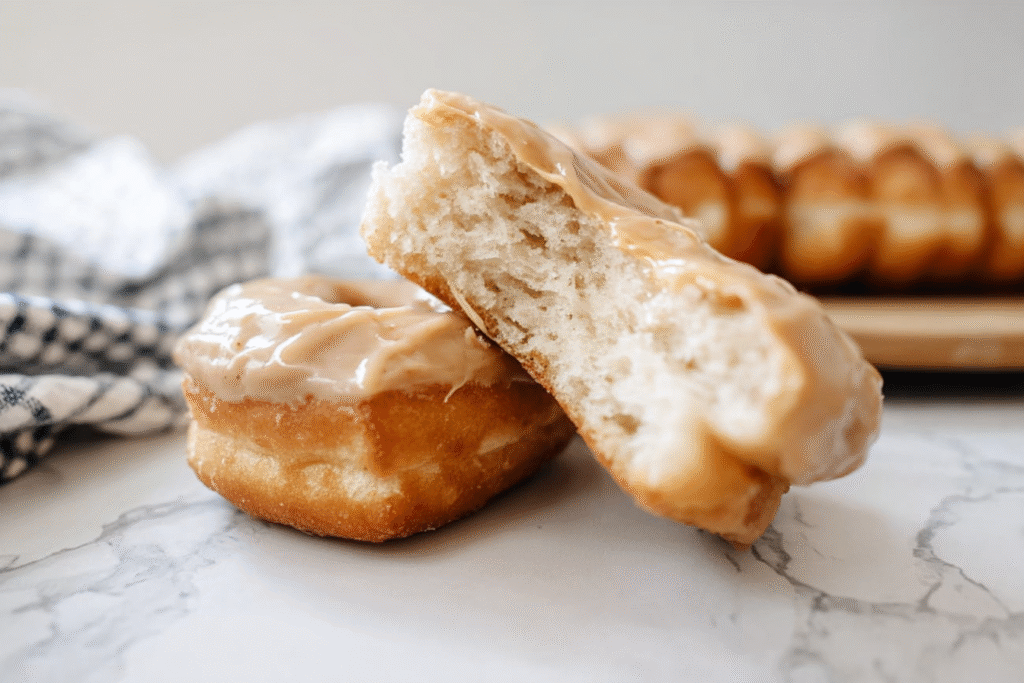
If you’re a fan of breakfast treats with a rich, caramel-like flavor, these maple donuts are about to become your new favorite homemade indulgence. Nothing beats the aroma of freshly made donuts wafting through the kitchen, especially when they’re topped with a sweet, sticky maple glaze that tastes like pure comfort in every bite.
- Ease of preparation: Despite their impressive appearance, these maple donuts are surprisingly simple to make. With just basic ingredients and straightforward techniques, even novice bakers can achieve bakery-quality results. The process requires minimal equipment and comes together in under two hours from start to finish.
- Health benefits: By making these donuts at home, you have complete control over the ingredients. Using pure maple syrup instead of artificial maple flavoring provides natural antioxidants and minerals. Plus, you can adjust the sweetness level and even experiment with whole grain flours or alternative sweeteners for a more nutritious option.
- Versatility: This recipe adapts beautifully to different dietary preferences and occasions. Whether you need a special weekend breakfast, a festive treat for holidays, or a thoughtful homemade gift, maple donuts deliver on both flavor and presentation. They work equally well for a cozy family morning or an elegant brunch spread.
- Distinctive flavor: The rich, complex sweetness of pure maple syrup creates a flavor profile that stands apart from typical glazed donuts. The natural caramel notes in real maple syrup develop beautifully when paired with a tender, fluffy donut base, creating a balanced treat that satisfies without being overly cloying.
Jump to:
- Why You’ll Love This Maple Donuts Recipe
- Ingredients for Homemade Maple Donuts
- For the Donut Dough:
- For the Maple Glaze:
- Optional Add-ins:
- How to Prepare the Perfect Maple Donuts: Step-by-Step Guide
- Preparing the Dough
- Shaping and Cooking the Donuts
- Creating the Maple Glaze and Finishing
- Dietary Substitutions to Customize Your Maple Donuts
- Protein and Main Component Alternatives
- Vegetable, Sauce, and Seasoning Modifications
- Mastering Maple Donuts: Advanced Tips and Variations
- Pro Cooking Techniques
- Flavor Variations
- Presentation Tips
- Make-Ahead Options
- How to Store Maple Donuts: Best Practices
- Refrigeration
- Freezing
- Reheating
- Meal Prep Considerations
- FAQs: Frequently Asked Questions About Maple Donuts
- What is a maple donut?
- How do you make maple donuts at home?
- What’s a good maple glaze recipe for donuts?
- Are maple donuts high in calories?
- Can you make vegan maple donuts?
- Maple Donuts
- Ingredients
- Instructions
- Last Step:
- Notes
- Nutrition
- Did you make this recipe?
Ingredients for Homemade Maple Donuts
Before diving into the recipe, gather all your ingredients to ensure smooth preparation. Here’s everything you’ll need to create these delicious maple glazed donuts:
For the Donut Dough:
- 3 cups all-purpose flour
- 1/4 cup granulated sugar
- 1 packet (2 1/4 tsp) active dry yeast
- 3/4 cup warm milk (110°F)
- 2 large eggs
- 1/4 cup unsalted butter, melted
- 1/2 teaspoon salt
- 1 teaspoon vanilla extract
For the Maple Glaze:
- 2 cups powdered sugar, sifted
- 1/3 cup pure maple syrup (Grade A amber for best flavor)
- 2 tablespoons heavy cream or milk
- 1 teaspoon vanilla extract
Optional Add-ins:
- 1/4 teaspoon maple extract for extra flavor
- 1/4 cup chopped cooked bacon bits for bacon maple version
How to Prepare the Perfect Maple Donuts: Step-by-Step Guide
Making maple donuts from scratch might seem intimidating, but with this detailed guide, you’ll be enjoying these delightful treats in no time. Follow these carefully curated steps for the best results:
Preparing the Dough
First Step: Activate the yeast by combining warm milk (110°F) with a pinch of the sugar in a large mixing bowl. Sprinkle the yeast over the milk and let it sit for about 5 minutes until it becomes foamy. This indicates the yeast is active and ready to leaven your dough.
Second Step: Add the remaining sugar, melted butter, eggs, vanilla extract, and salt to the yeast mixture. Whisk gently to combine the ingredients, being careful not to overwork the eggs. The mixture should be smooth and well-blended before proceeding.
Third Step: Gradually add 2 cups of the flour to the wet ingredients, mixing with a wooden spoon or dough hook on low speed. Once this mixture starts to come together, add the remaining flour one cup at a time until a soft, slightly sticky dough forms. The dough should pull away from the sides of the bowl but still feel tacky to the touch.
Fourth Step: Turn the dough out onto a lightly floured surface and knead for 5-7 minutes until smooth and elastic. The dough should feel soft and spring back when gently pressed with a finger. Place the kneaded dough in a lightly oiled bowl, turning once to coat all sides. Cover with plastic wrap or a clean towel and let rise in a warm, draft-free place for 60-90 minutes, or until doubled in size.
Shaping and Cooking the Donuts
Fifth Step: After the first rise, punch down the dough gently to release air bubbles. Turn it out onto a floured surface and roll to about 1/2-inch thickness. Using a donut cutter or two round cutters (one larger for the donut shape and one smaller for the hole), cut out donut shapes. Gather scraps, re-roll, and cut additional donuts until all dough is used. Place cut donuts and donut holes on parchment-lined baking sheets, cover, and let rise for 30-45 minutes until puffy.
Sixth Step: While donuts are rising, prepare the oil for frying. Pour 2-3 inches of vegetable oil into a deep pot or Dutch oven. Heat the oil to 350°F, using a kitchen thermometer for accuracy. Maintaining the correct oil temperature is crucial for perfectly cooked donuts that aren’t greasy or undercooked in the center.
Seventh Step: Carefully drop 2-3 donuts into the hot oil, being mindful not to overcrowd the pot. Fry for 60-90 seconds per side until golden brown. Use a slotted spoon or spider strainer to carefully flip the donuts midway through cooking. Transfer fried donuts to a wire rack set over paper towels to drain excess oil.
Creating the Maple Glaze and Finishing
Eighth Step: While the donuts cool slightly, prepare the maple glaze by whisking together powdered sugar, pure maple syrup, cream or milk, and vanilla extract in a medium bowl until smooth and glossy. The glaze should have a thick, pourable consistency. If too thick, add more liquid one teaspoon at a time. If too thin, add more powdered sugar.
Final Step: Dip the top of each slightly cooled donut into the maple glaze, allowing excess to drip off. For a bacon maple variation, immediately sprinkle chopped cooked bacon bits on the wet glaze before it sets. Place glazed donuts back on the wire rack until the glaze firms up. For best flavor and texture, enjoy these maple donuts within a few hours of preparation while they’re still fresh.

Dietary Substitutions to Customize Your Maple Donuts
Protein and Main Component Alternatives
Making maple donuts accessible to different dietary needs is simple with a few thoughtful substitutions. For those avoiding dairy, swap regular milk with almond, oat, or soy milk in both the dough and glaze. Plant-based butter or coconut oil works beautifully as a replacement for traditional butter in the dough. If you’re following a vegan diet, replace the eggs with flax eggs (mix 1 tablespoon ground flaxseed with 3 tablespoons water per egg) and use vegan-friendly sweeteners.
Gluten-free bakers can successfully make these maple donuts by using a high-quality gluten-free flour blend designed for baking. Look for blends that include xanthan gum, or add 1/2 teaspoon xanthan gum per cup of flour if your blend doesn’t contain it. The texture will be slightly different but still delicious when prepared correctly. For those looking to increase protein content, consider substituting some of the all-purpose flour with almond flour or adding a scoop of unflavored protein powder to the dry ingredients.
Vegetable, Sauce, and Seasoning Modifications
While traditional maple donuts feature a classic flavor profile, there are numerous ways to customize the taste to your preferences. For seasonal variations, consider adding cinnamon or nutmeg to the dough for a spiced autumn version. In winter, a pinch of cardamom or ginger creates a warming treat that pairs perfectly with the maple glaze.
The maple glaze itself offers opportunities for variation. For a more intense maple flavor, add 1/4 teaspoon of maple extract alongside the pure maple syrup. If you prefer a lighter glaze, reduce the powdered sugar to 1.5 cups and increase the liquid slightly. Chocolate lovers can create a marble effect by drizzling melted chocolate over the maple glaze or mixing a tablespoon of cocoa powder into half the glaze for a chocolate-maple swirl.
For savory-sweet combinations, try adding a pinch of sea salt to the glaze to enhance the maple flavor, or experiment with other savory toppings like crumbled sausage or crispy prosciutto in place of bacon. Fresh fruit such as chopped pecans or walnuts add both texture and nutritional value while complementing the maple flavor profile beautifully.
Mastering Maple Donuts: Advanced Tips and Variations
Pro Cooking Techniques
For consistently perfect maple donuts, temperature control is essential. When frying, maintain your oil between 345-355°F throughout the cooking process. Oil that’s too cool will result in greasy donuts that absorb too much fat, while oil that’s too hot will burn the exterior before the interior cooks through. Using a deep-fry thermometer eliminates the guesswork and ensures professional results every time.
For the lightest, most tender texture, avoid overworking the dough during mixing and shaping. Once the flour is incorporated, knead just until the dough becomes smooth and elastic. For even rising, find a warm, draft-free spot for proofing. An oven with just the light on creates an ideal environment, or you can place the dough near a warm radiator or on top of a preheating oven (with caution). For bakers who prefer not to fry, these maple donuts can be baked in a donut pan at 375°F for 10-12 minutes, though the texture will be more cake-like than traditional yeast donuts.
Flavor Variations
While the classic maple flavor is delightful on its own, several variations offer exciting taste experiences. For a maple bacon version, cook thick-cut bacon until very crispy, chop into small pieces, and sprinkle generously over freshly glazed donuts. The saltiness creates a perfect balance with the sweet maple glaze.
For a maple pecan variation, toast chopped pecans in a dry pan until fragrant, then press them into the wet glaze. To make maple coconut donuts, use coconut milk in both the dough and glaze, then sprinkle shredded coconut over the top. During autumn months, adding 1/2 cup of puréed pumpkin to the dough creates a maple pumpkin donut that captures the essence of the season.
For an indulgent treat, try filling your maple donuts with vanilla pastry cream or maple buttercream. Simply inject the filling into the side of the cooled donut using a piping bag with a narrow tip before glazing.
Presentation Tips
Elevate the visual appeal of your maple donuts with thoughtful presentation. For a professional finish, use a cooling rack over parchment paper when glazing to catch drips and prevent the bottom from becoming soggy. For a decorative touch, use a fork to drizzle the glaze in a zigzag pattern instead of fully dipping the donuts, creating an artisanal appearance.
When serving, arrange donuts on a wooden board or cake stand lined with parchment paper for a rustic presentation. Garnish with a few whole pecans or a drizzle of additional maple syrup for added visual interest. For gifting, place donuts in a bakery box with parchment between layers and tie with twine for a charming homemade touch.
Make-Ahead Options
For busy schedules, maple donuts can be partially prepared in advance. The dough can be made and refrigerated overnight after the first rise. In the morning, let the dough come to room temperature for 30 minutes before proceeding with shaping and second rise. Alternatively, completely shaped and proofed donuts can be frozen raw on a baking sheet, then transferred to a freezer bag. To cook, simply thaw in the refrigerator overnight and fry as usual.
The maple glaze can be prepared up to a week in advance and stored in an airtight container in the refrigerator. Before using, bring to room temperature and whisk vigorously. If the glaze has thickened, thin with a small amount of warm milk or cream until it reaches the desired consistency. This advance preparation makes it easy to enjoy fresh maple donuts even on busy mornings.
How to Store Maple Donuts: Best Practices
Refrigeration
For short-term storage, maple donuts can be kept at room temperature in an airtight container for 1-2 days. However, for optimal freshness and food safety, refrigeration is recommended, especially if your kitchen is warm. Place donuts in a single layer in an airtight container, separating layers with parchment paper to prevent sticking. When refrigerated, maple donuts will maintain their quality for up to 5 days, though the texture will become denser over time.
Before serving refrigerated donuts, allow them to come to room temperature for 30 minutes or warm gently in the microwave for 10-15 seconds. This helps restore some of the original texture and makes the maple glaze soft and glossy again. For the best eating experience, consume refrigerated donuts within 3 days of preparation.
Freezing
For longer storage, freezing is an excellent option that preserves the quality of maple donuts for up to 2-3 months. To freeze unglazed donuts, place them on a baking sheet in the freezer until solid, then transfer to freezer bags or airtight containers. This method prevents donuts from sticking together. For glazed donuts, flash freeze them uncovered on a baking sheet until the glaze is firm, then wrap individually in plastic wrap before placing in freezer bags.
To thaw frozen donuts, remove them from the freezer and let them thaw at room temperature for 2-3 hours or overnight in the refrigerator. For a freshly-baked taste, refresh thawed unglazed donuts in a 350°F oven for 5-7 minutes, then apply fresh glaze. Glazed donuts can be warmed briefly in the microwave (10-15 seconds) to soften the glaze and restore the texture.
Reheating
Proper reheating helps restore the just-made quality of maple donuts. The best method depends on your preference and available equipment. For a texture closest to freshly fried donuts, use an air fryer at 350°F for 3-4 minutes. This method crisps the exterior while keeping the interior moist. Alternatively, place donuts in a preheated 350°F oven for 5-7 minutes until warmed through.
For quick reheating, the microwave works in a pinch. Wrap donuts loosely in a paper towel and heat on high for 10-15 seconds. Avoid overheating, as this will make the donuts tough. For toaster oven owners, this appliance provides excellent results, producing a slightly crisp exterior while warming the donut evenly throughout.
Meal Prep Considerations
When incorporating maple donuts into meal prep, consider preparing a large batch over the weekend to enjoy throughout the week. Divide donuts into portions based on your planned consumption to avoid repeatedly exposing the entire batch to air and temperature changes. For convenient grab-and-go breakfasts, pack individual donuts in small containers or resealable bags.
If you prefer donuts as a weekend treat, prepare the dough on Friday evening and refrigerate overnight. Saturday morning, simply shape, proof, and fry for fresh donuts with minimal morning effort. This approach provides the satisfaction of freshly made donuts without dedicating several consecutive hours to the process.

FAQs: Frequently Asked Questions About Maple Donuts
What is a maple donut?
How do you make maple donuts at home?
What’s a good maple glaze recipe for donuts?
Are maple donuts high in calories?
Can you make vegan maple donuts?

Maple Donuts
🍩 Fluffy, maple-infused homemade donuts glazed to perfection – bakery quality without frying mess!
🥞 Easy baked version ready in under 30 minutes; sweet maple delight for breakfast or treats.
- Total Time: 33 minutes
- Yield: 12 donuts
Ingredients
Instructions
1-First Step: Activate the yeast by combining warm milk (110°F) with a pinch of the sugar in a large mixing bowl. Sprinkle the yeast over the milk and let it sit for about 5 minutes until it becomes foamy. This indicates the yeast is active and ready to leaven your dough.
2-Second Step: Add the remaining sugar, melted butter, eggs, vanilla extract, and salt to the yeast mixture. Whisk gently to combine the ingredients, being careful not to overwork the eggs. The mixture should be smooth and well-blended before proceeding.
3-Third Step: Gradually add 2 cups of the flour to the wet ingredients, mixing with a wooden spoon or dough hook on low speed. Once this mixture starts to come together, add the remaining flour one cup at a time until a soft, slightly sticky dough forms. The dough should pull away from the sides of the bowl but still feel tacky to the touch.
4-Fourth Step: Turn the dough out onto a lightly floured surface and knead for 5-7 minutes until smooth and elastic. The dough should feel soft and spring back when gently pressed with a finger. Place the kneaded dough in a lightly oiled bowl, turning once to coat all sides. Cover with plastic wrap or a clean towel and let rise in a warm, draft-free place for 60-90 minutes, or until doubled in size.
5-Fifth Step: After the first rise, punch down the dough gently to release air bubbles. Turn it out onto a floured surface and roll to about 1/2-inch thickness. Using a donut cutter or two round cutters (one larger for the donut shape and one smaller for the hole), cut out donut shapes. Gather scraps, re-roll, and cut additional donuts until all dough is used. Place cut donuts and donut holes on parchment-lined baking sheets, cover, and let rise for 30-45 minutes until puffy.
6-Sixth Step: While donuts are rising, prepare the oil for frying. Pour 2-3 inches of vegetable oil into a deep pot or Dutch oven. Heat the oil to 350°F, using a kitchen thermometer for accuracy. Maintaining the correct oil temperature is crucial for perfectly cooked donuts that aren’t greasy or undercooked in the center.
7-Seventh Step: Carefully drop 2-3 donuts into the hot oil, being mindful not to overcrowd the pot. Fry for 60-90 seconds per side until golden brown. Use a slotted spoon or spider strainer to carefully flip the donuts midway through cooking. Transfer fried donuts to a wire rack set over paper towels to drain excess oil.
8-Eighth Step: While the donuts cool slightly, prepare the maple glaze by whisking together powdered sugar, pure maple syrup, cream or milk, and vanilla extract in a medium bowl until smooth and glossy. The glaze should have a thick, pourable consistency. If too thick, add more liquid one teaspoon at a time. If too thin, add more powdered sugar.
9-Final Step: Dip the top of each slightly cooled donut into the maple glaze, allowing excess to drip off. For a bacon maple variation, immediately sprinkle chopped cooked bacon bits on the wet glaze before it sets. Place glazed donuts back on the wire rack until the glaze firms up. For best flavor and texture, enjoy these maple donuts within a few hours of preparation while they’re still fresh.
Last Step:
Please leave a rating and comment letting us know how you liked this recipe! This helps our business to thrive and continue providing free, high-quality recipes for you.Notes
🍩 Grease pan well or use non-stick spray for easy release.
🥛 Adjust milk in glaze for desired thickness – thicker for dipping.
❄️ Donuts freeze well unglazed; thaw and glaze fresh.
- Prep Time: 15 minutes
- Cool: 10 minutes
- Cook Time: 8 minutes
- Category: Dessert
- Method: Baking
- Cuisine: American
- Diet: Vegetarian
Nutrition
- Serving Size: 1 donut
- Calories: 250 calories
- Sugar: 28g
- Sodium: 220mg
- Fat: 5g
- Saturated Fat: 3g
- Unsaturated Fat: 2g
- Trans Fat: 0g
- Carbohydrates: 48g
- Fiber: 1g
- Protein: 4g
- Cholesterol: 40mg


