Why You’ll Love This Smores Bars
This delicious s’mores recipe combines the classic campfire treat into an easy-to-make dessert bar that everyone will enjoy. These chocolate marshmallow bars bring together all the flavors you love about traditional s’mores with none of the hassle of building a fire.- Ease of preparation: These Smores Bars are incredibly simple to make, requiring no fire or skewers. The entire process takes less than 30 minutes from start to finish. Even those with minimal baking experience can achieve delicious results. The layered construction means you just press the graham cracker crust, add the chocolate filling, top with marshmallows, and bake until perfectly gooey.
- Health benefits: While still a treat, these homemade chocolate marshmallow bars contain fewer preservatives than store-bought versions. Using dark chocolate adds antioxidants, and the portion control aspect of cut bars helps with mindful indulgence. You can easily modify the recipe to include healthier ingredients without sacrificing the classic s’mores flavor.
- Versatility: This s’mores recipe adapts beautifully to different dietary needs and occasions. It works perfectly for summer potlucks, holiday gatherings, or as a simple weeknight dessert. The bars can be customized with various chocolate types, different marshmallows, or additional toppings to suit any preference.
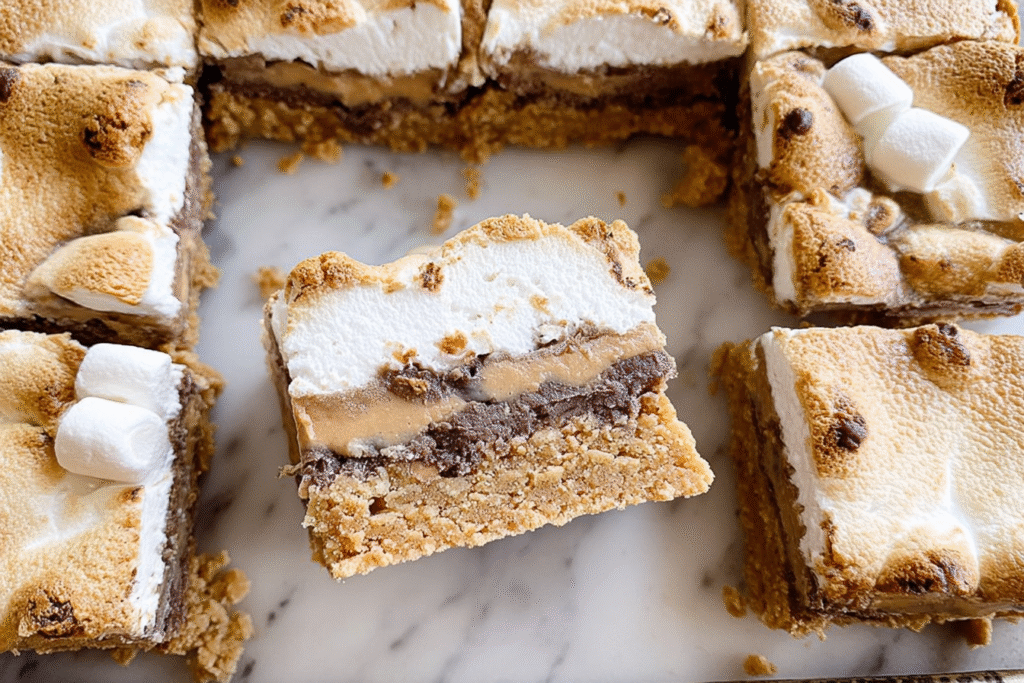
- Distinctive flavor: The combination of honey-graham cracker crust, rich chocolate layer, and toasted marshmallow topping creates the perfect balance of textures and flavors. The contrast between crispy crust and gooey chocolate marshmallow bars makes every bite irresistible. The slightly toasted marshmallows add a subtle caramelized sweetness that makes the entire dessert special.
The best part about these s’mores bars is that they capture the nostalgia of childhood campfire treats while being completely made in your kitchen. No mosquitoes, no smoke in your eyes, just pure deliciousness!
Jump to:
- Why You’ll Love This Smores Bars
- Essential Ingredients for Smores Bars
- Main Ingredients
- Special Dietary Options
- Vegan:
- Gluten-free:
- Low-calorie:
- How to Prepare the Perfect Smores Bars: Step-by-Step Guide
- Preparing Your Workspace
- Creating the Crust
- Adding the Chocolate Layer
- Finishing with Marshmallows
- Cooling and Serving
- Dietary Substitutions to Customize Your Smores Bars
- Protein and Main Component Alternatives
- Vegetable, Sauce, and Seasoning Modifications
- Mastering Smores Bars: Advanced Tips and Variations
- Pro Cooking Techniques
- Flavor Variations
- Presentation Tips
- Make-Ahead Options
- How to Store Smores Bars: Best Practices
- Refrigeration
- Freezing
- Reheating
- Meal Prep Considerations
- FAQs: Frequently Asked Questions About Smores Bars
- Smores Bars
- Ingredients
- Instructions
- Last Step:
- Notes
- Nutrition
- Did you make this recipe?
Essential Ingredients for Smores Bars
Main Ingredients
- 2 cups graham cracker crumbs – Forms the crunchy base that mimics traditional s’mores
- 1/2 cup melted butter – Binds the graham cracker crumbs together
- 1/4 cup granulated sugar – Adds sweetness to the crust
- 2 cups semi-sweet chocolate chips – Creates the rich chocolate layer
- 2 cups mini marshmallows – Provides the classic fluffy, gooey topping
- 1 can (14 oz) sweetened condensed milk – Makes the chocolate layer smooth and creamy
Special Dietary Options
Vegan:
- Use vegan butter in place of regular butter
- Replace sweetened condensed milk with coconut cream mixed with maple syrup
- Choose dairy-free chocolate chips
- Use vegan marshmallows
Gluten-free:
- Select certified gluten-free graham crackers or gluten-free cookie crumbs
- Verify that chocolate chips are certified gluten-free
- Check marshmallows for gluten-containing additives
Low-calorie:
- Use reduced-fat graham crackers
- Substitute sugar-free sweetened condensed milk
- Select dark chocolate with higher cacao content
- Add fewer marshmallows or use mini ones for even distribution
How to Prepare the Perfect Smores Bars: Step-by-Step Guide
Preparing Your Workspace
First Step: Prepare your baking environment. Preheat your oven to 350°F (175°C) and line a 9×13 inch baking pan with parchment paper, leaving an overhang on the sides for easy removal later. This simple preparation step prevents sticking and makes cleanup effortless. Gather all your ingredients before beginning to ensure a smooth cooking process. Having everything measured and ready makes the process enjoyable and stress-free.
Creating the Crust
Second Step: Create the graham cracker crust. In a medium bowl, combine the graham cracker crumbs, melted butter, and granulated sugar. Mix until the crumbs are evenly coated and the mixture holds together when pressed. Pour this mixture into your prepared pan, pressing firmly and evenly across the bottom using the bottom of a measuring cup or glass. Bake the crust for 8-10 minutes until lightly golden. This pre-baking step ensures the crust maintains its structure when adding the heavier chocolate layer.
Adding the Chocolate Layer
Third Step: Prepare the chocolate filling. While the crust is baking, mix the chocolate chips and sweetened condensed milk in a medium bowl. Once the crust is done, carefully spread the chocolate mixture evenly over the warm crust. The heat from the crust will help melt the chocolate slightly, making it easier to spread. Return the pan to the oven and bake for 12-15 minutes, or until the chocolate layer is set and bubbling slightly around the edges.
Finishing with Marshmallows
Fourth Step: Add the marshmallow layer. Remove the pan from the oven and immediately sprinkle the mini marshmallows evenly over the hot chocolate filling. For extra flavor, you can add chocolate chunks or crushed graham crackers between layers. Return the pan to the oven for 3-5 minutes, watching closely to prevent burning. You want the marshmallows to be puffy and lightly golden, not browned.
Cooling and Serving
Final Step: Complete with optional broiling. For a more toasted appearance on your marshmallows, switch your oven to broil for 30-60 seconds, keeping the pan about 6 inches from the heat source. Watch extremely carefully as marshmallows can burn quickly. Once achieved, remove from the oven and let cool completely before cutting. The bars need at least 2 hours at room temperature or 1 hour in the refrigerator to set properly. Use the parchment paper overhangs to lift the bars out of the pan, then cut into squares with a sharp knife wiped clean between cuts for the neatest appearance.

Dietary Substitutions to Customize Your Smores Bars
Protein and Main Component Alternatives
For those looking to add nutritional value to their s’mores recipe, consider incorporating protein powder into the crust. Adding 1-2 scoops of vanilla or chocolate protein powder to the graham cracker mixture increases the protein content without significantly altering the taste. Another option is using crushed nuts like almonds or pecans as partial replacement for graham crackers, which adds healthy fats and protein while creating a deliciously nutty crust.
If you prefer to avoid sweetened condensed milk, prepare a homemade version using milk powder and sugar, or use heavy cream sweetened with honey or maple syrup. Nut butters like almond or cashew butter can create a rich, creamy layer that still pairs beautifully with marshmallows while providing additional nutrients and different flavor profiles.
| Ingredient Substitute | Benefit | Best For |
|---|---|---|
| Protein Powder | Increases protein content | Fitness enthusiasts |
| Almond Butter | Adds healthy fats | Creamy texture lovers |
| Nut Crust | Provides crunch and nutrients | Low-carb diets |
Vegetable, Sauce, and Seasoning Modifications
While not typical, you can incorporate subtle vegetables into these chocolate graham bars for added nutrition. Sweet potato puree or pumpkin puree can be mixed into the chocolate layer for extra vitamins and fiber without affecting the overall taste. For a more adventurous twist, try adding a thin layer of raspberry or strawberry preserves between the crust and chocolate for a fruity contrast that cuts through the sweetness.
Seasoning variations can completely transform these easy s’mores bars. A pinch of sea salt enhances the chocolate flavor, while cinnamon or nutmeg adds warmth. Coffee extract or instant espresso powder mixed with the chocolate intensifies the richness. For a spicy kick, try adding a pinch of cayenne pepper or chili powder to the chocolate layer. These variations allow you to customize the recipe to suit different palates and occasions while maintaining the beloved s’mores essence.
Check out other easy dessert recipes on our site for more sweet inspiration!
Mastering Smores Bars: Advanced Tips and Variations
Pro Cooking Techniques
To achieve perfect results with your homemade chocolate graham bars, ensure your ingredients are at room temperature before starting. This promotes even mixing and smoother textures. When cutting the bars, use a hot knife dipped in hot water between each slice to prevent the marshmallow from sticking and creating messy edges. For extra crispy marshmallows, try using a kitchen torch after baking to achieve professional-looking toasted tops.
Flavor Variations
Experiment with different chocolate types to create unique versions of this s’mores recipe. White chocolate creates a sweeter, creamier variation, while dark chocolate offers a more sophisticated taste with less sweetness. Consider adding peanut butter cups, caramel pieces, or crushed cookies between layers for additional texture and flavor. Mint chocolate chips transform these into a refreshing treat reminiscent of thin mint cookies.
Presentation Tips
Elevate the appearance of your s’mores bars by serving them on a wooden board with additional marshmallows and chocolate chunks for dipping. Drizzle melted chocolate or caramel sauce over the top before serving for an elegant finish. For individual servings, cut the bars into smaller squares and place them in decorative paper liners for easy handling at parties.
Make-Ahead Options
These gooey treats can be prepared up to 2 days in advance, making them perfect for entertaining. Prepare the entire recipe, cool completely, and store tightly covered at room temperature. For longer storage, freeze the uncut bars and thaw overnight in the refrigerator before cutting and serving. This flexibility allows you to enjoy these best s’mores bars dessert whenever the craving strikes, even on busy weekdays.
How to Store Smores Bars: Best Practices
Refrigeration
For optimal freshness, store your s’mores bars in an airtight container at room temperature for up to 3 days. If your kitchen is particularly warm or humid, refrigeration might be necessary to prevent the chocolate from becoming too soft. When refrigerating, place wax paper between layers to prevent sticking. Bring to room temperature before serving for the best texture and flavor.
Freezing
These chocolate marshmallow bars freeze exceptionally well for up to 2 months. Cut the bars into portions, wrap individually in plastic wrap, and place in a freezer-safe container. Label with the date for easy tracking. To serve, thaw overnight in the refrigerator or at room temperature for 2-3 hours. Freezing is perfect for batch cooking and always having a sweet treat on hand for unexpected guests.
Reheating
While typically served at room temperature, you can briefly warm individual portions in the microwave for 10-15 seconds to restore the gooey texture. Avoid overheating, as the marshmallows may melt completely and the structure will become too soft. For a freshly-baked experience, place the bars in a 300°F oven for 5-8 minutes until just warmed through.
Meal Prep Considerations
When preparing s’mores bars as part of meal prep, consider cutting them into individual portions immediately after cooling. This makes grabbing a portion quick and convenient throughout the week. Store in compartmentalized containers with other snacks for balanced grab-and-go options. The bars pair well with fresh fruit or nuts for a more complete snack.

FAQs: Frequently Asked Questions About Smores Bars
Print
Smores Bars
🍫 Recreate gooey campfire s’mores in easy-to-share bars – melty chocolate, toasted marshmallows on crunchy graham base!
🏕️ No bonfire needed; quick bake delivers nostalgic treat perfect for parties or summer vibes anytime.
- Total Time: 55 minutes
- Yield: 24 bars
Ingredients
– 2 cups graham cracker crumbs – Forms the crunchy base that mimics traditional s’mores
– 1/2 cup melted butter – Binds the graham cracker crumbs together
– 1/4 cup granulated sugar – Adds sweetness to the crust
– 2 cups semi-sweet chocolate chips – Creates the rich chocolate layer
– 2 cups mini marshmallows – Provides the classic fluffy, gooey topping
– 1 can (14 oz) sweetened condensed milk – Makes the chocolate layer smooth and creamy
Instructions
1-First Step: Prepare your baking environment. Preheat your oven to 350°F (175°C) and line a 9×13 inch baking pan with parchment paper, leaving an overhang on the sides for easy removal later. This simple preparation step prevents sticking and makes cleanup effortless. Gather all your ingredients before beginning to ensure a smooth cooking process. Having everything measured and ready makes the process enjoyable and stress-free.
2-Second Step: Create the graham cracker crust. In a medium bowl, combine the graham cracker crumbs, melted butter, and granulated sugar. Mix until the crumbs are evenly coated and the mixture holds together when pressed. Pour this mixture into your prepared pan, pressing firmly and evenly across the bottom using the bottom of a measuring cup or glass. Bake the crust for 8-10 minutes until lightly golden. This pre-baking step ensures the crust maintains its structure when adding the heavier chocolate layer.
3-Third Step: Prepare the chocolate filling. While the crust is baking, mix the chocolate chips and sweetened condensed milk in a medium bowl. Once the crust is done, carefully spread the chocolate mixture evenly over the warm crust. The heat from the crust will help melt the chocolate slightly, making it easier to spread. Return the pan to the oven and bake for 12-15 minutes, or until the chocolate layer is set and bubbling slightly around the edges.
4-Fourth Step: Add the marshmallow layer. Remove the pan from the oven and immediately sprinkle the mini marshmallows evenly over the hot chocolate filling. For extra flavor, you can add chocolate chunks or crushed graham crackers between layers. Return the pan to the oven for 3-5 minutes, watching closely to prevent burning. You want the marshmallows to be puffy and lightly golden, not browned.
5-Final Step: Complete with optional broiling. For a more toasted appearance on your marshmallows, switch your oven to broil for 30-60 seconds, keeping the pan about 6 inches from the heat source. Watch extremely carefully as marshmallows can burn quickly. Once achieved, remove from the oven and let cool completely before cutting. The bars need at least 2 hours at room temperature or 1 hour in the refrigerator to set properly. Use the parchment paper overhangs to lift the bars out of the pan, then cut into squares with a sharp knife wiped clean between cuts for the neatest appearance.
Last Step:
Please leave a rating and comment letting us know how you liked this recipe! This helps our business to thrive and continue providing free, high-quality recipes for you.Notes
🔥 Watch closely under broiler – marshmallows toast fast!
❄️ Chill bars before slicing for clean cuts without gooey mess.
🍫 Use milk chocolate chips for sweeter, more authentic s’mores taste.
- Prep Time: 10 minutes
- Chill: 30 minutes
- Cook Time: 15 minutes
- Category: Dessert
- Method: Baking
- Cuisine: American
- Diet: Vegetarian
Nutrition
- Serving Size: 1 bar
- Calories: 220 calories
- Sugar: 24g
- Sodium: 120mg
- Fat: 11g
- Saturated Fat: 6g
- Unsaturated Fat: 4g
- Trans Fat: 0g
- Carbohydrates: 30g
- Fiber: 1g
- Protein: 3g
- Cholesterol: 20mg


